Leaderboard


Popular Content
Showing content with the highest reputation on 03/02/2025 in all areas
-
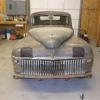
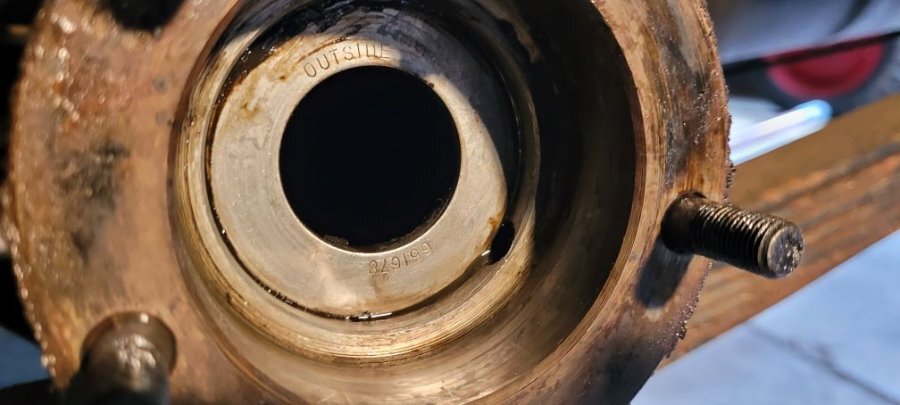
no idea if it matters ... appears to have the wrong cup plug when it should be a welch plug. I might be wrong, just not sure how well that cup plug will seal .... the sealing surface on the block is small. The Welch plug you install with the domed side facing out ... then smack it with a hammer inverting the dome side in and the plug expands against the block to seal. Just pointing out how it should be replaced. Looks like it might have leaked a little in the photo ... they may have enough goop on it to seal it. If the plug comes out will just be a minute or less to drain all the coolant from the block.3 points
-
That oil pressure relief valve mentioned should be installed behind the bigger plug at the bottom of your pic. And, probably is, or the engine would have no oil pressure. That is the key to making a bypass system work, only after the oil pressure/flow needs of the bearings is met does it open and allow oil to flow to the filter.2 points
-
The two on the right are correct and likely the original plugs, because service bulletins eventually changed them to a BPR6EY. The one on the left, who knows what went through the head of the guy who installed it, probably not much....2 points
-
holey schmokes were either of these plugs correct?2 points
-
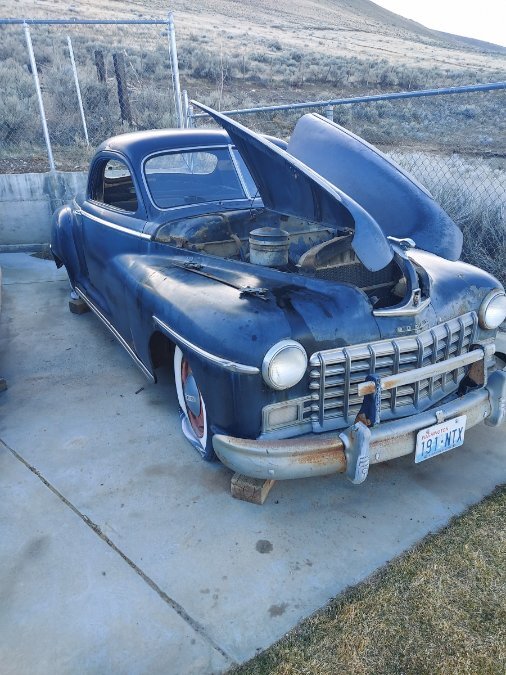
Been a couple weeks since a update .... I have been working on it when weather permits. I got hub caps from Hubcapmikes,com and happy with them Windshield wipers were a bit of a mess ... I finally got the parts and working wipers for way too much $$. I wonder if there is anything special to do with vacuum wipers? ... I saw where one person suggested ATF into the unit to lubricate them .... I dunno they work alright, but wonder if some maintenance can be done. Been working on the wiring and getting first class help from this forum, the best help anywhere period. Yesterday I finished up the wiring inside the engine bay, tail light wire been done for a long time. Today I worked on cleaning up the wiring inside the cab and the fuse panel .... All the lights except turn signals and brake lights are finished, connected to switches and harness is cleaned up .... The passenger side light is not on ... could be I damaged a splice or possibly the bulb is burnt out ... I have not checked it yet .... waiting for turn signals then will hunt down the issue. I have the wires ready for the turn signal switch and should be pretty simple to connect .... I'm just not happy with the used turn signal switch I bought off ebay a few years ago. Problem is the switch was rewired and the color of wires do not match original and it did not come with a proper clamp to connect to steering column ... I made one and it sucks, I do not like it ... A new reproduction is not that much and I have one on the way .... special thanks to @Young Edfor sending me good information a couple years ago ... My switch only has 6 wires, most have 8 or 10 .... the image Ed sent me that I thought was correct, has 7 .... I'm missing the main power wire that feeds the switch. .... So at this point, I will wrap things up tomorrow and Hound Dog is getting pushed to the side. I have parts on the way for it and not much more to do until they arrive .... I need to start working on the wife car again, I had sufficient time to cool off and not so angry with it ... It is time.


 2 points
 -
You might consider just looking for any suitable oil filter housing. There are a variety out there and most were dealer or owner installed during that time frame. It's not as if you are breaking protocol2 points
-
Possibly a coil issue. If it has one? I have seen coils fail with temperature rise.2 points
-
Finished setting up the lift last night. Just put the 50 on it a few minutes ago. Still need to move the tools to this shop. More news later
 1 point
 -
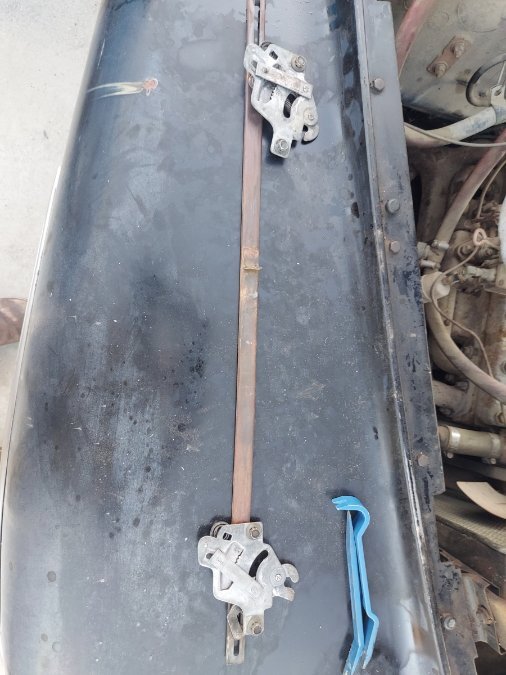
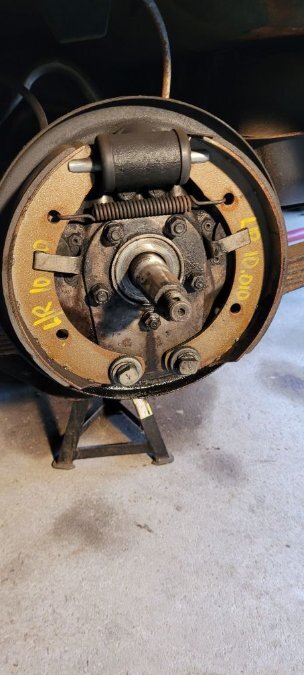
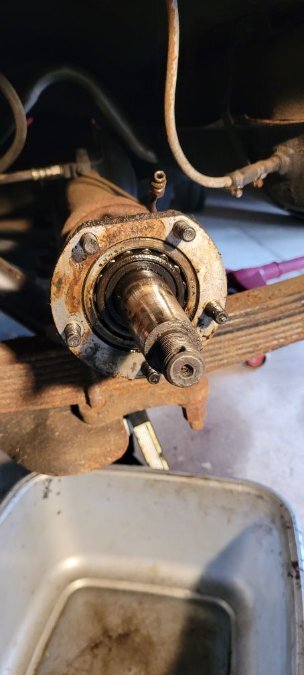
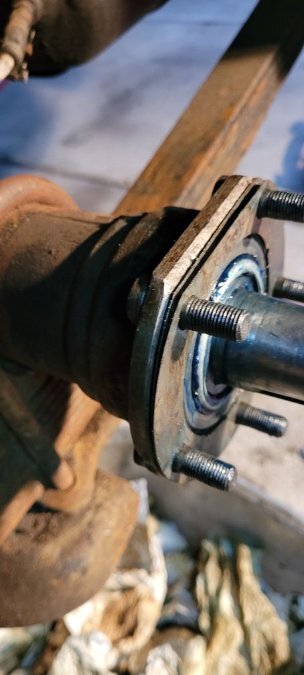
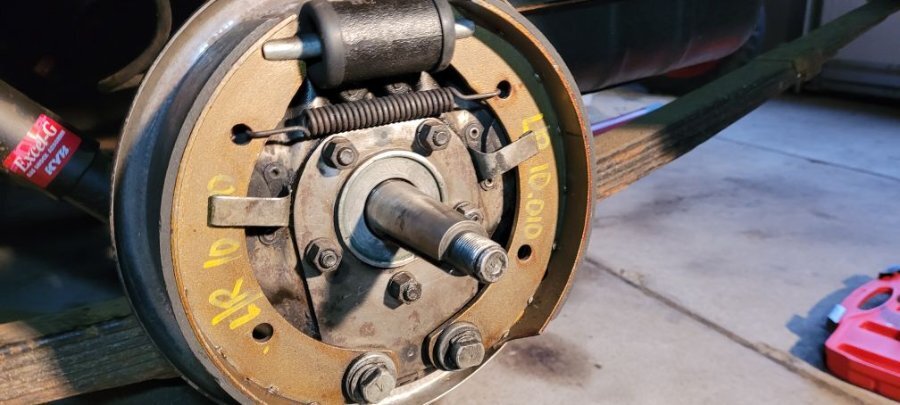
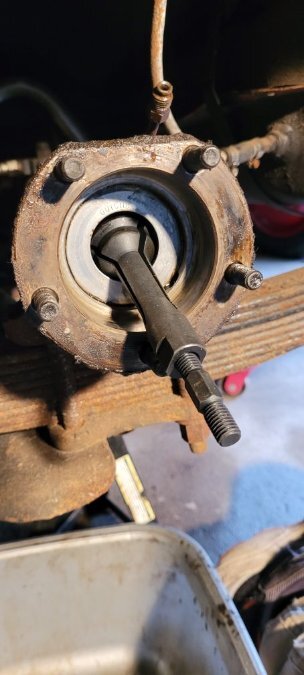
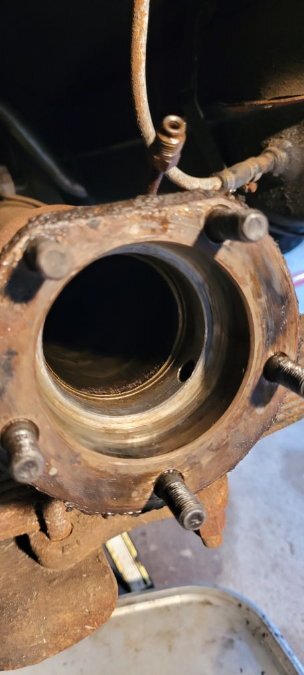
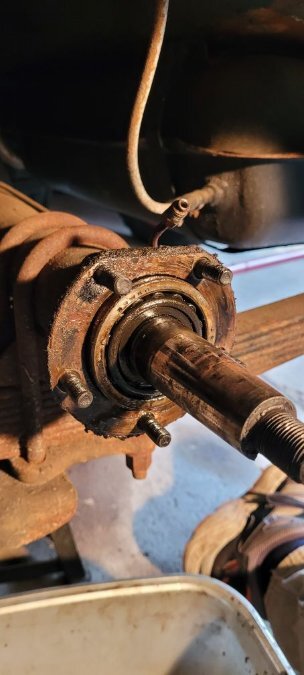
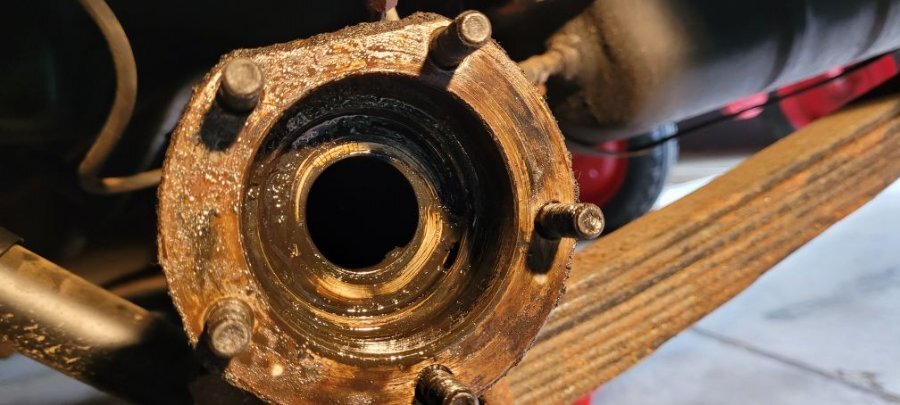
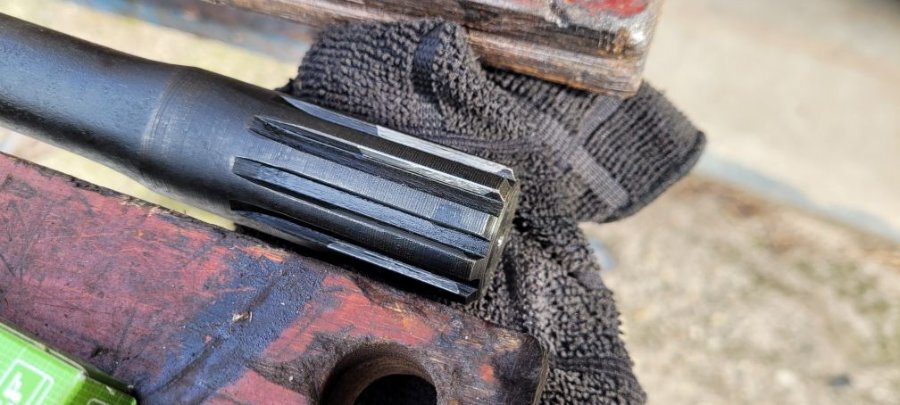
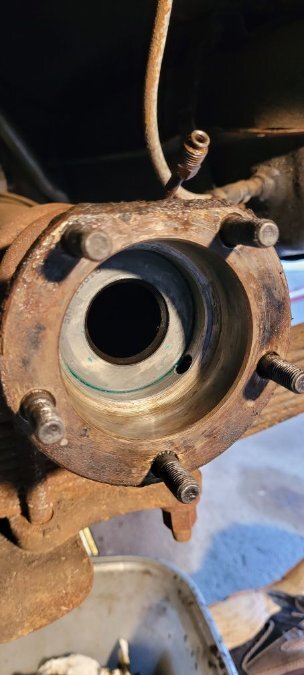
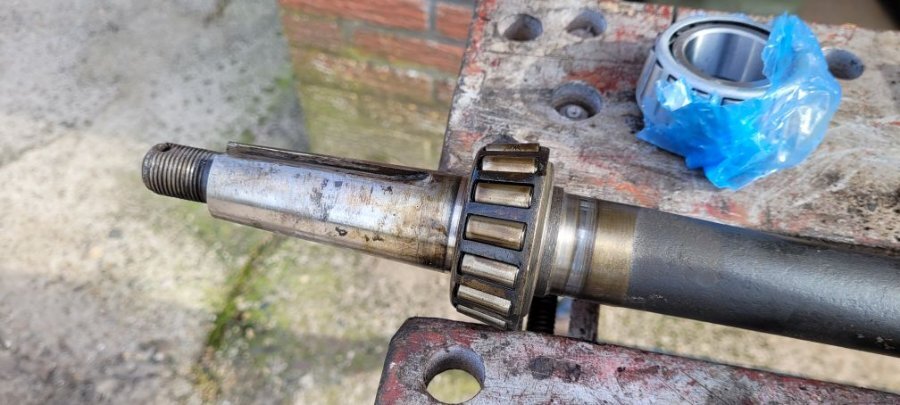
Thought I'd share a step-by-step on replacing the rear oil seals and bearings on a '47 Plymouth. Never done it before, so far I'm pretty happy with the results. There are probably better and quicker ways doing it, but I'm just a hobby 'mechanic'. 🤗 Reason for replacing them is that diff oil was visible at the rear off the backing plates. I jacked up the car on only one rear side, so later I'd have some stability when yanking on that axle shaft to get it out. Of course I put a jack stand under the rear axle. I removed the wheel and got the drum off witht this hub puller: https://www.amazon.nl/FreeTec-Wielnaven-wiellager-verwijderen-gereedschap/dp/B07MHTBLRV/ref=sr_1_5?__mk_nl_NL=ÅMÅŽÕÑ&crid=32K3JRCWBD2J1&dib=eyJ2IjoiMSJ9.1G2pXZJH6kiCywQxXIy6TSnIwhuWoTbfyudqcur_Wg9Tel0a0F1_KePL0hNWpuJbR7MeV58x3c_0JPuDT_B_eWwBpqvbdymA8Fngf9KumE6xK21S2x1AZjJ084q9jqWqqwTV0jlY0ScJcEosZrmoUrHSL5arf-Lsaf0iFjmoPdsOPyKWFAchaJpLsXCvCROeWA8EUmU2qGLT3eSLTljbIGeMDubDa0JYHFqJTdACMpgyZTgGCYWGswgV71bM74QQ4ksv-2WUm4bpVZpmmtJxHCdOHAru9oh0FraZb1yPLr2JyhJGdREPb6Esnkihhx0tkpmoKrI_YndEnuSEdvMwH_7O_5sobvNmF7I_aBTU0wluI1aB__3ABefZ2MGyy9U2RMLWYOA9zDPMAVPWOm8pYVLYL5mEdQF38_a0acPj1wxzFvgy6WMI_1TiF3xBF6bn.TGy7zy8idvNNwsuvBokGPaiF6qCkfDvwOMeTyT2G0YA&dib_tag=se&keywords=wielnaaftrekker&qid=1740901331&sprefix=wielnaaftrekker%2Caps%2C86&sr=8-5 Definately not the best one around, I wouldn't order it again, but it did the trick eventually. I'd order one with those 'legs', a nice and heavy one. The brakes look pretty nice, seems a previous owner had the brakes done not long ago and also had the drums turned. Disconnected the brake line and took the backing plate off. Could have been the original bearing, not sure. No grease left, all washed out by the diff oil I guess. The 2 shims were removed and set aside and cleaned later. With the help of a great video by forum member keithb7 (I'll put the Youtube link below) I put the drum back on, put the nut back on a few turns and 'yanked' the shaft out. In this picture the race started coming out. The shaft with bearing and the race are out. You're looking at the inner oil seal. The bearing on the shaft. Directly on the right of the bearing is a ridge which functions as the 'stop' for the bearing. Right from that you see a more shiny part on the shaft, that's were the old inner seal sat. I was a bit surprised by the orientation of the bearing, with the tapered side outwards and the race being put into the axle housing at last. Guess that's the way they designed it, so the race sits against the backing plate locking in the shaft. I got the bearing out by putting a large pipe over it and whacking it out. Same goes for putting the new one in, only with a smaller diameter pipe which sits on the inner part of the bearing. Unfortunately I forgot to take pictures. Replacement bearing part nr. is SKF BR25877 and race SKF BR25821 or National 25821. The shaft was cleaned, especially the part where the new inner seal sits. The old inner seal cleaned up. Original part nr. Here's where the confusion was in my case. Apparantly there was a changeover in part nr. for this inner seal, depending on car serial number. I think the changeover was around 1947. Depending on your serial nr., you need one of these seals: Seems the 'after' has a larger ID (thicker axle shaft?) and slightly wider seal. Mine is a 'before'. I decided to go with a narrower seal than stock, so it would take up a 'fresh' part on the axle shaft. In hindsight the original type would have been ok, since there wasn't that much wear on the shaft. I used SKF 13810 as inner seal. I took the old inner seal out with a seal puller: The housing cleaned up: The new inner seal in. What sucked was that the round spring popped off when driving the seal in, so that took me 20 minutes to get it back on with the seal already in place: A bit fast forward. The shaft with new bearing in place and the race driven in almost completely flush with the shims installed. I guess the trick here is not to drive it in completely, so later, when installing the backing plate, you'll drive it in completely, with the race sitting tight against the backing late. Which is important later for getting the end play right: The backing plate cleaned and installed. The new outer seal installed (in the center, around the axle shaft). The backing plate doesn't have a stop for the inner seal, so you have to make sure to get it centered in the backing plate. I think it was orginally peened in place. For outer seal I used SKF 13797, which is in fact listed as the correct replacement for outer seal: Now the trickier part starts, which I haven't done yet cause first I have to finish the other side. There are some valuable posts here on the required 'end play' for the axle shafts. You want the right amount of play in the bearings so the bearing doesn't sit too tight or too loose in it's race. This play should be between .003 and .008 inch, measured by pulling/pushing on the shaft and measuring the play with a gauge on the end of the shaft. It's better described in some threads here on this forum: Forum member Keithb7 with his Youtube video on removing the drums, backing plate and axle shaft: I'll post some more pictures after doing the other side and trying to get that end play addressed. Dennis


2.jpg.64f9722c6c3c6964c26dc33e6f9c98e7.jpg) 1 point
1 point -
https://www.ebay.com/itm/173002793410?mkcid=16&mkevt=1&mkrid=711-127632-2357-0&ssspo=JXn8xyoHQqK&sssrc=4429486&ssuid=jPrPlFMQQw2&var=&widget_ver=artemis&media=COPY This is the heater style but it would work. A call into them might find out they have the other style too. And it's cheaper to not order via ebay1 point
-
I always bring this up when people are working on the rear end. Check the vent and make sure it's clear. If it's plugged it will force the grease through the new seals and onto your new brakes when it heats up. I found this out the hard way when I had to replace the new brakes I had installed a month earlier.1 point
-
That sure is some uptown living there ... Looking good!1 point
-
1 point