Leaderboard
Popular Content
Showing content with the highest reputation on 06/03/2022 in all areas
-
2 points
-
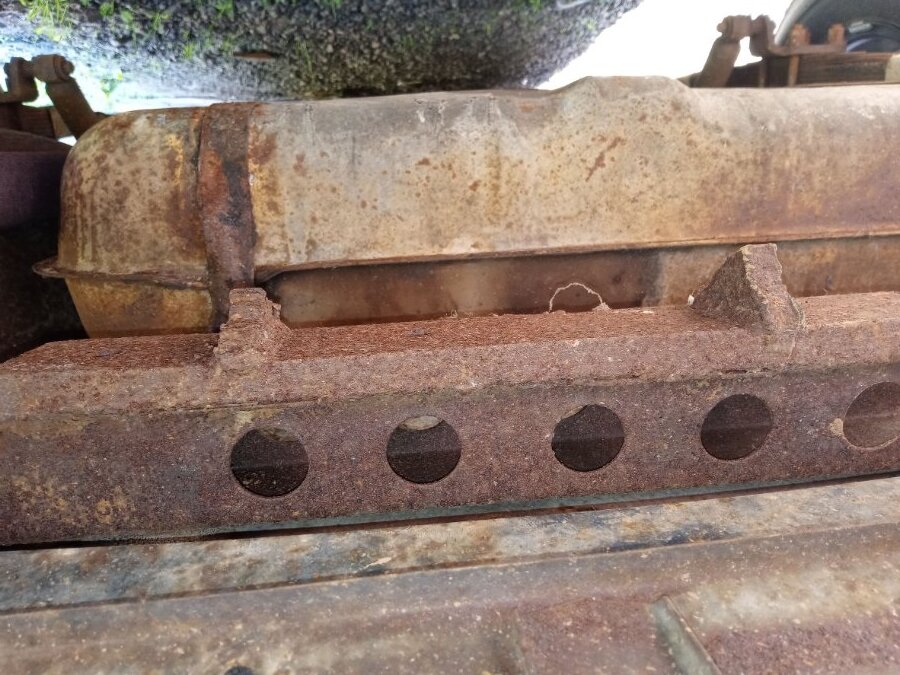
DELUXE PRODUCTS CORPORATION can be seen stamped into the lids of oil filter canisters that originated from a long-gone parts supplier whose origins and demise are not readily verified. But DeLuxe had the forethought to also stamp the filter element required into the canister lid for service needs, so that information endures. Questions about these filter canisters and elements in 2009, 2015, and 2020 got me motivated to do some research to see if I could find anything dispersed across the internets and in my travels about this orphan company and, more specifically, how that affects Dodge Trucks. What I was able to find has clarified my knowledge of these oil filters but I cannot say for certain if these findings are definitive as the source material for these things may be buried in boxes in a warehouse somewhere in Indiana for all I know. But to summarize, the DeLuxe JC filter elements used on Dodge Trucks were available in basically four different filter canisters that were adorned with five decals depending on the year and engine configuration. Early Chrysler flatheads had pressurized crankcase oil lubrication, but apparently no filtration, so companies like Purolator, Fram, and DeLuxe made aftermarket kits that relied on colorful product finishes and informative advertising to sell their products as a cost effective solution to extending engine life. I reckon DeLuxe first sold the CU series around 1937, before developing the JC series around 1939. This 39JC canister is notable in that it has an offset hemispherical sump to accommodate the drain port that is adjacent to the inlet port. These 39JC canisters appeared to have been painted red with two mounting clamps, and have the DeLuxe Clear Oil decal, available from Jim Osborn Reproductions [DZ0054]. A very rare service poster from 1945 changed hands to a private collector around 2010, and this was shared online, showing the evolution of the JC series from the bottom drain port on an offset hemispherical sump to an angled drain port on a hemispherical sump. This 45JC canister appears to have the outlet and drain ports in the same vertical plane. Pressurized oil filtration was an option on Chrysler flatheads, as seen in these two screen captures from the 1951 Dodge Truck Sales Training Film: Early B-series build cards may have listed this filter option, as seen in this ’48 1-ton build card: The B-series factory parts manual lists two part numbers for the oil filter canisters (1265706, 1503494) using the same replaceable oil filter element (676575), with the second canister p/n applicable to the B-4s. There is no diagram for this shown, but looking at the Power Wagon and Route Van parts listings, they use the same p/ns and show a diagram for each. The Route Van differs from the Power Wagon in that it has that bracket that mounts the filter canister to the rear of the flathead engine. The 1265706 canister shown appears similar to the 45JC canister, with the outlet and drain ports in the same vertical plane. These two screen captures from the Route Van Servicing Master Tech video show the installed RTVan DeLuxe filter. These also appear to have the 45JC canister. A September 1948 magazine advertisement found online describes the new DeLuxe-Baldwin cartridge, apparently showing the JC405 sock filter element, as well as a perforated metal cased element, but no part numbers are listed. The 45JC canister shown has a new decal on it that predominantly displays DELUXE, possibly a new branding of this filter product. Could a Baldwin buyout have been the demise of the DeLuxe Products Corporation? The best factory picture of an installed DeLuxe JC series filter that I could find was in several of Bunn’s books for a ’51 with a column-shift. Notice that it uses the old DeLuxe decal, and that the outlet and drain ports could possibly be in perpendicular planes. This appears similar to what I have seen in a ’50 Spring Special and my ’51 flatbed. I could not find any pictures of the B-4 1503494 canister, so for years, I assumed that it was some minor difference in the canisters done as a cost savings. Then I spied a ’54 stripped of its powertrain at auction, and discovered a barely legible part number: 1504092 [image pending] Looking at the C-series factory parts manual, 1504092 is not listed, just 1503494, same as the B-4. Looking up oil filter interchange numbers, and 676575, 1265706, 1503494, and 1504092 all refer to the Baldwin JC405, which I thought was odd since 3 of those 4 numbers are for the filter canister, not the filter element. Since the 1503494 was used on the B-4 and C-series, it dawned on me that the C-series parts manual might be incomplete, lacking the listing for the 1504092. Then I found a C-1 with a very similar looking filter canister as the one on my B-4 and it finally hit me: 1503494 was used on the flathead 6, while 1504092 was used on the V8…the differences appears to be the port fittings, lid and the use of a bolt or a T-handle. I found two factory pictures of V8 engine compartments in Bunn’s books, but the filter canisters were mostly obscured by the engines, though looked similar to what I found at that auction. Canister 1265706 appears to have two configurations of the same 5 parts. Both configurations use a smooth hemispherical sump that has a continuous resistance weld joint (similar to what is used on B-series fuel tank perimeter welds) with the housing. Inlet, outlet, and drain ports are brazed couplings. The 45JC configuration has the outlet and drain ports in the same plane, similar to what I removed from my ’48 B-1-B-108. The 49JC configuration has the outlet and drain ports perpendicular, similar to what I removed from my ’49 B-1-D-126. Canisters 1503494 and 1504092 use a 4-piece assembly (53JC) with a ribbed hemispherical sump that has an almost seamless joint with the housing. Inlet and outlet ports are brazed couplings, and there is no drain port. Decals differ by part number and location as engine mounting and firewall mounting differ. On the 1503494 canister, the T-handle appears to have been replaced with a simple hex head bolt that has a machined shoulder to seat in the recessed area on the lid. The perforated dome is spot-welded to the lid, with a lower profile than previous domes. I was not able to remove the T-handle on the 1504092 that I found at that auction, so could not confirm if that had a similar lid construction. The lack of a check valve as with the T-handle made me take a second look at the spot-welded dome, and sure enough there are perforations located closer to the lid than on the previous version. My guess is that if the sock filter element becomes clogged, the oil pressure is great enough that it breaks the upper element seal to the center flow tube and allows fluid to bypass the element and escape through those upper perforations to the outlet. And that is a guess that I am unwilling to verify (continued for restoration tips...)1 point
-
I don't get much time to do anything on my P15, so just little projects is all I can tackle. I dismantled an old HP printer recently (to separate what can go to the landfill, and what is considered toxic waste, like the circuit boards), and saw the rubber paper feed rollers, and had an idea of a way to use them. Made a mandrel and chucked it up in my drill, then shaped the roller into what I need to replace the grommet that fits into the headlight bucket. The original wiring harness was molded in one piece - the grommet and the rubber sheath over the wires was cast in one go. I was already planning to run the ground wire back to the terminal block (instead of screwing it down at the headlight housing) and some time ago i found some new 3-wire heavy gauge stranded electrical wire (with a strand count similar to the original wiring) in the dumpster behind the local hardware. Rubber coated, not plastic like most of what you see being sold now-a-days. But I still needed the grommet. These paper feed rollers are just a hair smaller diameter than the original MoPar grommet, so it was a good match. In the picture, from left to right, is an original paper feed roller, my first attempt (I got the groove too deep & too wide on this one), the first successful one, then the original harness and the jig I turned it on. (On the first try I didn't have a lock nut on the jig, and the resistance of the wood rasp I used to make the rough cut spun the grommet a bit, and that tightened the nut, which compressed the rubber roller, which I didn't notice until I stopped the drill for a look-see, and the rubber was really pushed out of shape, and the saws-all blade I was using to cut the groove went too wide. Used the same blade on the second one, but the lock nut prevented the rubber roller just tight enough to keep it from spinning on the jig.) Now, will this type of rubber last? That's something I do not know how to evaluate. But if someone manufactures these, I've certainly never seen them available anywhere. And, should I coat the surface with silicone rubber?1 point
-
Last weekend at the local flea market snagged two of these large mirrors for a 10.00 bill and mounted this one in the high bay of the new barn addition today...1 point
-
How hot is "Hot"? 180? 200? 250? How does it act when it is "Hot"? We can't see what you are working with. A lot of good questions already asked, until they are answered, not much more help we can give.1 point
-
I don't think there is any factory brackets there, I would suspect someone welded in a trailer hitch, then years later it was cut off with a torch. Not uncommon to see old pictures of cars pulling all sorts of trailers in the '50s and '60s.1 point
-
You have to tighten these Chinese fittings you need to use a breaker bar. Though I have never had too much of these leaks with any of mine but I try to use mostly factory old used fittings.1 point
-
A whole lot of time & effort has gone into that, it looks beautiful & relaxing. She gets a "AttaBoy" I can only imagine how many "honey doo's" you were involved in ... you get a attaboy too1 point
-
0 points


