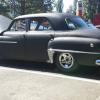
hendo0601 Posted May 6, 2014 Author Report Share Posted May 6, 2014 Ok so the carpet kit arrived yesterday, however, the weather was absolutely horrible so I had to postpone my install until today. When car parts arrive it is like Christmas for me and I just can't wait to dig in...but I don't want to put carpet in while it is raining! I took a gamble on ordering the carpet kit from JC Whitney...it was one of the only places I could find that actually offered a carpet kit for this car, and you just click a few drop down boxes to let them know if it is a 2 door, 4 door, long wheel base, convertible etc. They had a pretty decent array of colors available. I decided to go with a dark grey color rather than red because the red they had just didn't seem like it would go very well with the seats/door panels. I wanted black but went with the grey and I am glad I did. Overall the fit was good, there was very little trimming that needed to be done. I wish they had made it an inch wider on each side so I could trim it back to go under the sill plates a little more, but it fit under the sill plates just fine. The carpet I took out was a one piece set up, and this new carpet was in two pieces so installation was really easy. I decided to move the front piece back a few inches from where it is supposed to go so that I could cut a nice flap for access to the master cylinder. Had I installed it where it was designed to go I would have had to cut out the entire heel pad for access. This area will be covered with a floor mat so I am not too concerned about how it looks the way I installed it. Will it win me any trophies for "best interior"? Probably not. Is it a really good option for a really nice "driver" restoration? Heck yes. From start to finish it took me about an hour by myself to lay the carpet, trim it to fit, and re-install the seats. The previous owner had installed some really cheesy seat belts and just had them bolted to the floor pan. I decided not to re-use them for two reasons 1) they are this horribly ugly blue-green color that doesn't match anything on the car and 2) they would not do much in the event of an accident the way they were installed. If I decide to install seat belts in the future I will go with something that matches better and install them correctly/safely. Here are the pictures of the install. There are a few places where I will go back with some spray adhesive to get it to sit a little flatter, but I want to wait for the carpet to relax/settle down for a few days first. Rear carpet and seat bottom roughly in place. Front carpet in place and seat frames bolted down. Rear seat installed, front seat installed with carpet stretched under sill plates. Quote Link to comment Share on other sites More sharing options...
hendo0601 Posted May 6, 2014 Author Report Share Posted May 6, 2014 Front seat back and bottom installed, front carpet trimmed and screwed down under sill plates, and holes cut for pedals, master cylinder access, and dimmer switch. After I took these pictures I went back and vacuumed up all the little fuzzies and dirt I managed to track in. The interior of the car looks about 10000000% better than it did with the old nasty faded red carpet...and to top it all off it smells 100000000000% better! I am really pleased with the way it turned out. Now I just need to fabricate some new kick panels and a few other odds and ends and the interior will be all but finished. That will have to wait for another day! Quote Link to comment Share on other sites More sharing options...
Ulu Posted May 6, 2014 Report Share Posted May 6, 2014 (edited) Ok so the carpet kit arrived yesterday, however, the weather was absolutely horrible so I had to postpone my install until today. When car parts arrive it is like Christmas for me and I just can't wait to dig in...but I don't want to put carpet in while it is raining! . . . Rain mighta helped. Actually it'll lay down better if it's slightly damp. Car trimmers keep a spray bottle handy when fitting stuff. EDIT: I'll be buying carpet for mine soon. Hopefully I can find a matching trunk kit. how do you feel about the value of the kit you bought? Edited May 6, 2014 by Ulu Quote Link to comment Share on other sites More sharing options...
hendo0601 Posted May 6, 2014 Author Report Share Posted May 6, 2014 it would not have been damp had I done it yesterday...it would have been water logged!! It started raining on Saturday and did not stop until about 8:30 this morning. I was keeping an eye on the sky during my install and I got sprinkled on a little bit a few times, but nothing like the constant downpour we were having. Quote Link to comment Share on other sites More sharing options...
Ulu Posted May 7, 2014 Report Share Posted May 7, 2014 LOL I forget what it's like up there. We camped out on the beach near Seattle once back in the 60's. OMG! Here we've been having a nice drought, but I sorta prefer the desert atmosphere myself. Quote Link to comment Share on other sites More sharing options...
hendo0601 Posted May 8, 2014 Author Report Share Posted May 8, 2014 So yesterday after I got the rear windshield frame stripped, sanded, and painted and put back in I decided it was time to move the old girl into the next parking spot over to give me more room for working. Hooked up the battery, key on good fuel pressure and she fired right up. Pushed in the clutch pedal and the brake pedal....anddddddd no brake pedal. It went straight to the floor. I shut her down and tried pumping the brakes a time or 300 and still nothing. I removed the cover and master cylinder cap and discovered it was bone dry. I filled it up with fluid (didnt even spill any on the mew carpet!) and tried pumping the pedal and still nothing. No problem just need to bleed the brakes! Get the passenger rear jacked up, take the wheel off and go back to push the pedal and BOOM I have brake pedal now....what the heck? I continue with the bleeding and get a few tiny bubbles out of each wheel, but nothing major like I would expect. I had my fiance sit in the car and pump the pedal and hold pressure while I crawled around looking for leaks but I couldn't find anything. All of the backing plates are dry, no slow pedal fade. The only thing I can think of is, the car sat for the whole winter with the driver front tire flat, so it was at a really strange angle...could this have anything to do with it? I went back out today and the pedal is still nice and firm and the fluid level is still the same. This one has me cornfuzed for sure! Quote Link to comment Share on other sites More sharing options...
Don Coatney Posted May 8, 2014 Report Share Posted May 8, 2014 Brake fluid does not evaporate. You must have a leak somewhere. Quote Link to comment Share on other sites More sharing options...
Adam H P15 D30 Posted May 8, 2014 Report Share Posted May 8, 2014 Pull the drums. My 49 had a wheel cylinder leak and dry backing plates. Quote Link to comment Share on other sites More sharing options...
hendo0601 Posted May 8, 2014 Author Report Share Posted May 8, 2014 I will pull the fronts today and take a look...for the rear I will have to rent a puller as I no longer have one. One would think that if the leak was bad enough to drain the mc there would be evidence of it somewhere. Quote Link to comment Share on other sites More sharing options...
Ulu Posted May 8, 2014 Report Share Posted May 8, 2014 Mine had all new cups and seals when I parked it. 20 years ago. Over 20 years the fluid just leaked down. Quote Link to comment Share on other sites More sharing options...
Dodgeb4ya Posted May 8, 2014 Report Share Posted May 8, 2014 When did you last check the fluid level? You can pedal bleed them to get your pedal back if the fluid level just got low enough to suck in air at the M/cyl. Fill the M/cyl them stroke the pedalslowly back and forth several times. Let it sit for a few minutes the stroke it again till the pedal come back. This will work if something didn't let go and dump brake fluid all over. This is just till you get the leak fixed. Quote Link to comment Share on other sites More sharing options...
hendo0601 Posted May 8, 2014 Author Report Share Posted May 8, 2014 The last time I checked the fluid level was last fall before I parked it for winter hibernation. It wasn't exactly full back then, but it was also sitting on 4 inflated tires. I think sitting at such a wonky level allowed it to suck air, hence why after adding fluid the pedal came right back. I went outside with the intention of pulling the front drums, but my pregnant fiance asked me to check the brakes on her car....sooooo I got to do rear brakes on her car (in the rain) rather than fiddle with the old chrysler. Her safety and that of our baby is paramount to anything else. There is always tomorrow Quote Link to comment Share on other sites More sharing options...
Don Coatney Posted May 8, 2014 Report Share Posted May 8, 2014 I think sitting at such a wonky level allowed it to suck air, Can you explain further? Where did the air come from? Where did the fluid go? Quote Link to comment Share on other sites More sharing options...
hendo0601 Posted May 8, 2014 Author Report Share Posted May 8, 2014 My driveway is not level, it tilts slightly nose-down and left, and the driver front tire was flat all winter long which caused the angle to be exacerbated greatly. I think this coupled with the low fluid level was the root of the problem, because once I got the vehicle level and full of fluid the pedal came right back, for now. When weather permits I am going to go over the entire brake system to check for leaks. As it is right now I can press and hold the brake pedal for a long time and it does not leak down or fade, so if it does have a leak it is very very small. Quote Link to comment Share on other sites More sharing options...
Niel Hoback Posted May 8, 2014 Report Share Posted May 8, 2014 Once again I suggest that when these cars were new, it was a common practice to block the brake pedal down with a stick against the seat bottom when leaving the car for long periods of time. The pressure keeps all of the cylinder cups expanded to seal them tight against the cylinder walls. This helps prevent fluid leaks and infiltrating air. Don't forget to take the battery cables off, too. 1 Quote Link to comment Share on other sites More sharing options...
Dodgeb4ya Posted May 8, 2014 Report Share Posted May 8, 2014 All it takes is the fluid to get low enough for the M/cyl to get a gulp of air and the pedal goes to rubber or nothing. Fill er up quick bleed and brakes like before-BUT ya got a slow leak. 1 Quote Link to comment Share on other sites More sharing options...
hendo0601 Posted May 8, 2014 Author Report Share Posted May 8, 2014 Excellent advice! I will definitely do that, plus it will be a sort of litmus test for fluid leaks...jam a broom handle in there and if it's on the floor after leaving it all night I have a leak and can probably find it. I always leave the battery disconnected...just a habit I reckon. Quote Link to comment Share on other sites More sharing options...
Ulu Posted May 9, 2014 Report Share Posted May 9, 2014 I just pulled my front brake lines and stop switch last night, and the lines were still full of (old rusty brown) fluid. I last filled the brakes 24 years ago. The master cylinder had leaked out, but the residual pressure valves kept the lines from leaking down. That's why you can just fill the master cyl and pump it right back up. The lines and wheel cylinders didn't leak out. 1 Quote Link to comment Share on other sites More sharing options...
hendo0601 Posted May 10, 2014 Author Report Share Posted May 10, 2014 So today my goal was to do a walk around of the car and make sure all of the lights work. When I first started I had no turn signals front or rear, no license plate lights, driver side brake light worked, and headlamps work. I yanked a few bulbs and headed to Napa where I got two new 1154 for the front, two 1158 for the rear (these are what I took out so these are what I bought) and two new 63s for the license plate lights. Get home and get them all installed and now I have brake lights, turn signals, one license plate light, and parking lights. The inop license plate light is due to a broken ground that I found, so that is an easy fix. The drivers side parking light is very bright while the passenger side is very very dim...almost non existant. I swapped bulbs side to side, same result. Indexed the bulb both ways time and again same result, removed the socket from the housing and cleaned the mating surface, same result. I unplugged the butt connectors in the wiring in the trunk and cleaned them and put them back together, same result. I even took one of the new 1154 bulbs from the front and put it back there and it's still super dim. I did the old "mechanics wiggle" on the wiring while watching the bulb and still no change. I noticed the passenger front turn signal was not as bright as the drivers side also. I was about to break out my power probe and start applying power to the wires but it started to rain so I had to pack it up and come inside before my beer got rain in it. Why would the lights be dim on one side only? The sockets all have the original cloth covered wiring so I know they haven't been changed at any point. It is only the parking light that seems to be dim, the brake lights are bright, the turn signals are bright. There are only two wires going to this thing and I know power is getting there because the brake/turn signal works. I chased the wires along the inside of the trunk inspecting for rub-through and did not find any. I really hate wiring problems, even as a professional mechanic I still don't like doing it. As a side question...have any of you ever used a Power Probe with a 6v pos ground system? Quote Link to comment Share on other sites More sharing options...
DJ194950 Posted May 11, 2014 Report Share Posted May 11, 2014 Check your grounds! #1 reason for dim lights, turn signals not working correctly. Doug Quote Link to comment Share on other sites More sharing options...
Dodgeb4ya Posted May 11, 2014 Report Share Posted May 11, 2014 (edited) I have never used a power probe at all as I use Fluke meters for my work but....... Check this 1950 chrysler lighting bulb chart out... My 1950 six cylinder chryslers light bulbs are as in the bulb chart. Bob Edited May 11, 2014 by Dodgeb4ya Quote Link to comment Share on other sites More sharing options...
hendo0601 Posted May 11, 2014 Author Report Share Posted May 11, 2014 Ok so back outside with no rain, power probe hooked up (backwards) and here is what I get as far as voltage at the rear lights. No lights at all Driver side Wire 1 6.2v Wire 2 6.2v Passenger side Wire 1 6.2v Wire 2 6.2v Brake lights only driver side Wire 1 6.2v Wire 2 1.0v Passenger side Wire 1 6.2v Wire 2 0.4v Parking lamps only Driver side Wire 1 0.5v Wire 2 3.5v Passenger side Wire 1 0.5v Wire 2 2.8v Brake lights and parking lights on Driver side Wire 1 0.5v Wire 2 1.0v Passenger side Wire 1 1.4v Wire 2 0.3v With the parking lights on I can use my power probe to apply full battery voltage to wire number 2 (passenger side) and it lights up brighter but still not as bright as drivers side. With both brake and parking lamps on the drivers side illuminates both filaments. On the passenger side Neither filament light up... These tests were all done key off engine off. Quote Link to comment Share on other sites More sharing options...
Dodgeb4ya Posted May 11, 2014 Report Share Posted May 11, 2014 You have to have the correct bulbs in the sockets front and rear before using the probe to power them up to see if they work properly. The bulbs need to be indexed correctly in the bulb socket - IE left front #1158 bulb socket uses a green wire ( left turn signal) to the higher watted turn signal bulb filament. The other black wire to the lower watt parking filament both right and left fronts. The yellow wire feeds the right front turn signal high watt (21CP) bulb. Quote Link to comment Share on other sites More sharing options...
hendo0601 Posted May 11, 2014 Author Report Share Posted May 11, 2014 I suppose I should also mention that neither of the front marker lights work when the headlamps are on...they only function as turn signals. I am guessing this is not right? Tomorrow I will return to Napa for another pair of 1158s for the front and see what happens. Quote Link to comment Share on other sites More sharing options...
Dodgeb4ya Posted May 11, 2014 Report Share Posted May 11, 2014 Bad turn signal housing grounds? Quote Link to comment Share on other sites More sharing options...

Recommended Posts
Join the conversation
You can post now and register later. If you have an account, sign in now to post with your account.