Radarsonwheels
-
Posts
1,233 -
Joined
-
Last visited
-
Days Won
17
Everything posted by Radarsonwheels
-
 Finally got to test out the new FPR with a trip to the grocery store. It started well then once it warmed up it started hesitating off idle and running really lean in general. I could hear the fuel pump dying from the driver’s seat and after I drove back home behind the world’s slowest idiot I barely got in the driveway it was running so bad. OK so looks like the fuel pump was going bad too. No problem I bought one of those! It’s supposed to rain tomorrow and all weekend so when I found myself up way way past my bedtime and restless I figured the smart thing to do was go roll around in my driveway while it’s still dry. I got the new pump installed and cycled it a few times to hopefully bleed out any air. She’s way too loud to fire up at two AM so maybe in the next couple days I’ll get to find out if that fixed it.
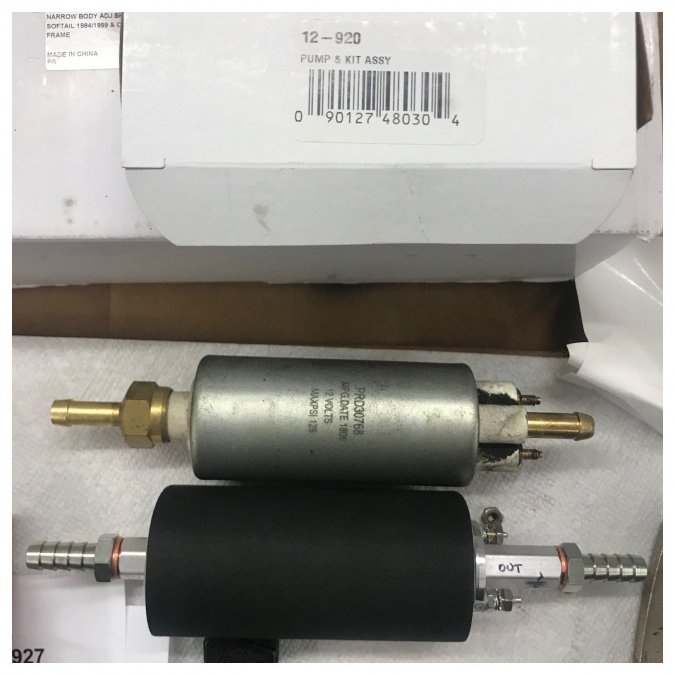
-
Good stuff man It’s always so satisfying when you decide to do a job yourself that your younger self would have seen as a bad idea or un-climbable mountain. post some youtube imbedded vids when you get her going again I love love that hemi
-
1947 Dodge truck blower motor
Radarsonwheels replied to Al Peterson's topic in Mopar Flathead Truck Forum
I bought one but I’m not sure if it will be an easy fix or not- will the hamster wheel press right on? Will I be able to mount it without basically making a whole new box from scratch. Going 12v too. I pulled my heater core the beginning of winter and still haven’t gotten around to it. I can wear a jacket and my cab isn’t drafty but a working defrost vent and tubes would be a big upgrade from the towel that’s folded up in the passenger footwell! sorry I wasn’t more help hopefully you’ll get some photos and part numbers out of somebody else. I know it’s been done plenty -
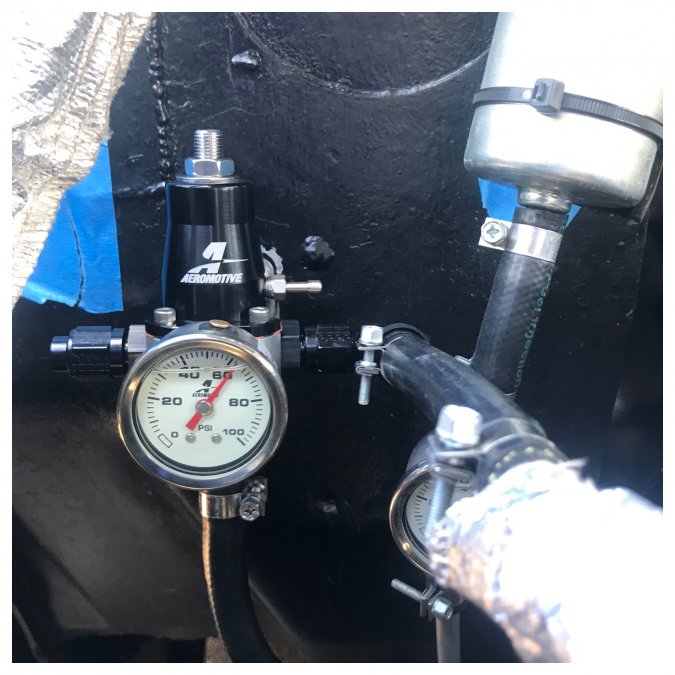
Howdy folks! It’s been a little while- I got busy building a 1952 harley panhead chopper and doing maintenance on a low mile (16k!) 1986 softail I got in a trade so I’d have a 2 seater for date nites. Anyway I’ve been enjoying the truck, driving it a couple times a week and doing truck things moving bass guitar equipment and the occasional couch or dump run. A couple (few?!) weeks ago it started hesitating bad off idle with a lean spike and I was super happy just to get home through medium heavy traffic in time to switch to a car so I could pick my kid up from school. The EFI can be a little complex with sensors and computers but I installed a pressure gauge on the fuel line- always check the dumb stuff first! After limping home I opened the hood and checked it- it’s supposed to be a solid 59.5ish psi with a high pressure pump feeding the throttle body & injectors and an internal bypass regulator bleeding off any extra volume and pressure. It always ran at 72 which is high but seemed to work just fine. Well it was swinging from 40-80psi. I suspected the pump was going bad but then it would be low pressure not wildly fluctuating pressure. The sniper throttle body has three possible fuel inputs and one regulated return output so for boosted applications you can plug the stock return and run a full pressure return to a boost referenced external fuel pressure regulator from an alternate input bung. So that’s what I did except no need to boost reference it on a NA application. I plumbed in an aeromotive 30-70psi adjustable external regulator and set it to 60 psi with the return thru a hose into a gas jug. The motor ran great and there was a LOT of gas steadily coming out of the return at idle. Healthy pump. I always suspected my high operating pressure was from a restricted return line- I have two 3/8” return lines teed into the 1/2” return bung in my fuel cell and one is for circulating fuel through my .4 gallon surge tank which is fed by a 6psi high volume carter lift pump. Makes sure the inline high pressure pump never sees air when fuel hets low and sloshes around. Well when I plugged the EFI return into my hardline on the firewall that goes to the tee the pressure was still a rock solid 62psi. So either the aeromotive FPR tolerated a restriction better than the holley FPR or the holley reg was not right out of the box. It did give a good six months of service before really malfunctioning though. In a super hot engine bay before I did the louvers too. Sorry for my tale of EFI troubleshooting and drag racing parts on the ‘ol iron forum but that’s all that’s goin on with the bigblock C series these days. Hoping to get in some more cruises soon, unfortunately with a pack of nitrile gloves for touching gas pumps and grocery carts... I know we skew a little older around here I hope everybody is being safe, enjoying their families, and not in financial ruin. There’s no corona virus in your trucks- grab some rubber gloves or hand sanitizer for gas stops and go make people smile and wave!!
-
The Phoenix is awakening / B3B Rises from the Ashes
Radarsonwheels replied to pflaming's topic in Mopar Flathead Truck Forum
I did this on my birthday in 2014. Fun!
-
Hi Dogedood It’s a comp hydraulic flat tappet xtreme energy .507”/.510” lift, 240°/246° @.050 I have 3.21 sure grip so I’m looking for torque not revving for HP. The 512 motor soaks up a bunch of duration making the cam seem milder, also I’m running ‘stealth’ heads unported so with my inches I would need max wedge ports to be able to make high rpm power. I bought cheap secondhand mufflers. They are rediculous but for $75 I’m good. Might put some quieter ones on at some point but you can have a conversation in the truck now and it’s a hotrod with no radio... Actually these are all excuses because my mufflers are silly. I have small tube block hugger headers that are probably barely better than manifolds (but fit!). They have 3” collector flanges. From there I have 3” downpipes that neck up to 3.5” pipe then into dual 3.5” flowmaster 40 mufflers. No crossover. The mufflers have scooped angled 3.5” tips that aim the exhaust at the tires in case I want to do a billowing burnout, which I’m definitely not in a hurry to do since I bought expensive dot drag radials!
-
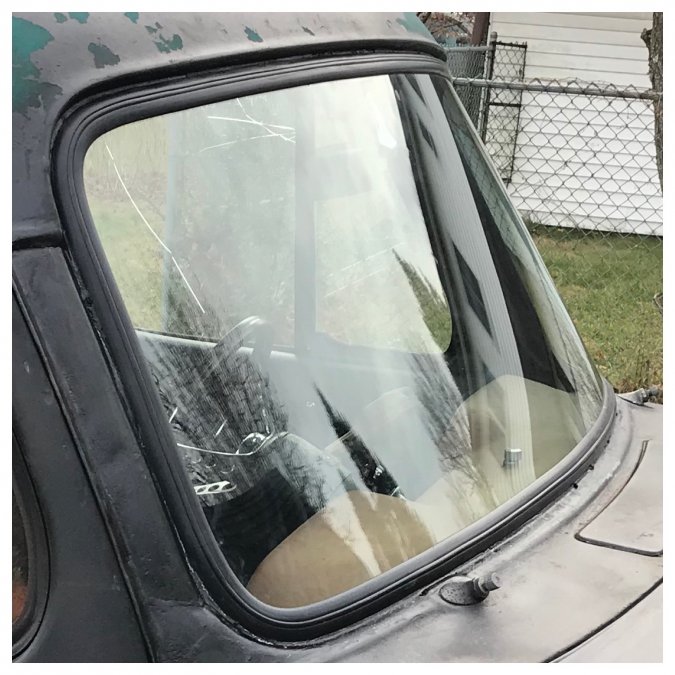
We had some torrential downpours lately which is great for me! The windshield is totally sealed up now which makes me very happy and I still haven’t gotten used to the new crystal clear wide and tall viewing area. It’s like driving in HD after a being used to 90s broadcast tv quality screen. The door weatherstrip is keeping H2o at bay nicely and the cowl including wiper pivots is successfully sealed as well. The passenger side is now dry as a bone. I squeezed some kneadable gray indoor outdoor window caulk inbetween the wires where my harness passes thru a rubber grommet in the firewall and that stopped letting water in that gets in the engine bay thru the louvers. The underhood wiring is all weatherpack connectors so no problems there. The driver’s side of the cab is still leaking. Somewhere around the top hinge bolts or the area where the skin wraps around the A pillar is letting in some water that sits on the shelf above the kick panel area and the nook inside the A pillar. Gonna keep after it with seam sealer until it stops and do some repairs when I dig into making the pillar and hinges more solid later (structural metal work). In the meantime it is warm enough in there to cruise whenever I want. I’m driving her once or twice a week lately. I need to get after resto-modding the heater and hooking up the defrost vent hoses so that I won’t need a windshield fog wiping towel in cold weather. No big deal though. Here’s a video of my drive to work in the rain this morning. Play it thru a tablet or computer speakers for full effect of the big block!
-
Nothing? Sure looks like some pedals and stuff
-
You need a strategically hooked piece of thick bailing wire and A lot of patience! Thanks for the warning though! I might have a window cut in the pillar at first but re-assembly could be tricky. I’ll be careful for sure
-
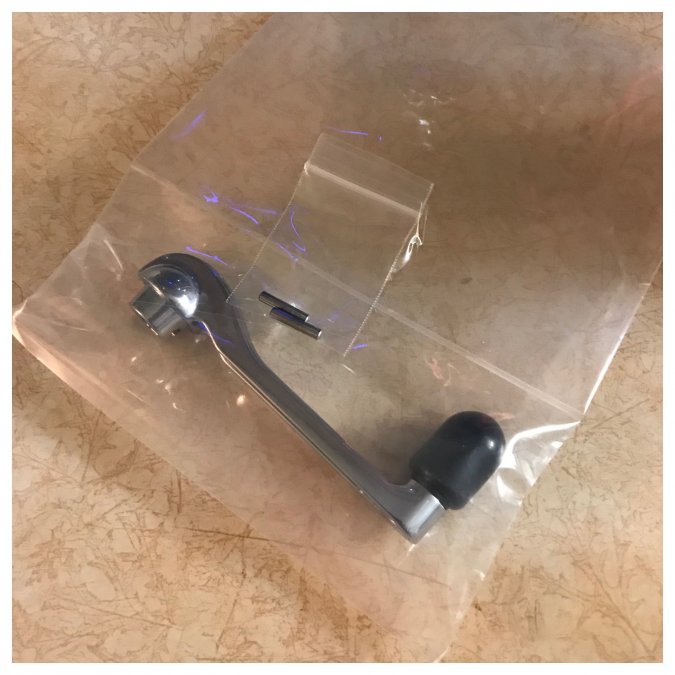
And more goodies in the mail! My upholstered luon door cards are much thicker than the stock vinyl covered cardboard so I had to re-drill the square shafts a little farther out from the stock holes for the retaining pins. The driver’s side was a tight fit tapping the pin home which is a good thing right up until the original pin mushroomed bent and got stuck. I ended up using a little piece of drill bit stock to hold the other side but now it is a little angled and will never come off without destroying the crank handle. So I ordered a new one. Soon the old one will get destroyed and I will do a ton of work to the door. I need to re-skin the bottom 1/2 of the door and bottom, make a rear lower window track to hold the (felt? Fabric?) channel that’s just hanging down right now, put in a new piece of glass (possibly an inch or two taller so it comes even with the sill at full down instead of dropping into the door). And of course the crank pivot will probably need to be removed so I can drive out the remnants of pin and re-drill a properly sized hole dead straight on the drillpress. I want to replace the crunchy area in the hinge pillar with new steel- it looks like the actual hinge slips inside the pillar and the four bolt holes have a little room for adjustment as the bolts locate the hinge by pinching the pillar between the hinge inside and bolts/washers outside. I’m also considering cutting out an access panel to make welding in the glass track a little easier. Somewhere that it can get welded back together and the seam hidden by the door card. I’m probably going to end up just pulling the door off the truck to repair it. This might be a good time to invest in one of those fancy automotive painter’s padded scissor folding sawhorse stands. I’d love to hear any helpful advice from you guys who have dove deep on door repair and replacement. Are new bushings and pins available like for 70s cars?
-
I pulled the lockstrip half at a time and caulked the windshield gasket inside and out, then finished weatherstripping the doors and re-did the gaskets on the backs of the vent windows. Fingers crossed the next rain stays out of the truck!
-
Well I didn’t have to wait long for a good rain- it was coming down pretty much all day while I was at work. I still have a nice drip down each dashboard corner. The driver’s side looks like the glass channel in the gasket is overflowing and spilling out. The truck was parked on a slight hill so 3/4 of the glass channel was pitched down that way. I still have most of a tube of bedding compound so it looks like I’ll need to seal up all around the glass side of the gasket against the glass. The passenger side leak seems to be coming from inside the dash up where the pinch weld comes together so I’ll have to also caulk the outside of the gasket as well. No big deal. I’ll wait for it to dry out and re-caulk and lockstrip it tomorrow. Surprisingly the doors are holding pretty well. It was really nice to have a good all day soaking so I could really get a report card on how well it was sealing. It’s still a million times better. I also was mildly annoyed by a foggy windshield on my way home. Time to put the heater core and defroster hoses on the list to get done soon, but carrying a small towel in the truck is working in the meantime. Do everybody’s trucks leak in the rain? Or do you all keep them inside?

-
I took stock dakota hangers, flipped them sideways so my slapper bars could still hit the front spring eyes, enlarged the pivot hole to take the bigger bolt, moved them up and back for the static chassis drop, and plated/reinforced them into the frame rail. But I have over 500 ft/lbs just off idle so I wasn’t messing around. I also cut off the rear hangers and moved them to get the shackle angle right. look on page 3 of my build thread you can see them getting located and tacked in before I reinforced them
-
Thanks GGdad That thought crossed my mind too. I was also thinking a piece cut from say 14g sheetmetal and welded on flat would be long lasting and not too fragile, then it could be gently hammered over some 3/8” round stock as a buck, but not too curved so it can be cleaned out (and the buck can be removed)
-
I put the wipers back on and drove to work in a drizzle today. Bone dry floors so far! I can’t believe the difference in my view! I feel like I’ve been wearing glasses that were handled by a toddler eating pancakes this whole time and finally cleaned them!
-
Hey so I have the dart A-body xhd six leaf springs under my truck- maybe I can help out with some info you might already know. -the front segment of the springs is shorter than the rear. This is good because it is stiffer and can act more like a trailing arm while the back of the spring does more of the work flexing. This gives less spring wrap and pinion angle change on acceleration but you might need to move your front spring perches back to center the wheels in the tubs. -where ever your shackle perches end up you want them in front of the rear spring eye with the weight of the truck on them. Any position that holds up the truck and doesn’t bind will work but under acceleration the rear spring eye actually moves forward as the spring wraps up, which is a little counterintuitive- seems like the spring would get longer not shorter. Anyway, the bottom shackle eye moves in an arc below the upper shackle perch so when it’s vertical it is lifting the chassis up the highest it can go. If you have the bottom eye behind the upper pivot point on the perch what happens on a launch is the spring eye moves forward and down and tries to lift the chassis as it swings in an arc. Mounted with this geometry the weight of the truck is loaded onto the tires when you drop the hammer. If it starts out vertical then it unloads weight off the tires when you launch, which is not what you want. All this is kind of drag strip stuff which has absolutely nothing to do with driving to the ice cream shop or hauling bales of hay but if you’re gonna do it why not get the angles right? of course maybe I’m preaching to the choir! good luck amd post more pics I love seeing this stuff! Rdr
-
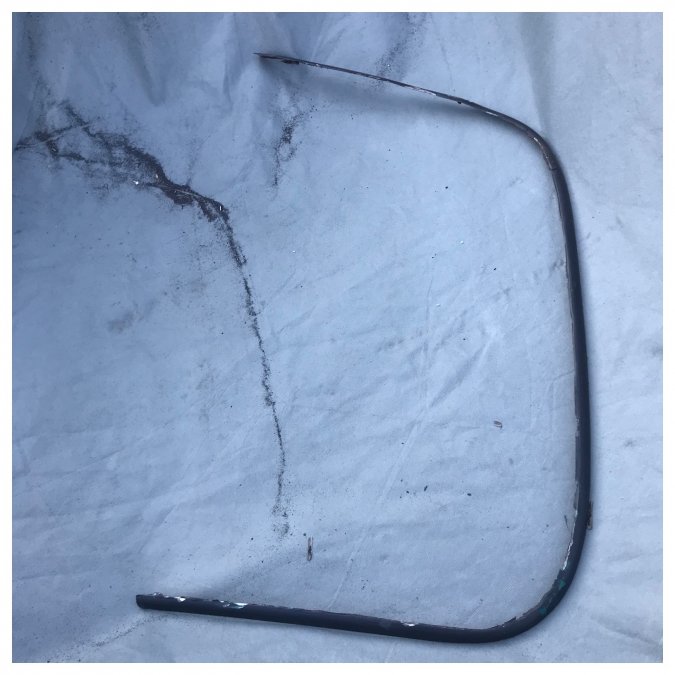
Phew! I looked up the data sheet on permatex ultra black- it’s non corrosive. I did find info about how some rtv compounds release acetic acid as a byproduct of the curing process. I’m sure that has something to do with the way my A-pillar skins were completely slotted through in the corners. I found plenty of hardware store clear bathroom silicone in there when I cleaned them out, especially after shaving the gutters. I’m tossing around ideas for the gutters now- maybe 1/4” round stock would look cool and unobtrusive while guiding water down off the top? I’ve seen shaved drip rails replaced with round stock or brake line then mudded in for a slight radiused bulge but mine would be perched on the top of my repaired pinch weld flange and fully welded in. I still have the stock gutter edges. The passenger side is in three pieces and pretty rusty. The driver’s side is in one piece and in better shape. Even though it is a complicated shape I think repairing them would be almost as much work as making new ones.
-
Man I am a big fan of this style of gasket now. I went back out and pulled half the lockstrip out, then laid a nice bead of glazing and bedding compound under the pinch weld flange lip. Without the lockstrip it folded up easily and it was easy to fill any gap between the gasket and the steel. I don’t run power tools after dark but some nights I can’t help myself and go back out after my kid’s in bed to tinker with a flashlight in the driveway. The lockstrip went back in super easily with the special tool except I must have pulled on it a little more than last time because now my tail is too long to tuck in. I’m going to wait till morning to trim or reset and trim it before driving to work. A little extra compound squeezed out all along the edge and most of it squeegeed off on a rubber gloved finger. The rest cleaned up nicely with a little gas spilled on a blue paper towel. The stuff sets in a minute or two and doesn’t ever really cure hard so I didn’t wait long. I played the garden hose all over the windshield roof and cowl and it looks like I got her all sealed up now. No familiar drip down the corner of the dash. I’m feeling pretty good about it! Now on to figuring out the gutters, restoring the heater, and a bunch of work on the driver’s door. I ordered a new window crank from dcm because I’m going to have to destroy this one which is cocked and has the pin stuck hard in it. Can’t fix the window until I can pull the door card and can’t do that with the crank installed. The driver’s door needs a ton of work but since nobody else uses it I have been procrastinating.
-
Ok I got some thicker weatherstrip over the doors and after more hosing the doors are not terrible, the wiper pivots are holding water, and there is still a trickle down the left dash corner out of the a-pillar. I guess I have to pull the lockstrip and throw some more glazing and bedding compound in the gasket. ? Sad but not the end of the world. I only put a small bead in the gasket when we installed it- I guess it wasn’t enough on the driver’s side. Getting the glass into the rubber and holding the rubber on the pinch weld was a bear but the lockstrip install was like butter and I have plenty more soapy water.
-
Working on sealing up the cab again. I got the cowl vent re-gasketed and hit the windshield and cowl with a hose. The cowl is sealed now but the passenger wiper pivot leaked like a sieve. I pulled it off and buttered it up with rtv. My new batch of weather strip should show up in the mail today so I can seal up the doors again.

-
I have done a lot of torch shrinking but the advantage of a shrinking disc on a grinder is that the big flat area wants to hit high spots by its nature. They do work great and I’ve seen dings and oilcans go away like magic.
-
Nice progress way to get in there and do what needs doing
-
yes the drivers door glass is spidered with cracks good eye
-
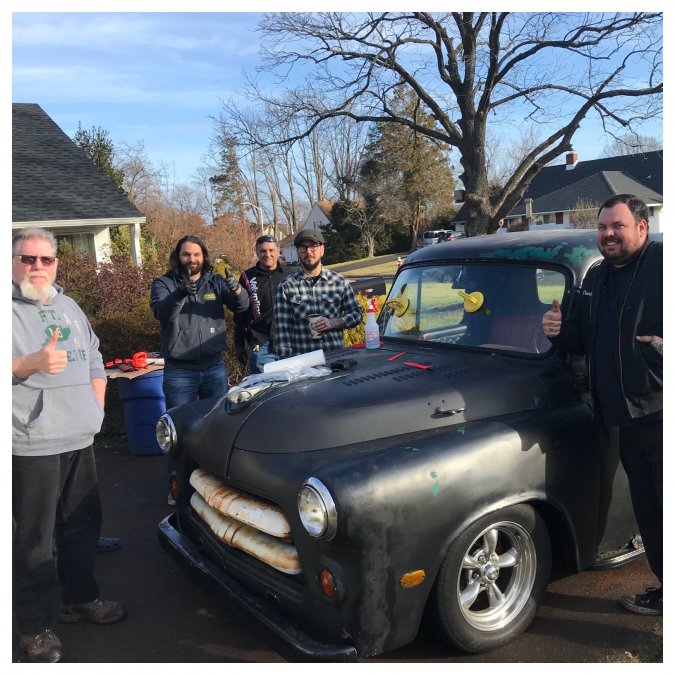
Out to breakfast with the fellas now. Too much help was just enough. Took 40 mins!