


Radarsonwheels
-
Posts
1,232 -
Joined
-
Last visited
-
Days Won
17
Content Type
Links Directory
Profiles
Articles
Forums
Downloads
Store
Gallery
Blogs
Events
Everything posted by Radarsonwheels
-
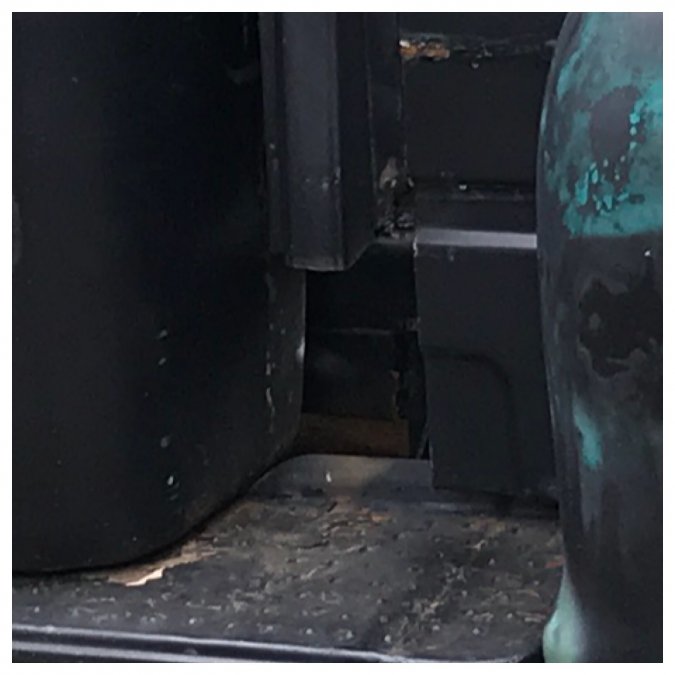
 Farmer- I’ve dealt with a lot of axles where the bolt on top of the tube is actually a breather. On mine it’s just a bolt- the breather port is under a little rear facing scoop on the top of the axle a few inches farther outboard. On my axle I’ve used all the space on top and over that bolt with the lower brackets for the airbags. The only part of the axle that shows inside the framerails is the cast center section. There is some free space under those brackets but I’d prefer to not have to fiddle around under there. I was hoping to re-use the hose and splitter I already had but it’s rigid section was too tall, the hose end was clocked wrong, and it had awkward output angles. Since I don’t want to try welding to the cast iron I decided to use a large exhaust clamp. If I clamp it with the U on the bottom I will be able to use the front threaded portion of the clamp to secure the splitter. The chassis hose bracket still needs to get located but that’ll be easy once the axle side of the hose is located. I really want to button up the rear and bed but I still need to finish plumbing the brakes and also boxing the frame behind my Z splices. I did manage to get some work done today. I welded in the rear angle iron that holds the back edge of the wood. It is tied into the floor frame and welded solid to the bedsides too. It’ll tie the wood in solid to the metal. I also decided to use two of the existing bolts through the front wood bed trim and boards to hold down the front of the bed. I didn’t want to put any more holes in all that pretty wood. The fuel filler run is now properly graded and the steel elbows in it are all painted to keep rust off the outside. The wires are run up to the firewall and straight to ground from the fuel level sender. Now I gotta wait for that hose and clamp in the mail and get those boxing plates made...
-
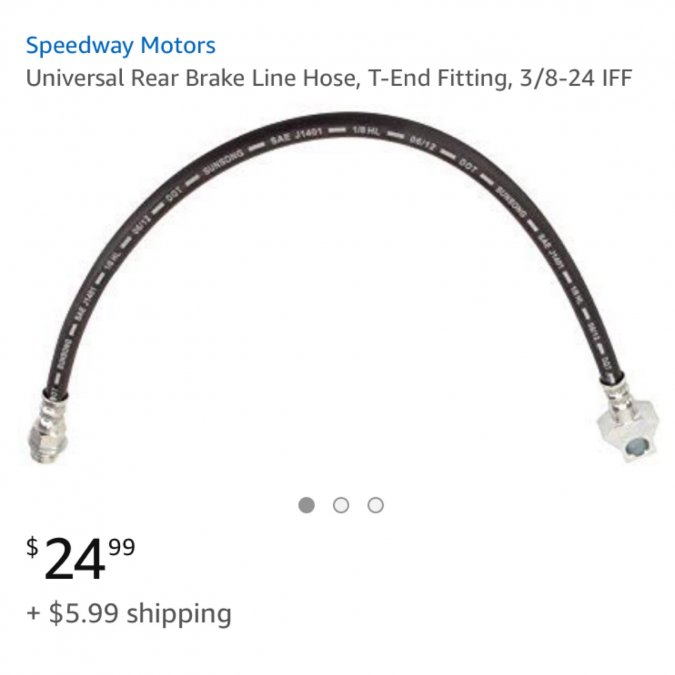
Thanks. I ordered a universal rear hose with a splitter. This should be easier to fit since it doesn’t have the stiff section of hard line that the stock hose has. I can locate the chassis bracket wherever I want- it’s just sitting there in that picture. I definitely want to attach the axle side bracket off of a tube not the center section so I can weld to steel not iron. It’s not the first time I spent too long figuring out how to put the square peg in the round hole.
-
I got outside for a few minutes and hung the rear calipers on their brackets, plasma cut the hole a little higher in the bedside to get the fuel filler hose run to be properly graded, and started trying to decide where to place the bracket to terminate the rear hard brake line, soft hose, and splitter. I am not sure if I should keep trying to make the jeep rear hose work, or rebend the hard portion thats attached to the splitter, weld a bolt to the pumpkin, use the snubber bolt hole, or get a whole new hose and splitter maybe a ss braided and seperate splitter block. The airbags take up the real estate usually occupied by the brake splitter and I want to keep the runs away from the ground and the driveshaft, mufflers, etc. any suggestions?

-
1951 Fargo 400cid on Dakota chassis
Radarsonwheels replied to f_armer's topic in Mopar Flathead Truck Forum
I’m a little jealous of your floor and firewall progress and also of how clean you made it. I have been busy working on the back of my truck- partly because it needed doing and partly because all that welding up front is going to be a pain in the butt and I’m procrastinating! I went back and took a closer look at your work looking for inspiration to get mine looking half as clean. Your gaps were obviously trimmed perfectly before welding and you run super regular clean beads with no evidence of burn throughs or blobs- a testament to your skill and experience. The shaping on the rear of the trans hump is very smooth too- round mallet/shot bag/english wheel? Or did you make a buck? Other than my lack of skill I see a couple decisions that make our floor/tunnels very different. First is my rediculous engine setback. I always wanted to do one. I’m still into it and will be proud when it’s done but ‘be careful what you wish for’. Kind of like building a barhopper motorcycle part of the pride of ownership is accepting compromises in comfort that other people wouldn’t. Q: “That thing looks cool but doesn’t it hurt to ride with no suspension and those crazy handlebars?!” A: “If you are cool/tough like me it is super comfy” hahaha The second thing is the toe angle on the floor. When I installed my swinging brake pedal/ firewall mount m/c on my truck a year or two ago with the original driveline & firewall one of the problems I had was pedal travel. I ended up installing a bigger bore master to lessen the travel. I am tall so that figures in but I had to bring my knee to my chest to get off the gas and onto the brake and it would hit the floor before locking the wheels. The bigger master (1 1/8? 1 1/4? Dont recall) gave less travel but less braking power it would slow quickly but was almost impossible to lock. My solution was to lose the toe angle on my floor and punch out the front corner of my footwell all the way up to the firewall. Now my pedal has an extra three or four inches to swing. If you end up needing more room it’d be easy to make a pocket to increase the pedal’s downward travel- the opposite of your passenger head pocket. I’m also curious about how your firewall intersects with the stock firewall and especially in the cowl vent area if you have pics. anyway- sorry for writing a novel on your thread and congrats on your solid progress. radar -
1951 Fargo 400cid on Dakota chassis
Radarsonwheels replied to f_armer's topic in Mopar Flathead Truck Forum
So simple and clean and well done very nice work man -
I bet you could run it but it never hurts to get it right and the peace of mind you get from triple checking and cleaning everything is priceless.
-
Info please on mustang 2 installation
Radarsonwheels replied to Dodgefran's topic in Mopar Flathead Truck Forum
I always wondered about throwing a light duty 4wd axle in there. Seems like the Dak stuff would drop in with new perches? It would probably be cheaper to hit the junkyard with a cordless sawzall, some extra batteries and a hand truck, even after buying all new wear items from rockauto. If you’re looking for bolt-in the stock setup works great if you can get the steering tight. It was the brakes and steering that got me in the weeds with mine. I did the ‘rusty hope’ disc kit but my steering box was super thrashed and even after new kingpins and tie rods it was not great over 35mph. Other folks on here with tight stock setups swap in lower gears and take long highway trips no problem. My 2¢... -
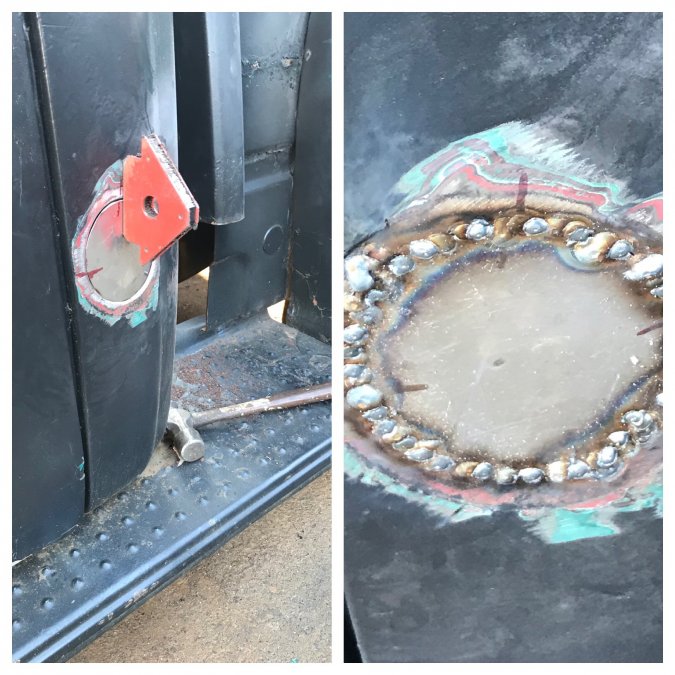
Now I have to handle this area. The other side looks better but in actuality needs to be trimmed back like this one before it can get made again. Thankfully I still have the 12” sections that I removed when I shortened the bed to make patch panels from.
-
Today I welded up a previous fuel filler hole in the rear bedside, the stock filler hole in the cab, and welded up the seams where I sectioned the bed. Lotta tacking grinding and waiting! Some day the cab wil get a skim coat of bondo to hide the fix. I didn’t go the extra mile to make it perfect in raw metal just real close. There are a lot of paintjobs showing in the feathered edge! Only most of them are probably lead paint.
-
Kendall I think the figurine under the DR is looking around to see where she left her pants! I have seen some badges applied to valve covers and other details in ways where they look right like they belong there. If I remember correctly there is a dakota swap and also another truck for sale at a dealer on youtube that put some modern touches. The badges don’t do it for me but the dakota rear bumper is close to looking ok. But like I said what do I know? Here’s a funny one- on that same 78 thunderbird with the karate man on the hood I lost one of the giant rectangular tail light lenses leaving three large concave squares with naked 1157 bulbs. I eventually glued in scarlet plexi with fluorescent drop ceiling diffuser behind it- looked almost stock. Before I got that plan together I still needed to get to work so I duct taped three red solo cups over the bulbs! Totally rediculous but from a couple blocks away it looked like ‘59 caddy lights hahaha
-
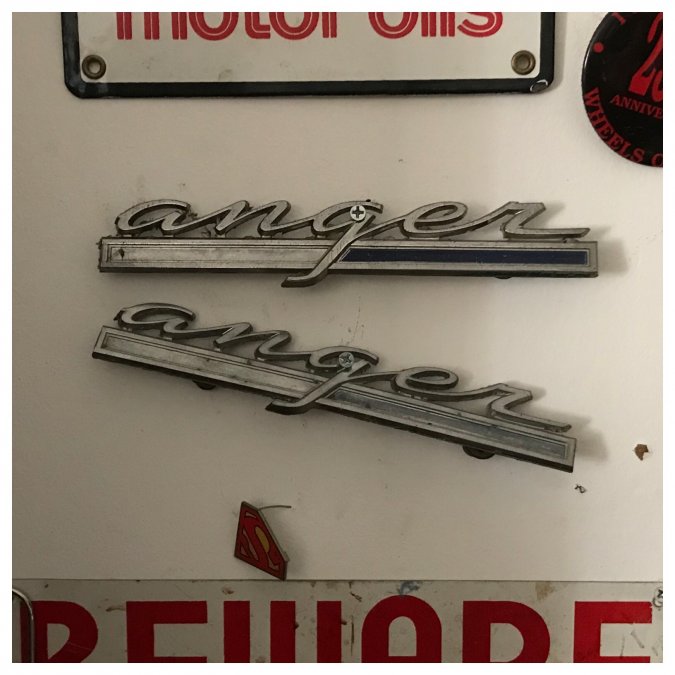
I thought the anger badges were cool but the last time my buddy owned our truck he took them off immediately- it’s a slippery slope- first silly badges then a mexican blanket seat cover, next thing you know you got a chevy engine and you’re welding circular saw blades to everything and airbrushing skulls under your fake patina...
-
The red looks a little better but that big horn still looks off for a vintage look. I have had some pretty dumb stuff added to cars I drove though! I had cursive badges that read ‘anger’ on my 54 dodge for a while. They were ‘70s ford Ranger badges with the Rs removed. I also had a ‘78 thunderbird cruiser with a karate man for a hood ornament. It was definitely a conversation starter people loved it and it is hard to devalue a 78 thunderbird!

-
Who has swapped in a ranger rear end
Radarsonwheels replied to Jj1981's topic in Mopar Flathead Truck Forum
Yup cut off the ranger stub and stick it on the dodge tube -
Who has swapped in a ranger rear end
Radarsonwheels replied to Jj1981's topic in Mopar Flathead Truck Forum
Should be fun and if you are just making a country road toy you can probably get away with welding the driveshaft up yourself too for a total cost of $20 for new perches -
Who has swapped in a ranger rear end
Radarsonwheels replied to Jj1981's topic in Mopar Flathead Truck Forum
My swinger drives fine until you hit the highway where it has a kind of thrumming vibration over 60. It’s been in paint shop purgatory for 6 years which is like free storage at this point and before that it was super fun around town with 3.73 limited slip and a slapshifter- it chirps second and third with a warm 318. So I never addressed the problem. Could be the pinion angle would solve it with some leaf spring wedge shims or maybe drastic measures are needed -
Who has swapped in a ranger rear end
Radarsonwheels replied to Jj1981's topic in Mopar Flathead Truck Forum
Oh and watch out the ranger axles’ pinions are a little more offset to the passenger side I considered running two short side axles and trimming one tube down but never got around to it -
Who has swapped in a ranger rear end
Radarsonwheels replied to Jj1981's topic in Mopar Flathead Truck Forum
I did a ranger (7.5?) axle in my 73 swinger. It had a flat flange on the pinion and needed a combination driveshaft welded up. The rest of the swap was easy I just had to shave the axle, mock it up for pinion angle, tack the leaf perches, measure for driveshaft length, take it apart, final weld the perches, and put it all back together. If I remember correctly our trucks are like the swinger in that the lower shock bolt is also the leaf spring U-bolt plate? So other than plumbing new brakes with 3/16” line there was nothing else that needed to be attached or welded to the rear. Good luck! -
I put a 51 style ram on my 54. Mostly because I like it but also because the stock style circlular badge costs an arm and a leg if you can even find one. I think the new style badges look wrong on the old trucks. The chromed plastic just doesn’t look like it belongs. I am doing a ton of messed up stuff to my truck though- have fun

-
1951 Fargo 400cid on Dakota chassis
Radarsonwheels replied to f_armer's topic in Mopar Flathead Truck Forum
Hand files and determination! -
1951 Fargo 400cid on Dakota chassis
Radarsonwheels replied to f_armer's topic in Mopar Flathead Truck Forum
very cool! I thought you were going with a mid plate for a minute. Great progress! -
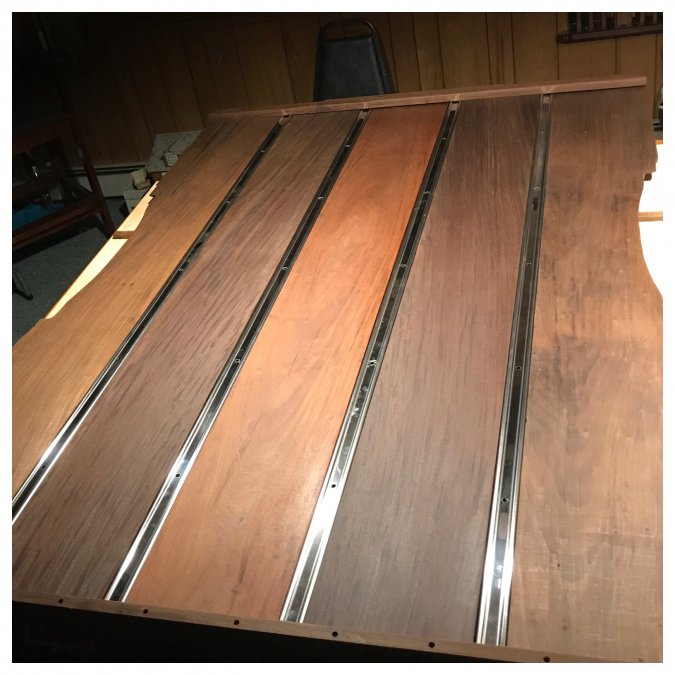
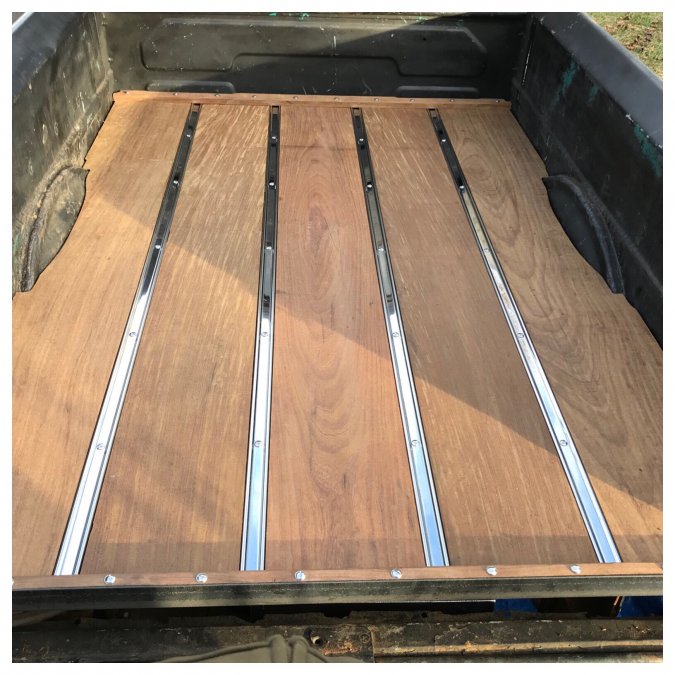
I’ve worked with some beautiful wood and even horn & bone making handles for things but this was my first big hardwood project. It’s hard to beat a flame or curly maple for highly figured wood- and of course bird’s eye maple. Other than the maple stuff I only ever messed with cocobolo and only on small projects. Everything I do on this truck is fun because almost nothing I do could leave the truck in worse condition than it was. A ‘bed you can put stuff on’ was my highest original aspiration then when my buddy offered me the ipe I thought the quality of the materials demanded that I try at least a little bit to make it look good. I wouldn’t have minded if both side pieces matched a little better but I really dig how the colors came out. Varied colors are definitely part of the charm of the ipe! It’s funny all the thinking and measuring I did to try and make this removable I was totally missing the fact that the bed floor sits under a rib in the bedside- it can only lift up a few inches and can’t move forward or back because it’s locked into the wheel tubs. D’oh! I am thinking about how to make the wood bolt down to the bed floor frame so it doesn’t jump or slam over bumps. The angle iron in the back actually touches the bedsides and the square tube floor so I could just weld that in. Then the planks and stainless ends would get pinched between the rear trim piece and the angle. The holes in the angle iron are tapped 1/4”-20 and I will finish with nylocks on final install. That handles the back. On the front I have a couple long shank 3/8” eye hooks I’m thinking about installing somewhere near the front corners. They are ones from a stake pocket kit (I took off the rubber chunk that is supposed to expand in the pocket) so they have a square washer on top with a thin rubber pad which would look ok in the bed. The stock style with the washer flush mounted with a forstner bit is handsome too. At least I got a brand new battery installed today, put in rubber lined P clamps for the 3/8” fuel hardline to the engine bay, and cleaned up all my junior woodshop tools and sawdust. I had the bed installed and apart about five times yesterday so I guess I can pull two bed boards or drop the gastank when I need a new battery- not the end of the world. Here’s an indoor mockup after the oil dried
-
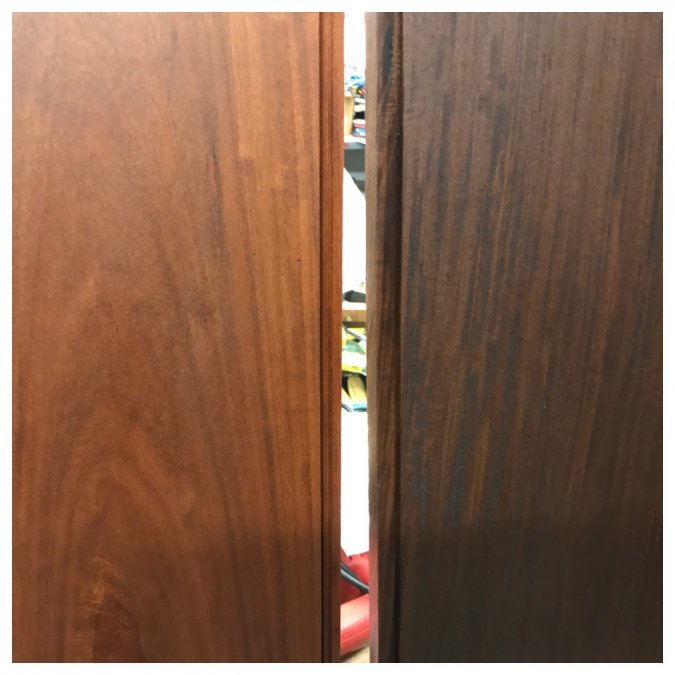
I got it fully mocked up with all bolts & unfinished wood, took it apart, sanded oiled waited & wiped. Looks like a day of cleanup then back to brakes & firewall. Here’s a pic of the mockup then one of the center board next to #4 board which is bookmatched to #2. The center is lighter and redder. The outside boards don’t match each other perfectly but they’re both a medium brown inbetween these colors.
-
Wow that is so cool! I would have such a hard time keeping it as a fire truck I think I would lose the tank, make it fit in a parking space, and try to drive it to work every day. Hopefully you have the wisdom skill and resources to restore it or at least preserve it like it should be as a piece of history.
-
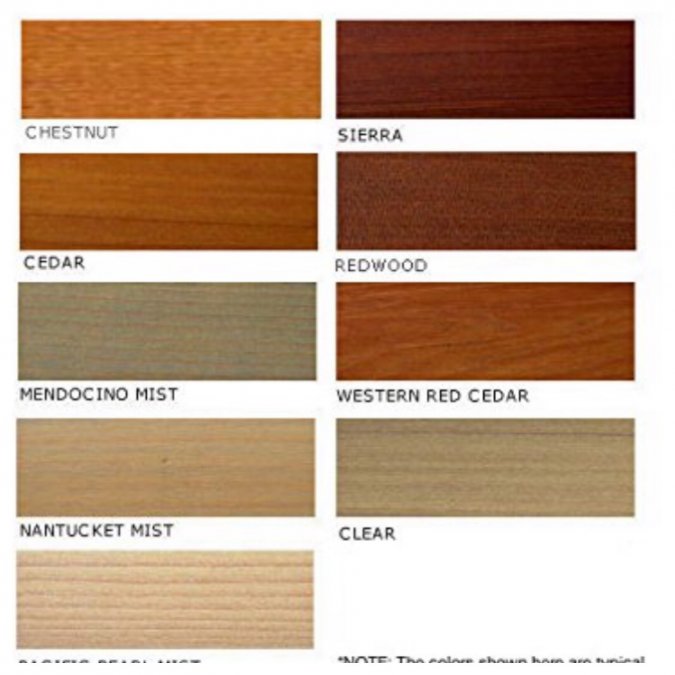
I’m actually excited to do the penofin. I went with the ‘western red cedar’ colored stain. I’m hoping to bring out a little more of the orangey redness and hopefully get a nice semigloss. I’m going to sand it 80 grit on the DA sander to get it uniform and smooth but with a little tooth. From what I’ve read the penofin will need to get rubbed in a couple times a year to maintain the color and UV protection. Easier to care for than nice base/clear paint and I figure I can refresh it without disassembly.
-
I was experimenting with ipe scraps last night. Reading about how hard the wood is even compared to other common decking hardwoods I decided to try drilling and tapping it. I drilled a little more undersize than I would have for steel but it tapped smoothly and the bolt was able to torque tighter than I might make it in wood I didn’t want to oversqueeze without feeling like it was coming anywhere close to stripping! I also learned that if I want a bigger hole for the top material I should start with the bit I want- enlarging a pilot hole chipped and shredded the face of the wood. Since the spot I want to attach the front trim piece is right over a steel crossmember I was thinking my only choice was drilling through the 1” .120”wall square tube and tapping or bolting through that which would make the wood less removable. Now I am planning to put two bolts per board through the front trim strip that won’t stick out the bottom of the floor boards. I got some smaller ss washers and I’m thinking if I make the holes in the trim 5/16” then it will have a little room to move around with humidity and hopefully not cup or buckle. The rear trim and angle iron will get matching spacing but there is room underneath to nut the bolts so I’m thinking 5/16” holes all the way through with nylock nuts holding the tension just past snug. Then the smaller angle iron crossmember I want to use across underneath the middle of the deck will only hold the spacing and the two end caps will hold it square. Then I can use 2 or 3 bolts through the middle of each outer board to keep the deck held down if I hit a bump similar to the 3 3/8” bolts on a stock bed. I’ve been talked out of bad ideas before and I’m a novice woodworker so let me know if that sounds fishy?


