


Radarsonwheels
-
Posts
1,232 -
Joined
-
Last visited
-
Days Won
17
Content Type
Links Directory
Profiles
Articles
Forums
Downloads
Store
Gallery
Blogs
Events
Everything posted by Radarsonwheels
-
Wow awesome tech post! Thank you
-
 Now the weight of the snow is pushing it down into the bed but the cab is where I have raw steel to protect. We’re getting hammered in PA
-
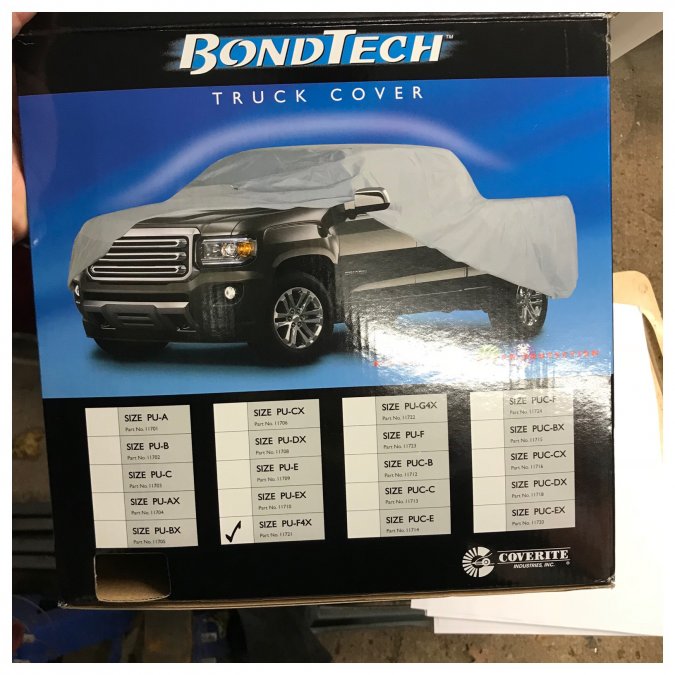
Here ya go
-
That one was from pep boys and it was a ‘med pickup ext cab shortbed’. It could cover the nose or the tail but neither bumper. I went back this AM and exchanged it for a four door shortbed medium size pickup and it fits much better- around both bumpers with no slop on the ground. The problem is our cabs are taller than modern trucks and also I have a ‘long shortbed’ I am at 6’ 10” or so instead of 6 or 8.
-
I still have to make filler panels to join my new floor pan and lower firewall to the fenderwell area that’s built into the cab. The .120” wall square floor frame is overkill but that’s ok. I cut out too much and not evenly when I chucked the motor in there and now I’m sistering up the tubes in spots. It is ugly but it’ll work and my nagging urge to cut it all out and start over is losing to my drive to get it on the road. I’m considering my options for the trans hump- the good old wheelbarrow trick is a good one but whatever I do will be complicated by the cowl vent and brackets. Having a fresh clean driver’s firewall is kind of exciting. It’s going to get cluttered in a hurry with the steering column brake booster and wiring harness.

-
My buddy lent me a bead roller that handles 16g no problem and I got started making the driver’s side firewall and footwell. The trans tunnel is going to be tricky since I want to make it removable. Jury’s still out on that. I wish it wasn’t supposed to be snowing sleeting and raining tomorrow.

-
It’s this one. It could use some greasing but it has free play in it. Hopefully if I unscrew the two exterior screws it will just pull out like a house doorknob with a square male drive and I can just hold it in a vice just past the witness marks of the interlock and twist it the required # of degrees up with ox/a pursuasion or add metal and file it back down or whatever is necessary. If I can get that going a good cleaning and greasing will ensure it doesn’t need excessive torque in the future.

-
I am not having good luck with the search function on this one, sorry for what seems like probably an often asked question. My driver’s door handle is droopy. It would look so much better if it matched the horizontal body lines. Is there a standard fix for these before I try to re-invent the wheel? I haven’t even tried to remove it or anything yet. I’m imagining a square or flat peg that is rounded off or is wallering out a hole? Any advice is more than welcome! Thanks!
-
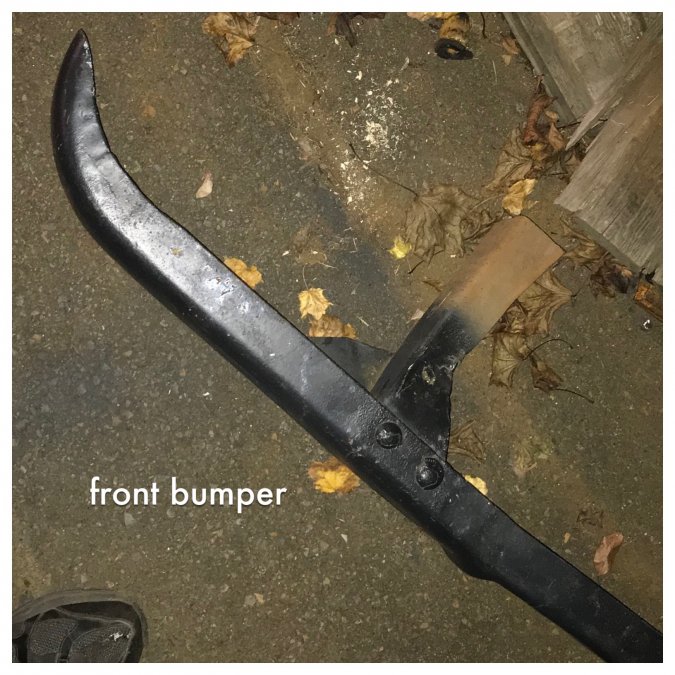
Today was front bumper day. My buddy came over and helped wrangle the doghouse on and off a few times. We jacked up the front and removed the wheels, measured and sanded the rad support crossmember and ‘54 frame stubs, put on the tins, cribbed up the bumper, and tacked a couple pieces of round stock in place. Then we pulled the tins off and connected the 54 frame stubs to the crossmember with 3/16” plate. Then we got excited and forgot to paint all the new stuff and put the sheetmetal back on again. I had never had the fenders in place since I swapped out the 1989 v6 springs for the moog coils and I was really crossing my fingers that it would not still be too low to turn the tires. Thankfully the spring swap worked out beautifully. The tires look nicely framed by the wheel arches but still have plenty of room to haul passengers, hit bumps, and turn into driveways. Another nice surprise was that the water pump pulley clears my electric fan with just enough room. Never had the nose on with the rad installed before. If I was running rubber motor mounts I would have to really watch out for trouble as they broke in but I think the polys will limit my motor travel pretty well. So here’s pics at full drop which looks pretty cool but rides on the rear bumpstops, and also around where I think I might want a regular cruising height, with the bags inflated but not too firm yet.


-
Cabbage Hauler - WD-21 Build Thread
Radarsonwheels replied to Jomani's topic in Mopar Flathead Truck Forum
Lookin good! What cam did you go with? -
Turn Signals Made in America?
Radarsonwheels replied to Jocko_51_B3B's topic in Mopar Flathead Truck Forum
I have re-done mine a couple different times. It’s pretty easy to get working as a switch but I never went the extra mile to make the indicator lights in it work with my 12v system. I probably will do that this go-around. Nobody likes the guy who drives around with his turn signal on for miles. I’m still tickled by the novelty of the non self canceling switch. The etched plate on the signal is one of the coolest details in my cab I would never replace it with streetrod type stuff as long as I could make it work. The other beautiful detail is the heater core- such a shame it’s hidden under there! -
The willys shackle is like 1/2 price or less than the dodge one on rock auto too. Probably the easiest way to get a little drop and not lose hauling capacity
-
Ha! I get a little obsessed when I have a juicy project going. I own a couple tattoo shops with my wife and we have a six year old too so I’m busy but I have an unconventional schedule. I end up having Weds 9-5 to myself and mornings free until I open my shop at noon. Then I often get a couple hours to putter around in the garage at night instead of watching tv or whatever normal people do. I knew this project was so big that if I didn’t keep pushing hard at least until it’s a driver it would be neglected and abandoned. The coming cold weather is another motivator plus I reeeeaaaly want to hear this engine!
-
The two tubes look like some kind of elaborate venting so water can’t get in or something? They are open at the bottom edge right? The case looks like it could have a motor in it? And the coat of arms logo is pretty cool too. The last mystery on here (possible keyhook turns out to be a pivot for a bus driver style fan) was a juicy one I hope we get to the bottom of this. And I couldn’t help hitting like on Plymouthy’s post- it wasn’t helpful but “fartwhipper” has such a nice ring to it and those could be spark arrestors in case the electric motor reacts badly with the methane...
-
Thanks for chiming in fellas! Yeah wierd right? Do your back bumpers attach with four brackets onto the frame like mine? My front bumper is totally different. Maybe my rear bumper is off a chevy or some junkyard magic happened but it looks like it’s 70 years old- about right! The front bumper on my truck is bolted or riveted to the front horns of the 1954 frame, which I sawzalled off and kept all the way back to where the 1954 front leaf hangers started. It’ll be less work to get the brackets lined up to the nostrils on the front under the grille with the original frame horns intact, and look more correct too. I am happy the front one is in good shape but I am considering giving it a touch more angle or peak in the front to match the sheetmetal better. I haven’t decided yet. After having no back bumper for months I am not sure how I like it visually but it isn’t a radical departure from stock and does make the truck look lower and wider in the back which is A-ok for me. I will probably have mixed feelings on the front too. I never wanted a smoothie street rod so I think the bumpers are necessary. I want somebody that’s not an expert to basically see an ancient work truck not a ratrod version of a Boyd Coddington car. I just won’t do any staged or fake patina- I have wierd specific taste.
-
Yeah thanks for the motivation Los! I have to go to my shop and do actual work now- just got all cleaned up. I finished making the trans cooler hard lines. Just have to put some rubber up front to keep them seperated and off the frame. I also had to install the shifter brackets on the trans and mock up the shifter to make sure the linkage would clear. Another fiddly little job checked off. I still have to plumb the brakes and the fuel line and remove a few scraps of dakota lines off the frame. It’s getting almost to where I need to make at least the driver’s side firewall before I can do much more- the wiring, pedals, brake booster, ignition box, mechanical oil pressure sender, shift cable and steering all need to bolt to it or pass through it. Plus I’ve been procrastinating on mounting the front bumper for months now it’s a pain to take the doghouse on and off alone to measure, fabricate brackets, tack it up, final weld, and re-assemble. Probably take a whole day like the rear bumper did. At least it’s not all smashed and twisted up.

-
The rear bumper is on there and the tag notch is done! Plus I almost have my transmission cooler lines done- I had been waiting on fittings.

-
Duh I need to move the 54 c channel to outside the brackets that’ll give much more interlock for a strong weld. I thought about reinforcing the lower channels but I think I prefer that to be the sacrificial item in a fender bender.
-
That bumper sure looks wierd hanging out in the breeze back there but I think I’m tucking mine in more than stock! Also I eventually want to do something about the home spun triangular rear bed reinforcements. She came that way when I got her- I guess those lovely curved stake pockets gave up the ghost in the 70s or 80s?

-
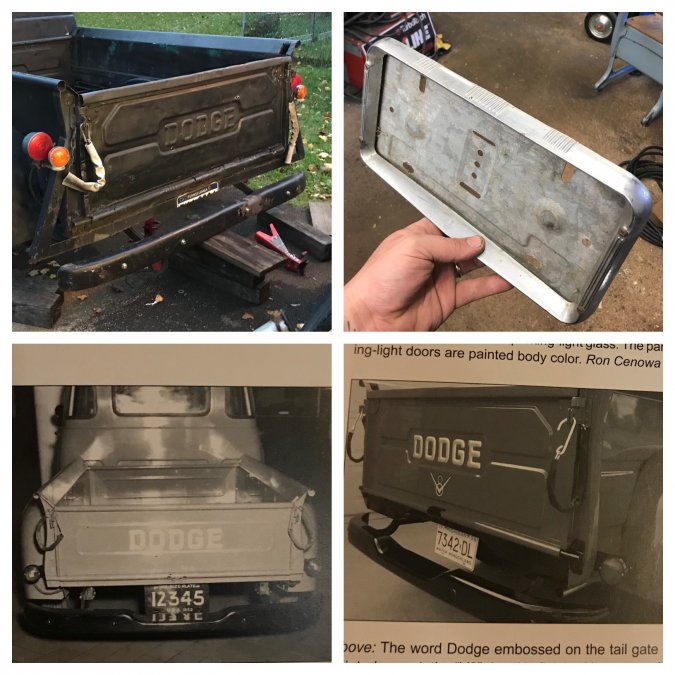
Today I started out with some small jobs. I made and loomed the wiring harness to go from the front of the motor back to the firewall with distributor, alternator, and h2o temp wires. I put a fuel filter between the mechanical pump and the carb hard lines with short rubber connections. I got a hosebarb 5/8” to 1/2” reducer and ran rubber lines to the heater core from the water pump. I installed a hosebarb in the intake for the 3/8” brake booster vacuum line. I looked at the oil dipstick, couldn’t figure out where it should live so it will have a straight shot to the pan and also not touch the header, and ended up doing nothing with it. It’s a knockoff flexi stainless braided one. stick itself is flexible-ish but not nice flat spring steel like oem more like a chunk of coat hanger. I’m thinking a little tab secured by the center left header bolt will do the trick. The main event/fiasco of the day was the rear bumper. It was severely pretzeled and the thick metal was stretched pretty badly. It also only had two bolts in the bumper out of four, and three out of six in the frame. I clamped it in my shop press and welded a bar across the end and straightened out most of the twist with leverage and ox/a. Then I ran it back and forth under the ram and got the front face a lot straighter. It still looks like hell and wrinkled in where it shrank after heating but it’s not getting much better without just replacing it. I’m covered in scars myself so I feel a little kinship with the poor old warhorse. Once I had it straighter I tried mocking it up but the bracket width was all wrong- it wanted to hit my rear leaf shackles. I did a little head scratching and cribbing up and trimming and measuring and more trimming. Wow by the way the oem bumper brackets are high quality spring steel! The solution I decided on was to re-drill the bumper to move the bracket pairs in 4” on each side, allowing me to bolt the ‘54 frame stub C channels so they interlock with the ‘89 C channel frame from the inside. I will weld it in then the frame will have new drop downs with bolt holes perfectly aligned. I have a fancy older licence plate frame I want to use. I think I’ll need to notch out the bumper similar to the ones off the bunn book pictured below. I wonder why my bumper is not already notched? It definitely covers the bottom 1/3 of the tag. I think it would be fancy to put the tag light inside the bumper shining up and hang the tag off the bed under the hinge.
-
Newbie Here - 1948 Dump Truck
Radarsonwheels replied to Goddom's topic in Mopar Flathead Truck Forum
Cool truck! The steering looked familiar on your ‘speed run’. Mine held a turn great but going straight I would have to deal with a huge amount of play before I could ‘find the edge’ of either side to make steering corrections. It looks like she is close to being what you need in a working truck. Do you have a plan of how it will come out when you’re done? Or are you letting the truck tell you what it needs and just fixing issues as you find them? -
New member new project
Radarsonwheels replied to Flatlander_summit's topic in Mopar Flathead Truck Forum
Looks like a good one! If my truck had been that nice I wouldn’t be butchering it. The flathead was definitely fun and 3 on the tree was awesome too. Woodie Guthrie said it- “step on the starter” -
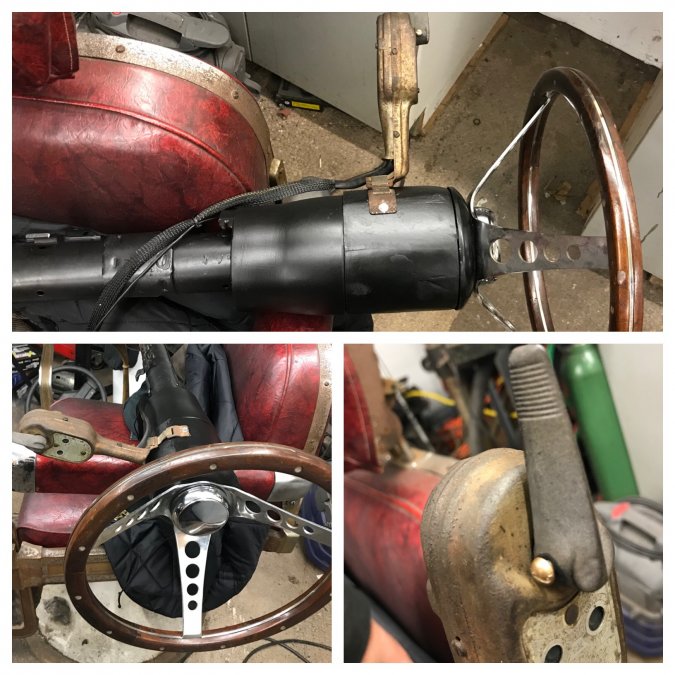
Ok I was considering actually finishing the bodywork really nicely but I threw some semi flat black on it and I really like how it looks all battle scarred and ancient like the rest of the truck. Without the shifter turn signal and other holes or bosses on it I think it looks more like an earlier column- definitely not 1989. Ditto on restoring the stalk- I like the contrast with the black. I got some nice wire loom to finish it off too. I did make a new brass set screw and loctite it into the turn switch. I used to get tired of that thing falling off all the time.
-
I got another thick ground strap from the starter stud in the bellhousing to the frame rail so now the motor has two strong grounds. I put a ground strap to the bed floor frame (which is welded to the box) too so all that’s missing is grounding the cab once the firewall is in. I also made a new four wire harness for tail brake left and right turn signals and routed it from the driver’s fender back to the lights. I’ll have to hack a tag light in to the running light circuit whenever I figure out where to mount the licence plate. The harness is all attached to the frame so I can just unhook the ground and three spade connectors on each side and the bed can come off and on if necessary. It was cool to see the rear end light up again after being sad and dark for so many months! It’s raining today and I had some time after getting my kid on the bus so I pulled the steering column and started the finishing work on it . I went to wire the grant horn which is a momentary ground and quickly realized that the isolated copper track under the wheel adapter no longer had a sprung contact that would maintain connection as it spun. Oops! I guess I shouldn’t have thrown away ALL of the electronic guts for the ignition and turn/wiper stalks. I made a new sprung brass contact button to live in the column out of a 45-70 case, smoothed and buttered up with dielectric grease. Hopefully I got the tension right so it will keep contact but not dig a groove through the track. The stock 1954 turn signal stalk just had to stay- the little etched plate on it’s face is so cool. I hammered the ends of it’s straps mostly flat so it could get bolted to the side of this column. It seems like it’s going to be right at home. The holes in the dakota column all got patches epoxied over them made from a plastic tube that an air tool water seperator came in. I’m hoping a little sanding bondo and spraypaint will have it looking smooth enough to not be an eyesore in the vintage cabin.


