


Radarsonwheels
-
Posts
1,232 -
Joined
-
Last visited
-
Days Won
17
Content Type
Links Directory
Profiles
Articles
Forums
Downloads
Store
Gallery
Blogs
Events
Everything posted by Radarsonwheels
-
 Thanks RN haha I’m not a tig welder and I’m not re-polishing rainbows out of stainless. If I wanted hidden fasteners I’d have bought the strips with the channel in the bottom for sliding studs. I actually like all those bolts it looks businesslike or army/navy equipment like a tank or an old airplane. I’m cheating with the fancy wide flathead stainless 1/4-20 screws I bought so I don’t have to chisel square holes- we’ll see if I line up all the slots like pebble beach cars ?
 -
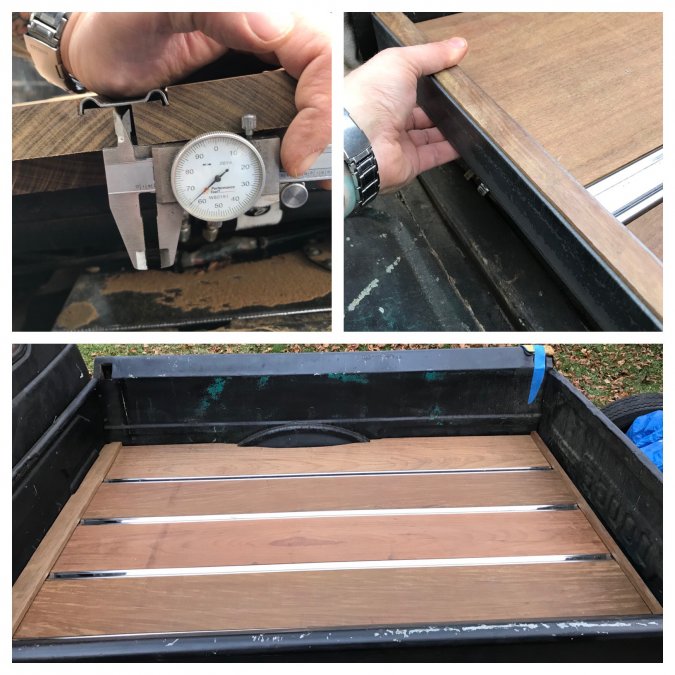
I went a few thou proud of dead even with the humps. Plus add on a small margin of unromoved material to account for amateur tablesaw work. It came out pretty clean. I added a hair more bolt clearance and ended up taking a little more width off the middle board to get all the gaps perfect. Sneaking up on this stage worked pretty well- didn’t have to pony up $100 for a ruined board yet! The front trim piece I want to rip down much thinner like fat 1/4 round and it will sit right over and can bolt right to tapped holes in the front bed frame crossmember. The rear of the bed I had the crossmember sitting 1/8” lower off level than the other three xmembers, making enough room to slip an angle iron underneath. I cut a 1” wide slice of the ipe to trim out that tall lip and match the front treatment. Edit *and keep junk from rolling off the edge* Just gotta go get my router and make these trim pieces flow a little and look nice to touch. And figure out if I’m doing hidden screws or proud screws that match the strip hold downs.
-
The stainless strips will have recesses milled in to the board edges so that they sit level with the top of the wood. Stock the bubbles are slightly proud I think.
-
Los- thats funny though I was also trying to figure out how I could get a triangle in there to keep it from parallelogramming if it got lifted up. I would be nervous about screws in the hardwood near the end grain. I know I’d have to drill pilot holes but still I don’t have the experience to do that right. Now two holes per board for through bolts on the back reinforcement- that I can do. I still haven’t decided about hold downs or U brackets. I want a couple in the front maybe but I don’t want rattling or stuff sticking up.
-
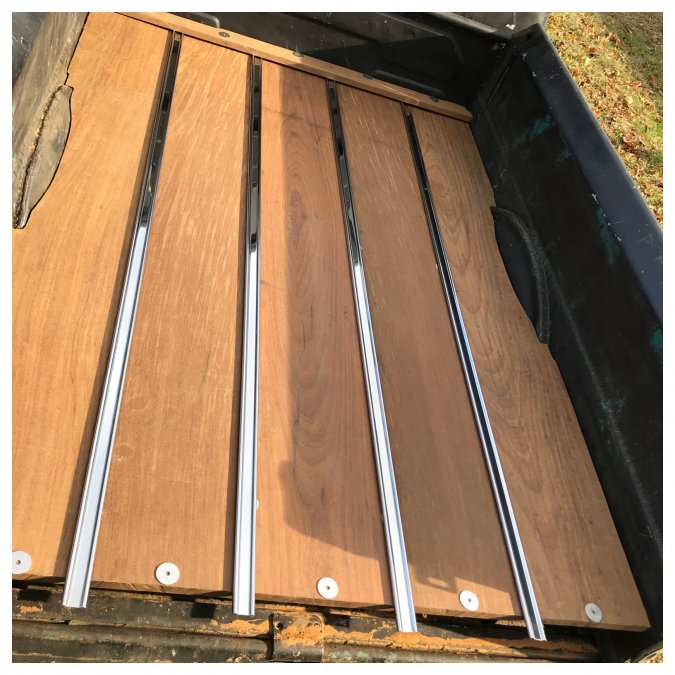
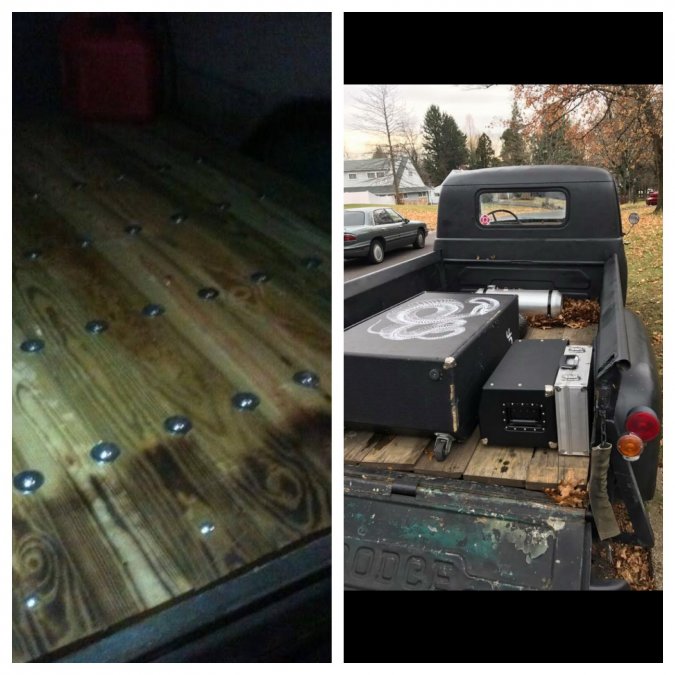
I’m still on the fence about having the bed as a removable slab like a barn door. I’m thinking that it would be less work to just cut the bottom off the battery box and make brackets for that or figure out how to make the battery drop out from the bottom despite currently being a toploader with a 45° angle iron and tension bolt hold down. Poor planning on that one- when I installed the battery box I was still planning on the spun tank above the bed floor. Getting the big hidden tank was a big upgrade for not too much backtracking. I started cleaning up and the brown truck came- the strips are dropshipped from mar-k which is where I suspected they would be from. I’m gaga over how good they look just set on there.
-
I’m messing around something different to trim out the front edge with wood and starting to mock up bolt quantity and location too. I’m going to thin out the front trim cap a little and hit the edge with a round over bit on the router. I’m thinking I can run the stainless strips right under the trim and then it can drain through the stainless channels and not hold water. Nothing worse than an unintended redneck swimming pool in your truck although it is fun to hit the gas and dump it out when that happens!
-
At one point a few years ago I had a clean 04 durango, decent looking mild custom 73 swinger, rowdy but straight 72 demon, and my 54 C-series in my driveway. The garage at the top of the driveway had a shovel head harley, an evo softail, a sharp bmw 1000 cafe, and a clean ‘05 ninja liter bike. Ok so it was seven years ago- now I have a kid who’s 6 and only three or four cars and one bike My neighbor shared our double wide driveway and one day I saw some punk had broken the rear window of his work van. Like any good neighbor and in truth not totally unselfishly (who wants broken glass around?) I swept up the mess on his side as soon as I saw it. He must have seen me cleaning it on his security cam because that night he came and thanked me for doing it. He seemed really awkward about it and I didn’t know why- I’m friendly and a responsable adult it seemed like the kind of thing any person who was raised right would do and not a big deal. Little did I know that while he was an elevator mechanic and had a broke down jeep behind his fenced in yard (normal working guy right?) his sheltered closed minded mall fashion middle class snob wife had convinced him that the grease monkey biker tattoo artist scumbag hotrodder next door with the junkyard for a driveway was the reason they couldn’t sell their house. By the way they had already turned down bids because she wouldn’t sell to Indians... It turns out he felt bad that I had shown friendly neighborlyness because they had already reported me to his wife’s friend at the township for having a driveway full of old dangerous junk. Here’s the fun part- By the time the inspectors came around there was over a foot of snow on the ground and I was only driving my 4wd durango and keeping the salt off my old treasures. I had to spend over an hour digging out my other cars which all ran, drove, and had registration, inspection, and insurance. I received no fines or warnings or anything- just an inconvenience and a new burning hate for my neighbors. The guy across the street had three ‘59 caddies in various states of returning to the earth under cheap canopies, slightly hidden by his refusal to attend to his landscaping. His neighbor had $$ and a big landscaping or building company- his chevy II racecar would raise the dead when he started it and threw his gravel driveway all over trying to drive it onto the trailer with a 5000 stall converter. You can do whatever you want on your own property until somebody starts complaining about you. I have had bad luck with neighbors in the past but good luck keeping all my projects either on the road or safely away from prying eyes. My current truck project I am super happy that it looks like a truck again and the old chassis and dakota wreck are long gone...
-
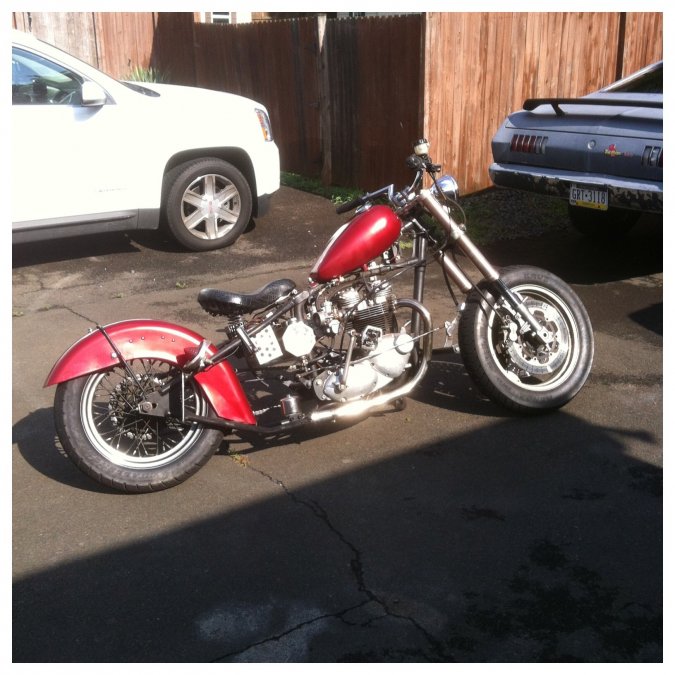
Just for fun- here’s the triumph. It got more than one ride in the old C-series. I rebuilt the motor and modified a 90’s sportbike front end to fit on there. As you can see I can’t leave anything alone haha
-
When I got the truck the bed floor was two sheets of 3/4” plywood. When that rotted I put in pressure treated 2 bys and a ton of bolts and washers. That took about three years to buckle and start spitting bolts while my buddy had the truck again (traded it for a hardtail ‘77 triumph 750). He put in the 100 year old pine boards in the pic with my bass gear from last year when I was still running the 54 frame and driveline.
-
Oh and I think the taper is pretty even. When I measured it this morning with two pieces of wood on each side measuring exactly 22” the stamping in the center was about 3/16” off which I decided was fine
-
Hi Merle! My bed has definitely hauled some stuff in its day! The tailgate and front wall are both bowed. Before I mounted the bed I spent about a half hour beating the front with a hand sledge like it owed me money which you would think should have left fist sized dents but I actually took a good inch of belly out of it. My tailgate doesn’t really have side to side play- the terrible looking hinges still work great- but the top right corner was starting to rot out and a couple years ago I noticed that any time I hung the gate and stood on it the gap would change so I cut out the rust and welded in a heavy plate reinforcement. Ever since then it grabs the bed sides the same every time- the little top tabs have a slight angle to them so it gets tighter as you push it in. When the chain holes are lined up the gate is snug enough that you have to give it a little nudge on both sides from the inside to pop it loose or else if you pull one side free the other one sticks a little. I set that how I wanted it by bending the tabs a little. The bed is square corner to corner but the sides especially the rt rear flat behind the tub has a little belly in it. Also remember I took 12” of length out of the front of my bed and my running boards too- exactly the same amount on each side. The rear of my bed at some point someone added a heavy angle iron across the bottom under the hinge which stretched out a good 10” or so on each side then angled up to reinforce the stake pockets. After I welded in my new bed floor frame I figured I could cut off those triangles and I was right it didn’t spring out after I chopped them off. So all the above is kind of a chronicle of abuse and evidence of a very hard previous life- which adds value to me! To add my personal take on the taper- I think it comes down to the bow in the front of the bed sucking the sides in, even after my vicious beating got it somewhat straighter. Before I added the frame as you know the only thing keeping the bed square or true is the floor- actually on a stock bed all the metal hangs off the wood and the channel crossmembers bolt to the frame right? I don’t even remember what held the bed on for the last ten years or so while different styles of 1/2assed platforms held up motorcycles couches drywall bass guitar cabinets and amplifiers and my kid’s tricycle! Maybe a couple or few added on crossmembers...
-
Gorgeous
-
Gotta head out to work then band rehursal till 1:00 tonight. Fridays always kick my butt. I still got out in the driveway and got cracking for a couple hours this AM. I got the side pieces angled 5/16”, verified that the center gap is now even, and ripped 5/8” off the second and fourth boards. Now I have the 1/4” I need for my bolts to drop through plus a margin for expansion. The gaps are even and square. Now I gotta get the strips and the boards will get a few more trips through the tablesaw, a bunch of sanding, and some oil. The leftover from ripping off 5/8” is looking like possibly a nice cap for the front corner of the wood. Still planning on a metal cap in the back.
-
My cousin is a trim guy he likes to say “can’t see it from my house”
-
I think that is what Los was saying too which is exactly the opposite of what I was saying. Which is why you guys are awesome- sometimes when the world is upside down I just need a friend to tell me I’m standing on my head haha On the rightmost board when I got done shaving the high spots until it sat with an acceptable gap to the flats was 3/8” wider in the front. I did exactly like you said los- scribed a pencil line, cut most of the meat off the fat side with a jigsaw, and finished with the sandpaper disc up to the line. It left a nice straight edge. There is enough material to keep going tighter and tighter to the sides but I think I’m happy with the side gaps. The easiest and best plan of attack is definitely to split the taper in 1/2 and take it out of the insides of the edge boards. A 5/16” wedge will melt off in a few minutes with a fresh flap disc and would be clean enough to show even though it will be hidden under the stainless. The fit on the sides I have about 1/2” of material that could get burnt up getting a perfect fit but I dunno it’s a farm truck not a show truck. The difficult thing is that not only is it bellied and warped on the sides but the tubs get almost 2” wider at the bottom of the wood than at the top. I’ll have to see if I’m still happy with it the next time I have the cover off. Honestly I liked it just fine in plywood and rough pine with no strips I just don’t want to do it all over again a third time any time soon. Thanks for the super helpful suggestions!
-
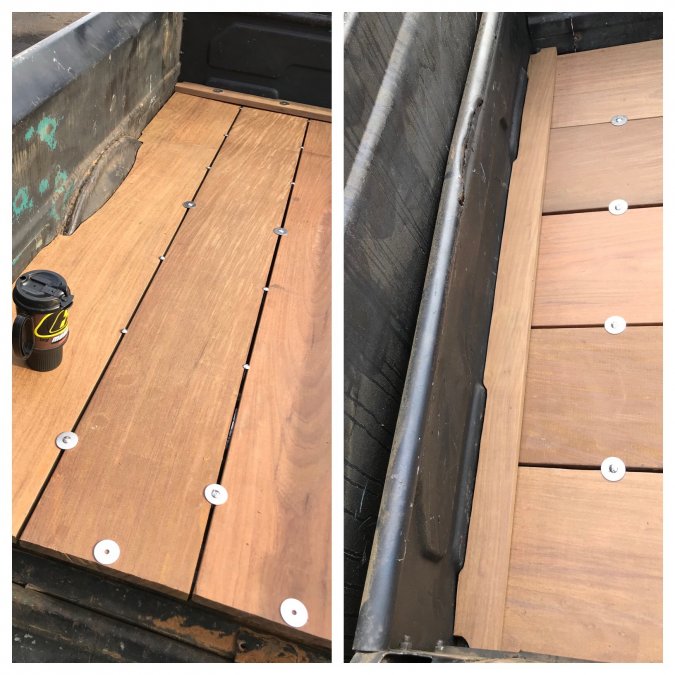
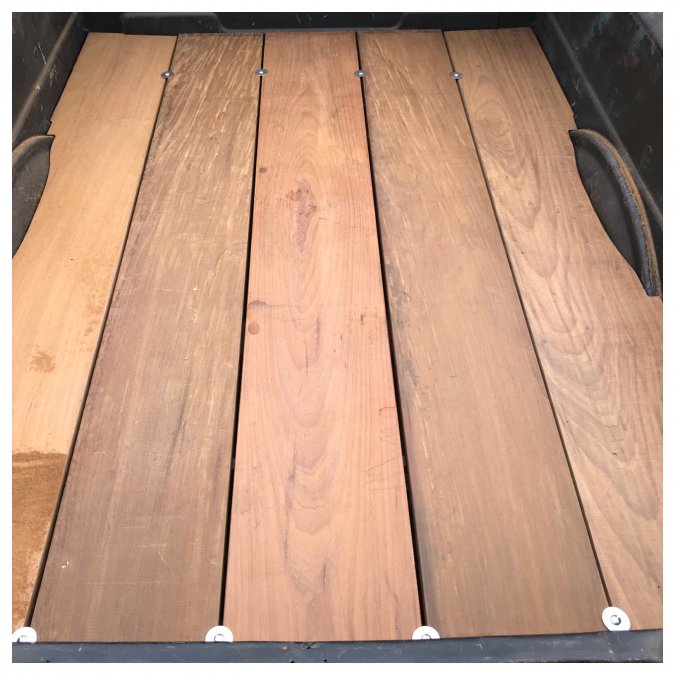
Another pic with the oversized center board just sitting angled in there. The gap on the left that has bolts hanging through washers as temporary spacers has a little bow in it. I might be able to fix it some with my taper plans or else the stainless will hide the ugly. Can’t wait for the strips and oil finish I ordered to come in but I still have to hang and plumb the brakes, and perfect & button up the fuel system before I can start bolting in the deck. It’s a good start though and at least my buddy isn’t storing the ipe for me any more.

-
Ok I had to work yesterday so I only got a little done but today I had a few hours to get after it. My previous idea of 3/16” gaps turned out to be laughable but it’s going well so far. I have the side boards fit where I’m happy with them and got 3/8” taper out of one of the raw boards from the sawmill. The bed has some belly in the sides so it took some doing to get all the gaps acceptable. Now that all my four side boards are fit and square I have a new problem- the bed has 5/8” taper toward the front. I have one 11” board left and a gap that is 9 3/4” in the front and 10 3/8” in the back! So plenty of material but now I have to figure out how to fudge this so the shovel strips look parallel. I’m thinking the best option is to fan them out evenly so without a ruler they will just look like they converge because of perspective/vanishing point instead of being an obvious wedge shape? This is getting fiddly. If I share the taper between three boards and only remove just under 3/16”ish of taper from of each I think I’ll be good. If I was using softer wood I’d attach an offset straight edge with short screws and rip the taper in the tablesaw but it is probably faster to shave to a pencil line with a flapwheel in my 4” grinder. When I did the shaping for the tubs I cut the shape out with a jigsaw and did the rest of the carving with carbide burrs in my die grinder and the flapwheel in the grinder. Both removed material pretty cleanly and quickly. I am glad I plan to cap the endgrain with steel front and back- they are far from perfect and the bed front and gate are bowed, plus it will keep me from having to taper both sides of the boards to keep the ends all perfectly square.

-
I love the sketch- I was thinking wow you even did a casual version of the architect all caps blueprint handwriting font, then I took a look at your profile- ha! I’m on board except for one thing- I want to show absolutely as much of this gorgeous wood as possible. I kind of feel like if I just do a nice 1/16” or 3/32” gap it will work great, drain rainwater and hose off easily, and I can tell myself I’ll do it right with angle strips when I get around to doing the body work right instead of just hacking at it. I also have to remember that the truck has a wiper arm groove in the one year only windshield and while it will never be a ‘ratrod’ it’ll always be a rat...
-
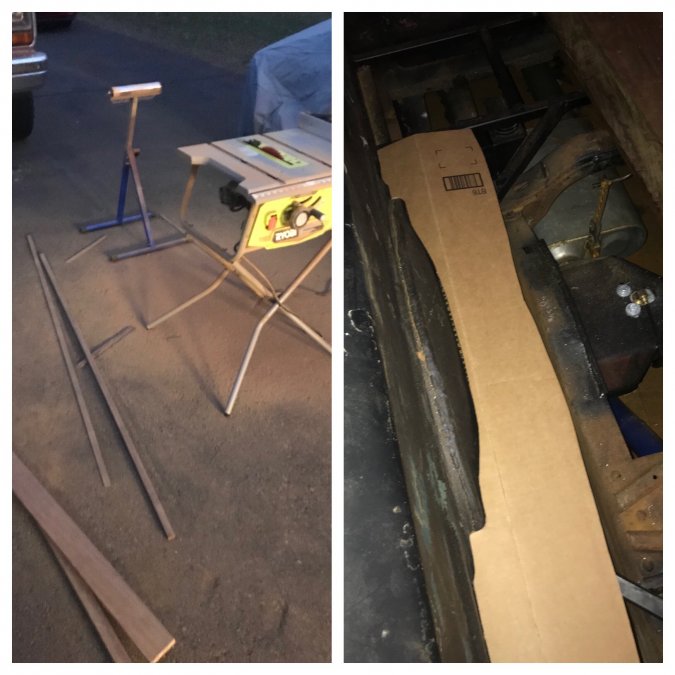
I have some woodworking tools but I borrowed a 10” tablesaw and bought a roller sawhorse and a 60 tooth diablo carbide blade. It had been a long time since high school shop class and I never ripped $100 boards before but I went slow and everything is coming out awesome. I got the two new boards ripped down- one to 11” and one to 12”- some extra for now. I’m going to fit the two boards on the sides around the wheel tubs first then sneak up on the central board last. I figure I’ll get them all fitting side to side then figure out how to mill out the corners after the shovel strips get here. If you look at the truck Los posted with the tree they spent a lot of time and money getting a bartop or high polish finish but the gaps suck around the tubs. I’m guessing they made patterns off the plane at the bottom of the wood and didn’t account for the tubs getting smaller at the top of the wood? I started making a cardboard pattern for the tub cutout in the bottom of the wood- here’s a pic. It’s still a little tight. When tried it on top of the wood an inch higher it was WAY big. I think I’m going to cut out the size of the top and hog out the angle until it will drop down, then round off the sharp top corner to get my 1/16” gap. This wood is easy to work with but any mistakes will be expensive!
-
Jeez Plymothy I don’t look down my nose at a fuel cell equipped truck but I definitely get it. I had that spun aluminum round tank in my truck with the flathead for a while and while it worked a treat it kind of reeked of a certain kind of streetrod wannabe racer deal. I think I feel the way you do when I see a car that sits below the scrub line or that ‘cambered’ ‘stanced’ german car with stretched tire thing, or even worse a tonneau cover hiding a hideous non functional bed interior that contains ill advised suspension parts instead of hauling capacity. I do like seeing an old pickup at the track with well a well fabricated cage and four link and big slicks in the bed- but it better not run a 13.5 second 1/4 mile. In any case I do agree with you enough that I want a bed that can be used to haul a mattress or a couch or bags of mulch for the missus’ garden and not have to unload at the gas station.
-
Maybe I should just cut the bottom of the battery box off and make bolt in brackets so the battery will drop out from the bottom. Then I can make a nice factoryish angle strip. The curve around the tubs would be challenging without a shrinker/stretcher. I like the idea of a clean 1/8” gap. Google results say 1/16” for decking with 4” boards.
-
My welded in bed frame does that job and also has the four poly mount points which are the only places the bed touches any other part of the truck. The bed sides and inner tubs are welded to the bed frame. Before I added the bed floor frame the bed had to come on and off a few times and it was scary how much it flexed all over the place. Now it stays flat and the corners stay square. The frame is way stronger than it needs to be. This bed only needs strength as a platform not as reinforcement for anything else and will be 90% decorative but I will not hesitate to use it as a pickup truck. Or to take a nap next to my cooler!
-
I am conflicted about the 90° edge strips. I don’t want anything that tucks in except maybe on the bed front since I want to be able to remove the bed wood as a unit without disassembly. I don’t mind if it gets tight in humid months but I don’t want buckling, cupping, or gaps that will let anything like a ratchet strap S hook slip between. Maybe if I give 1/16” gaps on either side of my 1/4” bolts and base my gaps on butting the shovel strips into the milled corners of the boards then the 18g strips will flex a little if the boards swell? I don’t mind changing the look from stock but I want it to work. Didn’t brand X trucks not have angle strips or do I have that wrong? Thanks for all the feedback- there are some experienced and passionate woodworkers on here!

-
The strips are from ‘classictruckbeds’ ebay seller. They are polished stainless and probably not correct dodge profile but I’m going for ‘looks right’ not correct. Since I only needed four strips it cost a similar amount from most sellers but this one had 80” strips sold in any amount. Shipping is the killer on the long package.
-
Thinking about how to do the rear wear cap. I want the whole slab to be a unit that can be removed or propped up like a hood for a battery change. I plan on four hold down D rings or maybe just three- two in front and a central one in the back for lifting with the hoist. These would bolt to the bed frame for strength. I think I have a racing power disconnect on the shelf somewhere that would make a good interruptor for the ground terminal- that way I can have a double secret kill switch and also an emergency way to easily disconnect the tucked away battery in case of fire or maintenance. The front cap I’m thinking just painted 16g lip of sheetmetal to keep stuff from rolling between the wood and bed, but I don’t know. Hafta see how it will fit with the bed stamping. I could even get nuts and put in a minivan tailgate ram or two and hinge the front...

