-
Posts
4,948 -
Joined
-
Last visited
-
Days Won
42
Content Type
Links Directory
Profiles
Articles
Forums
Downloads
Store
Gallery
Blogs
Events
Everything posted by Los_Control
-

51 B3B build thread - after all these years
Los_Control replied to bkahler's topic in Mopar Flathead Truck Forum
I was trying to picture in my mind how rough the truck would ride with 29 year old tires on it I was thinking these trucks would have had 7.50 x 16 tires and they would be the same height as a 235 75r 15 Seems a smaller tire would make the speedometer turn faster ... Maybe 5mph, not 20. I dunno, maybe 225 is the correct size ... lots of people run them. I bet that first drive you were grinning from one ear all the way over to the other -

Creative electrical, need help holding in the smoke.
Los_Control replied to Los_Control's topic in Off Topic (OT)
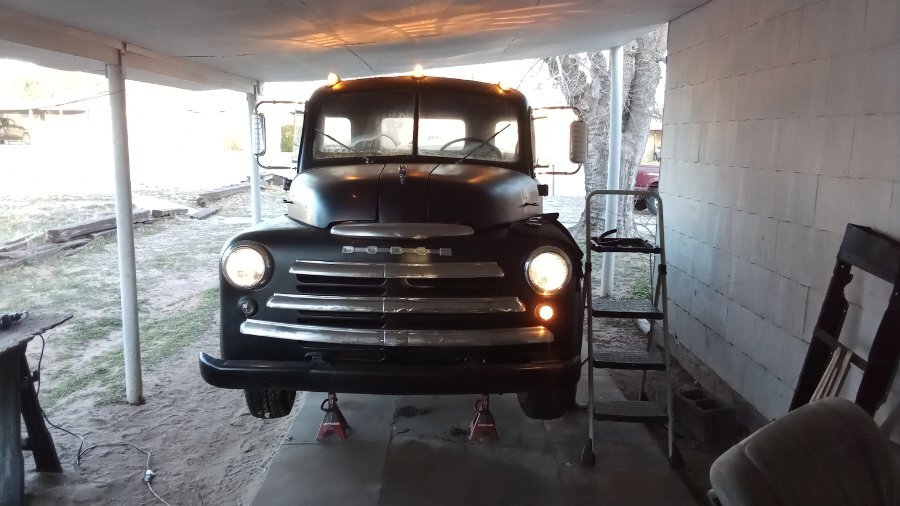
OK I wired it like suggested with 86 being switched from the ignition .... the horn only works with the key on. .... I think that is the best way for me. Horn works fine except for the horn malfunction .... the horn works when button is pressed .... the old bakelite button and the freshly painted wheel sticks and does not always return fully ... not a big deal. I finally did get to move forward and tomorrow I will be inside under the dash fixing things as they should be. I just laugh because I always said .... For the 6 wires this truck needs to run, will just build my own harness. ..... boy did I miscount the needed wires. While not 100% finished ... it is pretty close. As usual, I do have one lazy light No idea why the right side marker light is not on .... will fix it tomorrow .... I know it does work. Things are moving forward though .... tomorrow will be a special treat when I start connecting the turn signals and brake lights 🙄 -
Dodge was ahead of it's time in this era ... They knew way back then, the harder you work ... the more you appreciate them.
-

Creative electrical, need help holding in the smoke.
Los_Control replied to Los_Control's topic in Off Topic (OT)
Now all ya all got me thinking some more. There are a few different ways to wire the relay. You can watch the video if bored, but you can see how it is wired from the image. pin 30 and 86 both get power from a single source ... I'm thinking 14 gauge wire with a 20 amp fuse ... looks like 14 gauge on pin 87 also, then just 16 gauge on the others. Where the relay is mounted right above the starter .... will be a short run from the solenoid straight up to the relay. Now I'm wondering, if I used a separate wire from the ign switch to pin 86 ... the horn would only function with the key on? I see advantages to both ways ... simple and easy this way ... for safety reasons ... I can think of many reasons to use the horn without key on. I can also remember the days when a horn button would malfunction in a parking lot, while owner was inside shopping. This would be avoided if the key was not on. ... I think I like this way best. -

Creative electrical, need help holding in the smoke.
Los_Control replied to Los_Control's topic in Off Topic (OT)
Nothing like spending two days on wiring a frigging horn I do agree with you, same time I have connected horns without a relay and just a push button to fire the horn so a car could pass inspection. Not ideal but they worked fine and never caused a issue in the past .... mind you these were friends vehicles that asked for help and brought the materials needed to connect them .... I never have done that on my own vehicle. What is really confusing me is the original horn button works off of positive ground ... My "temporary" horn is 12V negative ground and it is grounded by simply mounting it to the cab. Is simply obvious that if a hot wire was connected to the horn it would be stuck on ..... the original horn button would have zero effect .... After spending the day reading about relays and how to use one to wire a horn .... I'm finally starting to understand that the relay will have power to it, and will be functional when the ground from the horn button is pressed .... I'm still skeptical and waiting for the final outcome. I did spend a few minutes and made a holder for the relay ....I'm certain it will look old and factory with the wires coming from it Tomorrow, day 3 ... I will actually wire it and test it. Been playing Texan today, is only 67 degrees and a breeze blowing for wind chill .... in the shop with a sweatshirt and propane heater on .... back into 70's tomorrow. -

Ignition diagnostics - symptoms of a bad condenser
Los_Control replied to bkahler's topic in Off Topic (OT)
Most people do not remove the distributor for nothing ... sounds like you are on the right track. I do not think there is a definitive test that follow steps one, two, three and if you get this result ... the condenser is bad. Seems they can fail in such a way and the electricity just disappears into a black hole. Sometimes they fail and when you test the spark it is unusually bright and that can mean it failed .... failed condenser is my go too, when I dunno. -

Ignition diagnostics - symptoms of a bad condenser
Los_Control replied to bkahler's topic in Off Topic (OT)
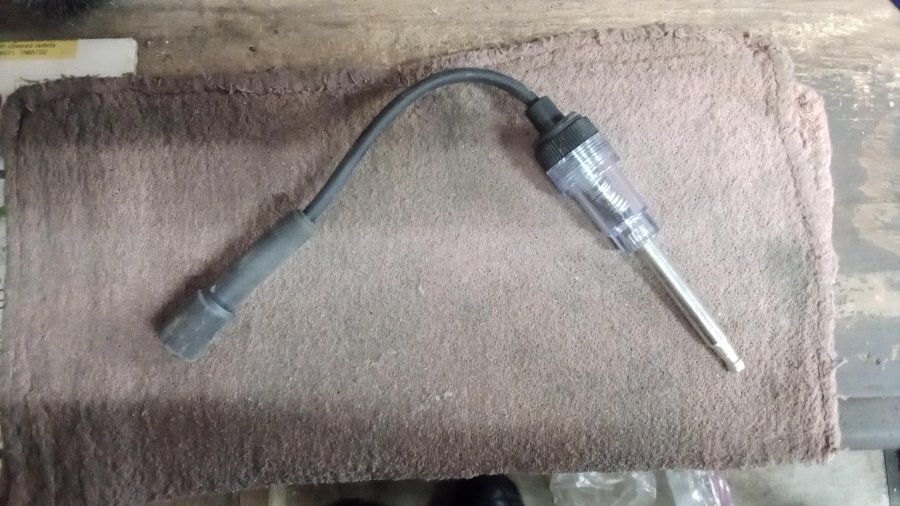
What is really helpful is to have a spark plug tester Just to check and see if you still has spark while it is dying then wont start. Chances are if it has a good steady spark it may not be electrical .... I suspect you may be on the right track. No idea about this engine, does it have a distributor? or are the points condenser behind the flywheel and have to remove it to get to them? Either way, it might be a good idea to replace points and condenser and check the wiring closely. Is there a pinched wire that might be grounding out or has poor insulation ... Like our old distributors where the insulation fails and grounds out the points ... not necessarily bad points or condenser, but the wiring going to them. I would just replace the points and condenser but mainly to inspect the wiring while there ... possibly remove the distributor if needed to really inspect it. -

Creative electrical, need help holding in the smoke.
Los_Control replied to Los_Control's topic in Off Topic (OT)
What I mean is .... A typical Amp gauge reads about 30 amps, then it is pegged out and may actually burn out if exposed to more then 30 amps. My cheap 1972 Chebby alternator is small and is only capable of putting out 65 amps .... twice what the 1949 Dodge amp gauge should see. And that is the rub .... some people will say they have been running a alternator through the amp gauge for 20 years and never had a issue. While others will say they did the same and they fried the gauge out. ... Just smoked it like a fuse and that left them sitting without a complete electrical circuit. So my goal was/is to not run the charging system load through the amp gauge .... I just see myself late at night with it snowing, the heater going full blast, the head lights on high beam and the radio blasting and wipers working .... and run too big of a load through the amp gauge and blow it out. All of this is impossible because I live in Texas and it does not snow, I do not use the heater, my wipers are vacuum and I do not drive at night .... there is still the possibility though So now I'm just unsure of what to do with the amp gauge ... considering to just run it in a loop so it appears to be functional and reads positive when engine running ... probably be better off to just ignore it and not connect it at all. Screw that .... what about the horn? .... hard to get motivated today. I did manage to install the steering wheel and fish the horn wire through. Can not really wrap my head around wiring it up. My horn is not original, the body is mounted on a bracket, the bracket is mounted to the car and the bracket is also ground for the horn. Then a hot wire is ran to the horn to activate it. IIRC, the horn button on a positive ground system is a ground ... I'm thinking I may need a relay to run the power wire from the horn to, then the wire from the horn button to the relay and also a hot wire to the relay .... then when push the horn button it will complete the circuit and honk. I know if I had a button that I ran power into and then out to the horn ... when I pushed the button it would honk. Just can not figure out how to connect power to the stock horn button, with only one wire coming out of the bottom of the steering column ... do I need a relay for this? -
I personally feel there were a lot of option back in this era of time. .... this was all new and nothing was set in concrete as the way everything should be done. If we turn our headlights on .... we expect the tail lights to come on also .... same with the dash lights .... but the dash lights were on a separate switch .... Many of the old moonshiners moved the tail lights over to the panel light switch .... They could turn off the tail lights when a tax collector was chasing them and they had a load of shine in the car. Today things are set to a standard or a law because of past behavior .... tail lights are to stay on when headlights are on .... not so much for the parking lights though. Seems to be a personal preference.
-
Lil putty lil paint ... make this old carpenter what he aint Oh my, the amount of times I repeated that phrase fitting complicated pieces together.
- 734 replies
-
Reading your first post, you are correct about changing the center section only. You are also correct about spline count on the axles .... Like you, I was told to count them to see if they are the same. Best advice I would have is to pull one of your axles and count before you go to the wrecking yard shopping. I have never seen that information listed here as to what vehicles used which axles ... just count is all I've seen. I did this swap on a 1961 Dodge truck before, it was really easy for me and only took a couple hours to complete. I was installing the original 4.11 posi that the previous owner took out and put in too tall highway gears ... so everything just fit for me. I would prefer a modern swap though myself, 3:73 gears, modern u-joints, self adjusting brakes, non tapered axles .... there is a lot of winning going with a modern rear end.
-

Creative electrical, need help holding in the smoke.
Los_Control replied to Los_Control's topic in Off Topic (OT)
I purposefully put the charge wire on the outgoing side of the Amp gauge, so the full charge would not run through the gauge. Now the gauge reads backwards as the flow is stronger ... flip the wires around would fix that, then the full charge would flow through the gauge .... what I was trying to avoid. So I decided to move the charge wire to the battery, this still puts charging before the gauge. Where I'm confused or undecided .... there is no place for the Amp gauge to flow to. This is currently what am thinking of ... after looking at the drawing, would be better to move the feed wire from the starter solenoid to the amp gauge, and feed the gauge from a slot in the fuse box. I can protect it with a 25 amp fuse and then run the exit ware as shown, back into the fuse box feed .... just run it in circles? Would be more simple to just use the volt gauge and leave the amp gauge disconnected. The other morning I started the truck and since I had ran the battery down while testing lights ... The volt gauge showed just over 14 volts ... working fine. Today I plan to be 100% finished under the hood ... all cleaned up and wrapped up. Then move back to under the dash and sort out the turn signals/brake lights and do something with the amp gauge. -
Would not be the first time I'm wrong .... just remember reading some Horror stories about LED bulbs that do not work. While my truck will not be a trailer princess .... I kinda am, I'm usually asleep or heading to bed when it gets dark .... If it is raining, I really did not need to go anywhere anyways. Standard bulbs will work for my driving habits.
-
We like to see the real thing .... not a simulation of what might happen. While I know little of 6V LED bulbs .... what I have heard is more often then not they suck ..... but if you get the correct ones ... they are awesome. I personally would drive to Napa and purchase the normal bulbs there, possible tractor supply has them .... they are available and I would use them to test and finish my new wiring. Then for 6V LED, I would start a new thread and go from there ..... I just have this feeling, if you have 10 choices for suppliers for 6V LED bulbs. 6 of those choices would be bad and leave you wondering .... Is it my wiring? .... or is it the bulbs? Fix your wiring, then venture into LED
-
-
Couple weeks ago I had my gauges out for wiring, when installed I started the truck up and instantly remembered I forgot to connect the oil pressure gauge .... poured all over my black tennis shoes before I could shut it off. 🙄 Is always something. Currently I have synthetic 10/40 in the engine with about a quart of ATF .... I'm trying to flush the engine out before I start driving it. I will change that and do the same again .... My truck does not have a filter and the oil is very black, like it ran non detergent oil before it was parked 30 years ago ... it needs a good cleaning and will probably have to drop the pan and scrape the gunk out. After that process is finished, I have a jug of Rotella straight 30 weight I plan to run in it. I think just about any oil is ok, they do not need special additives that I know of. Some people think synthetic oil is to thin and will leak out of the rear seal faster then dino oil ..... makes sense to me. My rear seal does leak a little bit with synthetic in it ... a spot the size of a quarter after several days .... I think that is kinda common for these engines .... maybe Rotella will help.
-
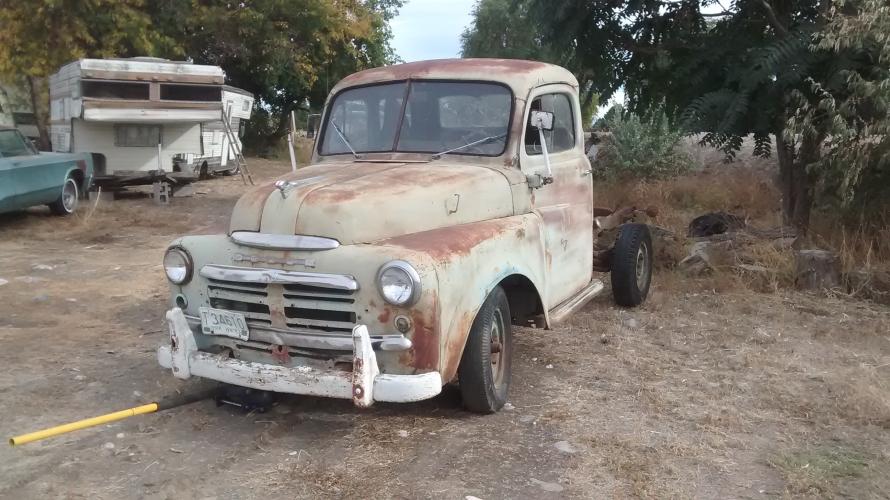
Interesting to see what others say. Some cars they did shut off the parking lights when the headlights came on. I'm currently wiring my 49 truck, need to use a test light and probe each connection as to what happens when the switch is moved through both positions. I actually want my park lights along with my cab lights and tail lights to stay on with the headlights .... so I will wire it that way. I believe I can have the park lights turn off with headlights on .... just not what I want. ... some do want them off ... they really are not needed with headlights on.
-

Creative electrical, need help holding in the smoke.
Los_Control replied to Los_Control's topic in Off Topic (OT)
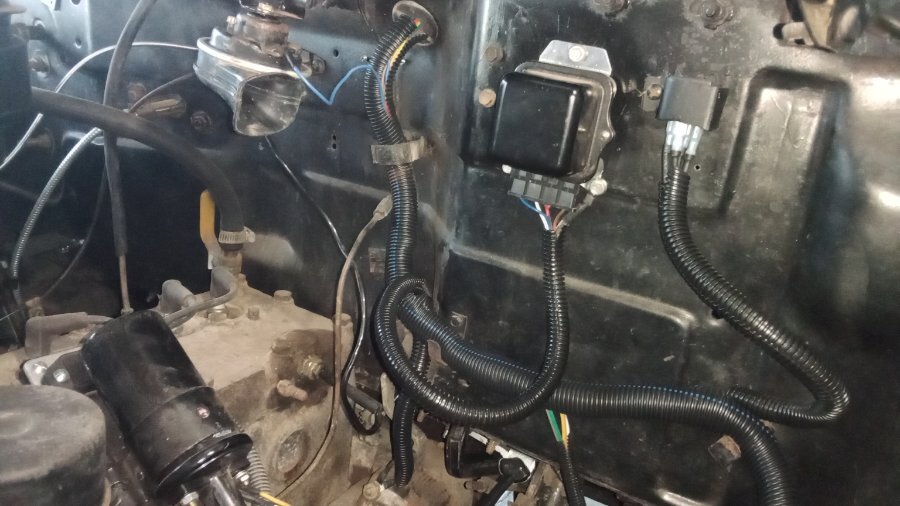
Honestly, I thought this thread would be pages long by now ... actually it has gone pretty smooth. I have ignition, charging, headlights, dash lights finished .... kinda. I really wanted a junction block so the front end can be removed if needed in the future ... like factory but different. Think I need to build a cover for this junction block. Little concerned my high beam indicator is not working correctly .... I will figure it out. I have changed twice on how I want the main charging wire connected to the system .... I have tried to keep it from running through the amp gauge and come in after the gauge .... the amp gauge just works backwards when I do. Now I'm taking it straight to the battery, then to the starter solenoid, to the fuse panel, to the amp gauge to the ignition switch. Modern wiring, the amp gauge is really the end of the line and just not needed with a volt gauge and a fuse panel ... I'm trying to keep it in line and relevant .... just not easy. I assume the charging system will run through the amp gauge in a round about way .... I just have not figured out a better way to include it and have it read correctly. I will change that around tomorrow, and then I'm working on the turn signals and brake lights ... that should complete it for now. -
Yeah, the stock wheels from the 60's-80's will fit fine and has a certain look to them. Some people are running a modern 17" wheel from a mustang or other vehicle. I think it might be ideal to have a stock set of wheels and tires, hubcaps ... use for car shows or parades .... then install modern radials for daily driving. I'm so tight on spending $$ and building my truck on a budget .... just amazing what they want for labor to dismount, mount and balance tires today. Here that is $40 for one wheel or $160 for 4. I'm use to it being $40 for 4 wheels .... I use to own a coats 40/40 tire machine .... thinking it is time to buy another.
-
The wheels should be 5 on 4.5" if it is a 1/2 ton. I prefer the newer style wheels myself. Mine are 5.5" wide so they accept a 235 75R 15 tire pretty good. These older factory wheels are still around and can be found .... without really searching I have found a few and am able to come up with 4 that look like a matched set .... what I mean is, the 2 on this side are Ford wheels and the 2 on the other side are Mopar wheels .... they look the same and use the same sized hubcap. I have seen some wheels on Ebay and they want $80 each and they do not know how to measure and check what size hubcap they use .... A local guy1.5 hours away wants to part out a old 60's Dodge truck .... He decides to sell wheels at $75 ... cheaper then ebay ... expects me to jack up the truck and remove them, then pay for disposal of the tires plus my gas to drive 3 hours round trip .... cheaper to just buy from ebay and pay shipping. Then I found a guy on FB that sold me 2 bare wheels for $20 each and delivered them to my house ... they are out there you just have to look. Then Wheelsmith sells a brand new powder coated reproduction for maybe $110? ... reasonable. Then Hubcap Mikes sells these caps, I just got them this morning and they are $30 each + shipping. Happy with the quality, they are not really thin and flimsy they are stout. For a daily driver, I think they are fine .... hubcaps can fall off, especially older ones with a loose clip. They are expensive and difficult to find ... If I lose one ... I'm out $30 and 10 minutes to get on line and order another ... not a huge deal. Also I'm biased to this style of wheel. When I was 25 years old in the 80's and could find cheap used Cragars or any classic custom wheels ... I liked this style best .... stock black wheel, baby moons and beauty rings. With the rings installed, they will be all chrome with a strip of black wheel showing. And it is just what I like and want ... I have had the same wheels on several cars in the past. For a truck some may like just the hubcap and no rings.
-

Resurrecting and diagnosing…
Los_Control replied to Matfirstattempt's topic in Mopar Flathead Truck Forum
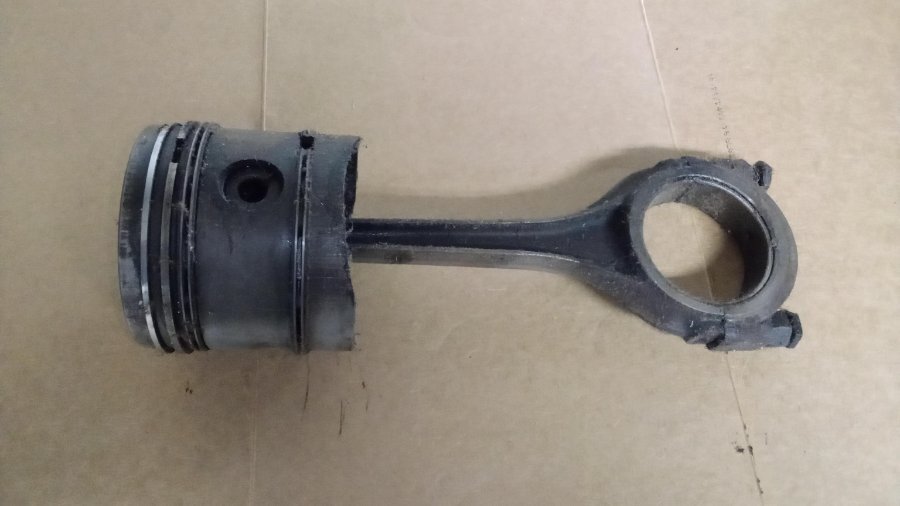
I'm a old carpenter, not a mechanic. .... If you valves are as good as they look in the photo .... possibly they need to be lapped. Go ahead and apply some liquid to them and see if they seal ... gas would be ok, water not ideal. First of all, when you have compression up to 110 .... that is ideal for a old flathead 6 ... some rebuilt engines do not get to 110 ... This tells me there is a good chance your engine has been rebuilt at some time in the past and it is in good condition. I suspect the valves are in good condition also. When a engine sits for a long time, at least one cylinder the valves will be partially open and rust can attach to the seats .... lapping the valves is just getting the valves to seal with the seats again ... look it up. Replacing the rings and doing a valve job on these engines was usually done with the engine in the vehicle at your local gas station. There was a mechanic on duty .... they could typically replace all the rings in a day .... if the engine needed valve work also ... then it was 2 days. Sometimes the engines were torn down to just work on the valves and not the rings .... They also had large boring machines available that they could mount to your engine and bore the cylinders to the next larger size without removing the crank or engine from the car .... unheard of today, we simply pull the engine and send it to a machine shop .... Back in the day, it was done exactly as you are doing it. Back then, cast iron rings were the best we had ... they wore out in 70K-80K miles depending on oil changes .... today they last 300K+ miles and the engines wear out before the rings ... Did you happen to notice your oil pressure when you had it running last? .... Good oil pressure means you have good bearings ... if the bearings are worn, you will have low oil pressure. It is possible to replace the bearings also while in there ... If needed .... I doubt you need it ... but maybe. Is easy to replace the rod bearings with the crank installed, a little more tricky to replace the main bearings with crank in place ... but doable. You will take the rod loose from the crank, you will set the bearings aside and carefully push the piston up out of the block. Here is a very dirty piston from a flathead Ford V8 .... The rings are a spring, you can see the gap and they open and close while at the same time they rotate around the piston. The piston has been sitting in my attic for years and covered in dust. This engine was rebuilt and the rings and bearings are like new ... I could spend $$ and replace them, or just disassemble and clean and re-install. Some will say you must replace with new .... Me, these are fine ... they just need to be cleaned ... probably better quality then todays aftermarket parts we have to buy. So that is what I'm saying with your engine, take the 2 rod bolts loose, push the piston out the top and inspect it. What you find will tell you your next step -

Resurrecting and diagnosing…
Los_Control replied to Matfirstattempt's topic in Mopar Flathead Truck Forum
Seeing nothing strange or large gauges in the cylinder wall is a good thing. From what we can see in the photo looks ok .... the thing with stuck rings is they are stuck. Rings need to rotate freely while installed on a piston. They rotate around to help seal, also they expand and contract to the shape of the cylinder. Cylinders will wear into a egg shape because of the forces of the rods thrusting the pistons. .... the rings need to be able to move to accommodate these things. The rings are made from cast iron ... the pistons are some sort of aluminum alloy .... the two dissimilar metals will corrode and stick to each other. If the rings are stuck to the side of the piston, they can not move freely like needed and they will not seal .... A common issue with old cast iron rings. Modern engines have better metals for the rings and not a issue. At this point, you kinda want to drop the pan and remove the rod cap and bearings on that piston and pull it out. Then see if you can gently free the rings and get them to rotate in the ring landings and then put it back in. Just depends how far you want to go .... you might remove each piston one at a time and free the rings, clean them and re-install .... or just replace the rings with new. With your last compression test, I think your rings still have some life to them ... just sticky right now .... this is where soaking in marvel mystery oil or such will help without taking the engine apart. .... Since you are already this far, you might as well drop the pan and take a physical look at your rings and pistons and make a choice of what to do next. I'm kinda where you are. I bought my truck in 2018 and it had one low cylinder like yours .... while working on my truck I have got the cylinder to 95-100. Then I let the truck sit for a year because life gets in the way, I lose compression in that cylinder ... then I get it back up and the engine stops smoking .... then it sits for long periods again and starts smoking again and loses compression. .... Currently it is smoking again so I know that cylinder is not sealing. My plan is to ignore it. In the process of new tires and today working on new wire harness .... March or April I will license it and drive it. I will take it on a long country drive for a few hours and keep a eye on it. After driving it all day, I hope the rings will be happy and seal up again and stay that way .... If not, I will pull the head and drop the pan and pull the pistons and replace the rings most likely. While in there I will lap the valves and inspect them. When you have cylinders above 100, your rings are in good shape maybe ... possible if you pull the piston out, you may have a broken ring. Same with me. -
The Motors manual I have only shows cars and says the 230 has 110 HP. I think my 218 is rated at 90hp A 218 and 230 share the same block, the 230 is a stroked 218 ... the crank and rods are different lengths. So measuring the stroke is a sure way to find out what you have like @Young Ed says above. I would have to look up the difference in strokes but is easy to find.
-

Resurrecting and diagnosing…
Los_Control replied to Matfirstattempt's topic in Mopar Flathead Truck Forum
With those numbers, compression is not your no start issue. It is common for the rings to stick to the pistons and not seal against the cylinders ..... possibly that is what is wrong with number 3. I had one that was down around 25 and after running it and a few heat cycles .... I soaked the cylinders with MM oil and got it up to 95-100. Then I let it sit for a year and is down around 70 .... it is rings and I may end up putting new rings in it yet .... not a big deal to pull the head and drop the pan and then replace each cylinder one at a time ..... they use to do this operation in a day at the local gas station. I'm thinking you have a spark or fuel issue as to why it will not start. -

Resurrecting and diagnosing…
Los_Control replied to Matfirstattempt's topic in Mopar Flathead Truck Forum
I want to say this is a tough call on which direction to go next. I wish you would have come here and asked ..... before you pulled the manifold off. .... Thats OK though .... just do not remove anything else before testing You think it lost compression while sitting ... totally possible and if it did, not enough to really make a difference. Still need to see compression readings on each cylinder. .... A compression gauge is inexpensive and needed .... you can still check compression with the manifold removed. These engines do not have a lot of compression to begin with .... very likely you lost spark, the engine turned so freely you thought it was lack of compression. Need to test these things first. You need to be above 60psi compression for it to even think about running .... If you have 70 + in 3 or more cylinders, you are pretty safe .... You might want to pickup a complete engine gasket set ... for a rebuilt engine ..... cheaper then buying gaskets individual, you still may pull the head .... not a big deal. First check your spark .... fix that if no spark. ... then put it back together. Then check compression ..... I think it is important to check compression even if it runs .... just to write down the information and keep a log as you go.

