

Los_Control
-
Posts
4,955 -
Joined
-
Last visited
-
Days Won
42
Content Type
Links Directory
Profiles
Articles
Forums
Downloads
Store
Gallery
Blogs
Events
Everything posted by Los_Control
-
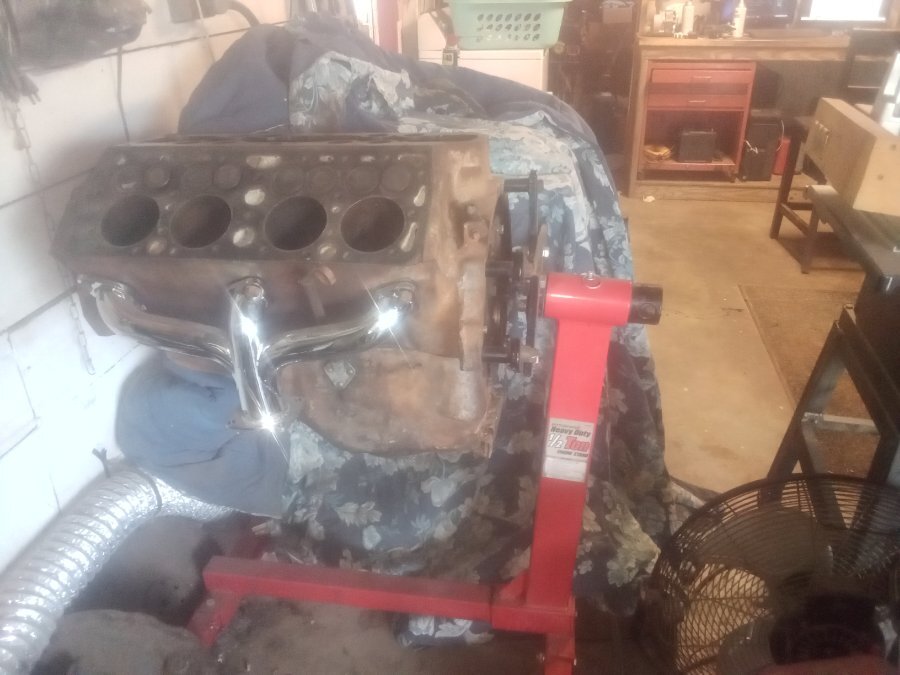
We learn something new everyday, Still a stretch since it was a Ford engine ...... was this the V8 60? .... Either way it is still a Flathead. I love the old saying .... "Speed kills, drive a flathead and live forever" With the valves in the block it is a poor exit plan for a air pump to move air. Then top it off with the 2 middle cylinders sharing a exhaust tube. Then the cooling is a issue as both banks are individual or separate from each other .... coolant only circulates through one side and not the entire engine .... 2 water pumps, 2 T-stats .... the water pumps double as motor mounts. Mine is a 1951 8BA, actually has a decent distributor .... the older engines had the dizzy mounted on the block below the fan .... You actually used a machine on the work bench to set up the points .... what a total pita. .... Adjust the valves on a stock V8 is a incredible process ..... shim or grind .... there are aftermarket adjustable lifters, not factory..... Sorry to say Greg I did not click on your link to see what Chrysler did with it ..... Anything they did to it is basically putting lipstick on a pig. Impossible for Chrysler to fix such a mess .... they could change it enough to call their own though. This one has been worked on, crank is turned 10/10, stock pistons with zero ridge nice bores. Some new valves were installed .... it was rebuilt then the truck was parked. Will be a nice runner someday ..... since I picked up a nice 318 I no longer entertain the idea of installing it in my Dodge 🤣 Like a Harley Davidson, flathead V8 just has a very distinct and pleasing sound I love em.
-
DING DING DING we have a winner!!!! Of course it needs to be rebuilt. I simply could not afford the machine shop bill or the parts bill that comes afterwards. ..... Or the 6 month turn around for a machine shop. What you can do is clean the crank the best you can, install some new bearings and use plasti gauge to measure .... shim if needed. Throw on some new rings. Depending on how well you clean & measure the crank & shim as needed .... dictates how long the new bearings last. New rings on a old cylinder may not seal .... They are a spring and we collapse them to install them .... they spring back to seal ..... Depending on how badly things are worn .... If you are lucky it might let out a puff of smoke when you leave the traffic light. ..... Who knows how many months or years this will last.. The point is it will get your car running again and you can concentrate on other repairs. ...... The stage you are at right now is disturbing and others have mentioned it. It is where the average man gives up and the car sits and eventually ends up in the scrap yard. I'm saying stick a few hundred $$ in it for bearings, gaskets, rings. .... If the car ran before you tore it down, it will only run better when new parts are installed. It may only last 6 months or 6 years .... But you bought time to fix the other issues and drive the car. Then prepare for the future replacement. A rich man would just yank it out and rebuild it .... We are not all like that man and have to work with what we have.
-
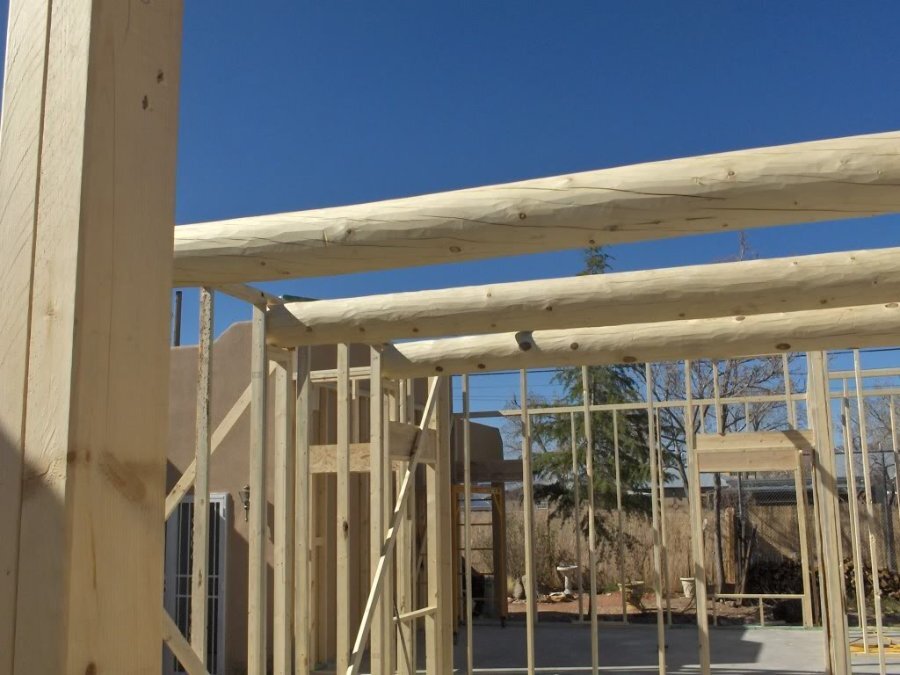
Oh shucks, you know the damn internet 🤣🤣🤣 ..... did you know Adobe houses were built with sticks & Mud? Here is a photo of a 2 story 4 bedroom house 2 car garage being added on to a 100 year old Adobe house in Old town Albuquerque. ..... It was built out of sticks and mud and perfect condition. The adobe walls were 12" thick and very economical to heat/cool .... We built the addition to match it with 12" walls ..... Later I did convert the original adobe house portion into a work out room and a apartment. Sticks and mud works really well together.
-
I will agree 100% .... use what we have and lets keep the cost down. As far as installing a flathead V8 .... I wonder if @Cooper40 is aware that Mopar never made a V8 flathead? So naturally it would turn into a bigger job Different radiator, Ford flatty has 2 water pumps with 2 upper radiator hoses. New motor mounts, transmission & mounts and modify or make a new drive line. I have thought about it a lot since I actually have one ..... Terrible idea.
-
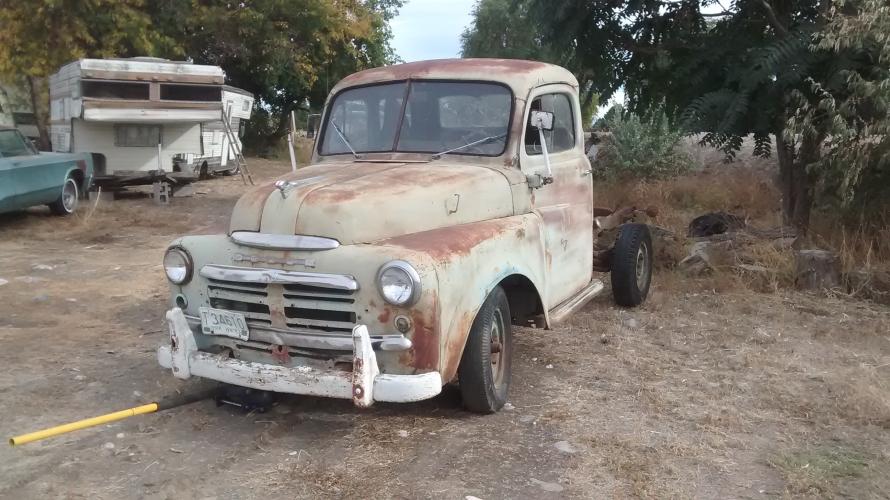
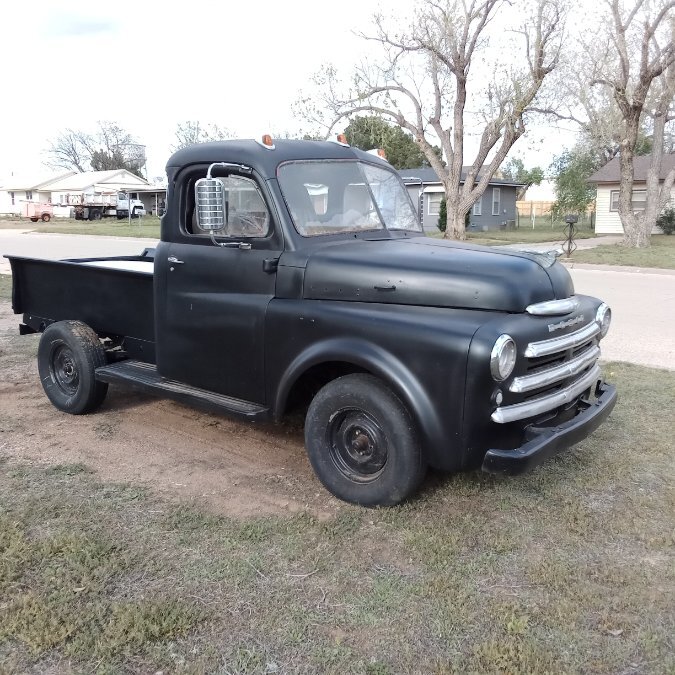
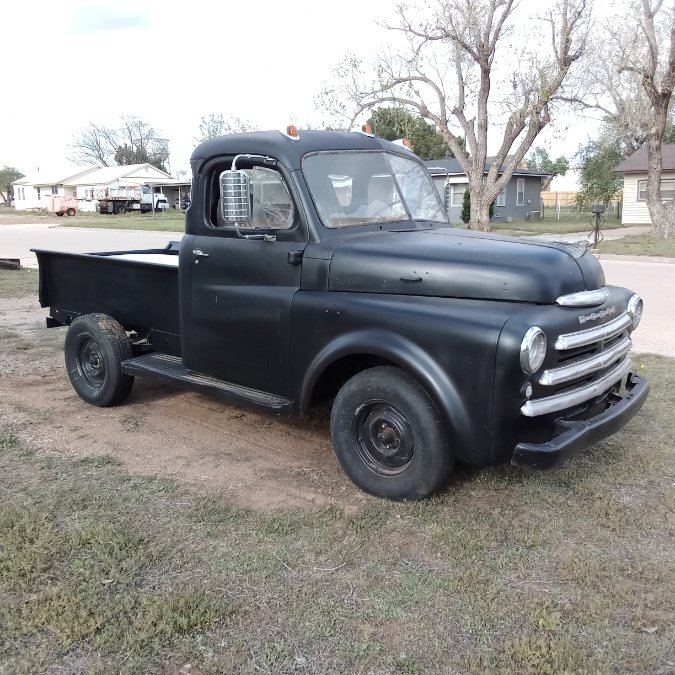
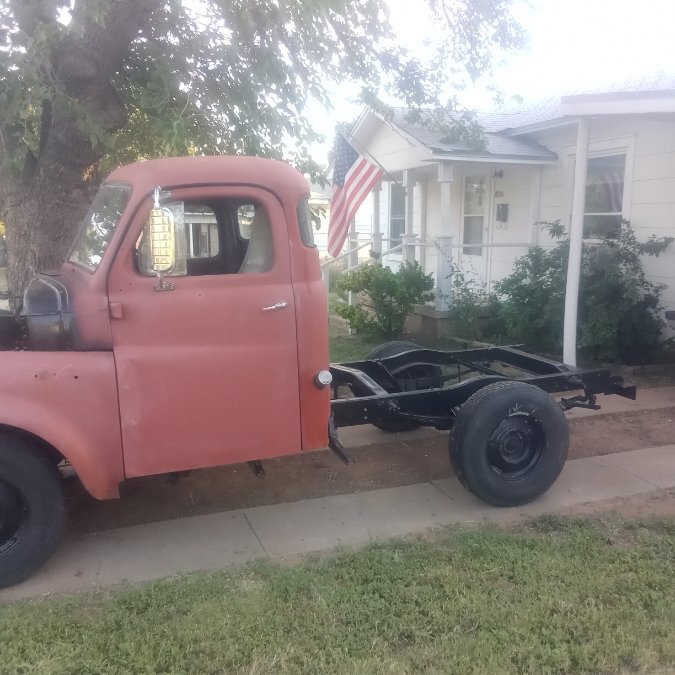
Honestly I feel you have more choices for a engine then those of us south of the border. USA it would have been a 24" 218 or 230 engine. .... North of the border they used 25" engines and I just assume the engines will fit fine if you stay with 25". The 24" engine would work also, then you need to move the radiator closer ..... you have no radiator sooooo? Just saying I believe the bell housing transmission do interchange. So nothing changes besides radiator location .... I guarantee I'm over simplifying it. The big trucks down south of the border did get the larger 25" engines ...... They just moved the radiator from the rear of core support to the front of core support. Only thing I have to say about the industrial engines .... They are a good choice and often have low hours on them. Typically they are in service to run at a specific speed. ..... Often they do not have a vacuum advance on the distributor .... carburetor may or may not be a issue.. Rumors have been spread the internal cam & timing has been changed ..... I can only say that many have installed industrial engines in their vehicles & 100% satisfied. I just feel at this stage of the game you can install a 24" 218, 25" 251 or 265 .... 318, 440 .... sbc or a LS .... Do not hate me. Your truck is nice but really rough, reminds me of mine when I first got it. ..... You can see in my avatar it looked like yours. Today it looks different, after many hours of working on it ...... not once did I ever think I would restore it to pristine condition. While physically it is possible, financially it is just pure stupidity. ..... Making it a fun to drive truck to enjoy is priceless.
-
As a young lad I asked a Bandag engineer why they installed brass parts on a $100k machine ... The brass guides are there as a sacrificial piece so the 8' steel runners do not wear out. Makes sense in that application, replacing the rails would have been about the same as replacing the frame of your car ..... Much easier to replace some brass guides. So a steel bushing for the transmission shaft makes no sense. We want the bushing .... The sacrificial piece to wear, not the transmission shaft. Just my opinion a steel bushing against a steel shaft is a terrible idea .... I do like the thoughts of steel roller bearings for a pilot shaft .... oiltite work fine.
-
I was thinking same thing as @Jerry Roberts seems like you always needed to do something to get them to start charging when installing .... I guess polarizing is correct term .... I would have to look it up online to see what to do .... seems you ground or cross some wire with it running. I'm just not the guy to mess with 6V and switched to a 12V alternator ..... knowing my generator needed work and was not producing enough to charge.
-
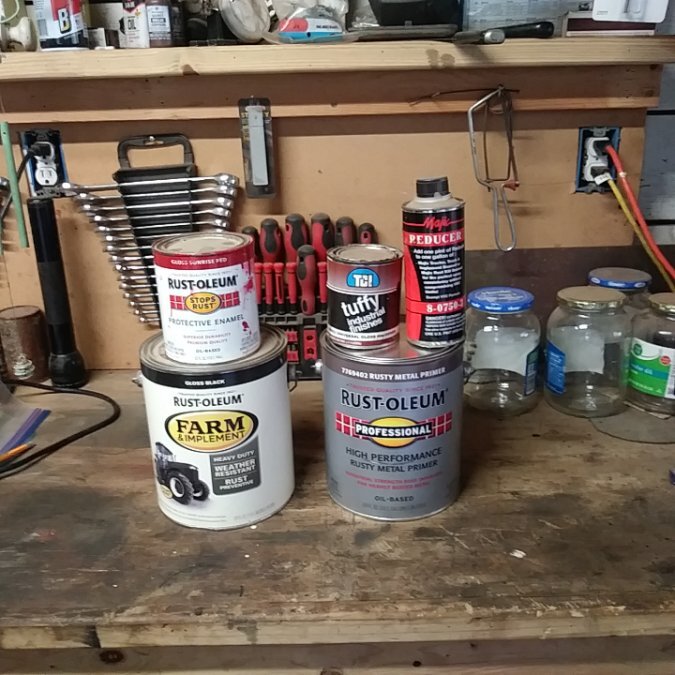
I believe you are 100% correct here, ..... sand and shoot again. You need to use the Rustoleum straight out of the bucket with a $1 paint brush ..... you will have a better quality paint job on your floors then what it was born with 75 years Ago. .... you can spend more $$$ .... I figure my job as a caretaker is to make it better then I found it ..... If the next guy wants it perfect, more power to them. As far as my issue, sorry for busting in on your thread and complaining about my problem .... I can start a new thread when ready to deal with it. That will be a month or two away .... truck is just put on the back burner for now while I take care of other spring projects. Same time for a hound dog hauler, it might just be fine as is.
-
First of all 40 psi above idle is not bad, at idle as long as it is close to 10 psi I feel you would be alright. As you say polishing the crank was done in the vehicle if needed. What you need to be concerned with is checking the specs with plastigauge. Myself I'm spoiled with growing up in a world where a machine shop was close by, I could drop a 6 cyl chebby head off and have it completely rebuilt and pick it up 3 days later .... for $75. So it was naturally just the quickest easiest way to do a job. Today we need to find a machine shop, then you are lucky if you can get them to work on your stuff in the next 3 months. Then the price is outrageous. If you have ridges you can catch a finger nail on or can see, they should be removed as they will just dig into the new bearings. ..... polish, polish, polish. If they actually look good, then you just need to be concerned with wear. I personally would not polish if they look good, might make them worse. So it comes time to install the bearings and use the plastigauge ..... all check within specs but one is out .... Now is the time to sit back and drink a cool adult beverage .... use the aluminum can to cut a shim and install it behind the bearing so the bearing reads specs. This trick will work for more years then I can count ..... Our Grandpa's did not have machine shops or money to pay them. We did growing up ..... Today it seems like we really do not have that option unless you are willing to wait months. GET UNDER THERE AND FIX IT!!! Make your Grandpa proud.
-
OMG ...... it is certainly fun to live in my world .... 🤣 You said you picked up a couple B&B's ..... I thought you mis-spelled and picked up a couple B1B's ..... Carry on. Kind of a tough situation ..... whatever you use you do not want to get the removed paint inside of the carbs and clog them up.
-
Pics or it never happened .... ! I will not be the best one to advise, am curious what they look like ...... Obvious first impression is what paint did they use? The problem here is the preparation of the paint .... will it last? .... I get you do not like the runs ..... Will it fall off in 6 months or will it last for years? These are the questions ..... possibly lust a rough sand and epoxy primer to lock it all in ...... $$$ Can you scuff it up and re-shoot it? Working with a poor previous paint job on two pilothouse trucks just brings up lots of questions .... you do not think we would just leave it there?
-
Just some thoughts here .... you pulled the transmission to replace the mounts .... what condition is the clutch pressure plate in .... did you inspect any of it while you have the trans out? Is it possible you knocked the pilot bearing out of position removing the trans? ... now it is not allowing the trans to go back in ... did you insert your trusty little clutch alignment tool to see it goes in? Sometimes when things do not go as planned, I wonder if I do not have a little Angel sitting on my shoulder saying no no no, you are not going to do this. Unless I know the condition and the miles on the clutch components, I would pull the bellhousing and inspect everything .... then proceed with re-installation as if I was installing a new clutch ..... and it may be your Angel sitting on your shoulder guiding you this way .... so you do not have to take it all apart again next week .... Of course chicken blood spread around the outside of the shop has been known to keep those pesky little Angels away
-
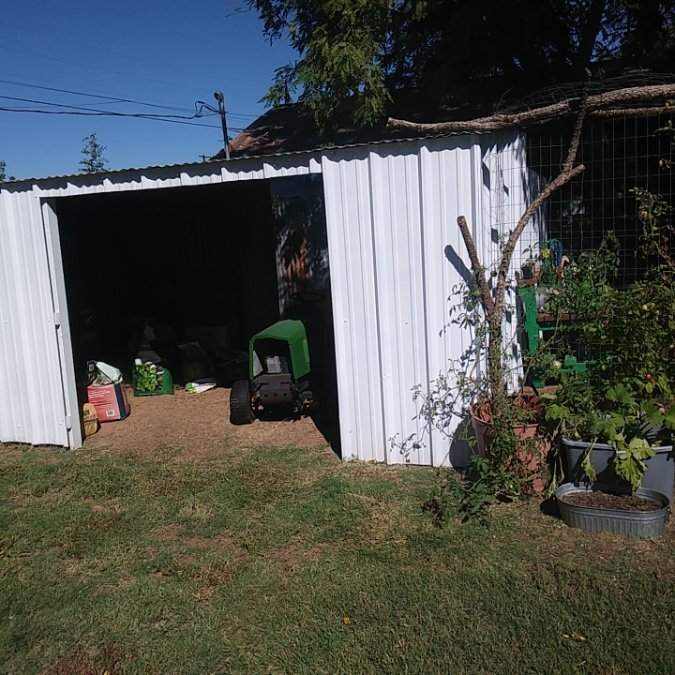
Something I have not figured out on my Rustoleum paint job yet. I love just using it straight out of the can with a brush for frame, suspension floors. .... My final product spraying the body, it looks ok but feels rough. When I run my hand over it it feels ruff ..... typically you would expect smooth. ..... Just not sure where I messed up here. I painted this little garden shed with Rutoleum white, run your hands over it and it is smooth. I painted this thing and it feels rough, not quite a corn cob rough .... but you feel it. .... Just not sure what I did wrong here. My $15 harbor freight gun had 10k miles on it before I sprayed the truck? Is it possible the low gloss black paint just comes out this way? Did I use the wrong hardener? I feel like something went wrong here and I'm not sure what it is. ..... 100% satisfied with the first car I ever painted .... I think I can improve on this though. Either way I still need more paint. Fenders are not painted, final paint in interior .....so I'm thinking about wet sanding and get it smooth then mask it off and spray it again. Certainly would be curious what others say about a final rough spray.
-

Many thanks to member Los_Control...
Los_Control replied to P15-D24's topic in Forum Announcements And Feedback
Thanks for the recognition, really not needed though .... I appreciate your hard efforts to keep this site going for us. I just felt bad this year, was a little later then normal. Was just a busy time for me this year for many issues .... including death of a family member ..... I'm hoping I'll be on time next year -
As a side note, removing the carbon in the plug hole was my bone head move. I just used a 16 penny nail and punched though. When I started the truck it ran for about 30 seconds really rough as the carbon got stuck under the exhaust valve .... then it passed through and was fine .... I think. The valves clearly are not seating perfectly from sitting 20+ years .... I'm hoping a nice long drive in the country will go a long ways .... possible I damaged the valve seat with the carbon .... time will tell. If I could do it over again, I would put some grease on a sharp drill bit and drill the carbon out .... most particles would get stuck to the grease and any in the cylinder would be harmless. I just find it strange that a loaner tool would not go through a spark plug hole .... Amazon has several from $12.99 & up depending on your phone ..... Here is one for $33 and needs no phone. ..... I do not have one yet, I expect to pick one up when the need arises. DOH!!! what a idiot I am, the spark plugs on a flathead are over the valves not the cylinder ..... so close you wont see much .... the tdc pipe plug will probably be best access.

-
Are you suggesting I need to wash the washer/dryer in the garage??? ..... Blasphemy!
-
I sprayed all body panels including the inner fenders and outer fenders ..... hung them up on a clothes line. I just used my best judgement when I would use the brush .... Underneath is all brushed, all sheet metal is sprayed. So far I'm satisfied with the outcome. I painted it last fall with no light under a dark carport. .... I'm not 100% happy. I did spray the whole gallon. Which is actually the 2nd gallon of paint on this truck .... 1 gallon was just for frame & suspension. .... What I'm not happy with, I laid it on thick but have a couple light spots. The surface is rough when you run your hand over it. ..... There are some blotches in it, making the gloss level different. I'm thinking some wet sanding and polish/wax would go a long ways ..... Same time I do not have paint for the rear fenders .... $100 more, I will wet sand it and shoot it again. This was painted last fall, never been washed or messed with .... it lives outside. ..... I'm fine with it as is, I think for $100 and some labor I can improve it .... possible it never happens and just left as is? ..... Should update my thread on it .... just too busy with spring gardening and working on the wife car.
-
For the floor pans this is what I would suggest, or what I did. I also painted my whole truck with it. I buy $1 nylon paint brushes 2.5" wide from the dollar store. I actually have a bag of them hanging on the wall .... use it and throw it away. I bought the paint from tractor supply and primer from Ace hardware. The paint is DTM (direct to metal) so primer is not needed. The paint really does lay down heavy with a brush but it flows good leaving no brush marks ..... After a hour the paint does melt the nylon brushes and it is kinda like spreading paint with a stick .... The $1 brushes will last about 1 hour though. I'm interested in the gallon can because I painted frame, suspension everything and then I used same paint to spray the body. I also found that if I did not use the paint right away, I could not properly seal the open can again. Come back a month later and there would be 3/4" of dried paint on top. I would dig that out and use the paint underneath ..... pretty wasteful. For floor pans maybe a quart can is better .... use it as you go. I'm 100% happy with using Rustoleum with a brush and I would do it again. ..... While rattle cans have their place, I would not consider it for frames or floors. All brushed on thick & heavy and cheaper then rattle cans.
-
I'm a firm believer in using spray paint where it actually is needed ..... I use it often all the time ..... as far as epoxy appliance paint ..... nothing better or worse then straight up spray paint. I have used it for touch up paint on the wife white car ..... I see no sign it is better or worse then other spray cans .... just has a fancy name.
-
I admit to being a odd bird .... yes I have a a spray can of epoxy white ..... I actually use it for touch up on the washer/dryer in the garage. I cant even imagine using it for the floors of my car ...... I say anything is better then nothing ..... just not my first or 10th choice. Nothing wrong with using it, just nothing I would set out intentionally to use in my vehicle .... Just white paint .... who paints their floors white?
-
I will agree with everyone ...... pull the switch in and out a zillion times to clean the contacts ...... I actually took my switch apart and cleaned it mechanically then greased it .... yanking it in and out many times will get the same outcome ..... same issue with my stomp starter .... not use it for awhile and it gets corrosion and fails to work .... stomp on it many times and it works again. Same thing with a bad dimmer switch, it will cause many issues if it is bad ..... I'm not convinced it will improve with stomping on it ..... If it goes bad it will be a issue.
-
At least NPT is the same in both Canada & USA Same deal with my tank, from Tanks. Uses NPT. ..... I used a flexible line from the tank to a filter mounted on the frame rail. I thought about running hard line to the frame then add a filter ..... such a short run on a truck just not worth it.
-
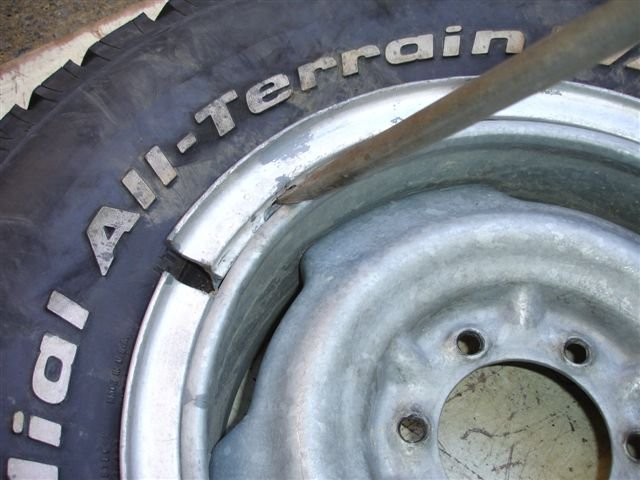
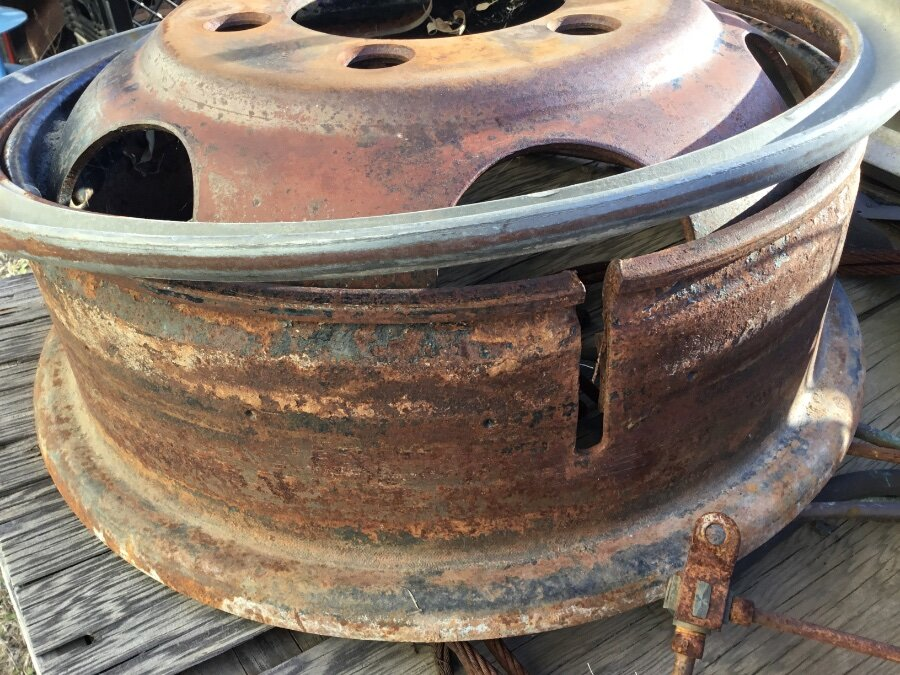
Going to steal some photo's from the internet ..... You need to break the tire away from the wheel. .... here soap and water helps. Then as 9' box says, there is a notch in the ring. That notch is there exactly for removing the ring from the wheel. .... you just get it started and work it loose. First you want to smack it around a little bit to get it loose. Rust forms and wants to stick to the rim .... you do not want to damage the ring though. .... If the tire is loose & the ring is loose .... ring comes off easily. Just remember, the ring is a spring of sorts. And we can see the lip on the spring as it is being pulled out of the wheel. If that lip is damaged in anyway from rust or bent ..... You do never put it back together. Because the ring is a sort of spring. when you lay it flat on concrete .... it may not lay flat. If there is any damage or bends to the ring .... it is junk. If you take apart a wheel and it looks like this ...... I would never put back together a wheel that looks like this. The wheel may be just fine, it needs to be sandblasted and inspected thoroughly before deciding. Your carefully inspected lock ring needs to mount to the wheel ..... If the wheel is heavily rusted .... you might lose your head. Nobody should mount a tire on that wheel in it's present condition ..... unless you a farmer, they play by a different set of rules. There is a bit of a process to remove the tires from your old wheels, not really difficult though. .... I say get them dismounted and show pics of what you have. Then we can move forward. I suspect any full service truck stop that takes care of 18 wheelers can change the tires ..... because of current condition they just do not want to waste time on them .... welcome to classic vehicles where we do the work so they do not have to. ...... Bring them fully restored wheels and they will be happy to take your $$

-
Imteresting project $3600
Los_Control posted a topic in Ebay, Craigslist and External Site Referrals
nowhere near me but would be curious to know more about it. This is a 1940 Plymouth sedan has a 413 Chrysler engine with the 727 transmission. Engine and transmission and steering column professionally installed. It is a project car it does need to be finished. https://www.facebook.com/marketplace/item/440774855160232/
-
Potential cheap shock relocation Mount option
Los_Control replied to Dan Capeci's topic in P15-D24 Forum
Sadly they nay or may not have them .... They do have a nice goodbye letter .... just selling off what they have in stock but think they wrote it 2 years ago. https://www.rustyhope.com/

