

MBF
-
Posts
1,862 -
Joined
-
Last visited
-
Days Won
5
Content Type
Links Directory
Profiles
Articles
Forums
Downloads
Store
Gallery
Blogs
Events
Everything posted by MBF
-
That could have been a firetruck in a previous life, and the frame rails may have been torched by them to accomodate the body and the step down for the rear step deck. Most firetrucks have very little factory frame behind the rear spring perches.
-
I think you can get a relay that makes an extra loud clicking sound as it cycles.
-
Guys: This event is sponsored by the Antique Truck Club of America held in Memorial Park in Macungie, PA. I can assure that this is a don't miss event. Last year we had over 600 trucks on the field. In addition to that, the largest truck only flea market is held on the show grounds. There is a lot to do and see. You can tour the MACK factory just up the road, and I believe the MACK Museum is also allowing tours. Check us out: http://antiquetruckclub.org
-
I converted my 1 ton to 12v several years ago when I was rewiring it. I did the same w my 36 Plymouth. The 49 2.5 ton is still 6v pos ground, and I may leave it that way. I do like the way that 12V spins over the starter, and I've never had much luck w 6 volt batteries lasting very long.
-
1952 Pilot House On Mecums Auto Auction........
MBF replied to B1B Keven's topic in Mopar Flathead Truck Forum
I think blackwalls look at home on our trucks. That's the way I remember them when I was a kid. I didn't put 'em on my 36 Plymouth either. I figured since it was the low cost MoPar offering (Chrysler, Dodge, Plymouth) that the owner probably didn't have money for them. My Dad has wide whites on his 35 Chrysler, but that was a richer man's car. I kinda like the blackwalls. Just a personal preference, not trying to influence anyone. Paul, that truck looks fine the way you've finished it. Goes nicely with the kid's uniforms. Mike -
Jeff if you're getting a bounce on the vac guage, it could be a leaking valve (needing adjustment or maybe just sluggish). You could try getting it warmed up and dumping a pint of Marvel Mystery Oil down the carb with the engine running. If its a sticky valve or a stuck ring that may help to free it up. Just make sure you do this in an open area, and not near where there are clothes on the clothesline. I kinda like the smell of MMO, a trait not shared by my better half! A PCV valve should reduce the vacuum reading evenly (assuming that you have it on a vac port under the carb) as it is a controlled vacuum leak. Make sure that you have a PCV valve designed for an engine of similar displacement so that the orifice isn't so large that it affects performance or results in an overly lean combustion. Mike
-
I started out using Eastwood's version of Dynamat on the roof and firewall. As Desototoday said it was not cheap. For the floor area I had a mat with a rubber backing. Under the seat, and for the back of the cab, I went to Lowes and bought a roll of foil backed plastic insulation and used an industrial adhesive to secure it. Every thing you do will help, but the biggest difference I found was when I installed my luan backed headliner and rear panels. It's still not as quiet as a modern vehicle, but it's far ahead of what it was. I kept all my cardboard patters and I'm planning on doing the same thing with the 2.5 tonner. Mike
-
I hear what you're sayin' about the location of the marks. Another way to tune is to use a vacuum gauge. If your timing chain and or gears are worn a timing light might not be that accurate anyway. A quick test to check for wear is to align the timing mark with the pointer at 0 degrees. Remove the distributor cap and note the position of the rotor. With a tight fan belt, grab the fan and try to rotate the motor one way until the rotor moves, and then back the other way until it moves again. Calculate the difference between the two marks where the rotor moved. That will tell you how much slop is in your timing chain and gears. I've tuned engines by attaching the gauge to a non ported vacuum source and rotating the distributor to obtain the highest vacuum reading and then back it off 1 or 2 degrees. With the engine up to temp, take it for a ride and see if it pings on a pull. If it does back it off a degree at a time until it stops pinging. There are other things a vacuum gauge can tell you- leaking valves, worn rings, etc. Mike
-
Ya really want a treat, go to a "concours" event. Went to one with my wife-never again. I'd rather go to a dentist than hang out with some of those snobs. A friend of mine has a beautifil split window Vette that he had just finished himself. They wrote him up because the glovebox light bulb wasn't the right diameter, and he didn't have the head of the phillips screws in his kick panels all pointing the same way. When he heard that he got in and said: "yea, but watch what this bitXh will do and did a donut on the field then left. I'm pretty sure that wore out our welcome-but it was a hoot. I even saw one guy that I knew had his wife scrubbing his tire treads with a toothbrush. I knew better than to even ask my better half if she would do that. It takes all kinds they say........
-
I had a similar thing happen with my 1 ton several years ago. They put me off by myself as the lone truck. I had a lot of spectators looking at my truck (isn't show quality by any means) but it was different than the numerous plastic 32 Ford coupes, early camaros and new vettes. I purposely skip that one every year-they can stick it. I go to a lot of truck shows being a member of the Antique Truck Club of America. You'll meet a lot friendlier folks at one of our events, and there is shiny stuff along with rust parked side by side given equal attention. I avoid car shows as I'm not a trophy chaser, and have seen too many hissy fits from soreheaded losers. One guy told me he could buy two trucks like mine for what he had in paint. He was p o'd because I won a trophy and he didn't. I offered to give him mine because I didn't want it-and that really ticked him off. To me, these car shows could do themselves a favor by making them a non judged event and ditch the trophies. I do attend a fair amount of car cruises, and am always welcomed by the group. Now there are several of us Dodge truck guys that his these as a group almost every week. There goes the neighborhood!
-
Roberts sells these I bought mine years ago from them. I think the unofficial name is fender filler. I understand that a fender welting for an early 50's Ford F series will also work. I believe that Robert Drake and other aftermarket suppliers sell these. I did mine so long ago that I don't remember if this item was purchased by the foot and trimmed to length or if they were precut. Mike
-
I would think that a broken or loose or cab mount or a cracked frame rail/broken cross member could contribute to this. The dash support was designed to support the steering column, not the other way around. I had a parts truck that when I loosened the under dash support the cab nudged downward but there were no front cab mounts left due to the dreaded tin worms.
-
The drop center rim is most likely what you have. It is similar to a modern car rim. Dodge used these on the 17" and other single piece rims of the era. There is a large recess in the center of the rim that one side of the bead slips into when mounting or dismounting a tire. The drop center should allow you to run tubeless tires w/o flaps and the worry of the lock ring coming off. The locking ring is a 2 piece rim with a removable ring on one side of the rim that fits into a groove on the outside edge of the rim. You can run radials on the locking ring rim, but as someone else said you'll need radial tubes. The limitation is tire width for this style rim, but others here have done this successfully and provide more detailed information. I can get you the measurement of the inside diameter of a 16" rim which you should compare to your brake drums and the narrowest part of your current rims. You will want to make sure that a 16" locking ring rim won't have any clearance issues with your front or rear drums and tie rod ends due to a different offset. You may want to look around some local junkyards. Some of the older motorhomes used the 6 lug rim in a drop center design. Another source (if they would fit) are the military Kaiser jeep styled pickup of the 70's. These also have the 6 lug Budd design and may also be available. Mike
-
Pilothouse Windshield Wiper Arms And Blades
MBF replied to Jeff Balazs's topic in Mopar Flathead Truck Forum
Some arms are adjustable in legnth so you can compensate for the longer wiper blade and adjust it so that it just misses the A pillar with the end of the blade. -
I noticed that in one of the pictures but I didn't say anything because I wasn't sure and God knows my stuff aint perfect either. I did it myself once years ago as a trial to see if I could get the windshield in by myself. It went it pretty easy but when I went outside and saw what I had done I immediately took them out and had a glass guy install them so I wouldn't screw up my new gasket. Mike
-
Dave: I can't see from your photo what type of rims you have but they look to be 6 lug Budd style. If they're 17.5's they are probably drop centers. You'll have to be careful if you go in search of a replacement rim to adapt to a more popular tire size. That bolt pattern doesn't have a lot of alternatives. There are 16", 16.5, and 17's" rims will match your bolt pattern but may not clear your brake drums. If you're looking for rims, especially the locking ring style make sure the rims are solid and not rust jacked where the hoop is riveted to the centers. Again-making sure the rims will fit your truck is key. Mike
-
If its antifreeze and you have any pets, keep them out of the garage until you find the source and stop it. It only takes a small amount of it to kill a dog or cat. The sweet smell draws them to it. You'll eventually get it sorted out and will laugh about this some day. It's time to take a break and smell some other roses.
-
If you feel confident, take it apart and clean out/replace the old grease that has hardened , and clean up the commutator and check the brushes. I have one on the shelf if you need it. Both my trucks have vacuum, and they're the closest thing to intermittant wipers you can get! I grew up with them, and like the simplicity. Mike
-
It isn't a big deal to make your own using a piece of luan as a backing and covering it with vinyl. I did that with my 1 ton, and I'm going to do it with the B2JA too. I used the old one for a pattern for the door and window handle holes. Mike
-
I just went through something similar. I pulled both ends of the cable and pulled the cable out of the shroud-it was covered in gritty grease and the cable had frayed strands. Luckily I had a spare inner. I shot some brake cleaner through the cable shroud to clean out anything that was lurking in there, blew air through it and then pumped some light oil down through it. I slowly fed the inner cable through it putting a light coat of vaseline on it as I went. After I got it back together I realized that the speedo was still reading slightly slow (due to the two speed adapter being removed), but my odometer was clocking miles like crazy. Took an old one I had completely apart and saw how it worked. On mine, the mile and 1/10th drums were stuck together. Took them off the shaft and carefully cleaned the shaft and put it back together. Did a test run with a drill and saw that the odometer was working properly. Never been inside a speedo before, but there isn't much to them. Now I'm gonna dig into the adapter and see wuzzup wid dat. Mike
-
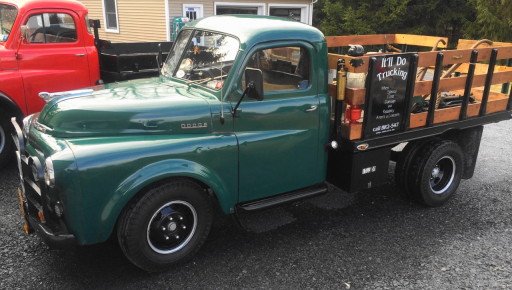
On my 1 ton I'm running 7.00-16's in the front, and it still has the 6:50-16's that were on it when I bought it on the rear. The rim you have on the right front is a dually offset. If you're going to be carrying a load on this, you may not be able to go much bigger than 7:00's in the rear or the inner sidewalls will touch. With the 6:50's I've go on now I can just get my fingers between the inner sidewalls. I have a friend that has a D300 firetruck with the same rims as ours. He has 7:50's on the rear and the tires touch sitting empty. By the way-nice truck!
-
You can also try Universal Tire. I've bought from Coker Miller and Universal in the past depenind on what I needed. Had good luck with all 3. Mike
-
What I did with mine was remove the vent. Cleaned and painted the trough and then used Dow 1357 adhesive in the trough. As I worked the seal in the groove, I put a clothespin every couple of inches. When I had been all the way around I filled in all the gaps that I could with additional clothespins and let it sit for a day or so. That was probably 10 yrs ago, and the gasket has never leaked or come loose. Mike
-
Draft Tube / Pvc Route Revisited / Question
MBF replied to pflaming's topic in Mopar Flathead Truck Forum
I did this modification a few years ago. I immediately noticed how much cleaner the oil was staying between oil changes, and after dropping the pan and cleaning it during a gasket replacement after a valve job I was surpised that there was no sludge buildup in the lifter area or pan itself. The 180 thermostat along with the filtered PCV system allows the crankcase vapors and condensation to be removed via a constant vacuum instead of relying on road speed to vent the crankcase. The PCV valve is basically a check valve to prevent a backfire in the manifold from igniting the crankcase vapors. The key to efficiency from this update is that the engine must run hot enough to heat up the oil to a point that will allow it to vaporize any condensation that has been collecting. I made my own system by cutting the tube off the draft tube and welding on nipple. From there I plumbed in a PCV valve to a vacuum port on the intake manifold. For incoming air into the crankcase I used a newer styled valve cover vent plumbed into the air cleaner to make sure that any air entering the crankcase was kept as clean as possible. There were several threads posted on this in years past. Mike -
Batt negative to the lug on the switch. A test light to batt positive. Move the switch to the park and head positions and by touching the probe to the various posts you'll see what is hot and when. You can do the same test with an ohm meter. If you want the parking lights to work when the headlights are on, hook them to the tail lamp post on the switch. I think I have a diagram of the post positions written down somewhere, but they may also be marked on the switch. I've had to take a switch or two apart to clean the contacts and lube the shaft and slider. Mike
