

soth122003
-
Posts
989 -
Joined
-
Last visited
-
Days Won
7


-
 You might also want to check that rubber hose from the steel fuel line to the fuel pump input. It may look good from the outside but crap on the inside, causing it to collapse under suction from the fuel pump at speeds above idle. The electric pump will push fuel thru without collapsing it. Joe Lee
 -
You Sir are normal. Used to be a time up to about the mid nineties you could tell make and model apart and appreciate the styling of a car. Now They all look the same due to EPA regs and such about fuel economy. Todays cars have no style. Yesteryears cars however... have class. even the modded, dented and rusty ones. You'll never here anyone say of a 2000's or later "hey what kinda car is that, or what year is your car, or even better the older people with a story about a car they or their family had that was just like yours. Plus with inflation and all the do dads on new cars you can buy a fully restored car for about the same price as the lower entry new cars (and it will last a lot longer than the new car you just bought if you take care of it). Joe Lee
-
Hey Harley, if one roller did that, I'd be leery of the rest of them. Good news is the bearings and races aren't that expensive. Rock Auto has bearings and races for under $10. Just make sure you order by the bearing number on the old bearing. Ask me how I know? lol Joe Lee
-
Random thought hit me. How steep is the hill? This question is in relation to the carb attitude. (and no I don't me it's mental state, tho that mite apply) It has to do with the float level and the angle of the carb on the hill. If the float is set lower than normal and the angle lets the gas in the bowl settle to the back, the float won't come down until the gas in the bowl is reduced at the back to lower the float. That amount might be an almost empty bowl that borders on empty and the refill of the bowl might cause an air pocket that cause the stumble. Since you say this random does it happen on the same hill or different ones? Crud I just fell in the rabbit hole. What is your gas tank level on these hills close to empty or more than a 1/4 of a tank? I think I'll stop here before I get really weird. Uh Oh Might be timing set just a touch to far on advance and only visible on harder loads like hills. Joe Lee
-
My best guess is forged steel. Two reasons for this assumption. (I know ASS U and Me) 1. If it was made from Iron, if your car sat in a field or barn for decades the crank would likely be more rusted than it is due to the nature of iron and an open vent system in the crankcase allows moisture/condensation to build up on the crank. Just my thought. 2. The amount of torque a crank goes thru in its life. The iron is a softer metal and would likely break/bend easier than steel, resulting in more crank replacements due to stress than is actually done. Without knowing for sure these are my two thoughts on the material make up of the crank. Don't know if I am right, just my guess. Joe Lee
-
There are 3 things that strike me as very funny about the "climate change/crisis" 1. The unmitigated gall of the ignorant that won't do the historical research to understand what is happening. You always here some one say "It didn't use to be like this." That's because most people don't live to be a few hundred years old and don't understand the cyclical nature of weather cycles over hundreds to thousands of years. 2. The stupidity of people living in a climate prone area, coastal, desert, plains or mountainous areas. Then wonder why hurricanes, drought, tornadoes or flash floods suddenly seem to affect them. (see subject one) It has happened before, just the time scale for events may be annual, every few decades, centinial, or millenial. Take the snowstorm that started this thread. Last time snow like this was seen on this scale was over a hundred years ago. The difference between then and now, advanced warning prep time. The problem is most don't believe it until it happened. The Texas freeze a few years ago, Hurricane Sandy that screwed most in the New England states because it can't happen to them. 3. Mitigation and Preparedness. The short sightedness and attention span of most people today is terribly short. A small generator and a 5 gallon gas can will give about 3-5 days of heat or A/C during a power outage. A small camp stove will boil water and cook meals. 5 days of groceries will ride out most emergencies. The trouble is most will never think of doing this or will say it can't happen here. A one time 2-3 hundred dollar purchase can ride almost any one/family through a crisis. Ready made emergency meals for a family of 4 for 72 hours less than $50. The big difference between than and now is forecast. It used to be "SURPRISE" event is here. Now It's about a week for hurricanes, 2-3 days for floods, tornadoes and drought is forecast almost years out. Here is another thing to consider. The Glory Days. Why in my day.... Got news for you. When you were younger you were 10 feet tall and bullet proof. Now Your just so high and water resistant. That temp range you could deal with when you were 10 years old to 40, that don't feel so good at 50. My theory is for every 5 years past 40 you lose 5 degrees +or-. So by the time your 60 unless it is 70 or warmer, you use a sweater. If it is 85 outside you bump the A/C to 65 just to stay comfortable because you got used to it. Throw in a weather event and BAM no power or the roads can't be used or you have power but the store/gas station you go to doesn't. Small events are 2-3 days at worst. Big events can be months long. It all boils down to how much you prepare. Joe Lee
-
My 48 is set up the same way. 1st pull parking lights, 2nd pull the front parking lights go out and the head lights come on. When I wired in the turn signals, the signals work with the headlights on. I believe this is the case for most cars from back then. The parking lights were the notice the car but not for the driver to see anything. The headlights were to let the driver see in the dark and the parking lights did not add to the area of effect to see surrounding details. Also to note, by not using the front parking lights with the headlights it lessened the strain on the generator by about 2-3 amps. Each incandecent bub draws about 1 to 1.5 amps. It may be more as the 6v systems are 1/2 the volts twice the amps of a 12v system. (I believe) The gennys had to spool up to about 1500 engine RPMs to reach full output. So at low speed/idle your lights drained the battery. Hence the lights brighten when you revved the engine. With the advent of alternators (set output at low speed) when the engine is at idle, you still get full power, so no need to manage your electrical systems. Joe Lee
-
Even though this has been fixed by the original poster, It might help some one else in the future. Instead of the cookie sheets, you might try 2 panes of glass in the oven. That way you can keep an eye on it as you go thru the process. As long as you keep the heat low, (150-200 degrees) the glass should be fine and you can also add weight to a specific area that might need it. Joe Lee
-
The biggest problem with the genny was it's variable speed out put. At idle the genny did not produce enough power to run the lights, radio and other system draws, which is why they installed the fast idle cable. The alternator on the other hand produced max power at idle. The genny was also DC current while the alternator was AC with a rectifier to change AC to DC. Now with that said, just because the power was produced (either Genny or alternator) it was not all needed or used. That was the job of the voltage regulator for the genny and the rectifier for the alternator. Both supplied the needed volts/current to recharge the battery and stopped the extra power so it did not fry the electrical system. The generator was capable of producing 30,40, 50 amps and so on, but it had to run at faster rpms to do so. The alternator did the same but it's max output was set at a predetermined rpm (usually low speed) so no matter how fast it ran (rpm) it would never increase it's rated output. I switched to the Pos grnd alternator and have been very happy with it. Hooked the wire from the alt to the bat connection on the VR to maintain the look of the period. Sniper is also right that the ammeter is just a visual indication of charge/discharge. The more the needle moved the bigger the charge or discharge. The only numbers on the gage are the max number (usually 30) to indicate the output of the max load the electrical system can handle (I think, might be the genny size also). This is my layman's explanation of the system (not to include such things as corrosion, frayed wires and so on). If I got anything wrong feel free to correct me. (Still working on the FTL problem in my spare time). Joe Lee
-
Thanks for the vid Los, now I feel pretty doggoned smart. Before you posted about the magnet, I thought the speedo might be gear driven somehow. But when you said magnet my feeble mind went what if? My head felt a little warm as the 2 brain cells I have started rubbing together to make a thought and presto.. my previous post was born. Next thought....Faster than light travel. Wish me luck Joe Lee
-
To my understanding YES. The speddo cable drives the magnet, which creates a field that drives the needle. The spring is the dampening or breaking action that keeps the needle from going to 100mph or max on the speedo meter. So the faster you drive the more magnetic action the more needle pushes against the spring and shows relative speed. That's why it's so hard to get these cars up to 90-100mph. It is that speedo spring. LOL I don't think the spring is wound. It creates tension when the needle pushes against it. Then the tension pushes the needle back to 0 when stopped. I guess the engineers that thought this up were pretty sharp. If you really want to blow your minds, think about how different tranny gears or size wheels affect the speedo accuracy. Well that's my theory and I'm sticking to it. Now my brain hurts. Joe Lee
-
According to the Motors Manual the doge 230 engines valve clearance from 1941-53 are: hot/running engine, .008" intake and .010" exhaust. (1935-40 are .006 I and .008 E and .012" timing) The manual did not list a cold setting, but the manual list a timing clearance as .014, which is basically a cold clearance. This is the base for installing valves/cams after a major repair or rebuild. Set to .014 the run the engine and after it is at running temp adjust them to .008" for intakes and .010" for exhaust. Most people do one of two things on an engine that has already been used/run/broke in. 1. Run the engine up to temp. Shut off engine and adjust to spec. 2. Set the valve at .002-.003 over the spec cold and run the engine to temp and check the valves and adjust the ones that need it. Now I have not done this check but after the valves are set hot, you let the engine cool down (24hrs) then check the clearance and see what the difference is between hot and cold and this should be fairly applicable to any other Mopar you work on. Most of the mechs use option 1 as the least labor intensive option. Hope this helps. Joe Lee
-
The small hole is to relieve the line pressure after the brakes are released. The 2nd rubber cup on the MC piston sits between the large and small holes when the brake is at rest. When you do a pedal adjustment, make sure the cup does not cover the hole or the brakes build up pressure and will not release. It must be open. Best thing to use is a piece of .020" safety wire. A bread twist tie can work as well. I usually put the wire in the hole when I make pedal adjustments to make sure the cup doesn't cover the hole, but comes right up to it. Joe Lee
-
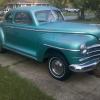
When These vehicles were made, the bumpers and accents were chromed or steel polished to make the car stand out. They also had a fairly straight color palette to use. Today with the advent of meta-flake/pearl enhancement and clear coat epoxy style paints the car itself attracts the attention with out the need of the chrome high-lights. If you are going to go with the standard paint job or originality, stick with the chrome to make the car pop. If you are going to put a $5k to $10k paint job on it, then you can probably match the bumpers to the car and it will look good. Especially with the enhanced color types available today. I've seen a lot of pic's of these old cars with the newer styled paint jobs with the bumpers the same color and they look good, real good. The pics of the cars with the old style paint with matching bumpers just seem to be missing something. My personal feeling is, new modern paint with high-lights match the bumpers. Old style paint, chrome or... paint the bumpers a different color to draw the eye. The only problem with this is some people have really, really bad taste. (Like an orange car with green bumpers. UUNNGGHH) Joe Lee
-
How long has the oil had time to soak in? Going from not working to pegging at 100 says it needed lube, but it might need more time to completely lube all the parts in the speedo. Granted it will probably need a rebuild, but you might want to give it a little more time to soak in and maybe it will work as needed, but probably not accurate. It might also help to slowly exercise it by using a low speed drill to turn the cable and work the speedo at a low speed. Joe Lee


