bkahler
-
Posts
1,947 -
Joined
-
Last visited
-
Days Won
39
Content Type
Links Directory
Profiles
Articles
Forums
Downloads
Store
Gallery
Blogs
Events
Everything posted by bkahler
-
What the heck kind of grille is on the front of this 49? I've never seen one like it. I would have to assume some sort of aftermarket accessory. http://cgi.ebay.com/ebaymotors/Dodge-Other-Pickups-1949-Dodge-1-2-ton-pickup_W0QQitemZ220270726921 Brad
-
I got to thinking about the fact that I bought this tool to use on my 1/2 ton dodge pickup and realized I didn't really need the holes for the 11" and 12" drums. So after looking closely at Pete's drawing and reading the instructions he provided as well, I figured the easiest way to make the pin would be to set the micrometer dial at "0" and then make my pin such that with the slide caliper set to 10" it just fit. So with that in mind I set about making a pin today. Since I'm on a temporary work assignment away from home I had to scrounge tools to get the job done. I ended up using a cordless drill, hacksaw, flat file, 24" caliper and 4" hand grinder to make it. I didn't realize that a 5/8" cold rolled steel bar was actually slightly over sized. So I had to file the diameter down slightly to get it to fit into the hole. Other than that I didn't really have any problems. http://www.141.com/dodge/photos/ammco-pin-1.JPG http://www.141.com/dodge/photos/ammco-pin-2.JPG http://www.141.com/dodge/photos/ammco-pin-3.JPG http://www.141.com/dodge/photos/ammco-pin-4.JPG I went ahead and added the holes for the 11" and 12" drums just in case. They aren't in absolute perfect alignment but they should be close enough to work. I'll be home over labor day and hope to find out whether my fabrication job will work . Brad
-
Sounds good. I'll fax your diagram over to my machine shop and have them build me one. Thanks! Brad
-
Oh sorry, that was Ken that got the other boxes.
-
It was missing the pin mentioned above, the extension pin and the spacer. It does have the collar. Brad
-
Pete, I have a question for you on the drawing you made of the pin. The dimensions listed on the drawing show .512" between holes on the pin. Yet in the paragraph below the drawing you stated that the holes were 1/2" apart. In my attempt to analyze the situation it would seem that 1/2" is the correct number. Yet you were pretty clear in listing the dimensions as .512" as well. So which is it By the way thanks for taking the time to post the above drawing. I managed to buy one of the 1750 tools on eBay but of course it didn't have the pin. Knowing you had provided the information is what made it worth while for me to try and get it. Thanks! Brad
-
I was working on the 4th floor of a building in downtown Pasadena when the quake hit. We felt a pretty good jolt and the building started swaying. We felt a bunch of smaller after shocks and the building continued to sway for probably 2 to 3 minutes afterwards. All four elevators in the building stopped working as well as the escallators. Having been born and raised in Nebraska it was rather interesting to experience my first quake. Hopefully it will be my last as I'll be leaving Pasadena in early November . I can handle tornadoes and such but I don't think I care to be around when the next quake hits. Brad
-
If you're a B1 or B2 owner Allan's information is by far and away the best to use for making your own harness. The information I posted on making a B3 harness was based off of Allan's work and has yet to be proven to be accurate since I haven't completed nor have I fit the harness yet. You can check out Allan's info here http://www430.pair.com/p15d24/mopar_forum/showthread.php?t=10669 Brad
-
B1B wires updated information
bkahler replied to Allan Parkhurst's topic in Mopar Flathead Truck Forum
If you're a B1 or B2 owner Allan's information is by far and away the best to use for making your own harness. The information I posted on making a B3 harness was based off of Allan's work and has yet to be proven to be accurate since I haven't completed nor have I fit the harness yet. Brad -
You definitely need to get that plunger out of there. You're going to need to get air pressure blowing from the oil gallery side of the plunger to get it to come out. I'd be a little leary of the machine work that was done. With that plunger still in the block there is a chance that metal debris could still be in the oil passages. One last thought on getting it out would be a really strong magnet. You might get lucky and it will be sucked out that way. Good luck! Brad
-
Most likely cause is the clutch disc is not centered on the flywheel. If its not centered the input shaft of the transmission won't mate up with the pilot bushing hole in the flywheel. Recenter your clutch disc and you should be good to go. Good luck! Brad
-
Putting a gate like that in the tailgate was a common practice for farmers in Nebraska. I would say a good 2/3 of the trucks I found in junk yards there had the gate modification done to them. Brad
-
Albert, I finally got the corrections made to my notes. The link above for the B3B wiring harness info now works. I haven't detailed it out quite as much for the wiring under the dash because the information from Allan and David were for the B1B & B2B trucks so I left the wires a little long and figured they will have to have the ends put on them once the harness is installed. The change in the gauge arrangement on the B3B necessitated this approach. What I will probably do sometime down the road is document further what lengths the wires were under the dash and update my notes. However that won't happen for quite some time as I'm 1800 miles from my truck and before I work on it again I'll have to move it from Arkansas to Kentucky. Brad
-
First thing you would have to do is switch from 6 VDC positive ground to 6VDC negative ground. An alternator is grounded through its case so if you take a standard 12 VDC and mount it along with the 6 VDC generator the grounds would be tied together which should be no problem. As long as you don't let the + output from the alternator come in contact with the + out from the generator you'll be fine. However the inverter option as mentioned by Dennis_MN is probably your best bet. Brad
-
Well like everything I do I made a couple of mistakes in my wire length calculations so I've temporarily removed the wiring harness worksheets until I can get them corrected. I'll try and get it redone early next week. Sorry about that Brad
-
I'm gearing up to make a new wiring harness for my 51 B3B. I've opted to not buy a new harness from YnZ or Rhode Island wiring. I find it hard to justify the cost. Also I feel I'm capable of making a new harness that looks similar to original. Since I'm working out in Pasadena for a while I stopped in at YnZ's store to buy wire and connectors today and walked out with $250 worth of the same . The wire is similar to what was used on the truck originally, namely lacquer-coated braided wire. For those of you interested in the project I've uploaded my worksheets in PDF format. http://www.141.com/dodge/b3b-wiring-harness-details-rev-1.pdf. The pages are in 11x17 format. Without the information provided by Allen Parkhurst and David Erb located on the http://dodgepilothouseclub.org/know/wiring_harness/wiring.htm I wouldn't have been able to develop my worksheets. Many thanks for their willingness to take the time and effort to provide the information for the rest of us . I've taken the liberty to change a couple of colors, mainly for the tail light wiring where I wanted the turn signal/brake light and the parking light wire colors to match modern day vehicles. I felt that would make it easier if/when I add a hitch to the back of the truck. I'm also adding in turn signals like Allen and David did and I'm also including a wire up front for powering some original fog lights. I may also include a few wires into the engine compartment for an A/C compressor. Living in the south for the last 8 years I've found that having A/C in a vehicle is immensely better than not having it . One drawback to buying the wire from either Rhode Island Wiring or YnZ's is you have to buy a minimum of 10' for each color. In some colors I only needed 20" or so. I'll add to this thread as progress develops. Brad
-
Merle, in the 3rd picture I noticed that there's a rock missing...... You did a fantastic job and it looks great. I'm sure you're going to have a lot of fun driving the truck. Brad
-
Here's the link to the new 8.0 AVG download. Its definitely better than the previous version. Been using AVG Free for years, wouldn't do without it. http://free.avg.com/ww.download-avg-anti-virus-free-edition Brad
-
Ok, where do I find plans for one of those . Brad
-
If she's worth it there is only one choice......... Brad
-
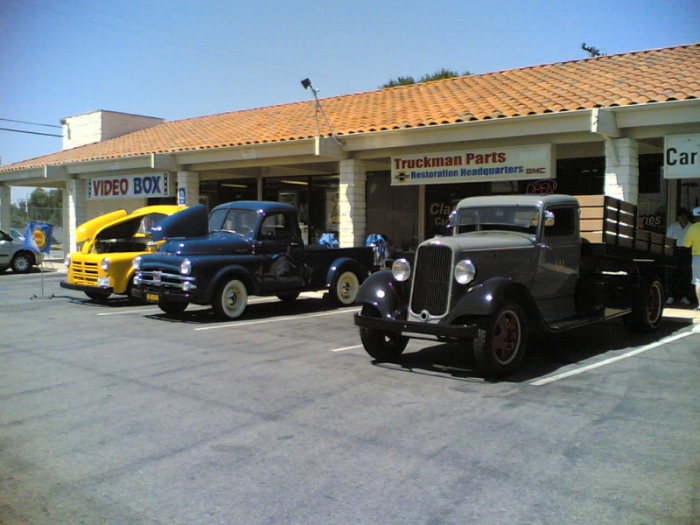
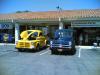
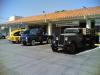
Bob, I managed to make it to the 1st Annual Fullerton Get Together. In attendance were two Pilot House trucks and a 1934 Dodge Brothers (probably 2-ton) flatbed dumper. Not the largest showing but for a 1st time event not bad at all and it was the first time ever for me to see to drivable Pilot House trucks side by side . Dave Simon's is making nice progress on his truck and I managed to get a ton of detail shots of it. I haven't sat in my truck since I tore it apart back in 96 and Dave was gracious enough to let me sit in his, makes me wish mine was done! I was extraordinarily pleased to see Ron Tamez show up with his 1951 B3B pickup. I'm in the middle of restoring my 51 B3B and being able to see his nicely restored truck was a gift from the gods! Unfortunately he had to leave before I could get any pictures so I'll be making arrangements with Ron to stop by and take about 20 rolls worth of photos . All in all a nice little get together, got to meet a bunch of nice people and hopefully the event will grow as the years go by. Thanks! Brad
-
Nazgul50, Thanks for the reply and info. So far every where I've checked the part is back ordered. But at least I know what to order which is great. Thanks! Brad
-
Has anyone used a speedi-sleeve to repair the front crank pulley on a 218 engine? If so do you remember the part number. My truck is a long way away from me right now and I'd like to get a speedi-sleeve bought and ready for when I get home. Thanks! Brad
-
I think aerodynamics has a lot to do with the mileage difference. As an example, our 1984 Airstream 31' motorhome gets 8 mpg with a chevy 454 yet with our 1983 27' Winnebago motorhome with chevy 454 that we used to have we were lucky to get 6 mpg. The Winnebago is shaped like a box where the Airstream is rounded and flows well. Brad
-
I like it, and for my shop VERY appropriate! Brad