


bkahler
-
Posts
1,951 -
Joined
-
Last visited
-
Days Won
39
Content Type
Links Directory
Profiles
Articles
Forums
Downloads
Store
Gallery
Blogs
Events
Everything posted by bkahler
-
Ahh, the parts interchange link you posted gave me the info I needed. The OEM parts manual lists 1321 268 as the shocks for my 51. That equates to Monroe 31000. Thanks! Time to get them on order. Brad
-
Ok, I'm getting the itch to start working on my truck again. It's only been about 12 years since I last touched it. I put off buying shocks knowing it would be a long time before they would be needed well....I guess it's time. I used the search function and browsed through 16 pages. The best I could come up with was Monroe 31000 and 32207. The OEM parts catalog says front and rear shocks are the same. Any suggestions on which shock would be correct? The truck sits perfectly level. Thanks, Brad
-
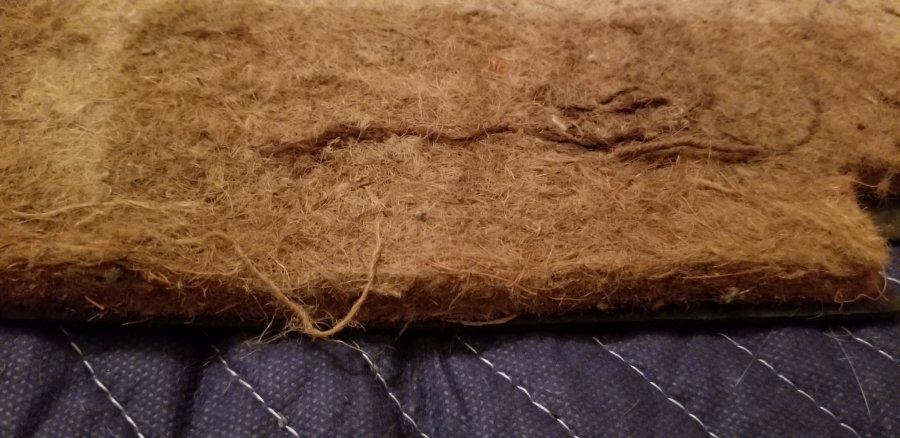
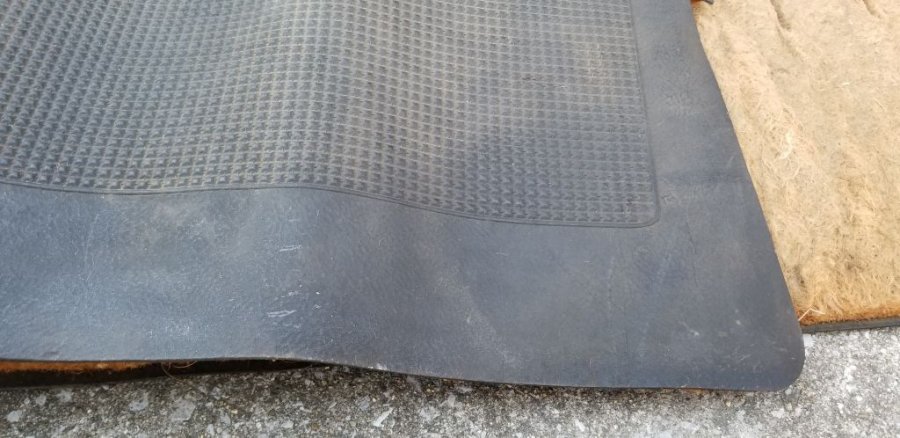
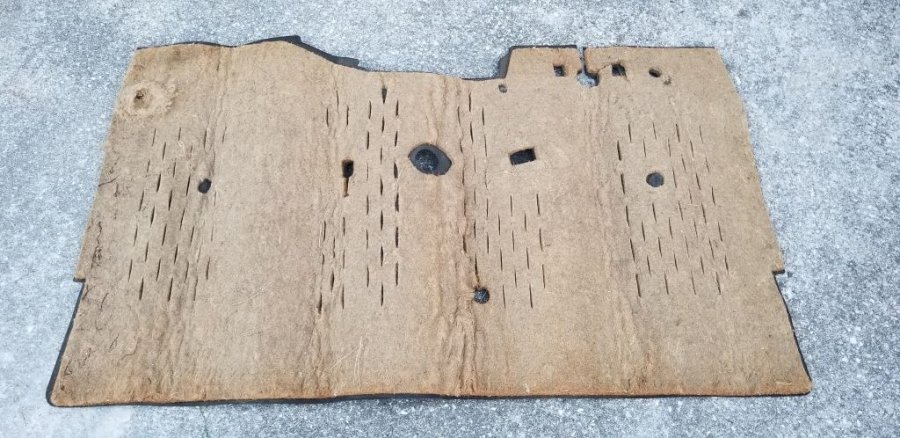
I'll try and get a trace in the next week or two. Lot's going on right now but I should have time in early November. In the meantime I'm going to lay some objects on the mat to try and get the wrinkles out of it. Brad
-
Yep, that's the guy. I dealt with him on several items, interesting character if I remember right. Brad
-
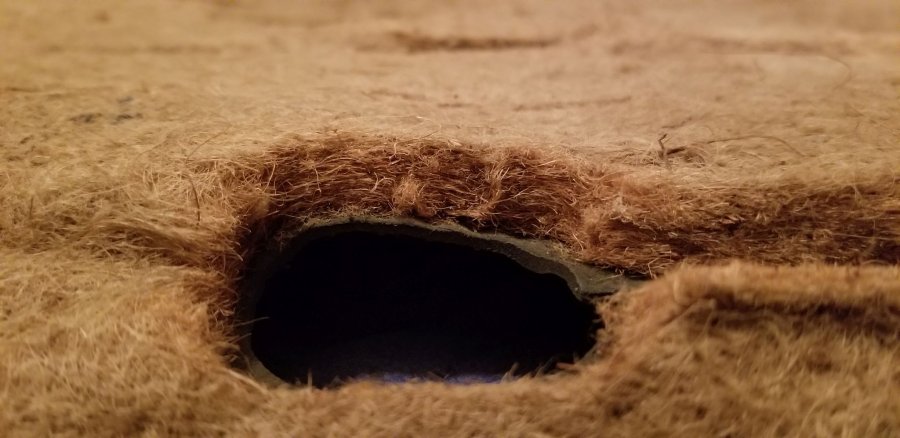
I would be more than happy to trace the mat and all of it's openings, etc on a large sheet of Kraft paper for those interested. Back when I was looking (late 90s?) for a replacement mat the only products I could find weren't even close to what the original was like. I'll have to look for the receipt but I think I bought it from a place with Mitchell or something like that in the name. I probably found the name in Hemmings and they listed lots of NOS dodge parts. I'll see if I can find the receipt this evening. Brad
-
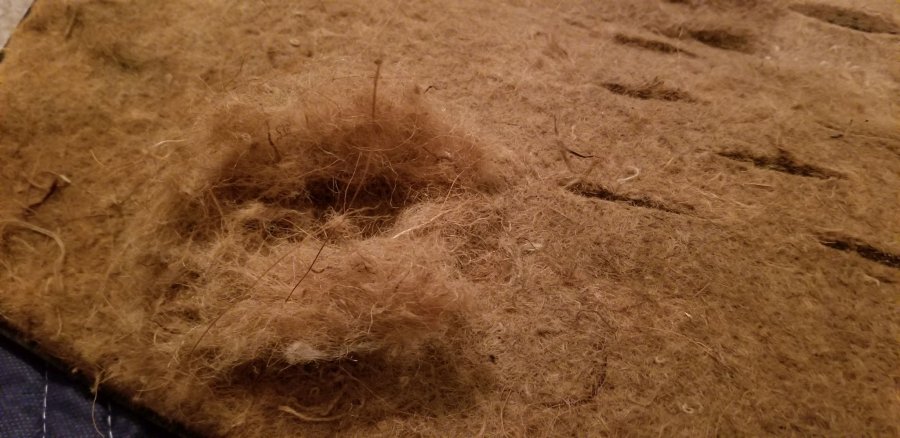
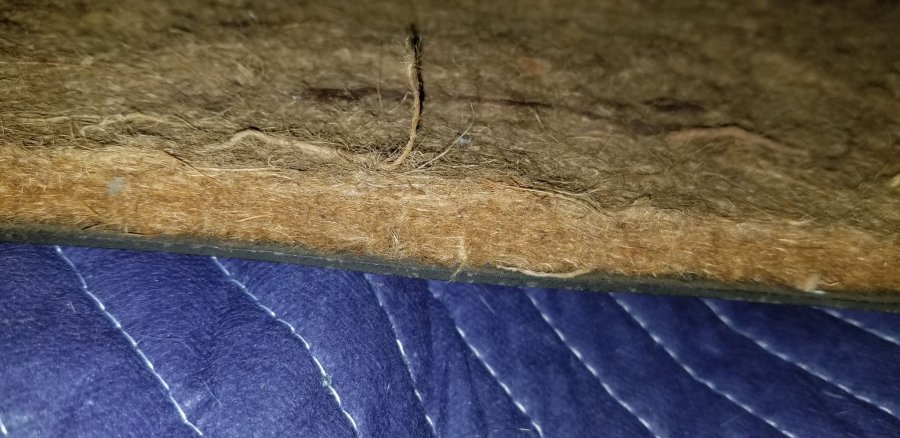
Yep, looking at pictures online of jute backing its definitely jute. Thanks Brad
-
I don't really know for certain but it sure looks like shredded string. At first I was thinking horse hair but after looking closer it sure looks like string remnants. Whatever it is I'm sure it was in common use back in the day so maybe some might have the answer. Brad
-
Here is a NOS floor mat for my 1951 B3B I bought about 20 years ago. Someday I hope to actually install it in my truck! Brad

-
CHS Ricardo Cavallero S.R.L manual steering boxes
bkahler replied to bkahler's topic in Mopar Flathead Truck Forum
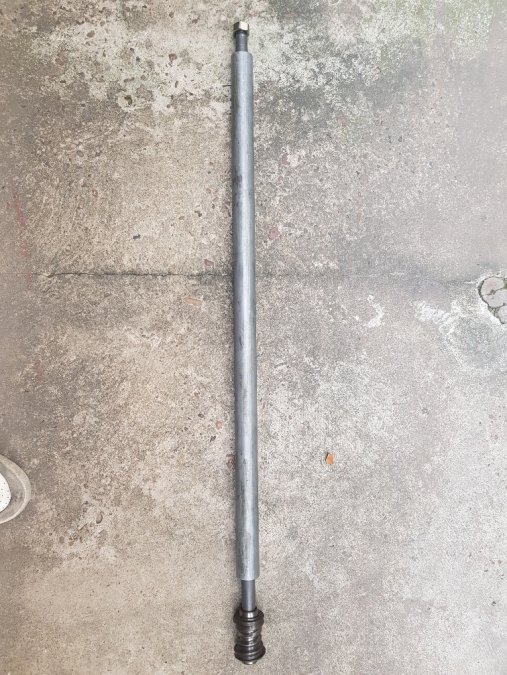
Thanks for the replies. CHS did reply to my request for information and was kind enough to send me some information on worm replacement and the sector roller replacement. Below is the written description for the roller removal: Tips to replace the roller on a sector sector with roller. 1) Removing the used (worn) or old roller. For this there are 2 possible methods: a) Using an oxyacetylene flame torch, heat one end of the roller pin so that the end is heated to a malleable point, immediately after hit this end of the pin with a punch and a suitable holder in order to remove the pin. Attention !!! Do not heat the sector axis. b) With a bank boring machine and an integral HSS drill (approx dia 11 mm), mill a cone or center in one of the ends of the pin of the roller, in such a way that the riveted end thereof is weakened. After this hit this end of the roller pin with a punch and an suitable holder to remove the roller pin. NOTE: all these procedures must be carried out with the appropriate personal protection elements, such as safety glasses, gloves, etc. 2) Installing the new roller. Now with the sector shaft without the roller, proceed to clean it and evaluate if it is necessary to grind or polish its cylindrical parts where the bushings work. Also the internal flat faces of the head of the sector shaft must be inspecting in order to see if it is necessary to grind or polish and keeping its parallelism. With the sector shaft in good condition and clean, measure the width between plain surfaces of sector shaft head in order to adjust the thickness of the thrust washers (side spacers) in such a way that the total width "washer + roller + washer" can be placed on it sliding and without axial clearance. Both thrust washers must be the same thickness. NOTE: All our roller kits include 2 thrust washers (side spacers) approximately 0.1 mm thicker than the original ones. This allows adjustment according to the wear of the internal faces of the sector head. Once the roller assembly, washers and pin have been placed, the riveting or fixing of the pin-pin must be carried out on the sector axis. If you do not have the specific riveting machine (Press Type Spot Welding Machine), there are 2 possibilities: a) Fix it with a little welding point on each end of the roller pin or b) Heat and rivet one end at a time of the roller pin, with the same torch and punch that you used to remove it. They also sent me a brief description and pictures show how they remove and replace the worm gear. It seems to be a pretty straight forward approach. Our method to mount the worm on the steering shaft, is the following: -Use an hydraulic press that allows to place the length of the column. -Re-condition and check the diameter of the shaft where the steering worm will be mounted. (Surface condition and dimension) -Usually this diameter should measure 18.84 / 18.82 mm for our steering worms. -Protect the thread of the steering wheel nut with a long nut. Very important : In order to avoid the buckling of the shaft. we protect the shaft with a common gas pipe a little bigger in diameter but shorter in length.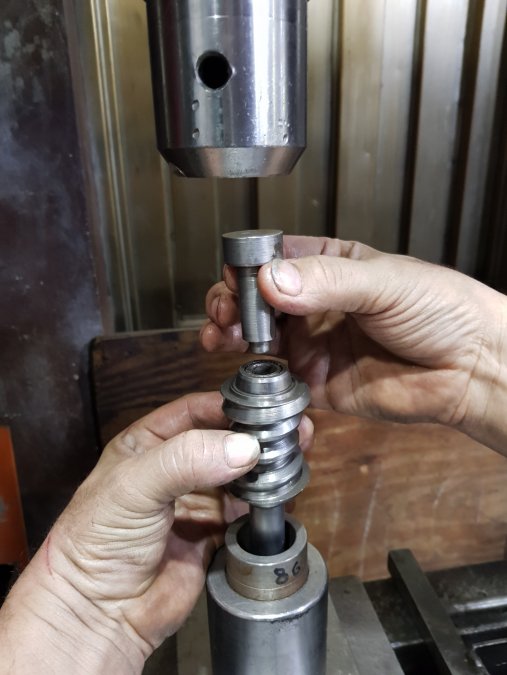


-
CHS Ricardo Cavallero S.R.L manual steering boxes
bkahler replied to bkahler's topic in Mopar Flathead Truck Forum
I'm happy to report that I received the steering gearbox rebuild kit from CHS and the initial inspection shows the parts to be the correct size and type. Now I need to find the time to do the actual rebuild. What I'm dreading the most is pressing off the old worm and pressing on the new worm. I've asked Ricardo if he has any pointers on how to do the job but haven't heard back as yet. The bottom line is I'm glad I went through with the purchase. Brad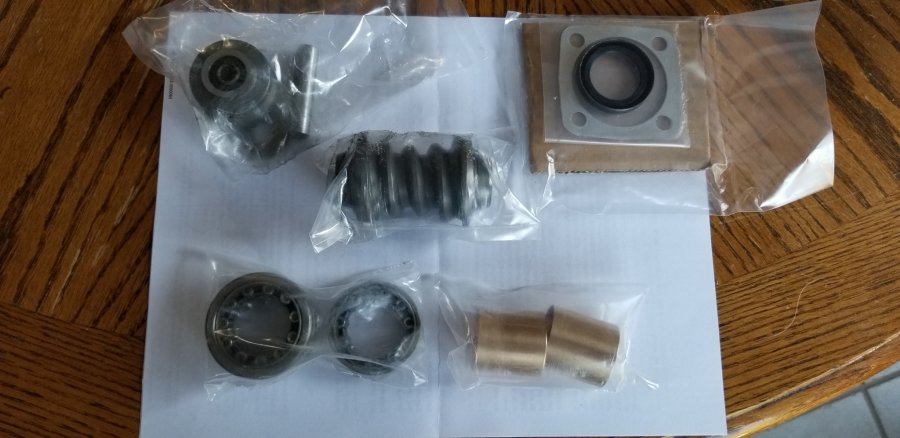


-
CHS Ricardo Cavallero S.R.L manual steering boxes
bkahler replied to bkahler's topic in Mopar Flathead Truck Forum
Just got news from CHS Ricardo Cavallero that the package has shipped and I should get a Fedex tracking number tomorrow. Stay tuned...... -
CHS Ricardo Cavallero S.R.L manual steering boxes
bkahler replied to bkahler's topic in Mopar Flathead Truck Forum
It took two tries at the bank to get the wire transfer competed. First go round I was missing some information from CHS. Even after I got the information the bank still had issues trying to get all of the requested information into the format required by Argentina. Needless to say it was an interesting process. This was my first and hopefully last international wire transfer. Now I get to see if I just threw away $500 or if the parts actually arrive. Stay tuned...... brad -
CHS Ricardo Cavallero S.R.L manual steering boxes
bkahler replied to bkahler's topic in Mopar Flathead Truck Forum
There might be a fly in the ointment. Ricardo sent me a list of dimensions to verify mainly pertaining to the sector shaft diameter. The dimensions he sent do not match the dimensions of my sector. Mine is 1.125" in diameter and he thought it should be 1.250" in diameter. So it's possible they don't offer a kit for the B3B trucks. I should know tomorrow. Brad -
CHS Ricardo Cavallero S.R.L manual steering boxes
bkahler replied to bkahler's topic in Mopar Flathead Truck Forum
I suppose anything is possible but looking at the worm it doesn't appear to be the same diameter through it's length. I think it would be a real challenge to do a one of weld and regrind. I can't imagine what the cost would be for such an endeavor! Brad -
CHS Ricardo Cavallero S.R.L manual steering boxes
bkahler replied to bkahler's topic in Mopar Flathead Truck Forum
I've considered it and actually browsed ebay for a while but in the end it's a crap shoot as to whether or not a used box is worth the cost. I'm going to go ahead and give CHS Ricardo Cavallero a try. Worst case is I lose my money, best case is the kit turns out to be a nice deal. I'll report back once the kit arrives. Brad -
CHS Ricardo Cavallero S.R.L manual steering boxes
bkahler replied to bkahler's topic in Mopar Flathead Truck Forum
Earlier this morning, after having thought about it for a few days I contacted Ricardo and requested the paperwork to go ahead and make the purchase. While throwing away $500 would not be something I want to do on a daily basis I agree with you that sometimes you just have to take a chance I still need to supply him with a couple more dimensions to verify their parts kit is correct. Once the purchase is made I'll post back here and let everyone know how it went. Brad -
CHS Ricardo Cavallero S.R.L manual steering boxes
bkahler replied to bkahler's topic in Mopar Flathead Truck Forum
Well that sucks. I had a reply all typed ready to send and the p15-d24.com site started an upgrade and threw away my reply! In talking with Lares they indicated I could deal with any of the different company's with links from the website and might even save a little money but the gearbox would eventually be sent to them for rebuilding. Per my discussion with Lares, the base price for rebuilding the gearbox would be $415 plus shipping both ways. The base price only covers cleaning, painting, bearing and seal replacement with a lube job and adjustment. However if the worm and wheel are bad then the cost would jump about $500 for those parts. I'm 99% certain my worm is bad because of the large areas that are galled and pitted. My steering was extremely sloppy and rough so I can't picture them not needing to be replaced. Oddly enough the bronze bushings for pinion shaft are nice and tight so I they don't need to be replaced. Attached is a picture of the CHS kit. Now I need to decide what to do. Thanks, Brad 1951 B3B Richmond, Ky (formerly from Jefferson, Arkansas and Lincoln, Nebraska)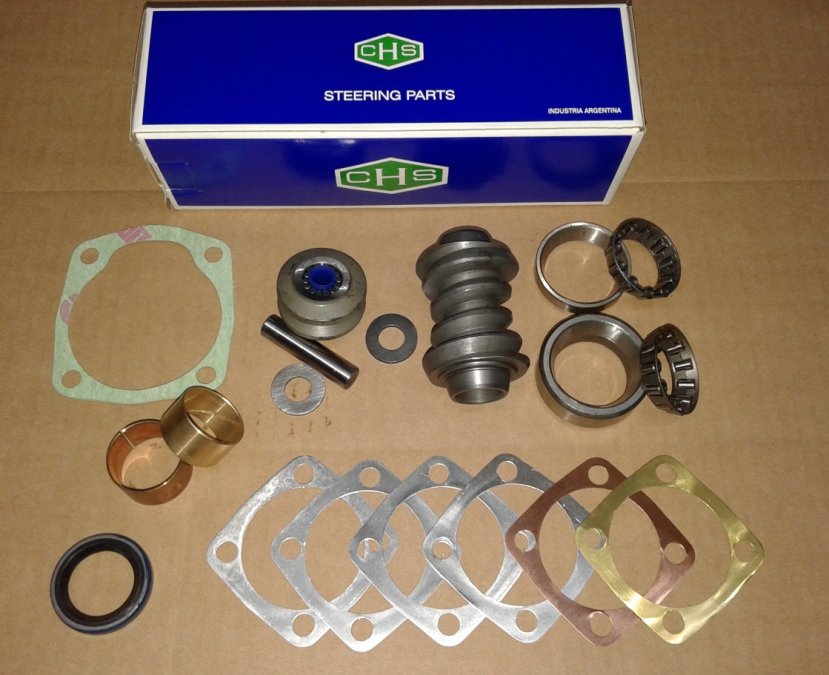
-
CHS Ricardo Cavallero S.R.L manual steering boxes
bkahler replied to bkahler's topic in Mopar Flathead Truck Forum
You must be talking about Lares Corp. I just found their name using the search for Gemmer. I'll go ahead and contact them today to see what they have to say. Thanks! Brad 1951 B3B Richmond, Ky (formerly from Jefferson, Arkansas and Lincoln, Nebraska) -
Hi All, It's been a number of years since I've posted to a thread. I have a 1951 B3B that I started restoring in 1997 and reached a point by 2001 where the chassis was basically done, all body work done and painted and then I got married. At that point all the work pretty much stopped. Fast forward to today and I'm looking to finally get back to working on the truck. The only issue remaining on the chassis is the steering gearbox. The steering box is in pretty bad shape with lots of play in the wheel and adjustments are not going to fix the problem. I did a lot of searching via google and finally came up with a company in Argentina call CHS Ricardo Cavallero S.R.L. They appear to be a rather large company that fabricates or reproduces a lot of the Gemmer manual gearboxes. I've been in discussion with them about parts for my 51 and it turns out they offer a steering kit K-8777 which contains the following parts: - 1 (one) Gear worm. - 1 (one) Roller-kit ( 1 roller, 1 pin for riveting, 2 oversize washers & the full complement of needle rollers) - 1 (one) Lower bearing set ( 1 cup and 1 cage with tapered rollers ) - 1 (one) Upper bearing set ( 1 cup and 1 cage with tapered rollers ) - 1 (one) Oil seal for the output shaft. ( Please confirm these diameters : Shaft dia 31,7 mm bore dia 42,86 mm ) - 1 (one) Set of shims ( for adjusting the end play of the gear worm ) They are 6 shims : 4 of 0,2 mm thickness, 1 of 0,1 mm and 1 of 0,05 mm ) - 2 (two) Needle roller bearings (B2016) ( Please confirm this bearing size : shaft dia 31,7 bore dia 38,1 mm ) Also, please inform us if you prefer brass bushings instead needle bearings. - 1 (one) Gasket for the housing cover The delivered cost via Fedex to Kentucky would be $460. The price doesn't concern me considering all of the parts involved. What concerns me is the financial terms. They don't accept credit cards, paypal or any other of the normal methods of payment I'm used to. The only method of payment accepted is through bank to bank transfer of funds. Needless to say that concerns me. I'm still doing research to determine if the CHS Ricardo Cavallero company is a valid company and any other checks that I can make. So my question to the forum is has anyone dealt with these guys before? If so are they legit?! Thanks! Brad 1951 B3B Richmond, Ky (formerly from Jefferson, Arkansas and Lincoln, Nebraska)
-
Wow! That is an impressive looking truck! I think you got a gem for sure. Take the radiator to a good old fashioned radiator shop and have them check it out. My 51 B3B has the original radiator that is just fine, with luck your's will just need to be cleaned and the tanks re-soldered to the core. You'll need to replace all of the rubber in the brake lines. Better to do it now and get it over with. Before thinking about re-ringing or other engine work run Seafoam through the fuel system for a tank or two. You might be surprised how much it will help. Good luck! Brad
-
What about this company for rebuilding steering gear boxes? http://www.steeringgears.net/ I know nothing about them but I'm in the same boat as you are with the steering gearbox from my 51 B3B. It's extremely sloppy and needs to be rebuilt or replaced. Brad 1951 B3B
-
You're talking about Larry Frank. Used to live in Leadville Colorado but I believe he moved his family farther west to Mack Colorado some years ago. Early on when I started restoring my 51 B3B I bought a lot of parts from Larry. Always charged reasonable prices. Not sure what he's up to now but I thought he had gotten out of the Pilot House parts business before he moved to Mack. He used the wrecker a lot while he was dealing in dodge parts. Again I don't know if he kept the wrecker when he moved west. Brad
-
Wow! Ok, I'm in! Hopefully you won't wear the tool out before I can get my bar to you, I've got it stashed in a box where it would be "safe" until I needed it. Heaven only knows where the "safe" box is at the moment. Thanks! Brad
-
Just curious about an update as to how your new tooling is working out. I have a division bar I would like to have modified for adding a rear view mirror. Thanks! Brad
-
Just FYI, there are several sizes of the bumper guards. The 1/2 thru I think 1 ton trucks have a smaller size bumper than the larger trucks. I bought a center bumper guard from Mitchell Motors about 15 years ago thinking it would fit my 1/2 ton only to find out it was for the larger trucks. Brad

