bkahler
-
Posts
1,947 -
Joined
-
Last visited
-
Days Won
39
Content Type
Links Directory
Profiles
Articles
Forums
Downloads
Store
Gallery
Blogs
Events
Everything posted by bkahler
-
Well, the pics are showing for me! When I did the frame on my 51 I opted to have a sandblaster do the job. Made it a whole lot easier for me ?
-
I like your plans. Are you planning on a mostly stock interior as well?
-
51 B3B build thread - after all these years
bkahler replied to bkahler's topic in Mopar Flathead Truck Forum
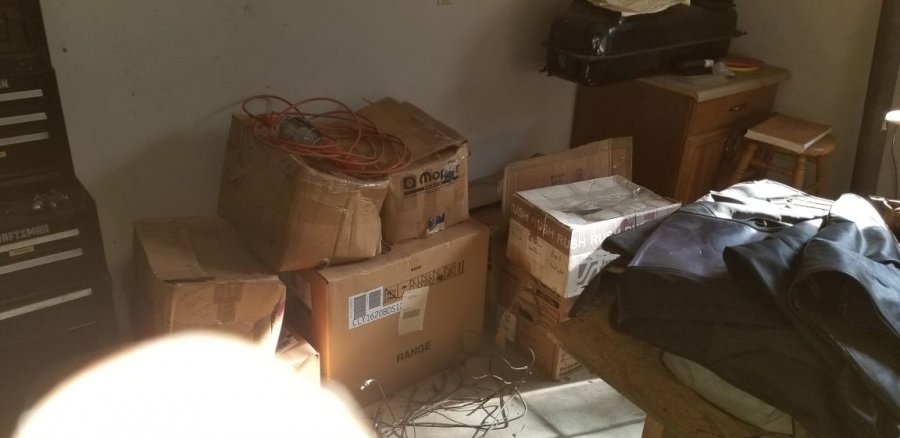
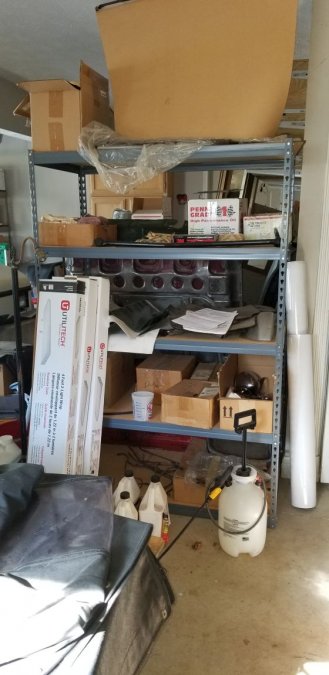
It's been 5+ years since the last time my B3 saw daylight. Yesterday after work I pulled it out of the garage so I can wash it down to get rid of 20 years of grime from being in storage all that time. This also gives me a chance to clean out the garage to make it easier to actually work on it. For the last 5 years the garage has a accumulated way to much junk. That will soon be remedied! Brad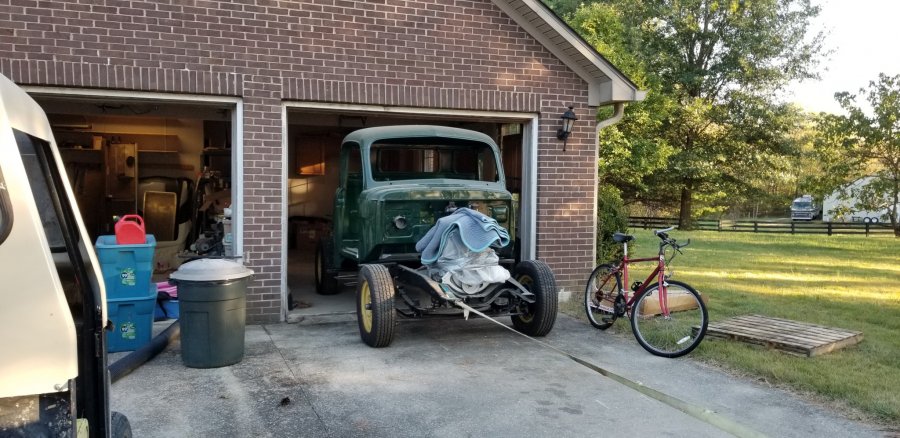
-
HA! I just saw Todd B's response. What he said
-
I don't really have an answer for you on the rebuild kits or carbs but I would suggest filling a 5 gallon can with gas, adding in a can (or two) of Sea Foam and then run a line from your fuel pump inlet to the gas can. I've solved more carburetor problem this way that I have rebuilding them. I've found Sea Foam to be a really good product. Brad
-
51 B3B build thread - after all these years
bkahler replied to bkahler's topic in Mopar Flathead Truck Forum
The felt seal on my Triumph was about 1/8" thick, nice and stiff and was fitted as you describe. The felt would be the easy item to come up with, the cap is a different matter. I don't know of any junk yards around me that cater to the old pickups so posting a classified is probably my best bet. That makes me wonder if the splined section of the Cleveland style of yoke wasn't longer than the Spicer version. Unfortunately I don't have any pictures of the yoke that was on the truck so I have nothing to compare to. What I will likely have to do is wait until I get the parking brake installed so I can do a temporary install of the driveshaft to see where things end up. -
51 B3B build thread - after all these years
bkahler replied to bkahler's topic in Mopar Flathead Truck Forum
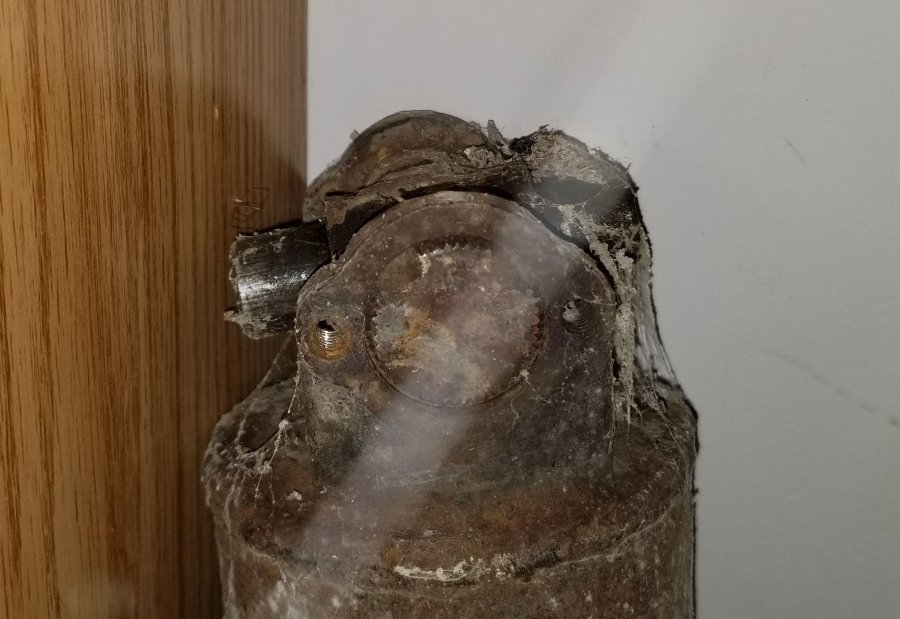
I did a little cleaning on the driveshaft and yoke splines and was able to get the two to slide together smoothly. In the picture the yoke is fully seated on the driveshaft. As you can see the exposed splines are filled with dried dirt and grease which to me would indicate the original yoke never went down any farther than the yoke I have now. So my question is, does this combination look right? In other words, should the yoke be longer for more spline engagement? Assuming the answer to the above question is my yoke is ok then I’m in need of items 1 and 2 as shown in the attached picture. 1 = cap and 2 = seal. Any suggestions on where to find the cap and seal? According to the parts book all of the driveshafts used the same cap and seal. Thanks, Brad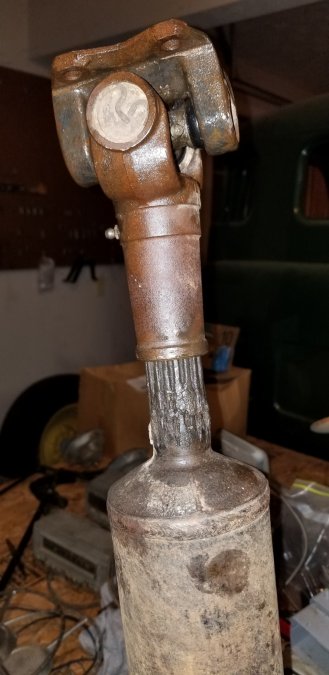

-
51 B3B build thread - after all these years
bkahler replied to bkahler's topic in Mopar Flathead Truck Forum
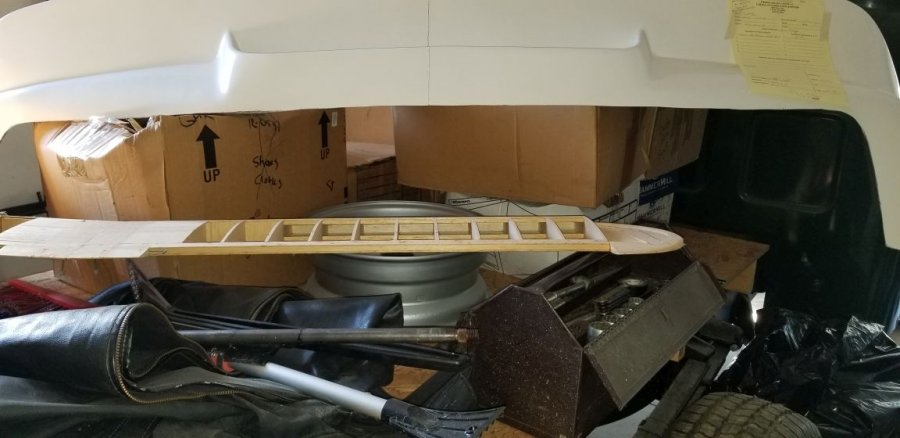
Twenty year old memories are starting to come back to me as I sift through the pieces and parts that I have laying around. I found a bag labeled U-joint, transmission end. In the bag were the straps used by the Cleveland style of U-joints. This fact reminded me that when I obtained the replacement 4-speed syncro box from Larry I swapped the slip joint end of the drive shaft with him. I don't remember the exact reason why we made the swap but we did. That swap also explains why the slip yoke I have now doesn't slide easily onto the splined end of the driveshaft. It's possible the yoke bolt pattern was different between the 4-speed crash box (my old box) and the 4-speed syncro box that I was buying. I guess I need to spend some time with the driveshaft and the yoke end to see if I can get them to mate properly. If not I guess it's off to the driveshaft service shop. Brad -
51 B3B build thread - after all these years
bkahler replied to bkahler's topic in Mopar Flathead Truck Forum
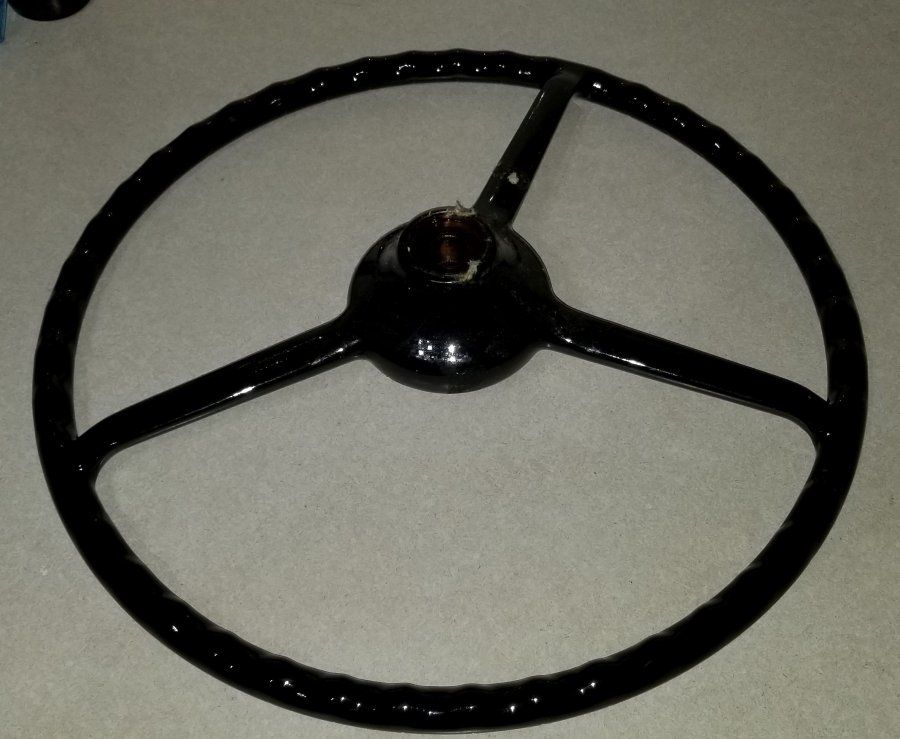
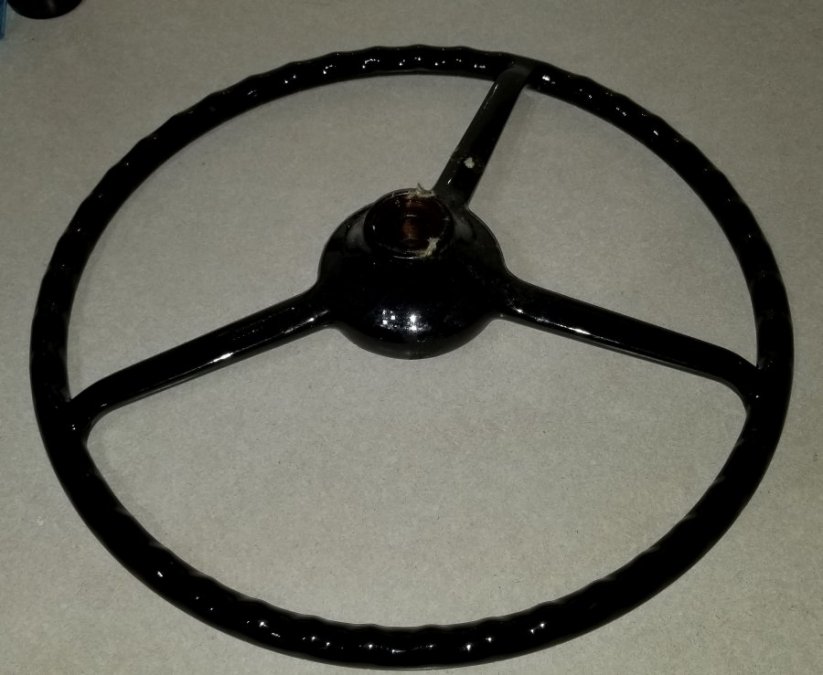
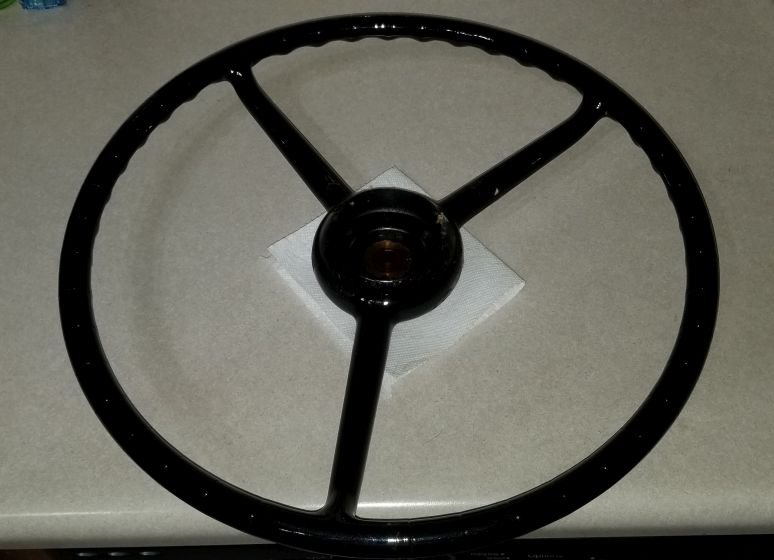
Used mineral spirits yesterday on the steering wheel and it cleaned up nicely. I did find a hairline crack at the base of one of the spokes. I guess after some 69 odd years it was bound to happen. -
51 B3B build thread - after all these years
bkahler replied to bkahler's topic in Mopar Flathead Truck Forum
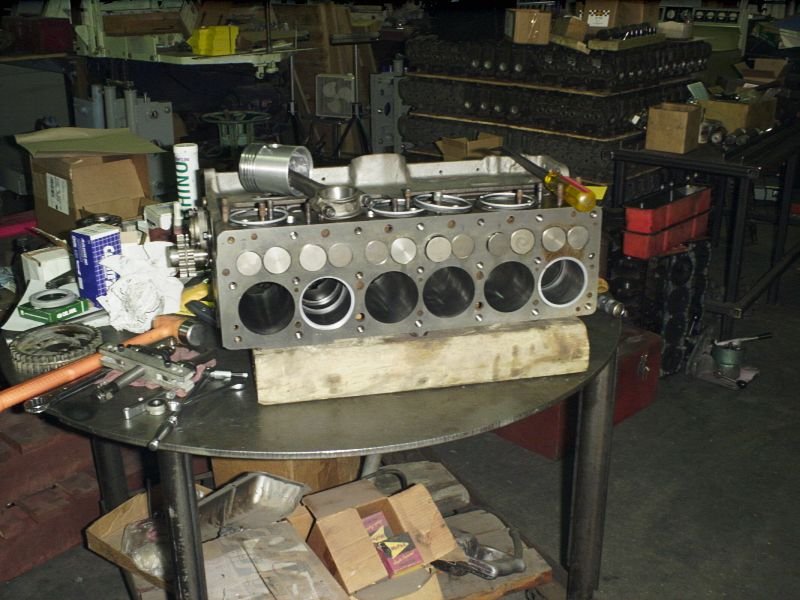
Thanks! I've put off working on it for way to many years. Yes, that is a round metal table. I'm not sure where Dean found it but it's a nice table. My guess is it started out life as a welding table. -
51 B3B build thread - after all these years
bkahler replied to bkahler's topic in Mopar Flathead Truck Forum
Well, I've gut plenty of old socks ? I'll try that later today. -
51 B3B build thread - after all these years
bkahler replied to bkahler's topic in Mopar Flathead Truck Forum
I pulled the NOS steering wheel out of the box this afternoon. When I bought it back in 2008 I only took a brief look at it before putting it back in the box. The wheel itself is spotless. The gunk on it appears to be cosmoline. I'm not sure whether it leaked onto the bakelite over time or was smeared on at time of application. Any suggestions on how to remove the cosmoline without damaging the bakelite? Thanks, Brad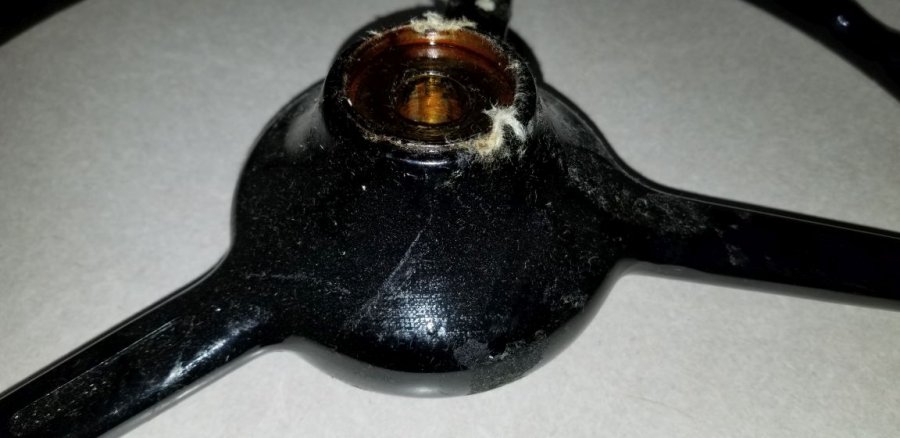

-
51 B3B build thread - after all these years
bkahler replied to bkahler's topic in Mopar Flathead Truck Forum
Thanks for the driveshaft link. You're right, they certainly look like Cleveland u-joints. I'll have to give Mopar Mall a try. Thanks. -
Windows are in and door panels too!
bkahler replied to tanda62's topic in Mopar Flathead Truck Forum
Wow! Nice job! I haven't seen to many that don't have the wing windows. -
51 B3B build thread - after all these years
bkahler replied to bkahler's topic in Mopar Flathead Truck Forum
Among the many things left to do on the truck is cleaning up the driveshaft and replacing the u-joints. According to the factory parts catalog both u-joints are supposed to be the same. From the two pictures below they sure look different to me. One of the things I still have to work out is my truck originally came with the column shift setup. Some PO replaced that transmission with a 4-speed crashbox. I'm replacing that box with a 4-speed syncro box. I'm fairly certain the 4-speed syncro box was available as an option but what I don't know is if the u-joint would be the same. I have about 30 boxes to go through to find the transmission yoke so it may be a day or two before I figure this out! Brad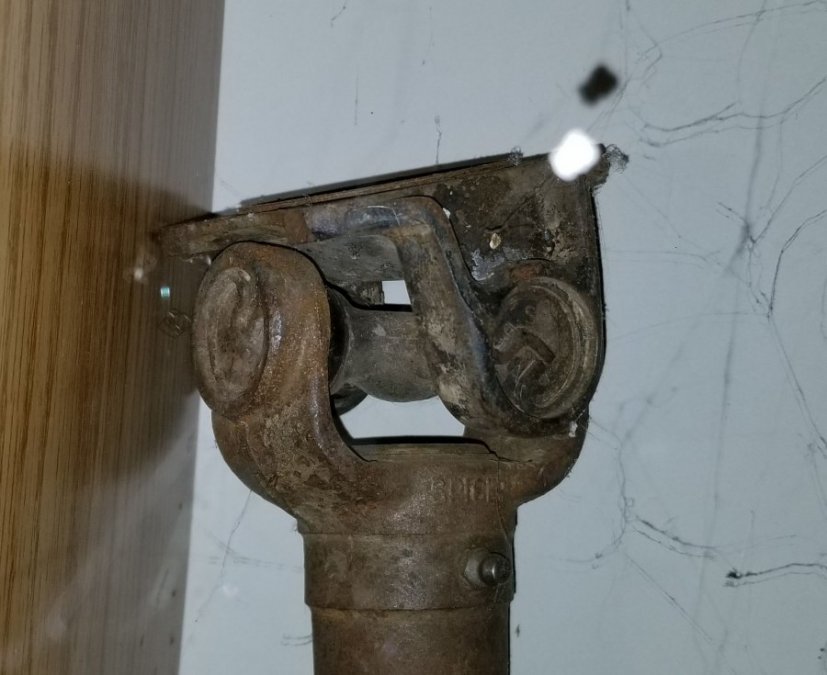
-
51 B3B build thread - after all these years
bkahler replied to bkahler's topic in Mopar Flathead Truck Forum
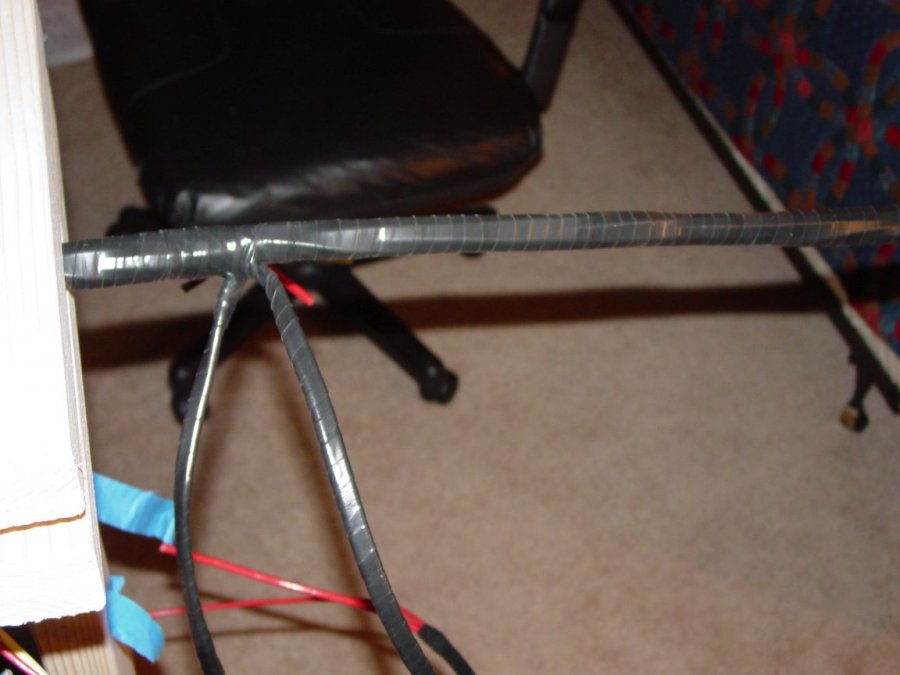
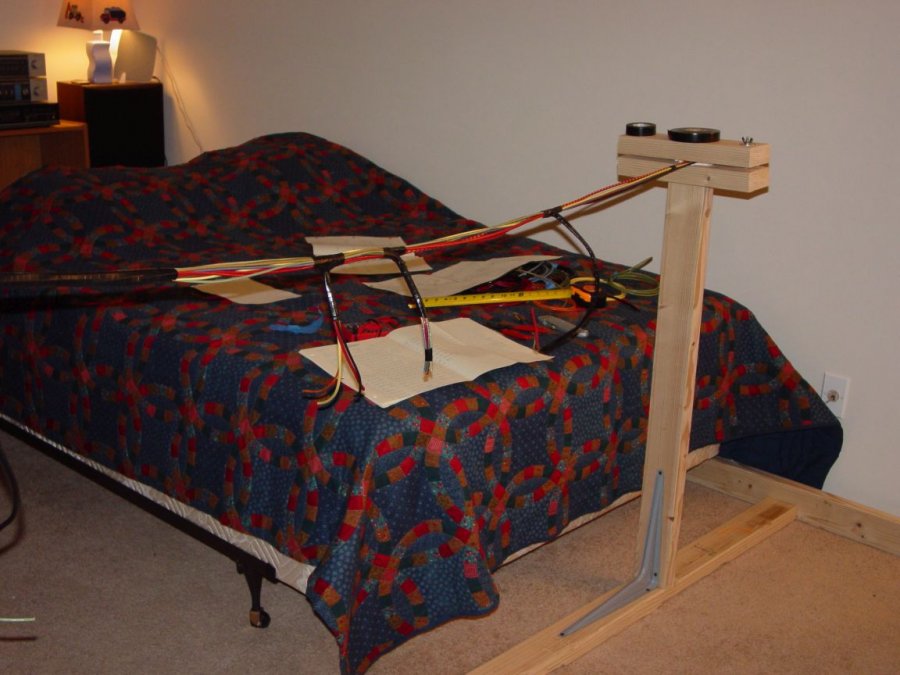
Thanks! While in Pasadena I had all of my weekends and evenings free so I decided to raid the local junkyards for parts and take care of a few tasks on my truck that I could do while in a small apartment. I was pretty pleased with how the harness came out. It still needs all of the connectors installed but I figured that would best be done after the harness is fitted in the truck. -
That's a great looking mat! Definitely a smart move to buy that many when you had the opportunity.
-
51 B3B build thread - after all these years
bkahler replied to bkahler's topic in Mopar Flathead Truck Forum
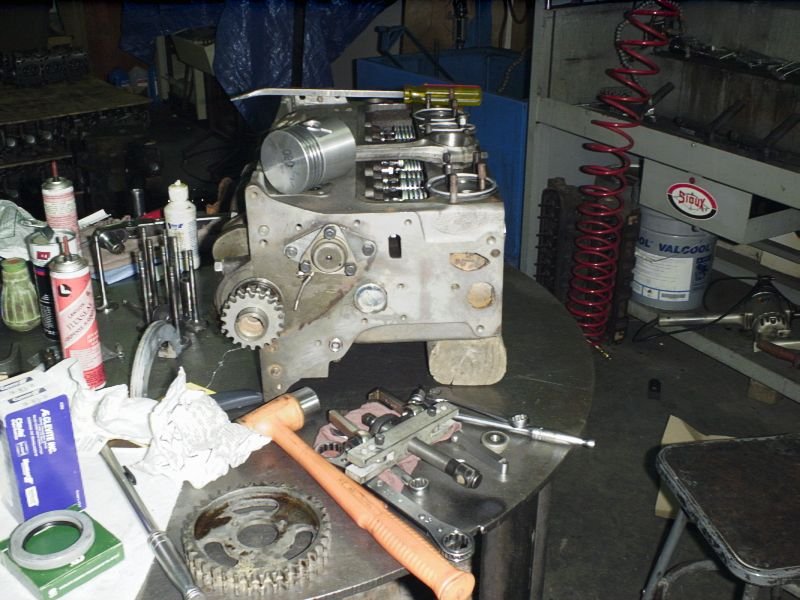
Pictures of the wiring harness being constructed in Pasadena in my little apartment. Also pictures of the engine being built.

-
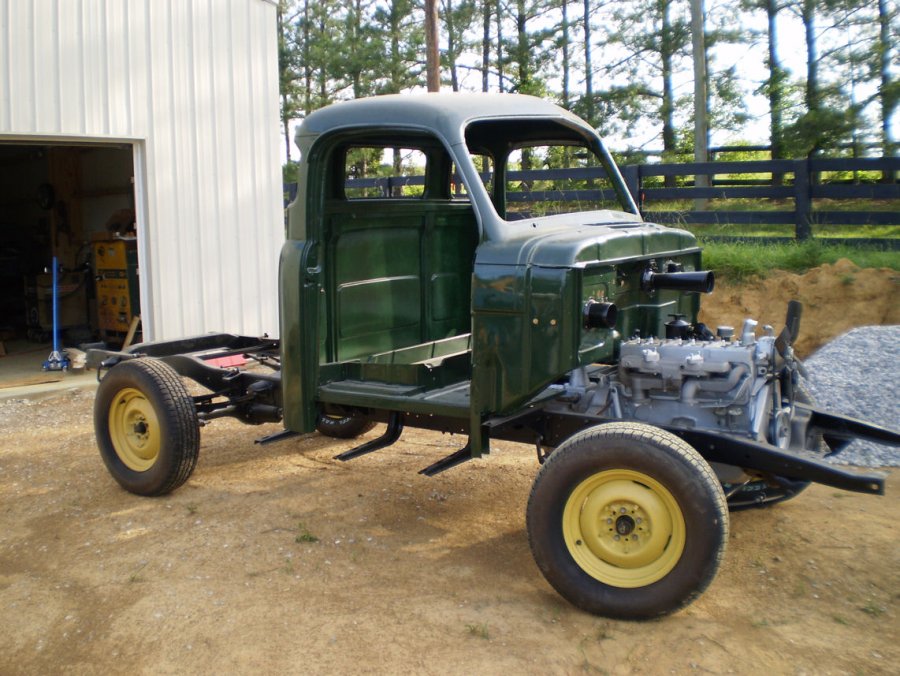
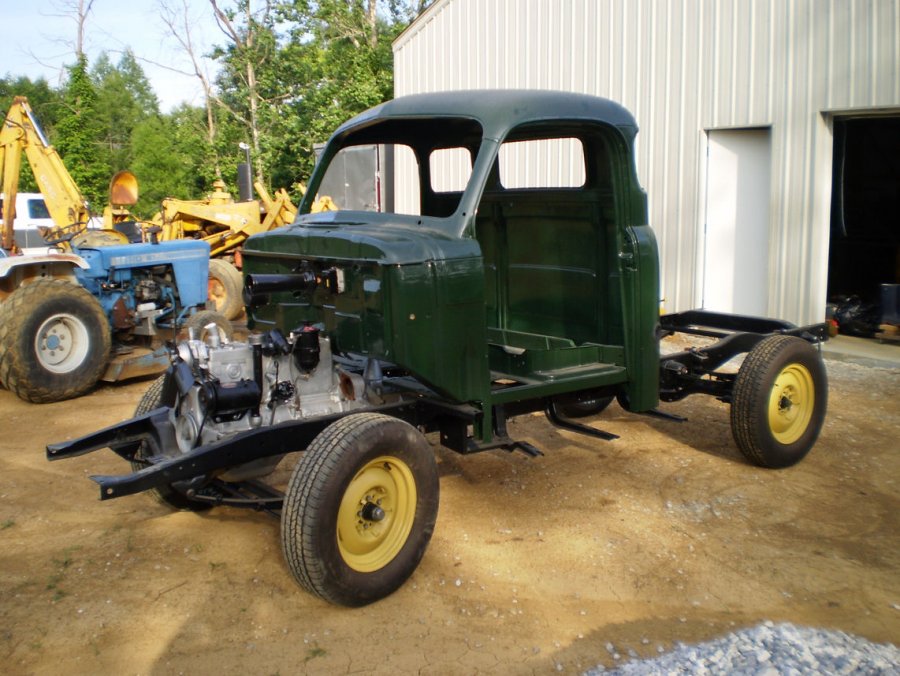
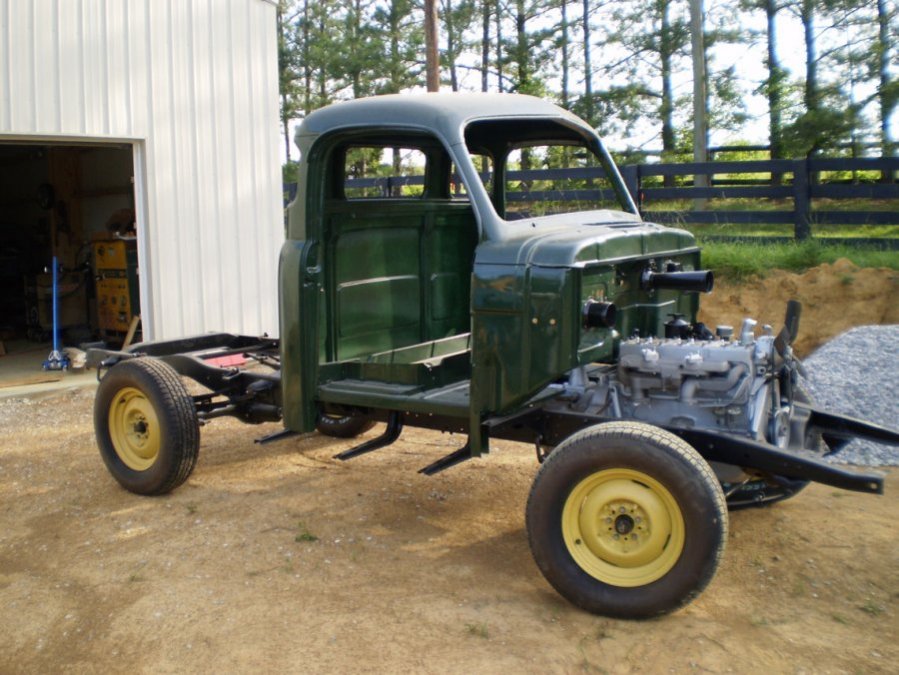
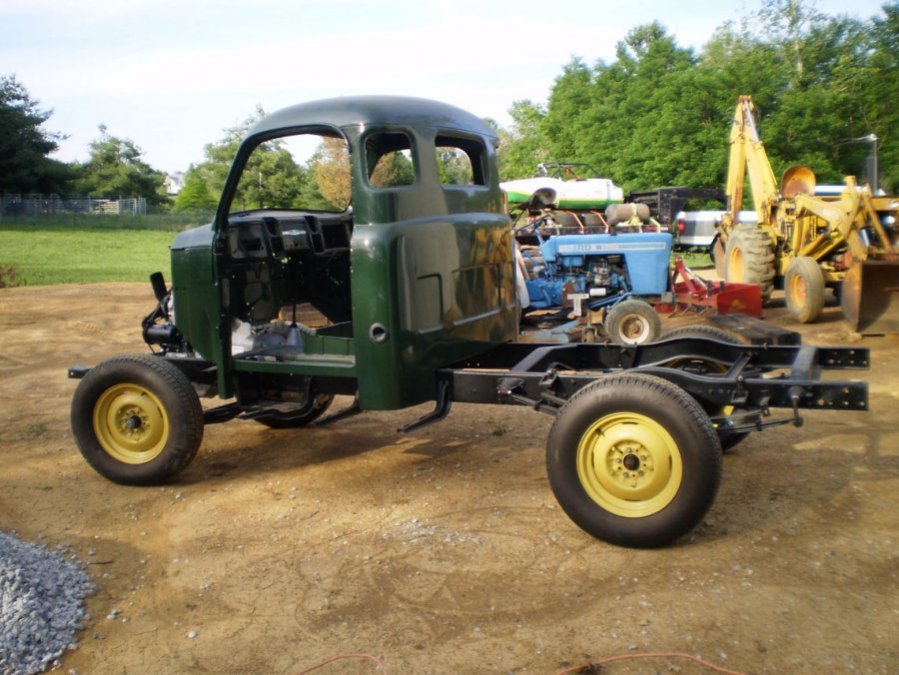
I think maybe it’s time I started a build thread for my 51 B3B. I’ve actually been a member of this forum (or it’s earlier derivatives) since the late 90s. I bought the truck in Hailey Idaho in 1996 and trailered it home to Lincoln Nebraska. Over the next couple of years I proceeded to dismantle the truck and started the rebuild process. By early 2000 I had a rolling chassis with engine and cab installed and all sheet metal painted ready for installation. It was at this point things sort of ground to a halt. I proceeded to change jobs (working overseas for a number of years) and then moved, with the truck still in pieces, from Lincoln to Dallas, then from Dallas to Little Rock Arkansas and finally to Richmond Kentucky. During the years from 2001 till now I’ve really not had the opportunity to work on the truck with the exception of a few sort periods of time. There were multiple times over the years I considered selling but just couldn’t bring myself to do so. In 1999 the engine was rebuilt by a respected dirt track engine builder. It has been bored 0.060” over (with 3 cylinders requiring sleeves) and has a new 230 cam. Around the same timeframe I had the transmission rebuilt by a local shop along with the differential pumpkin. The frame was sandblasted and painted as was just about every component I touched. I built my own sandblast cabinet and small wall mounted paint booth, both of which have also made every move with the truck. I spent 2008 in Pasadena (on short term work assignment) and while there I fabricated a complete wiring harness using wire and connectors from YnZ while using modified diagrams that someone on this forum had posted. Also during that period I rebuilt two carburetors for use on the Offenhauser dual intake manifold that I’m installing. Over the intervening years I would watch for parts on ebay and elsewhere. I managed to come up with a NOS steering wheel, NOS floor mat, NOS fuel gauge, NOS temp gauge, NOS coolant heater valve, NOS rear bumper, NOS amp gauge, and NOS speedometer cable. I might have a few others but can’t think of them off the top of my head. Oh yeah, I think I have a NOS front bumper as well. So as it sits today the truck is a finished rolling chassis with cab and engine installed. All of the sheet metal has been leaning against the wall for years and is covered in dust and grime. The rolling chassis desperately needs to be hosed down and scrubbed clean. There are five new (in 2000) radial tires that probably have a grand total of 500 feet on them but will need to be replaced if/when the truck is ever ready to finally hit the road. When I bought the truck in 1996 I was able to drive it up onto the trailer in Hailey and drove it off the trailer in Lincoln. Since then the truck has traveled 2,711 miles and none of it under its own power! I still don’t have much free time to work on the truck but I’m going to at least make the effort to tinker with it from time to time. The first step is to gather up all of the parts boxes and sort through them to see if I have the parts I’m supposed to have. I think that will be a good winter task. The pictures are from 2009 after it arrived from Arkansas getting ready to be pushed in to my new shop. You can bet I will be having lots of questions as time goes on. Anyway, that’s my story and I’m sticking to it Here's a link to the steering box rebuild that I did for the very badly worn original steering box.

-
At the time I was looking to buy the floor mat I was deep in the middle of a complete house remodel. It was kinda hard to justify the price BUT I also knew the odds of finding another one were slim and none. What prompted the search for a mat was I had bought a "repro" on ebay about two months prior and it wasn't worth putting in the truck. So not only had I just spent $67 I was now having to spend an additional $189.50 for a proper mat. Still worth it however. I'm in total agreement about using NOS parts versus repops. There's usually a night and day difference between the two. Brad
-
I finally found my receipt and yes it was Frank Mitchell. I paid $189.50 in December of 98. Price seemed high at the time but I couldn't pass it up! Now it seems like a bargain......
-
Ahh, the parts interchange link you posted gave me the info I needed. The OEM parts manual lists 1321 268 as the shocks for my 51. That equates to Monroe 31000. Thanks! Time to get them on order. Brad
-
Ok, I'm getting the itch to start working on my truck again. It's only been about 12 years since I last touched it. I put off buying shocks knowing it would be a long time before they would be needed well....I guess it's time. I used the search function and browsed through 16 pages. The best I could come up with was Monroe 31000 and 32207. The OEM parts catalog says front and rear shocks are the same. Any suggestions on which shock would be correct? The truck sits perfectly level. Thanks, Brad
-
I'll try and get a trace in the next week or two. Lot's going on right now but I should have time in early November. In the meantime I'm going to lay some objects on the mat to try and get the wrinkles out of it. Brad
-
Yep, that's the guy. I dealt with him on several items, interesting character if I remember right. Brad