


bkahler
-
Posts
1,951 -
Joined
-
Last visited
-
Days Won
39
Content Type
Links Directory
Profiles
Articles
Forums
Downloads
Store
Gallery
Blogs
Events
Everything posted by bkahler
-
Roxanne - She don't have to put on the red light.
bkahler replied to FlashBuddy's topic in Mopar Flathead Truck Forum
Thanks for the link. Now to decide if I should order or not! Brad -
13th ANNUAL CLEMENTS TAILGATE BBQ, Clements , Ca
bkahler replied to 48Dodger's topic in Mopar Flathead Truck Forum
Ok, you made me spit up my drink....... ?- 159 replies
-
- 1
-

-
- bbq
- old friends
- (and 2 more)
-
Roxanne - She don't have to put on the red light.
bkahler replied to FlashBuddy's topic in Mopar Flathead Truck Forum
If you don't mind my asking, where'd you find those hooks?! Brad -
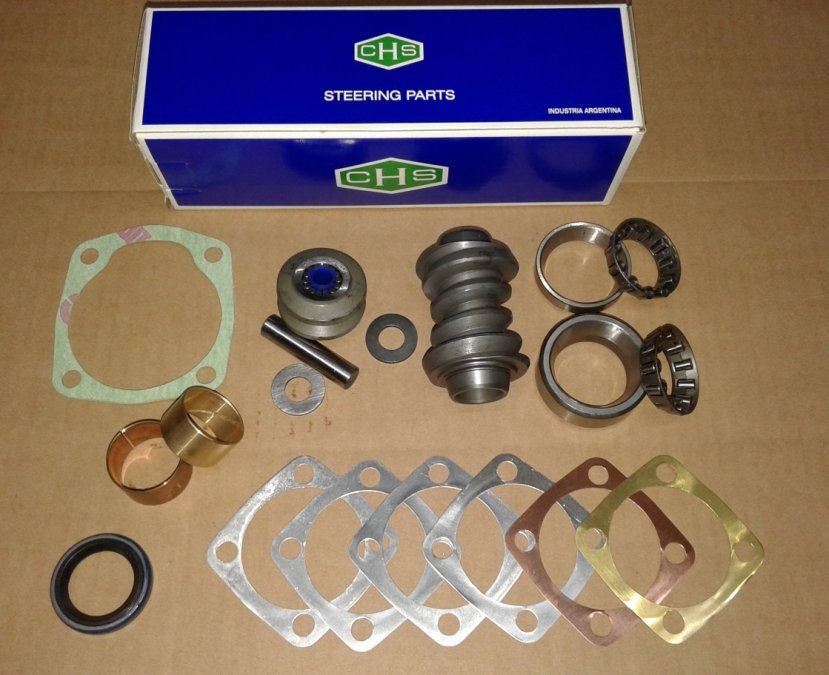
What you see in the picture is what is included in the kit.
-
Blank canvas?
-
This might be the first time I ever won anything
-
Gas tank sending unit float?
-
This is a source for a steering gearbox rebuild kit that is in Argentina. I bought the kit but have not yet used it to rebuild my gearbox. I will eventually provide feedback on how well things go. I will say I'm impressed with the quality of the components in the kit. Brad
-
51 B3B build thread - after all these years
bkahler replied to bkahler's topic in Mopar Flathead Truck Forum
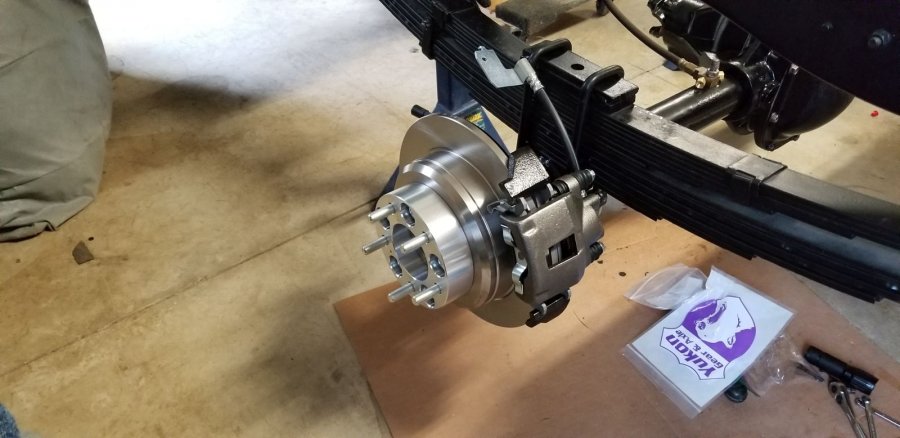
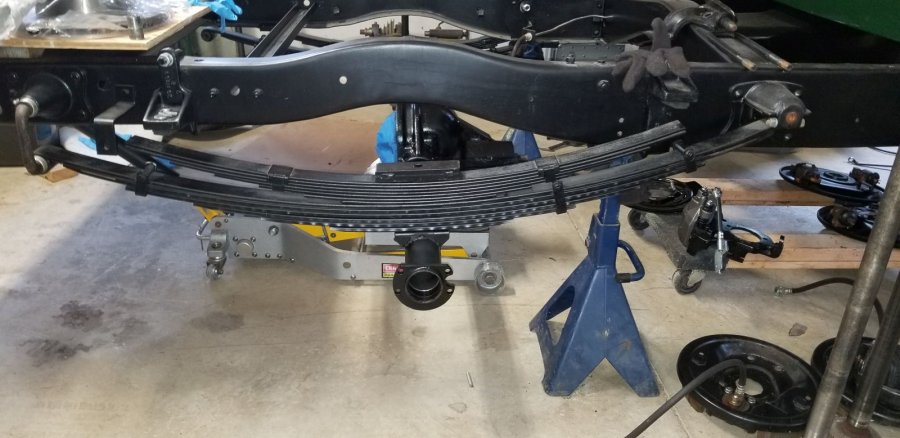
This has certainly been a strange couple of weeks. I took all of last week off for a stay at home and work but instead I got sick with a nasty sinus infection. It wasn't until this past weekend that I started to feel better. The doctor suggested I take this past Monday off and then return to work but my boss said stay home and come to work later in the week (tomorrow). So I've used a whole bunch of vacation hours and didn't really accomplish squat around the house or any of my projects ☹️ I did manage to get a few things done, mostly yesterday and now today. Today's achievement was to install the plastic liners between the leaves in the front suspension and start the cleanup and installation of the front king pins. As I had mentioned previously, when I removed the front steering knuckles so I could drill/tap the holes for the disc brake kit I found that the king pins and bushings were brand new but had never been greased. A while back I sourced a NOS king pin kit and I can definitely confirm that the new king pins are a perfect slip fit inside the knuckles. Sometime this coming weekend I hope to get the knuckles reinstalled so I can mount the front axle. Now COVID-19 is playing havoc with everything and needless to say I'm not looking forward to returning to work tomorrow. Oh well..... Brad -
51 B3B build thread - after all these years
bkahler replied to bkahler's topic in Mopar Flathead Truck Forum
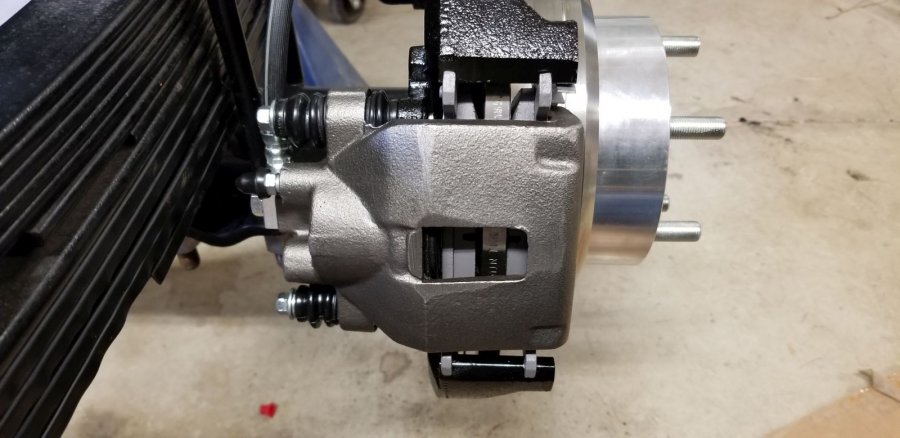
I guess my attention to detail is not what it used to be, either that or I never had attention to detail As mentioned by Dave and Eric the notches have to be in the right configuration. I actually thought I had placed the pads such that the notches were down but for whatever reason I had the two inner pads swapped. The right was on the left and vise versa. Once I flipped those two pads the calipers just about fell into place. I now have the c-clips installed along with the rear rotors and pads along with the wheel adapters. What I didn't get done was replace the threaded pin that holds the spider gear shaft in place. I had ordered a replacement but as luck would have it the one I received is 1/2" to short. Once I can source the pin I'll get it installed and will finally be able to install the pumpkin cover. Thanks for all the helpful replies! Onward...... Brad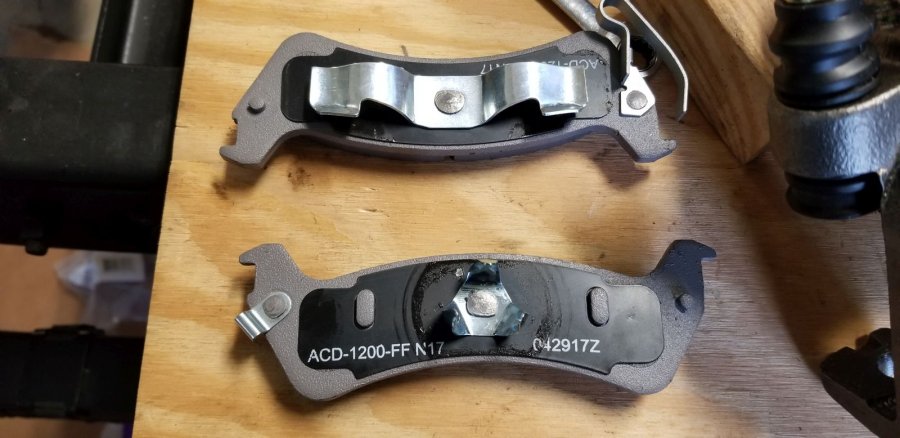
-
Check out DCM Classics. I was able to find some of the brake parts I needed from them.
-
51 B3B build thread - after all these years
bkahler replied to bkahler's topic in Mopar Flathead Truck Forum
Later today or possibly tomorrow I'm going to fiddle with the calipers again. First I'm going to install the c-clips so when I do get the calipers/pads installed I don't have to take them back out just to install the c-clips. I think I've tried all of the suggestions mentioned but there is obviously something I'm missing. I'm usually pretty good at figuring out things like this so I will admit it's a little annoying that I haven't gotten it so far! Where's my BFH......... Brad -
Steering Column Jacket Bearing Etc.
bkahler replied to Jocko_51_B3B's topic in Mopar Flathead Truck Forum
Interesting looking spacer. I don't recall ever seeing one in any of my parts boxes/bags over the years. -
Steering Column Jacket Bearing Etc.
bkahler replied to Jocko_51_B3B's topic in Mopar Flathead Truck Forum
I've thought about that from time to time as well but then common sense finally takes hold and I drop that train of thought! I've got enough projects laying around that will never get finished as it is so I'm trying my darndest to fight the urge Brad -
Steering Column Jacket Bearing Etc.
bkahler replied to Jocko_51_B3B's topic in Mopar Flathead Truck Forum
Well crap. After reading through this thread I went and checked my steering column and wouldn't you know it, spacer 19-14-15 is missing ? I'm sure trying to source one is going to be like looking for a hen's tooth..... -
51 B3B build thread - after all these years
bkahler replied to bkahler's topic in Mopar Flathead Truck Forum
Actually I've tried various angles of attack with no success. I haven't tried for a couple of days as I came down with a really potent sinus infection that's pretty much sidelined me for a few days. When I went to the doctor last Tuesday I got a taste of what it's like in this new Coronavirus world we live in. They took cultures for flu and Coronavirus testing and I have to wait until early this coming week for results. Worse, for the doctors and nurses at my local office are out of masks and can't get any. It was pretty obvious they were a little on edge. Not good.... -
I wish I had some more/better advice to give but you've been doing pretty much everything I can think of to loosen it up. I'm pretty sure I left mine soaking in various liquids for months before I finally had success. Periodically during that time I'd try pulling it with the hooked flat bar that I had made along with a slide hammer. Eventually it gave in...... Don't give up Brad
-
Last night I found the NEAPCO catalog online and spent some time trying to decipher it. I may end up taking the two u-joints to the local Napa and ask them to assist. Thanks
-
51 B3B build thread - after all these years
bkahler replied to bkahler's topic in Mopar Flathead Truck Forum
The calipers are new and I believe the pistons are retracted but I will verify before continuing. I kinda figured this would be the logical way to torque the nuts. I'll do what I've done in the past which is put nuts on the studs so the threads won't get dinged. I've read good and bad about them and didn't want to spend $50 just to find out they weren't consistent in torque. Thanks Brad -
I just recently became aware of special u-joints frequently called conversion u-joints that provide for two different bearing attachments. My 51 had at some point been retrofitted with a 4-speed spur gear type gearbox and it appears that when the swap was made they brought along the older style of driveshaft that uses the Cleveland strap style of u-joint. At the same time they replaced the rear yoke in the differential to make the combination work. The problem I have is with the Grand Cherokee axle conversion I now have an axle that uses the Spicer clip style of u-joint that needs to mate to the Cleveland strap style of u-joint. I've been unsuccessful in finding a correct 51 driveshaft for my truck so my next option was going to have the driveshaft modified at the rear yoke to work with the GC u-joint. However just recently I saw some info on conversion u-joints and would like to pursue that avenue to see if that might be an alternative. One of my hurdles is trying to figure out the correct designation of the Cleveland u-joint. I can't seem to nail down a specific part number or anything like that. Help!!! Thanks, Brad
-
51 B3B build thread - after all these years
bkahler replied to bkahler's topic in Mopar Flathead Truck Forum
Lug nuts and thread engagement are always a hot topic when brought up I appreciate all of the various points of view. Knowing that you can't believe everything you read on the internet I still found as many sites stating 1/2" engagement on 1/2" studs is sufficient and others stated 1.5 times the thread diameter. The wheel adapter manufacturer states that 1/2" engagement is sufficient. Wheel Adapters USA appears to be a reputable US based company and I would think they would error on the conservative side with their specifications. I did some measuring today and thread engagement is 9/16". There is about 1/4" of thread exposed inside the nuts. I'm going to think on this for a day or two but as the saying goes, I'll probably "run what ya brung".... I need to keep in mind this is not a work truck, it's not a race car and it's not going to get driven that often. Anyway, whether or not I replace the studs I need to figure out how to torque the wheel adapter nuts. I'm not a fan of using a tire iron between two wheel studs to keep the hub from turning while I torque the nuts. Anyone use those torque sticks? Are they all they're made out to be? Thanks! Brad -
51 B3B build thread - after all these years
bkahler replied to bkahler's topic in Mopar Flathead Truck Forum
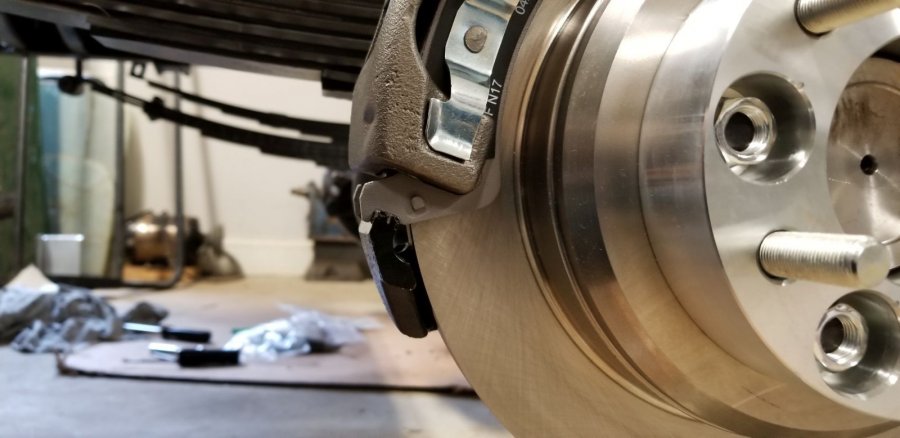
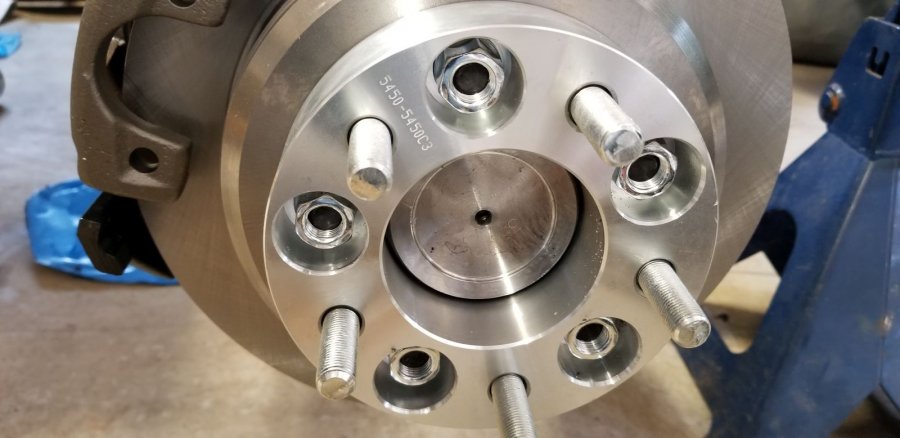
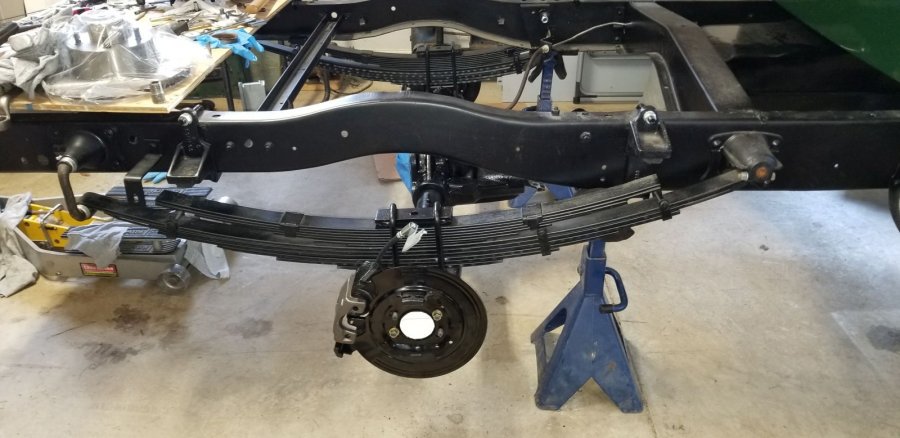
Got a little more done on the Cherokee axle. After greasing the new axle bearings and seals I slide the passenger side into place and it was to long. So, I tried it on the drivers side and it fit perfect Both axles are in place but I still haven't installed the c-clips although I will likely do so tomorrow. I realized while playing around with the calipers and brake pads that I can't install them until the c-clips are in place. I tried test fitting the calipers and am stumped as to how to get the calipers and pads into place. There doesn't seem to be any way to get them to fit. I know Eric worked at a jeep dealer at one time so maybe he'll chime in and tell me what I'm doing wrong! I also installed the wheel adapters and was a little surprised that the lug nuts for the adapters are longer than the wheel studs i.e. the studs don't protrude through the nuts.. These adapters were sold specifically for the 97 Jeep Cherokee so I assume it's ok as is. I will likely try calling the manufacturer just to be sure what I'm seeing is ok and also to find out what torque I should apply to the wheel nuts. Edit: Just called Wheel Adapters USA and they say it's normal for the studs to not protrude through the nuts and I should use 85 f5/lb torque.


-
51 B3B build thread - after all these years
bkahler replied to bkahler's topic in Mopar Flathead Truck Forum
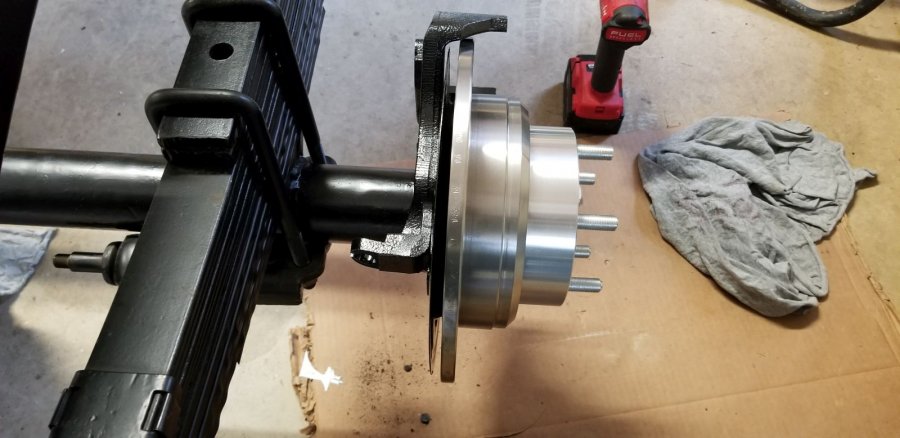
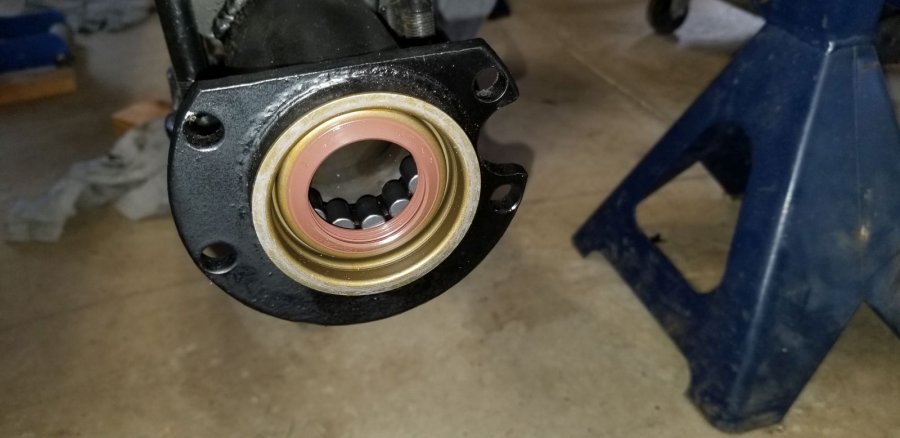
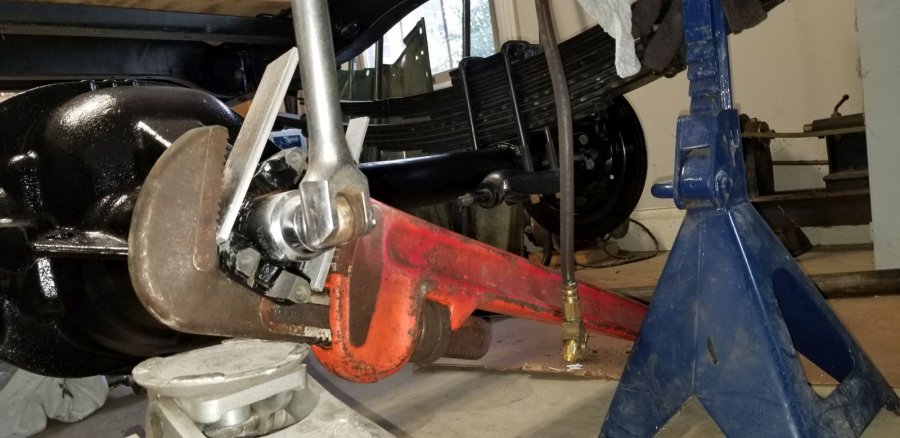
......continuation of the Cherokee rear axle install. Axle bearings and seals are installed along with the pinion seal, yoke Speedi-sleeve and the yoke itself. Getting the nut torqued the last little bit took a 4 foot cheater pipe on the end of my breaker bar! Instead of lining my punch marks up exactly even I over torqued the nut slightly. I had run across several threads during my searches were it was recommended to move past the marks slightly since this was a retorque. It took about 6 tries to move the punch mark a fraction of a turn. It was TIGHT and I didn't want to over torque. All that remains for the axle install is to mount the brake backing plates, grease the wheel bearings, install the axles and c-clips and put the rear diff cover on. Oh yeah, and fill the diff with gear oil. Who knows, maybe this weekend it will be sitting on the rear wheels Brad


-
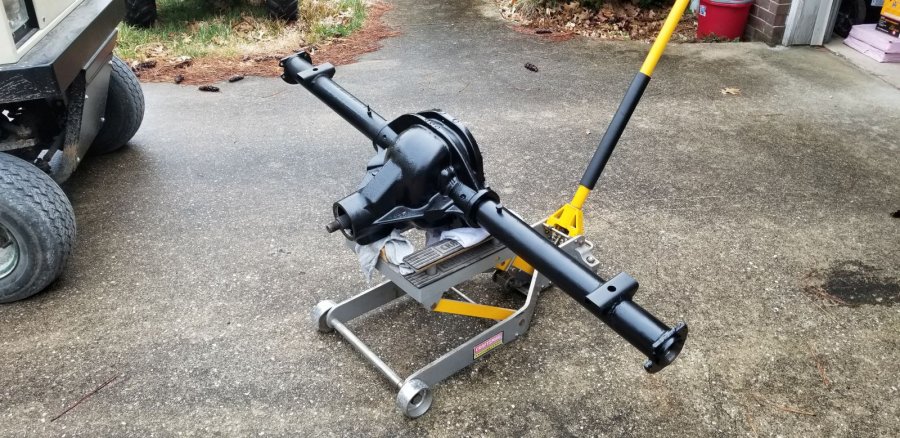
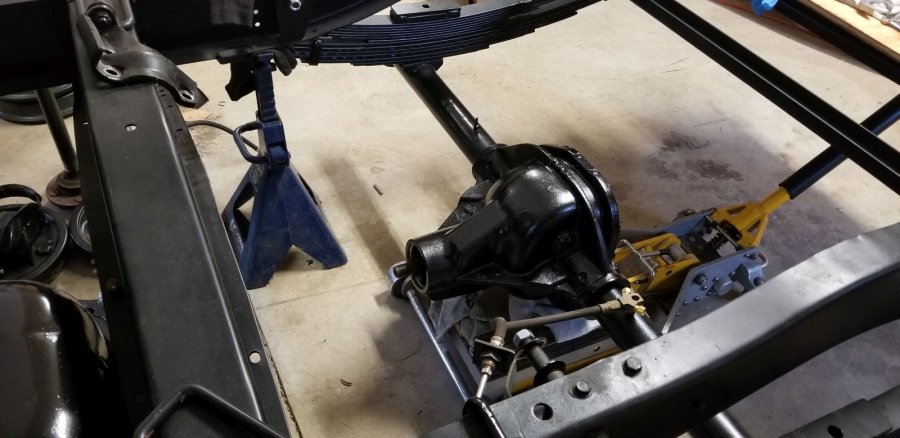
51 B3B build thread - after all these years
bkahler replied to bkahler's topic in Mopar Flathead Truck Forum
I got the final color coat on the axle housing yesterday and today I rolled it under the truck. With luck tomorrow I'll get it fastened to the leaf springs. After that it'll be new axle bearings and seals, pinion seal and yoke and then the brakes. I'm really hoping I can have it setting on it's rear wheels by the end of the weekend Brad
-
Vic's Dodge Garage is also a site supporter. Good selection of parts and re-pops

