

Adam H P15 D30
-
Posts
1,322 -
Joined
-
Last visited
-
Days Won
14
Everything posted by Adam H P15 D30
-
I thought about that also. The steel I would have used for the runners was almost mirror like. An unintended benefit of using the EMT tubing it the inside of the tube is rough, almost like a casting. Adam
-
25" intake and exhuast port sizes needed
Adam H P15 D30 replied to Ajgkirkwood's topic in P15-D24 Forum
Funny, my 230's ports were all 1.25. I'll remeasure when I get back into town. The gaskets were larger and if I didn't have a freshly rebuilt engine I would have matched the portsto the gaskets also. The headers I used were the small primary tubed SBC headers, I think 1 5/8 and they were plenty big for my 230 Adam -
Me too
-
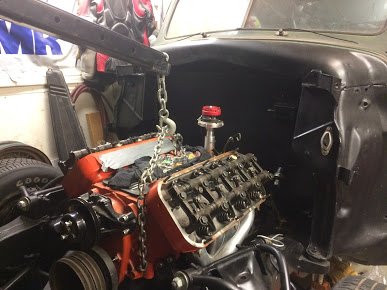
still have about 8 inches to go before it hits the hood.
-
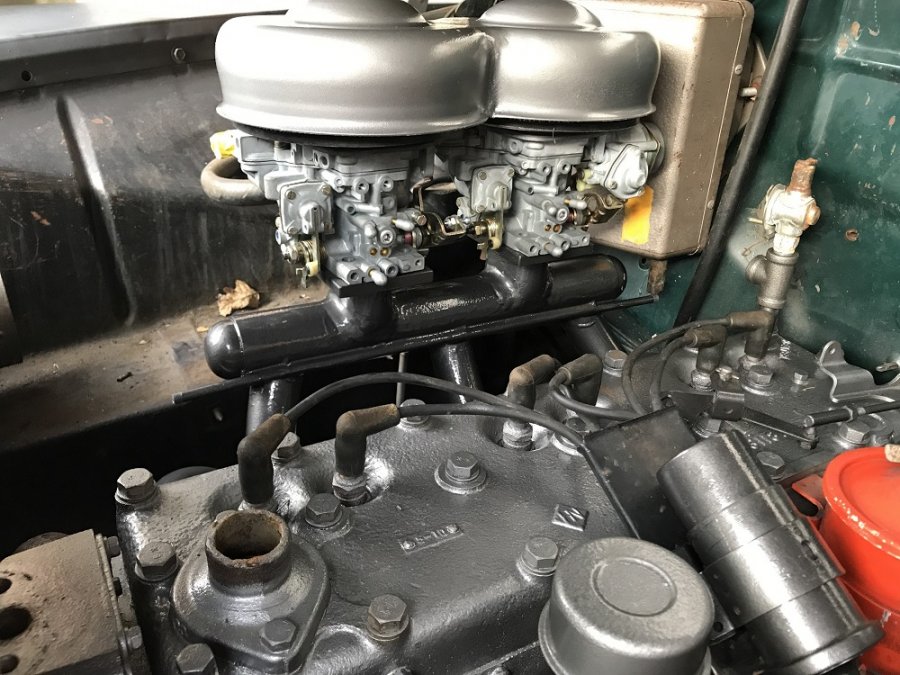
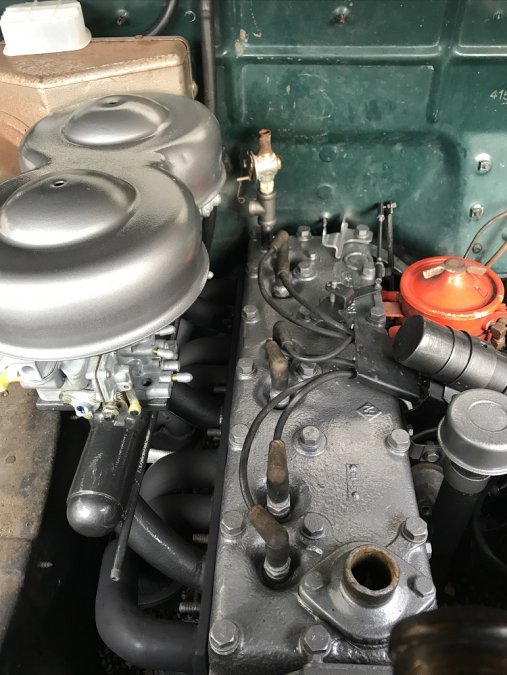
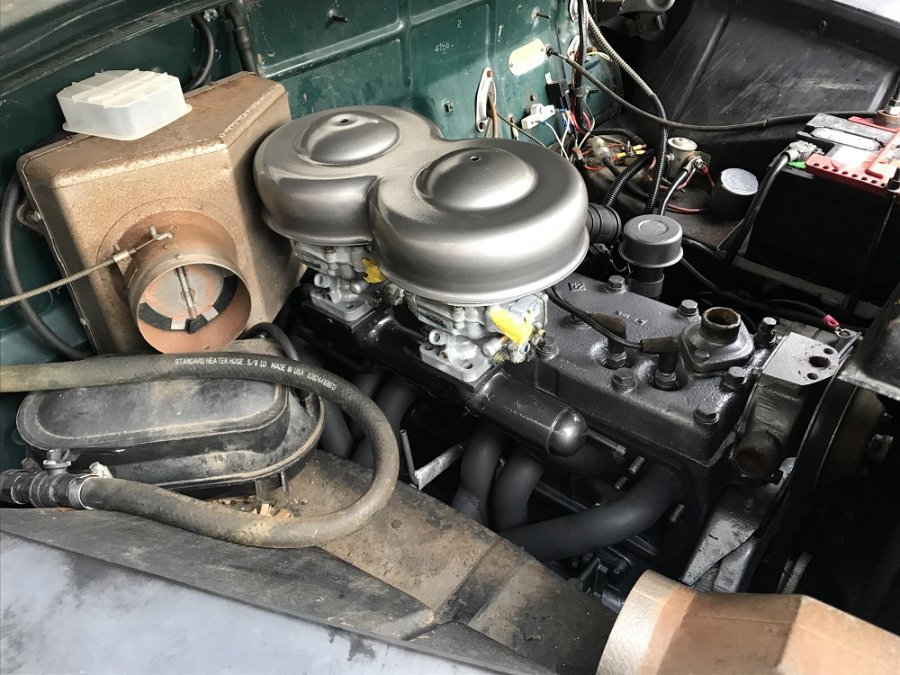
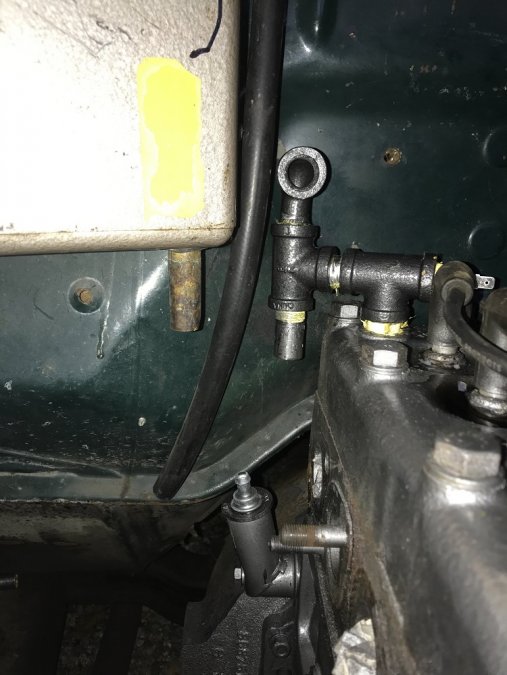
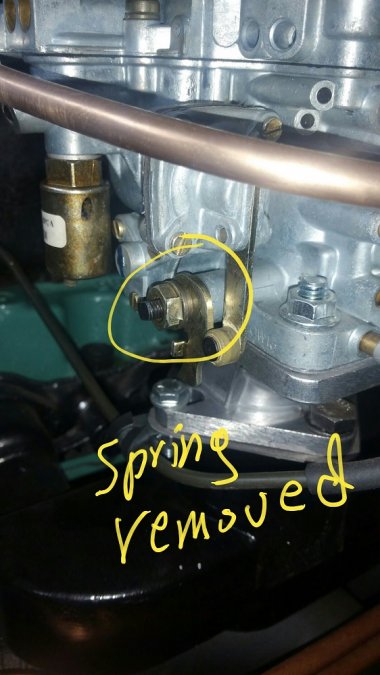
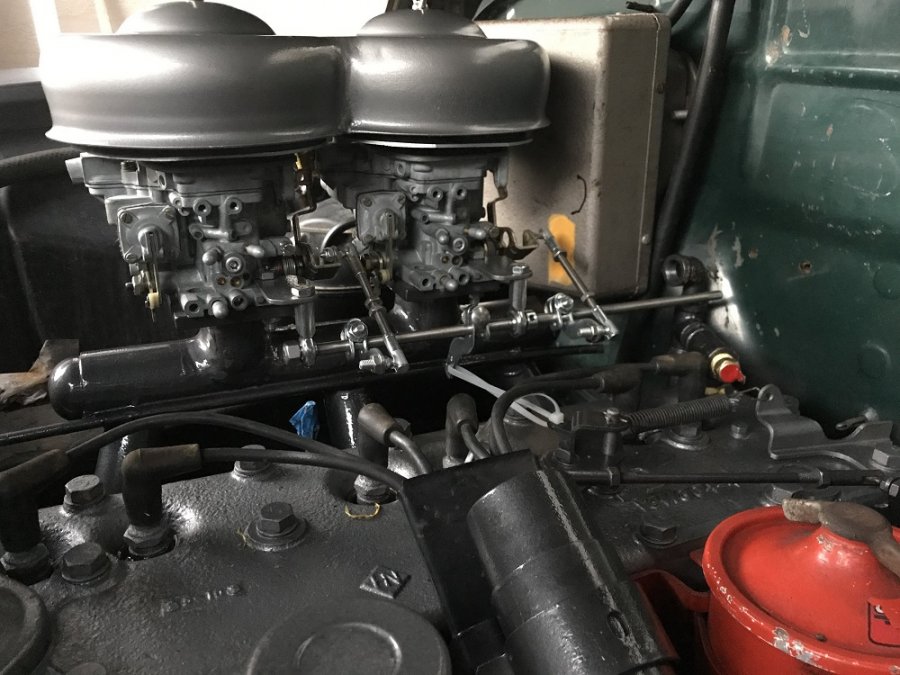
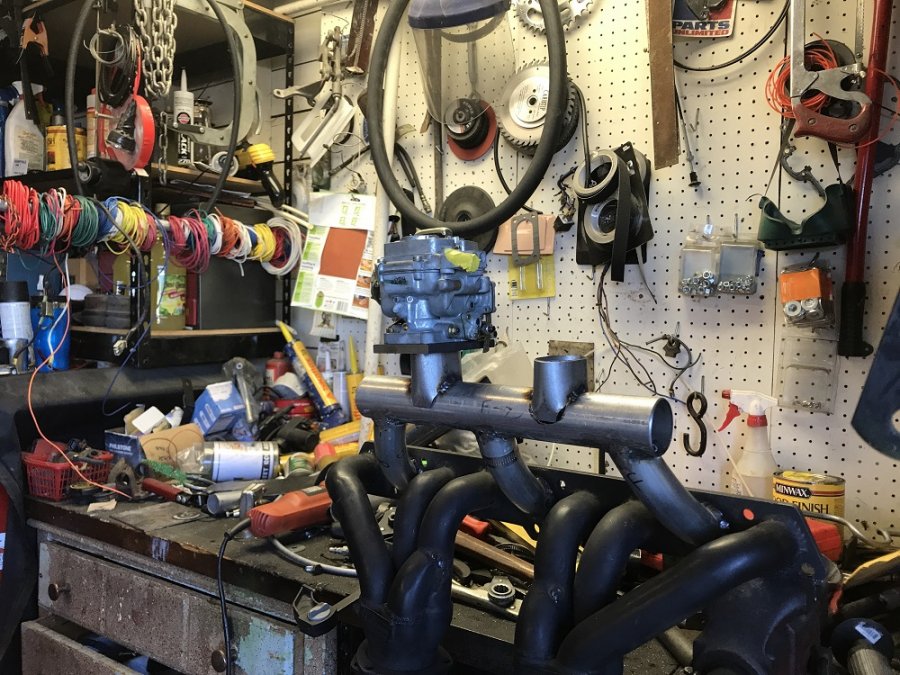
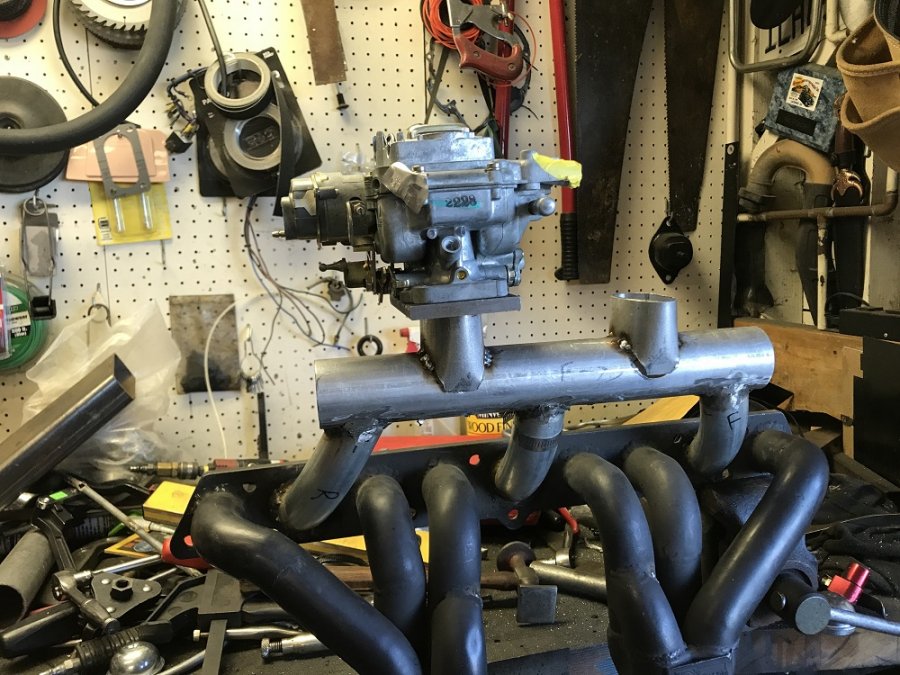
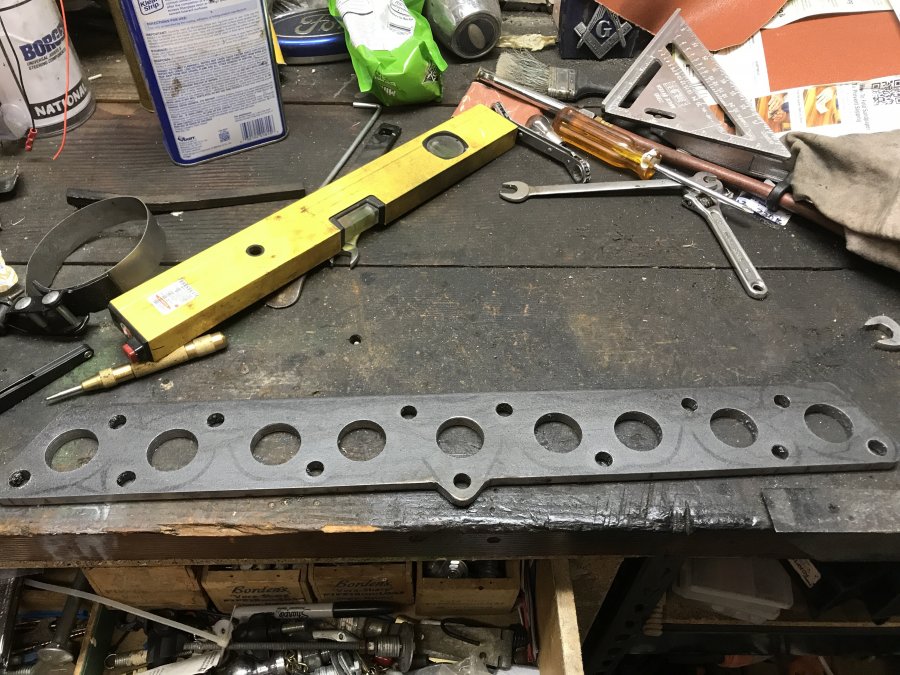
Don't forget to blend the intake holes on the flange to the runners. Wasn't sure how to cap the ends of the log part of the intake but I was sure I didn't want to just put flat plates on. Found front wheel bearing caps for a Volare fit nicely and add a little rounded touch to the project. Also added a hot water tube to the outside of the intake to keep it warm. Here is the 5th or so test fit after I painted it. You can see the choke hitting the heater box I also ordered Langdon's air cleaners and throttle linkage but do to me placing the carbs too close together they didn't fit, another mistake but after thinking it through I cut and welded the tops together and finish painted them the hammertone silver I painted the engine. The intake is painted a darker cast iron hammertone along with the breather tube for some contrast. The ugly heater valve is next. Added a new fuel line Next is the manifold and heater hose plumbing. Also, my PCV modification... Removing this spring is a must or you will have a super stiff throttle. I lifted this image from the net.. Finally installed with the throttle linkage, pedal feels nice and smooth. The red thing in my rear heater hose connection is my cooling fan switch. I ordered some hoses from NAPA and had to leave it here while I travel for work the next 2 weeks. Hopefully be running by the end of the year...

-
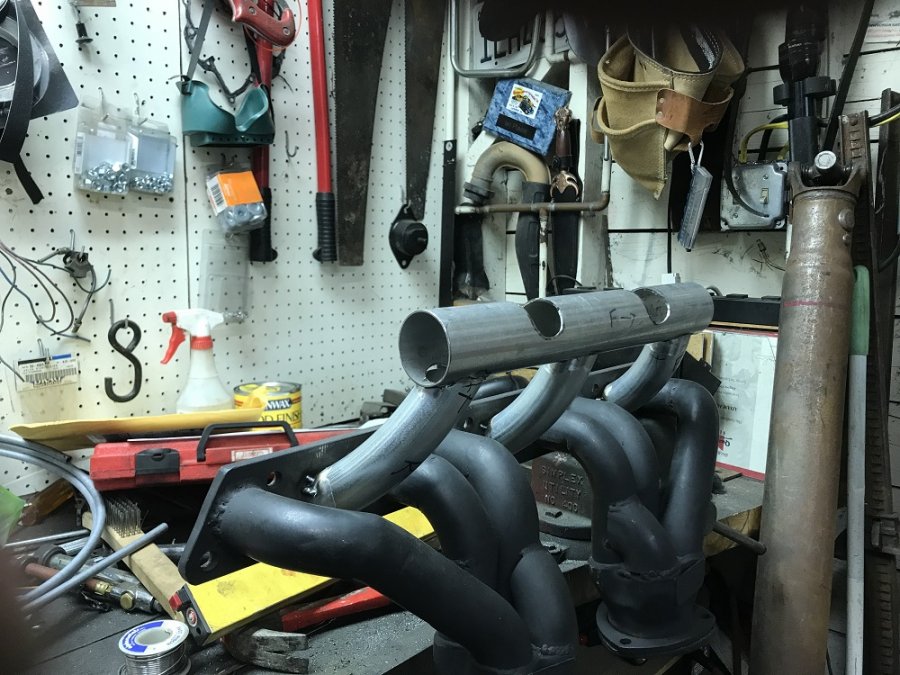
Intake time.... Couple of dilemmas here, my 49 has a heater box hanging on the firewall and I wanted to center the 2 carbs between the 3 intake ports as best as I could. Some careful measuring here but I did make a couple of boo boo's. First, I underestimated how bulky these Weber carbs were going to be so I goofed a little on the spacing. Second I mis-measured on the back carb and got too close to the heater box. The results were choke removal on both carbs to fit. Oh well, I live in CA so it will be fine... What to use for intake runners? I didn't want to use standard bends but I wanted a gradual bend from the intake log to the port, off to Home Depot I go. I found 90 degree bends in the EMT section that will fit the bill perfectly. Now to clear the heater box, remain symmetrical and be able to center the carbs between the ports I had to lean the outer intake runners toward the middle a little Adding the horizontal part of the intake Risers for the Weber carbs
-
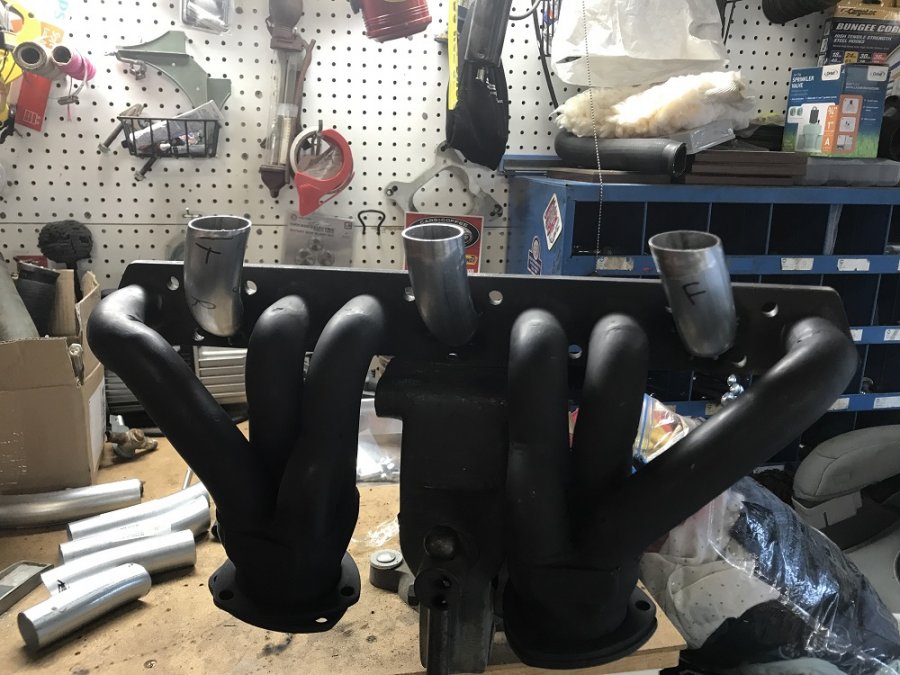
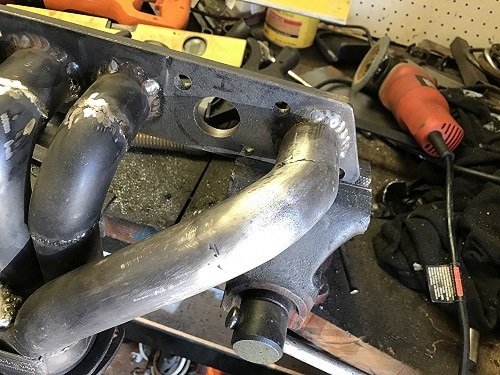
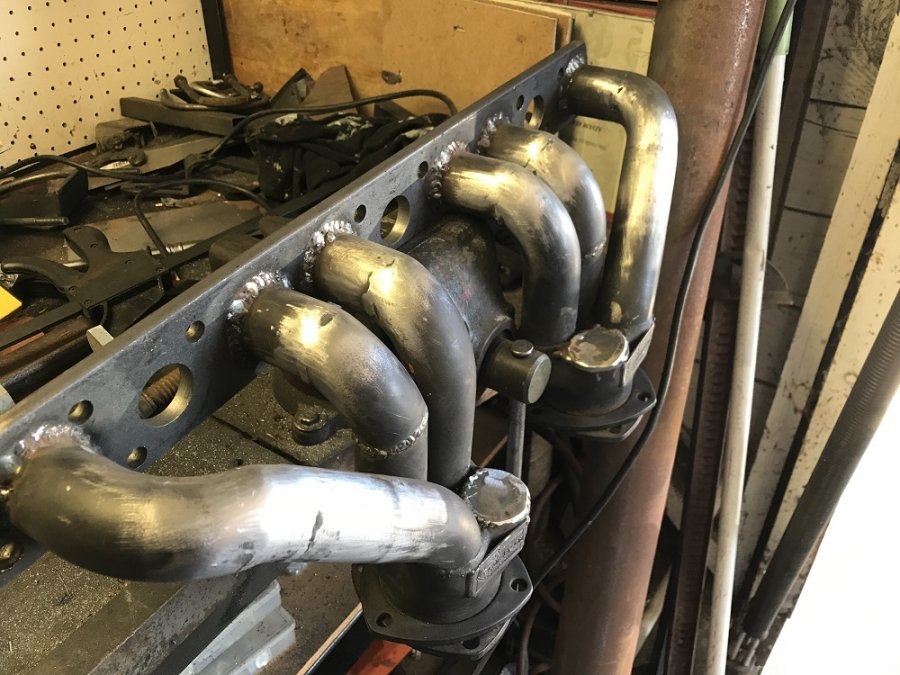
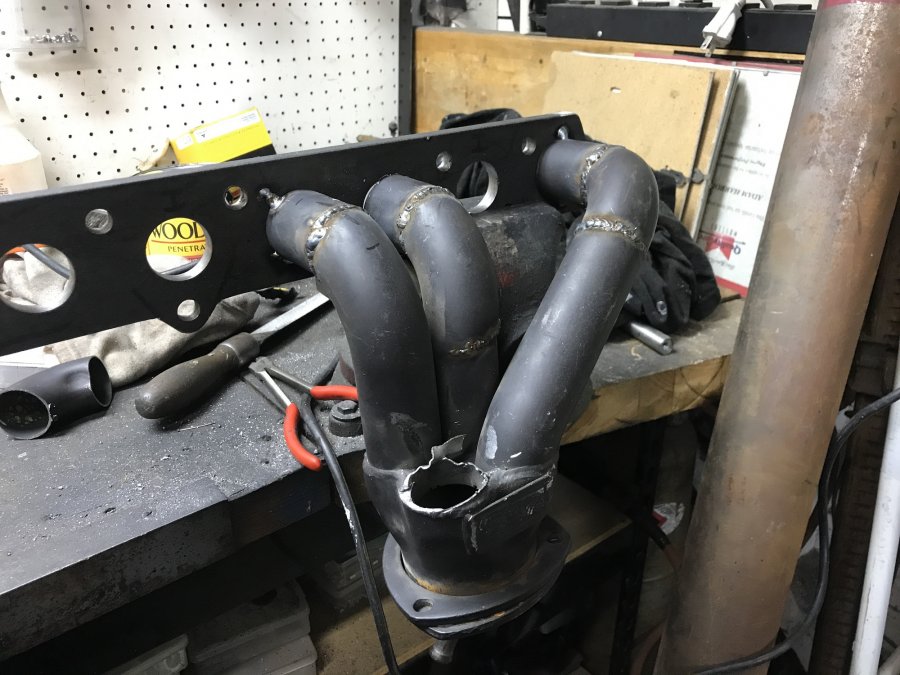
I chose to finish the headers with a hand file. My OCD is showing... I didn't like the caps I welded over the removed 4th exhaust tubes so I made some covers. Warpage can be a problem so I had to bend it back a little. (pitfall)
-
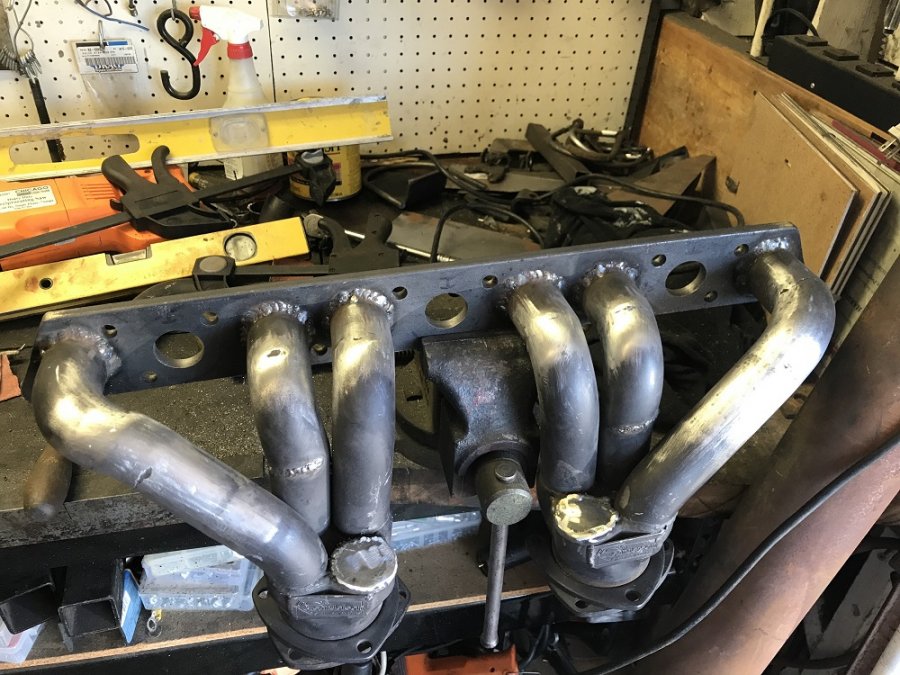
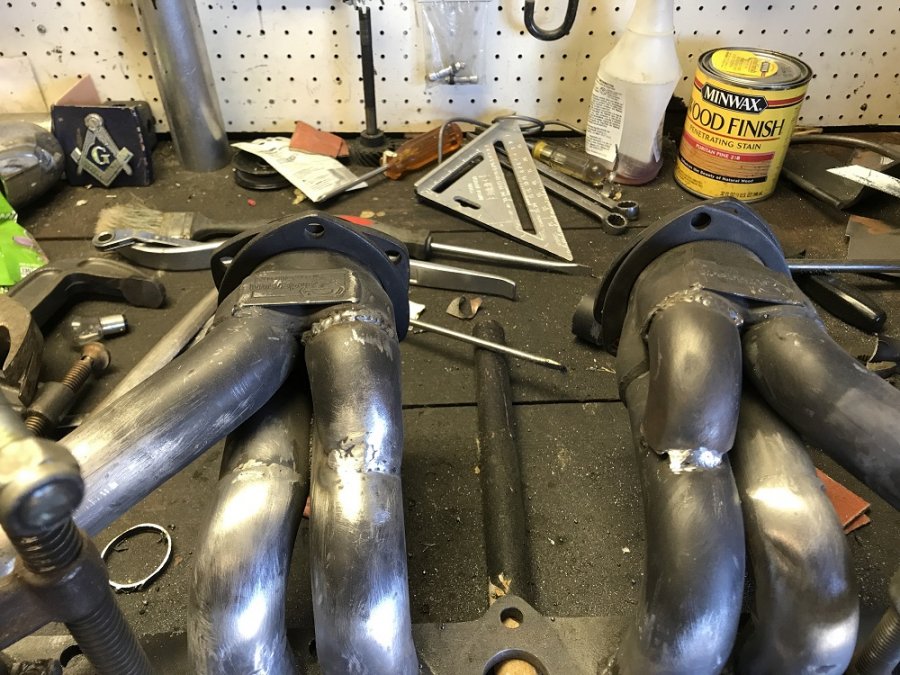
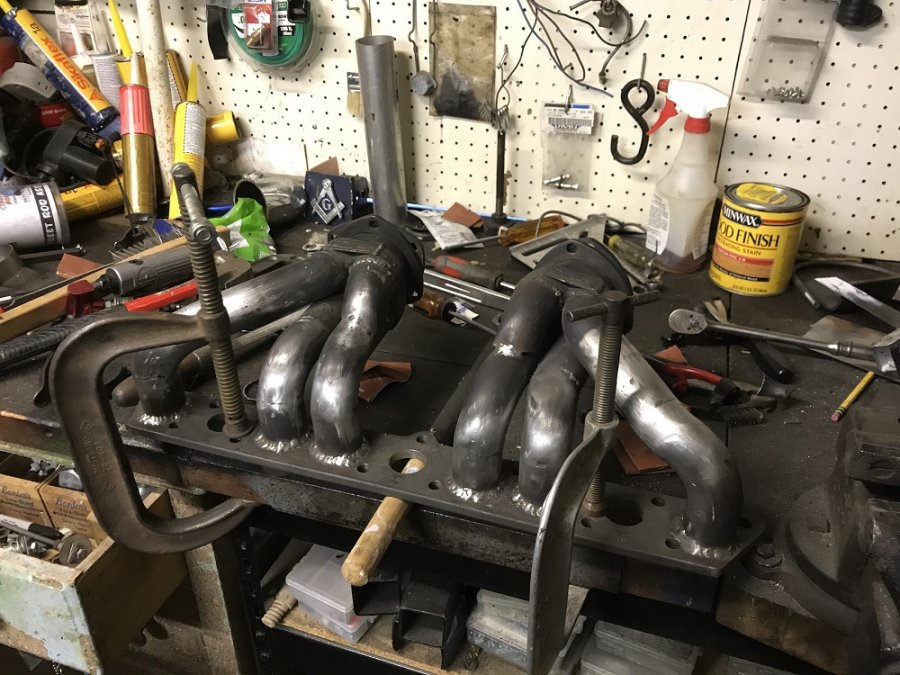
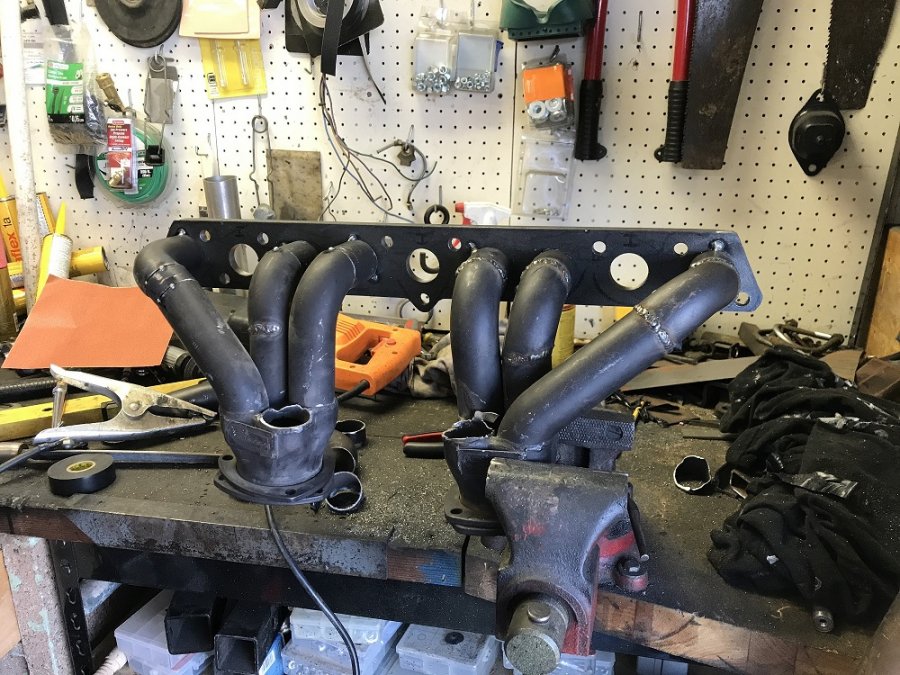
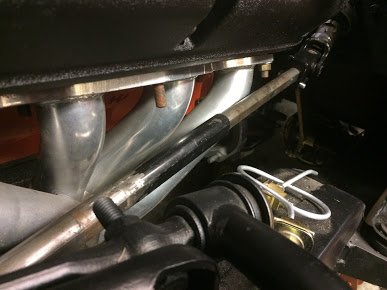
Next would be to find a set of donor headers to cut up, in my case it was SBC headers. Cut, weld, modify and start tacking them to the flange. Best to get both tacked on and fit to the engine before final welding. I wanted to be able to clear the oil pump and fuel pump with room to spare. Finished welded the headers to the flange, ground and dressed the welds.

-
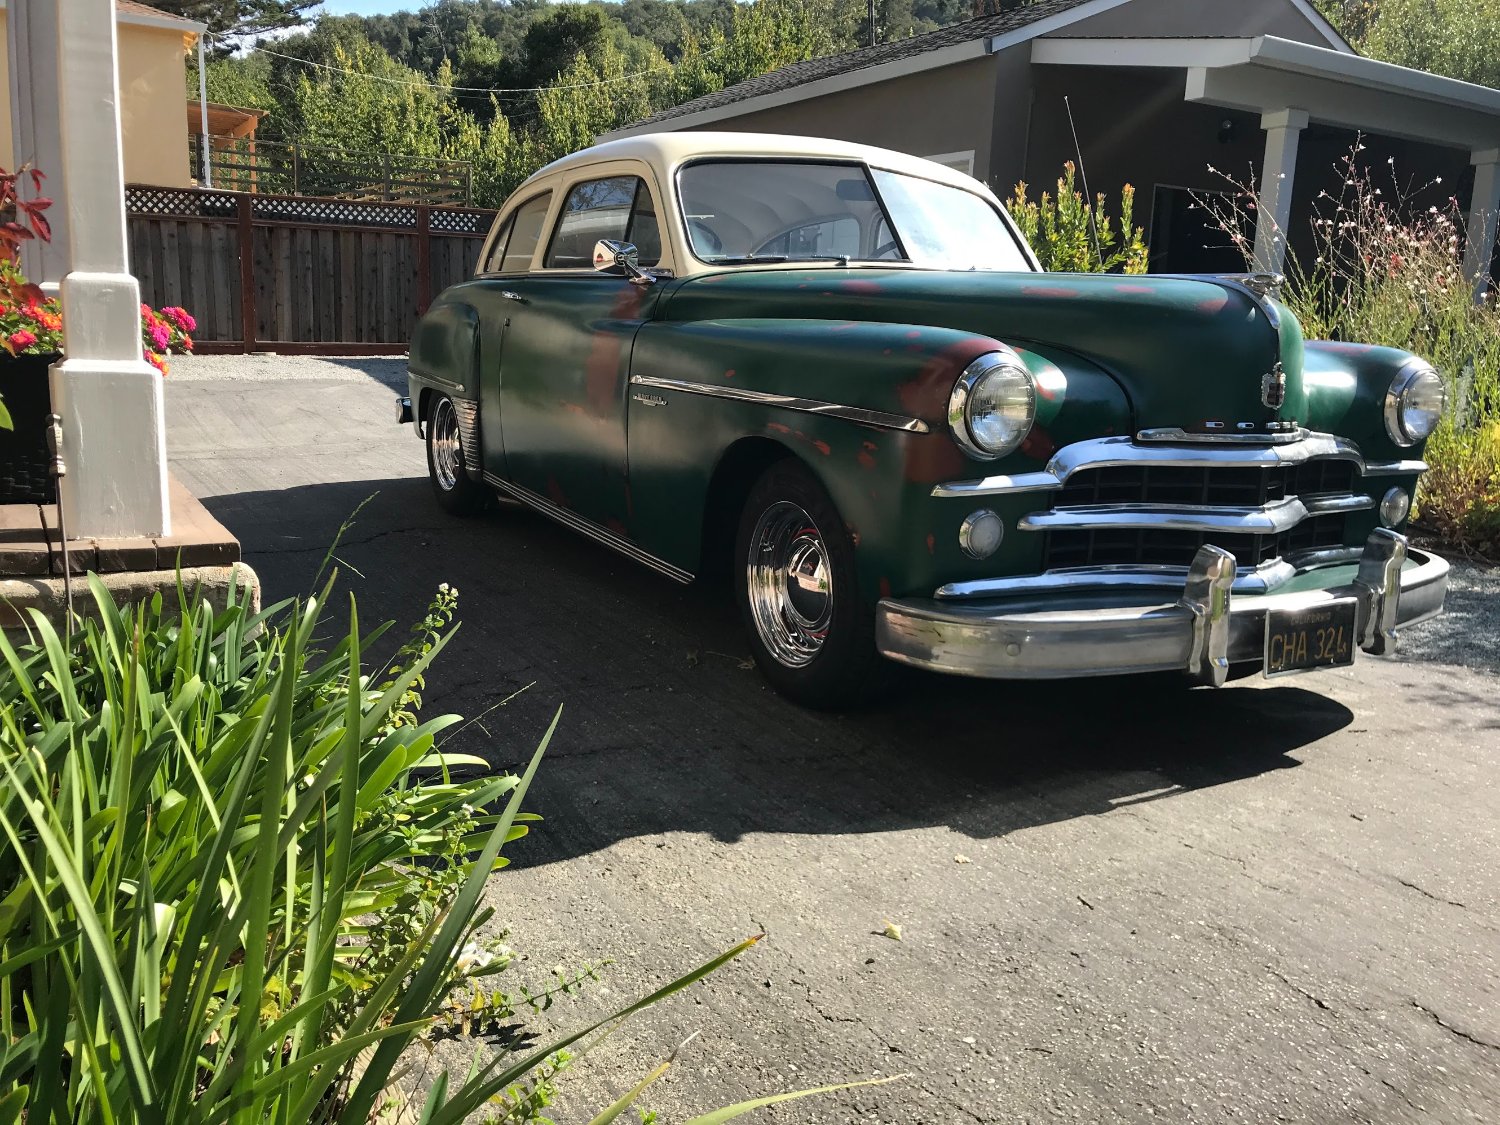
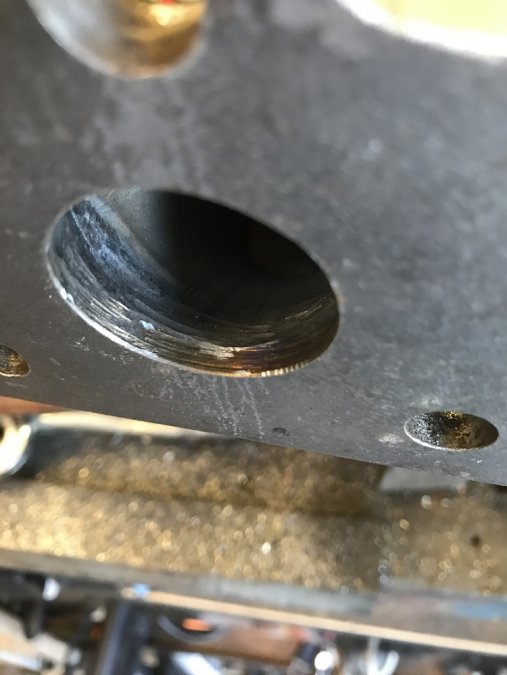
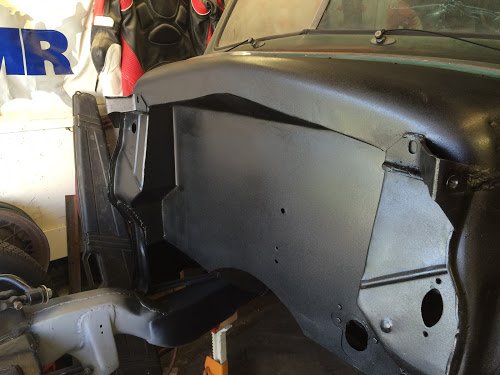
Hello group - Thought I would post some pictures of a project I've been working on with my 49 Dodge. Looking at some old spare parts I had hanging around the garage and decided to make use of some of them. Initially I was planning to make some headers for my 230 using an old set of SB Chevy Sanderson headers I've had for a while. Then I decided to make a header / intake combo with a Rochester 2bbl I had lying around. As all projects seem to go I decided multiple carbs was the way to go for better fuel distribution. Thinking through this further, I wanted to use Tom Langdon's Weber 32's as my carbs of choice. Hopefully I can share (remember) all the things I did correctly, pitfalls I encountered, and mistakes I made (there were a few). First was to cut a plate to act as a flange, I chose 3/8" steel. Note: Purchase a good holesaw for this and use a drill press.
-
Yes, I installed the new exhaust and muffler when I still had the OE manifold. I just finished fabbing the new intake and exhaust so I haven't run it yet, I'll follow up in a few weeks when I get back on it. Maybe I'll do a thread with some of the build pictures?
-
Oh and the exhaust sounded pretty good through the mustang muffler with the stock manifold. Just an FYI, the exhaust ports are 1.25 diameter. I built a log type intake with 2 Langdon Carter/Weber 32 carbs.
-
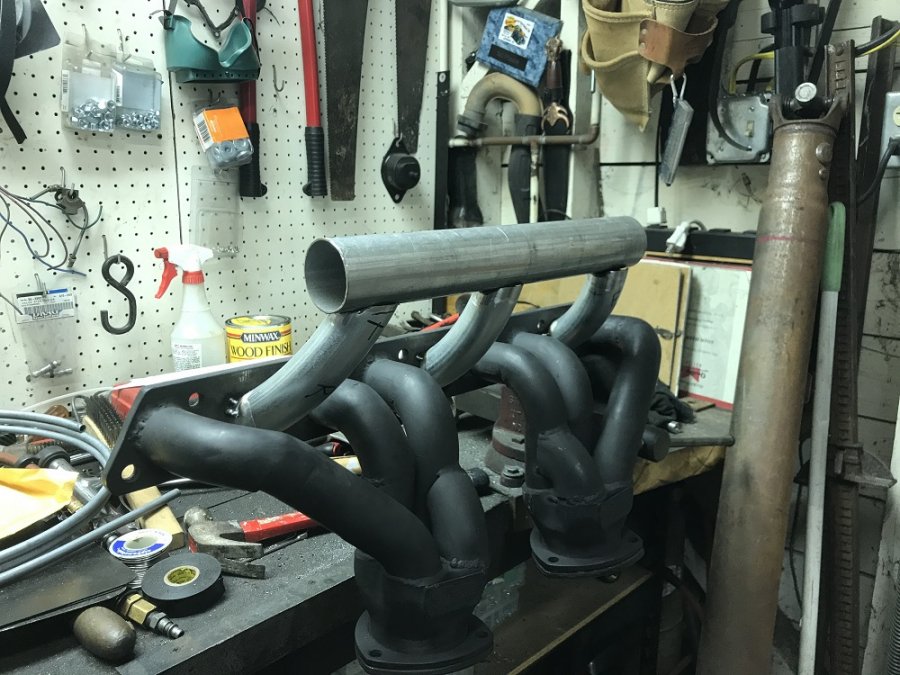
I used 1.75 primary tubes and 3" collectors on the ones I built. They will go into a single 2.25 exhaust through a Mustang GT muffler exiting in front of the right rear tire. Haven't started the car yet so I can't tell you how it sounds yet. SBC Headers and muffler I had.
-
Dad put a Volare clip in his 47 Ford. It was a nice, compact, clean install and it rides / handles very well. The adjustable torsion bars are a big plus.
-
I would just put an alternator on it and save yourself the grief, you're in it this far Starter doesn't know the difference and will last a long time Just replace the flasher
-
BBQ paint on the exhaust
-
The Mopar Flathead 6 and other makes of straight 6's suffer a major flaw when it comes to fuel distribution and exhaust. With the single carb in the middle, the center 2 cylinders receive a lot of fuel while the outer cylinders receive less. The fact that 2 carbs are placed evenly between the 3 intake ports is why many see an improvement in performance and fuel economy. Looking at a stock exhaust manifold speaks for itself. The farthest cylinders from the exit suffer the most. Any way to minimize that distance will help. FWIW, Adam
-
I used the Fatman narrow control arms on my clip. Tucks them right under
-
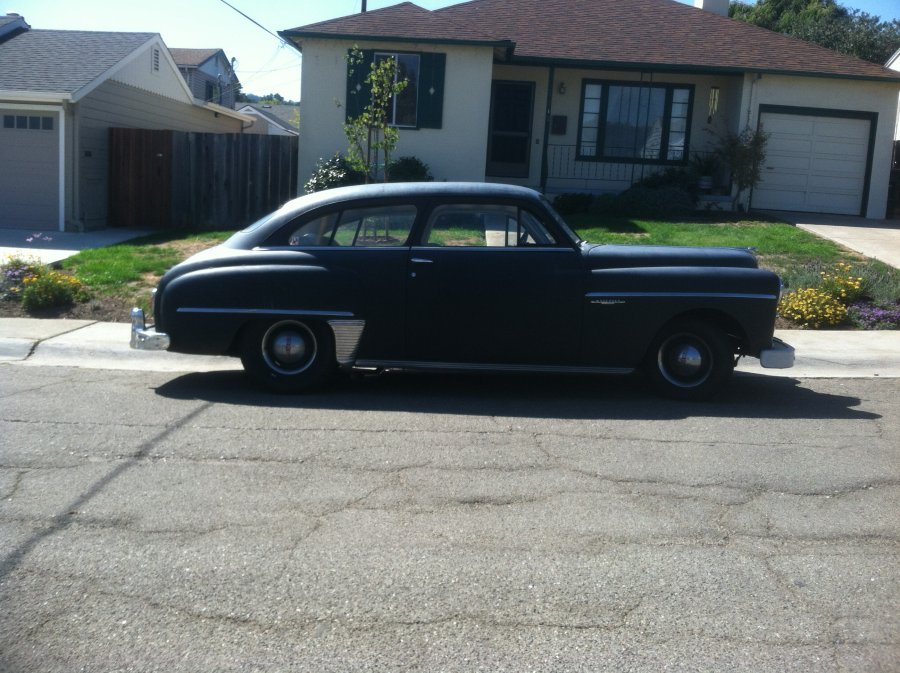
Not very fast at the moment because I always seem to take it apart... Decided to make it one color and maybe put some sort of interior in it, wife insists. The few times I have driven it and stood on it, went pretty good. It handles very well but traction is sometimes an issue It's one of those filler projects that progresses between real projects. To the O.P. Point here is put what ever floats your boat in it. It's your car and you should only have to please yourself and nobody else. Take your time and do the best job you can and make it SAFE. If you find yourself cutting corners, take a break and walk away for a while. Sit down and think of a plan and stick to it as best as you can. Always remember, there only needs to be 1 pristine original example of every car, the rest can be hotrodded! Adam
-
I agree but each has it's advantages, that's why I drive this almost daily... Has that mohair smell and sound only a Flathead can make... But when I want to go fast.......
-
Here's mine with a 71 Firebird clip. Trick is to graft it and finish it in a way that is both strong and looks almost factory. I've seen some really scary looking clip jobs. Besides what was already stated, the clip doesn't taper as much as the original frame giving me more room for exhaust and the steering box is completely out of the way. BTW I hate rack & pinion steering so the clip was a no brainer over the MII . Adam
-
My 48 Dodge Interior Pics - & color question
Adam H P15 D30 replied to Bryan's topic in P15-D24 Forum
I can't believe the shape that interior is in. Was the car vacuum packed and stored? -
Ok, I will never claim to be as knowledgeable as Tim Kingsbury or George Asche but I have built a few engines in my short time on this planet.... Rest assured, going with Tim's suggestions is always a good idea. I take no offense to anyone telling me these mods aren't necessary, and also I don't want to get into some of the personal entanglements I see more and more here and other places, so no problems here. To be clear, a factory, stock, out of the book, no changes or deviations rebuild is just fine and will net you many, many trouble free miles. But where's the fun in that? Yes. for several reasons. First the piston stays at TDC a little longer, there are pros and cons to this but so much has been written about this, the information is out there. Secondly the side loading on the cylinder wall is decreased so a shorter, lighter piston can be used. That in conjunction with a modern 3 ring pack will reduce the friction on the cylinder walls freeing up some power and reducing heat and wear. How much? who the hell knows. We all read how the 230 crank and rods are the way to go and in "demand" I would think a 218 rod set would be pretty easy to source. Let's say a set of cast pistons built to spec is ~$600.00, a set of stockers is ~$200.00 (if available), so for a few hundred more, you can spec it exactly how you want it, maybe even have the piston go to the top of the bore. If a few hundred bucks breaks the rebuild budget, time to look for a new hobby or do a quickie ring, bearing and hone and roll on. Besides there is nothing "cutting edge" about using long rods, or our engines in general. Also, I would not build an engine any different for a vehicle used on weekends or a daily driver. Occasional use isn't a recipe for cutting corners or compromise. Build it correctly and how you want it the first time. Funny there is never enough money or time to do it the way you want but there is always enough to do it over. I've seen people here spend countless $$$$ for that elusive 10% gain in HP or TQ. Multiple carbs, split exhaust manifolds, crankshafts and rods, milling heads, blocks, cams but if it's getting a full rebuild why not start with the basics, stroke to rod ratios, max compression height, low friction rings, smaller, lighter, better pistons? Inexpensive things to do during the machining stage, expensive to do later. My opinions are worth what you paid for them. FWIW, Adam
-
Since you are in it this far (and you asked) I would have a set of modern 3 ring pistons made and while you're at it find a set of longer 218 rods. Then recalculate your total height to 0 deck. Though you have no plans to rev it higher than 4000 rpm, the long stroke makes the piston speeds very high in our old engines, coupling that with 4 rings on our OE pistons.... Also you get the advantage of a longer rod and moving the wrist pin higher inside the piston. Is all this necessary, probably not. Will our old engines run a very long time without modifications, you betcha. But since you are there anyway spending thousands on a proper rebuild, what's an extra few hundred bucks to improve the design a little? If I had to go through my 230, I would spend the money on pistons and longer rods first. Adam
-
For 99% of us cross drilling a crank is a solution to a problem that doesn't exist. These engines will take quite a beating in stock form and I don't hear of a lot of lower end problems caused by oiling. Chamfer the existing oil holes in the crank, radius it correctly and maybe shim the pressure relief spring (maybe not) motor on... Adam EDIT: Full grooved main bearings might not last long as you loose the hydrodynamic wedge.
-
A good caliper is all you need to measure the bore then the piston. A little subtraction and you have your clearance. Calipers or better yet digital calipers are not too expensive and should be a part of your basic tools. Adam


