
.jpg.56ce293a459a79127a8bac606eb18411.jpg)
ccudahy
-
Posts
132 -
Joined
-
Last visited
Content Type
Links Directory
Profiles
Articles
Forums
Downloads
Store
Gallery
Blogs
Events
Everything posted by ccudahy
-
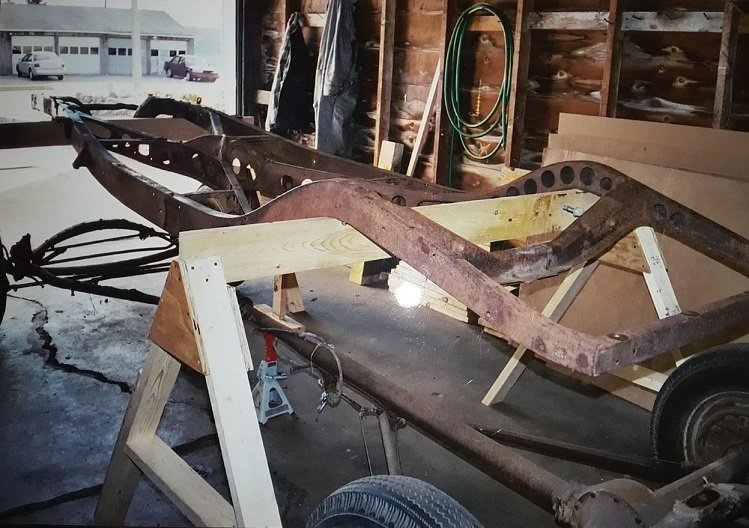
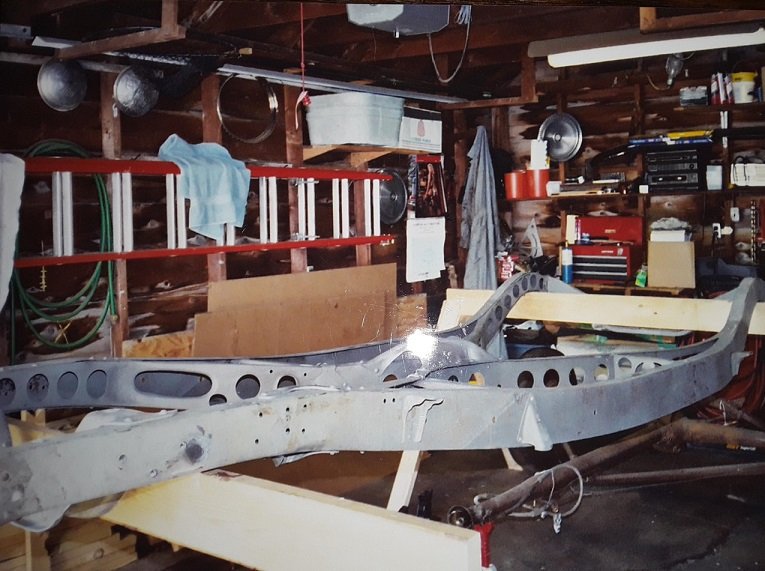
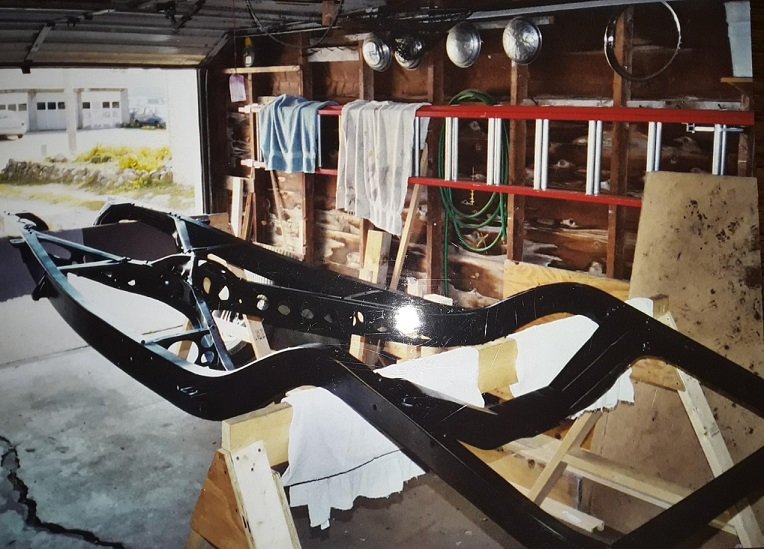
If you really want to get your frame clean. Finish take everything off of it and get it acid dipped and epoxy coated. I did that 16 year ago with a frame. Below are the results. The whole process cost probably what a nice pressure washer would, and no one got hurt. The frame stripped for acid dipping. The frame after acid dipping, home for repairs. The frame after being epoxy coated (E-Coat).
-
Hernando, bolts through the hole! For your '49 De Soto (2nd Series)

-
From what I have on the forum here as long as they are not carbon core on a points ignition you will be fine.
-
Ton's Performance has a nice selection of spark plug wires you can buy by the foot, if you are willing to make your own wires. https://tonsperformance.com/
-
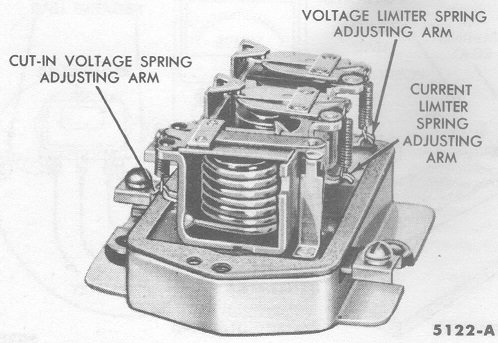
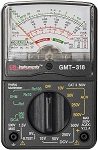
My Plymouth was doing very similar thing. Is your voltage regulator a new replacement or original? I just had my generator rebuilt and found out from the machinist who did the work that the replacement regulators are not adjust properly out of the box. The output voltage might be on the low side and/or the the "kick in and out" amperage is set too high/low respectively. The gaps on the points in the voltage regulator need to be adjusted to corrects these issues. It also need to be at operating temperature and the metal cover need to be on to get accurate measurements. This happen to be my case. The output voltage when cold was 7.8 volts, when warm was only 6.6-6.8 volts and the generator did not "kicked in" until the draws was over 12 amps. He adjusted it so the output voltage is now around 7.6 volts and "kicks in" around 1.0-2.0 amps (I think can't quite remember the new amperage setting). He even had it set up on the test stand with an NOS ammeter and load tester to show that everything works good.
-
39 TF-37...So It Begins (Lots of Pictures)
ccudahy replied to TooManyIrons's topic in Mopar Flathead Truck Forum
I sent my info in for the build sheet in September of '20. Thought it got lost in the mail, sent it again in December of '20 still have not got anything back. @billrigsbythanks for sharing the email. Now I know I just have to be patient and wait. -
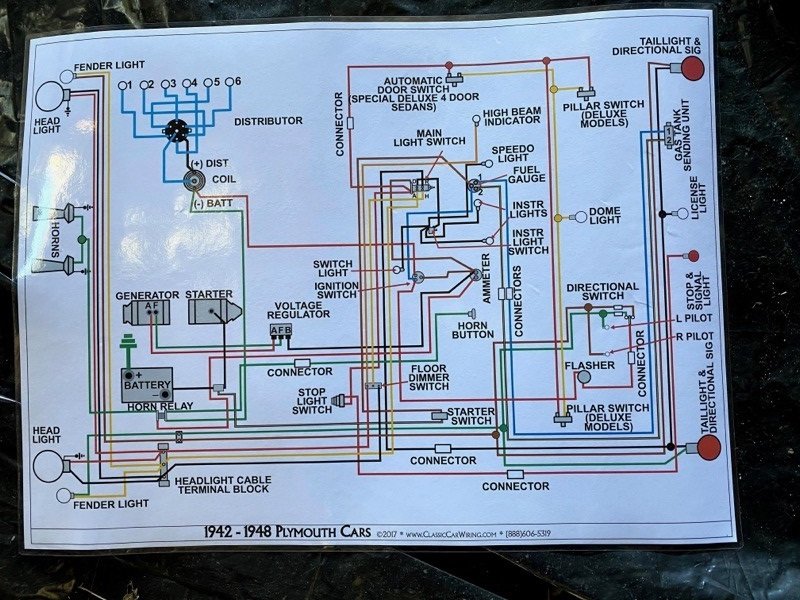
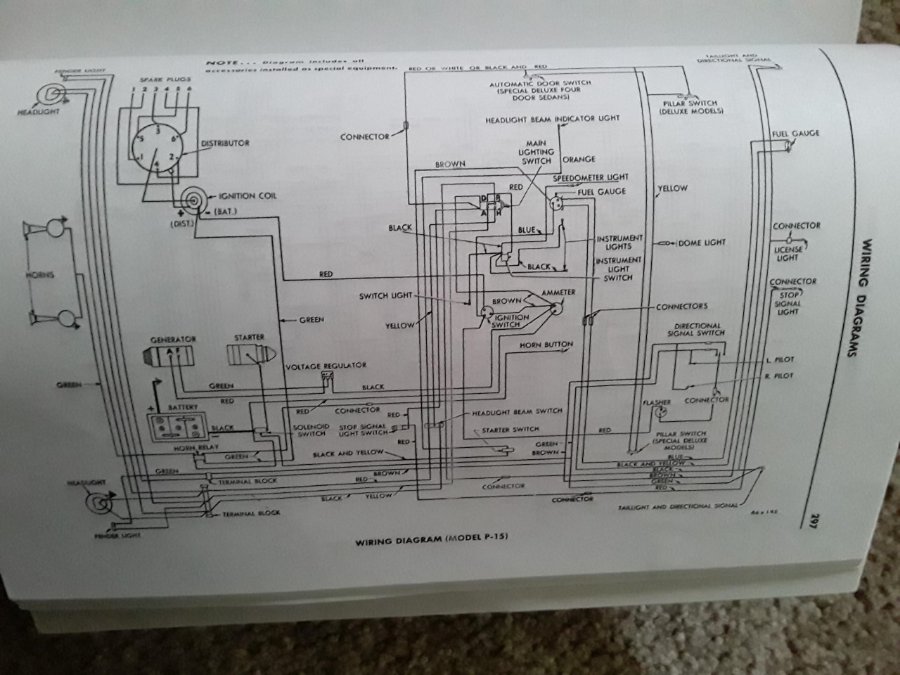
I also purchased a Classic Car Wiring diagram, large format/laminated. Yes, the picture on the site is just an example, they don't want you copying them for free as @James_Douglas has stated. Very nice diagram, would recommend. Here is a picture of mine, Classic Car Wiring vs. Factory diagram, for my Plymouth. CLASSIC CAR WIRING DIAGRAM FACTORY SHOP MANUAL DIAGRAM
-
keithb7's videos might help show you how the steering box comes apart and goes together.
-
When people look at my car, you don't know how many times I get asked "what is that lens/light/glass for?" Got that name embedded for life!...?
-
Ebay! https://www.ebay.com/itm/CLEAR-GLASS-LICENSE-PLATE-LIGHT-LENS-1942-48-PLYMOUTH-CARS-1942-1946-1947-1948-/124545076828
-
Clutch assy selection for 1948 Plymouth Business Coupe
ccudahy replied to dartgt's topic in P15-D24 Forum
Please, if you can, post details and any info you come crossed for your project installing the OD. I am interested doing the same thing to my '47. It would be nice to see what I maybe getting myself into. P.S. - Beautiful car! -
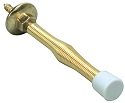
I would agree with the black background and white or cream letters. I was looking on Ebay and they were that way. I was trying to see if they had any picture from the back down the threaded hole. I was thinking...if the knobs are hollow, and the embossed disk is visible, a drop or two of clear strong glue (ex. Super or Loctite Gel) down the hole and place the knob horizontal so the drops run across the seam and keep that way until cured should keep the disks from turning. Just to get some glue in the seam will hold it.
-
Another thing the machinist told me and its in the books, was that everything also need to be checked when the circuits warm up. That was when the readings really tanked, it was on the low side to start but drop to doing nothing after about 1 min. on the test bench running. The units probable meets there physical tolerances, but they don't do a dynamic test so little demand. Throw it in the box, ship it, and the customer can deal with it.
-
I had my generator rebuilt this winter and brought the machinist a Standard Ignitions regulator, I purchased. He also thought it was a quality unit. He also had to adjust the output voltage and the "kick in" amperage for 6v 35 amp. The setting are very low out of the box.
-
Just thinking out loud!?... Could the running rough issues be caused by a bad manifold/carb gasket, loose carb at base, or loose carb at the halves? With all the jostling around created a vacuum leak putting the air cleaner on. Then the second time putting air cleaner back got everything set back to a better position? Would it not hurt to check if everything from the manifold up is tight? Had a Slant Six went you put the Air Filter on you could change the setting the carb halves were warped so bad.
-
For the recessed letters, you can also use water based hobby acrylic paint found at any department store for usually under $2 for a small container. Paint with a brush or even wipe with a finger across the depressions. Wipe the excess off with a damp cloth. Repeat as needed to get fuller coverage in the recesses. It won't harm black finish and will get nice crisp lines. Let dry really well, and take another slightly damp cloth to wipe any haze that might occur off. Kinda like grouting tile.
-
If you have a analog voltmeter and a spring door stop. You can test for the polarity of your coil. Doesn't matter what the voltages are. Take the Spring Door Stop apart so you have just the Spring. Take any ONE of the Spark Plug Wires off. Place the Spring in the Spark Plug Wire Boot an make sure it makes contact with the Connector. Place other end of the Spring on the Spark Plug. Take the Voltmeter and put it on the HIGHEST voltage stetting. Place the Negative Lead of the voltmeter in between the coils or clipped to the spring. Connect the Positive Lead to the engine or head. Turn the ignition on and try to start the engine. (If it doesn't start that's fine it will work.) If the needle on the meter goes Positive (the full sweep of the needle) the coil is hooked up correctly. If the needle on the meter goes Negative (doesn't move or pegs out on the stop) the coil wires need to be switched, and repeat. After this is done, make a note for next the coil needs replacing so you know which wire goes to which terminal. This is a modern version of the old pencil and spark plug wire trick. Hold a spark wire with the connector exposed let it zap the pencil. If the flare fires away from the pencil the coil is right. If the flare is attracted to the spark plug wire the coil is backwards. Hope this helps.
-
Heat also can be used when cold is not cold enough. @keithb7 in the auto store machine shop, we used to take an oxyacetylene torch and warm the the cylinders bores of the block. Kept the sleeves in the freezer overnight, then put them in the snow bank by the machine shop door. Close to where we were working when it was time to use. When the cylinders would start to darken and just drop the sleeves into the bores. They would only do sleeving jobs in winter. We did a big Mercedes Diesel 6 cylinder that way, that was neat to witness. Usually for valve guides in heads a hydraulic press was used, the bottle jack type. Sometime those bores need to be reamed if the guides outside diameter were a slightly larger size. There are recommended tolerances on interference fits. Also, if the bores were distorted slightly from removal , galled, or a burr was rolled from taking out the old guides to clean them up. For older valve seat grinding equipment, a good name to search for is Sioux Valve Seat Grinders.
-
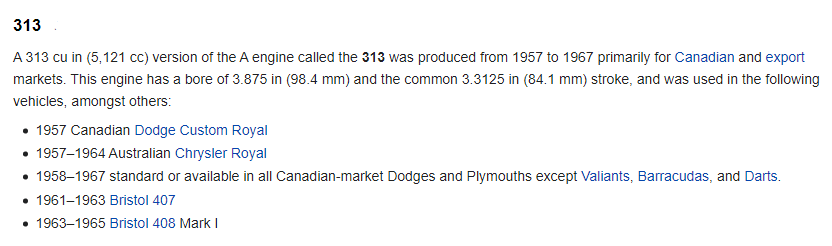
Here is a little info on the 313 cu. in. V8 : The 313 is considered in the A engine family. The A engines are mostly the polyspherical engines (277, 301, 303, 313, 318 poly, & 326). "The Chrysler A engine is a small-block V8 gasoline engine built by Chrysler with polyspherical combustion chambers. It was produced from 1956 until 1967, when it was replaced by the wedge-head LA engine. It is not related to the hemispherical-head Hemi engine of the same era."
-
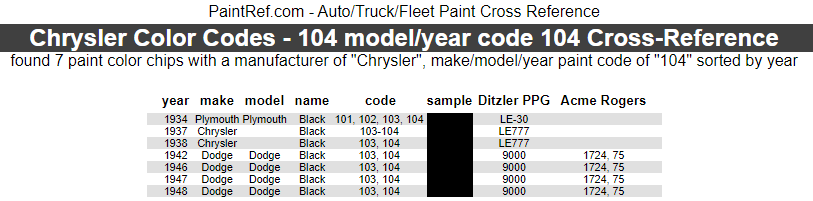
According to https://paintref.com/paintref/index.shtml website, there are 2 blacks for 1946. You will have to figure out if you are a 103 or 104 paint code, but here are the cross references. The 103 has a modern day equivalent.

- 1 reply
-
- 1
-

-
Glad to hear your getting some help with finding your color formula. That is really a nice color and I hope it all works out. Like you said @46DodgeDeluxe it will be worth the work to get it perfect it will really set that car apart from all the other, besides the A/C.
-
You can call PPG and they will get you an equivalent formula if you have a code number to work from. PPG Color library at 1-800-647-6050. When lacquer paint was being phased out we had to call all the time to get enamel equivalent formulas.
-
I did a search for 1954 Chrysler Colors, and came up with this site: http://paintref.com/paintref/index.shtml It had a list of colors and Ditzler/PPG numbers maybe this will help. P.S. - Nice car and good luck on your project.

-
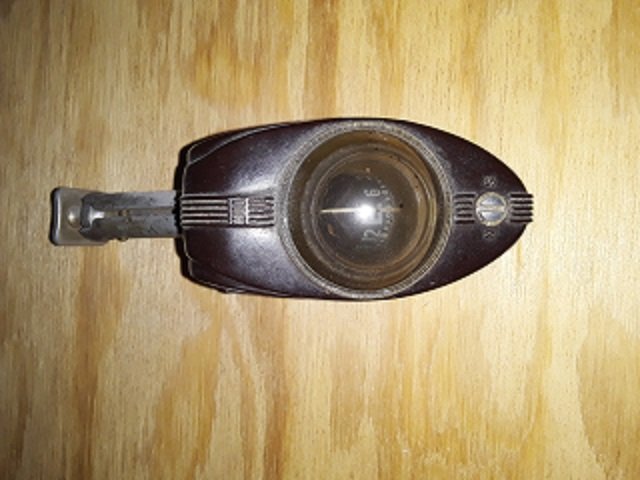
Swell sale fellas! I got my Hull Compass so cheap, it was almost free.? It came with the house, was in one of the work bench drawers. Always wonder what year it might been from. Now I got an idea.
-
Tasting oil no. When I was working at the automotive store, some of the guys that worked there, told me you didn't need an antifreeze tester. Dip your finger in the radiator, touch it to your tongue, if it was sweet it was good yet, it it was bitter time to change. I DON'T RECOMMEND THIS! Get a tester.
