

TravisL17
-
Posts
107 -
Joined
-
Last visited
-
Days Won
6
Content Type
Links Directory
Profiles
Articles
Forums
Downloads
Store
Gallery
Blogs
Events
Everything posted by TravisL17
-

Back Among The Living. Reborn ‘38 Plymouth Sedan
TravisL17 replied to keithb7's topic in P15-D24 Forum
Congrats on the successful rebuild. It's an incredibly rewarding experience. I'm happy for you! -
Looks like a Motorcraft carb to me.
-
Glad to hear your search is finally over! Sorry for not being able to help you out with a trailer. It's still loaded with marine engines, sitting in the pole barn.
-
Nice video and quick walk through on the install. I'd love to hear a follow-up on how it does on the highway.
-
As long as we're talking about strange advertisements, my wife found this somewhere on the internet. I thought it was too good to keep to myself. And it brings this thread back on topic! ? It made me think of the previous owner of my Meadowbrook. Decades ago he had a 50 Coronet that was giving him troubles to the point of absolute frustration so he ran it across some train tracks in revenge. It handled the abuse so well, it turned his attitude around and he fell in love with the car. He later sold the car and regretted it. Years went by and he always wanted another 50 Dodge. He eventually found, purchased and fixed up the Meadowbrook that I now own.

-
Engine Failed and Need Help With Bearing Identification
TravisL17 replied to TravisL17's topic in P15-D24 Forum
I realized today that I should have provided an update on this thread, so here it is. As of September 23 the Meadowbrook is back up and running. I've put a bit over 300 miles on it and so far so good. I've had a couple minor coolant leaks around the t-stat housing and upper rad hose, nothing that a bit of tightening didn't solve. I do have a core plug seeping that I will address, likely in the spring. At first I had some blue smoke in the exhaust when snapping the throttle and on acceleration. That has since cleared up with drive time allowing the rings to seat. I assume the rough hone finish and chrome rings made for slow seating. As far as measurents go, everything is outside of spec. Cylinder taper, out of round, ring end gaps, valve guide wear, and rod bearing clearance all outside of spec. I figure this will be a good test of how forgiving these engines are. After running a hone through the cylinders and cleaning up the deck I can say with certainty this engine had water in cylinders 3 and 4 at one point and was stuck. I figure it ran pretty decent before the failure why not do what guys once did in corner service stations. So I proceeded with installing new pistons (came with wrist pins and retainer clips), rings (chrome top ring, cast lower compression and 2 one piece oil rings) and rod bearings. Hone the cylinders and cleaned the block as best I could with the crank still in it. It has a pretty rough looking exhaust valve seat in cyl 3 from corrosion pits. So far I'm happy with the results. Power is up, idles smoother, and most importantly it's back on the road. I'm curious to see how long this "rebuild" lasts. In the mean time I can drive the car, get my truck road worthy and start planning an actual rebuild for the engine that was originally in the car. Also, kudos to Vintage Power Wagons. I ordered most of the parts from them. Excellent customer service. I had an issue with a part and they made it right, no questions asked. Top notch guys working there. -
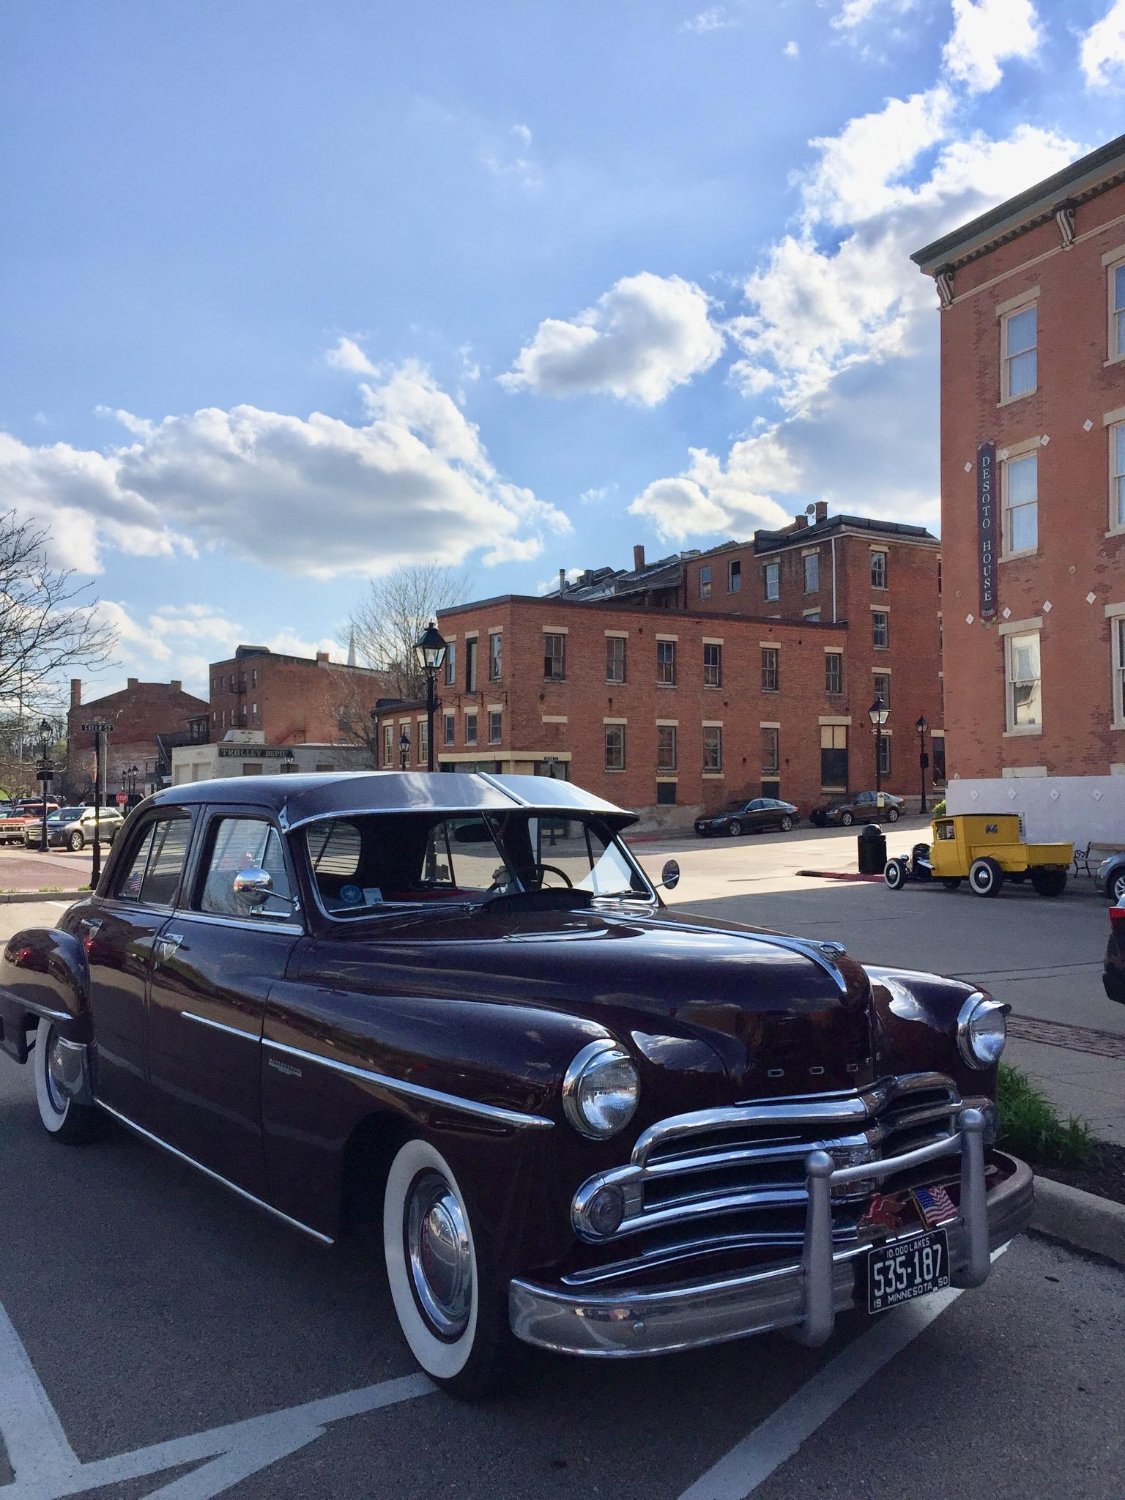
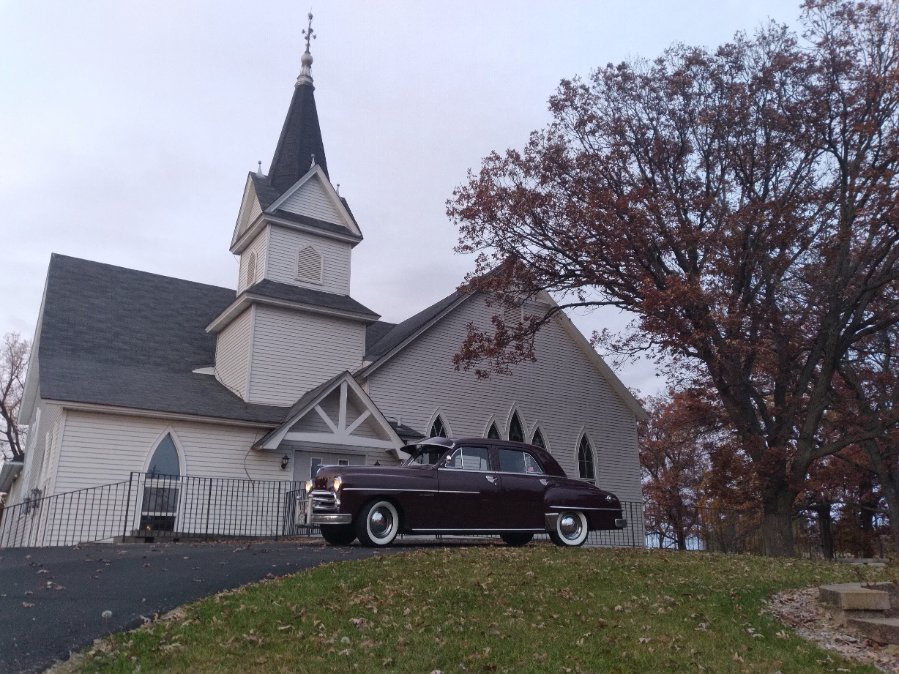
Out for an evening drive. Fall colors are about peaked here. It was a beautiful drive through the country with the fall colors, the setting sun, migrating birds flying in formation, fields all golden and ready for harvest. It was a bit chilly since the Meadowbrook doesn't have a heater. I love fall but I'm not ready to park it for the season.
-
My truck is crapping on it self.......ideas?
TravisL17 replied to Jeff Balazs's topic in Mopar Flathead Truck Forum
Could you disconnect the exhaust before the muffler somewhere and test run it? You mentioned you had smoke coming from the breathers, I assume that's referring to the draft tube and the oil fill tube? The fact you said it won't Rev up makes me think air flow restrictions, whether that's into or out of the engine. With smoke from the breathers it kind of sounds like lots of crankcase pressure. Restricted exhaust would definitely cause that. You may be on to something there. Any popping coming back through the carb? -
My truck is crapping on it self.......ideas?
TravisL17 replied to Jeff Balazs's topic in Mopar Flathead Truck Forum
Have you checked the air filter housing? Would it be possible that a critter built a nest in there while the truck sat? After a couple days of driving the nest blocked air flow? Just a thought. -
Welcome. Beautiful car! Will you be doing a video on it anytime?
-
I can't speak to the new cable and if needs to be lubricated. I can say that last winter I lubed my speedometer cable with liquid graphite lube and oiled the speedometer oil wick with clock oil. It cured the bounce my speedometer had when going under 20mph.
-
That is one beautiful car. I love the green. Very close to the color of my envy.
-
Engine Failed and Need Help With Bearing Identification
TravisL17 replied to TravisL17's topic in P15-D24 Forum
@Sniper - After you mentioned the one ring possibly being chrome it made a lot more sense. I called the parts supplier that I purchased from and they clarified that the black ring is chrome and goes on top. Also said the new style pistons can be put in either direction since there is no heat dam. Thanks for the help, its appreciated. -
Engine Failed and Need Help With Bearing Identification
TravisL17 replied to TravisL17's topic in P15-D24 Forum
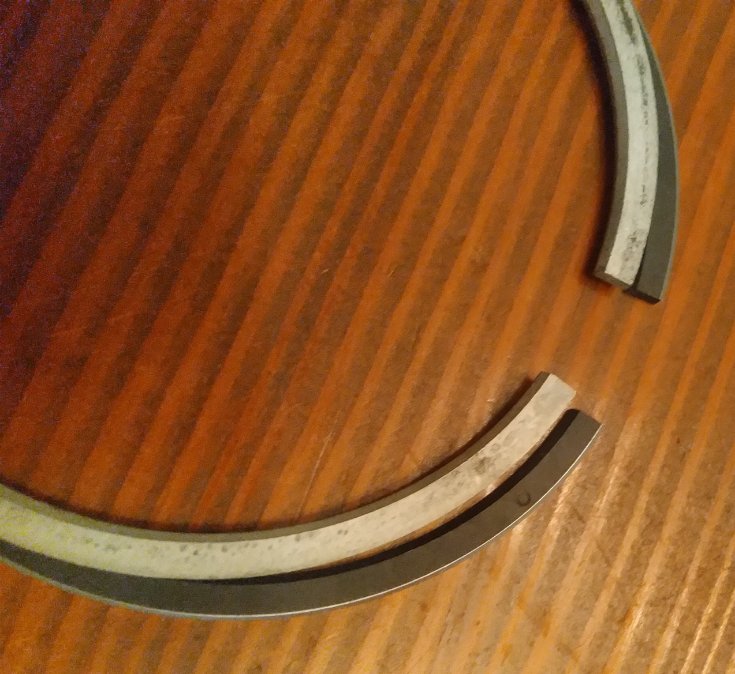
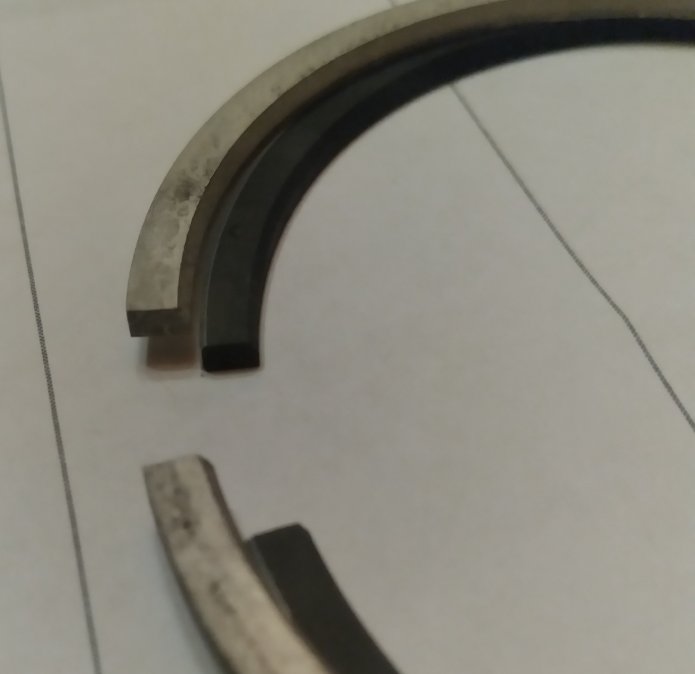
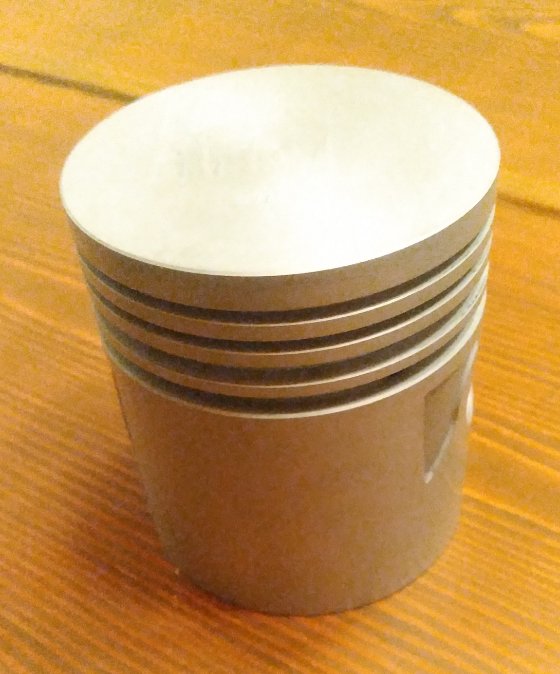
My parts arrived today and I need some advice on a couple items. First is piston rings - These are NOS rings that I ordered. When comparing the new rings, the cast colored ring has sharper corners than the black ring, and the black ring has a dot on it. Near as I can tell from comparing pistons out of old engines, the black ring with the dot is the lower compression ring. I looked at piston rings out of two engines I have here, both have a dot only on the lower compression ring and the lower compression ring has a larger end gap compared to the upper ring. The new rings didn't come with any instructions. Manual says chamfered edges up but doesn't give any info on which ring is top and second. Which ring do you think would be the top compression ring? Second is the pistons- These are new pistons and they don't have a heat dam. I know that pistons with a heat dam, the dam faces away from the cam side of the block. Can these new pistons be installed in either direction? Any insight, opinions and help are appreciated!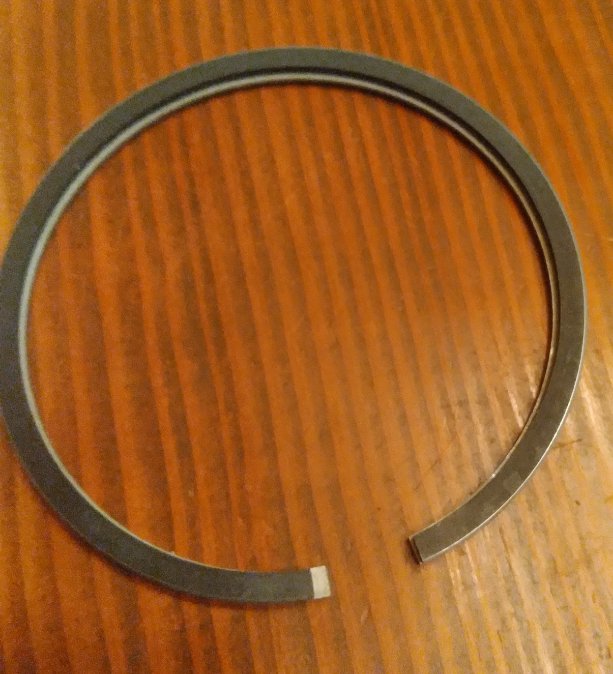
-
Is Andy Bernbaum auto parts still in business?
TravisL17 replied to MarcDeSoto's topic in P15-D24 Forum
I recently purchased a part from them online. They called me the next day to confirm some info. I missed the call and called them back. They answered pretty quickly and got my part shipped. Its supposed to arrive today. I've had good experiences with Bernbaum, sorry to hear you're having a hard time. -
I found a kit on Rockauto recently that says they're brass. I contacted the manufacturer to find out what comes in the kit. Company is QualCast and kit part number and contents are below. Price was around $18. I have not ordered one yet. Below is their reply to my email. 97-61B: 7 96-1625CCB Brass 1-5/8 Concave Cup 1 96-1375CC Steel 1-3/8 Concave Cup 2 96-375HCPP Steel 3/8” Hex pipe plug
-
Engine Failed and Need Help With Bearing Identification
TravisL17 replied to TravisL17's topic in P15-D24 Forum
It was painted in 97 by the PO. Monarch Maroon, I'm told its an original color offered by Dodge. The original color of the car was a blue/grey color, not sure of the actual name. -
Engine Failed and Need Help With Bearing Identification
TravisL17 replied to TravisL17's topic in P15-D24 Forum
I've made some more progress on the Meadowbrook the last couple days. I sent the 55 head to the machine shop and had it cleaned up, mag checked and milled flat. He had to take .014 off to make it flat again. Once I got the head back home I realized the hole in the head for the temp gauge bulb was way too small. It was 1/4NPT and needs to be 1/2NPT for the gland nut to fit. Drilled and tapped it to the correct size and thread. Then I found the hole in the head for the throttle linkage bellcrank pivot was 3/8NPT and needed to be 5/16 UNC. So I drilled and tapped the center of a 3/8 pipe plug to fit the 5/16 bolt and got that taken care of. Now the 55 head should work in the car. Then I got the deck surface of the block cleaned off and chased all the bolt holes for the head bolts. Also cleaned up the head bolts and inspected them. I got all the cylinders honed out and coated with oil to prevent flash rusting. Pistons, rings and rod bearings are coming from VPW. I got a new t-stat housing coming from bernbaums. I purchased a head gasket set from a local parts store and found the head gasket was damaged when I got it home. Ordered another set, went to exchange it and the second head gasket was more damaged than the first. They ordered 2 more sets and a lone head gasket. Hopefully one of the 3 they ordered will be undamaged. All the heavy work is done until I get parts. After spending hours planking on the left front fender of my car today, I expect I will be sore in the morning.
-
Finally after 10 years. On the road
TravisL17 replied to fargorat's topic in Mopar Flathead Truck Forum
Your truck turned out amazing! Great work and congratulations! Now drive the heck out of it and have fun! -
Engine Failed and Need Help With Bearing Identification
TravisL17 replied to TravisL17's topic in P15-D24 Forum
I finally got back to digging into the engine more. I was going back and forth between just doing the one cylinder or doing all 6. My gut said do all 6, but time and budget was saying just do the one. I decided to do all the rings, swap in a used piston to replace the failed one and hone all 6. I pulled the other five pistons out today and cylinder 5 was the only one that DIDN'T have a broken ring. Cylinder 1 had both compression rings broken. I know they aren't fresh breaks from removal because the breaks had carbon stains and smoothed edges from rubbing together. I never would have guessed this to be the case given how it drove, idled and compression test results. I've read many times how these flatheads are durable and forgiving, but experiencing it firsthand blows me away. The pic below shows piston 6. Top compression ring was broken and the ring groove was getting hammered out. Tomorrow I will get pistons, rings and rod bearings ordered. This week will be cleaning parts and honing cylinders. Also, the block in the car is from a 55 Plymouth with internal coolant bypass. The head that was on the engine, I assume is off the original 50 Dodge engine with external bypass (The engine swap was done by the PO and the original engine came with the car). The external bypass head doesn't completely cover the bypass hole in the gasket so I have no idea how it wasn't pouring coolant from the bypass hole in the block. It did have a very very slight weep at the front of the head, but never terrible. I am going to drop off the 55 Plymouth head at the machine shop and have it cleaned up and cut. Looking at HP ratings, the 55 Plymouth made about 14 more HP. I assume from the bump in CR. Since bore and stroke didn't change the only difference must be in head volume, Right? Switching to the 55 Plymouth head should bump CR and HP a little bit and more importantly ensure there won't be a coolant leak from the mismatch bypass situation. This has been and educational experience. I'm not new to working on engines, but I am new to working on these flatheads. I am thoroughly impressed by these engines. I love their simplicity and durability.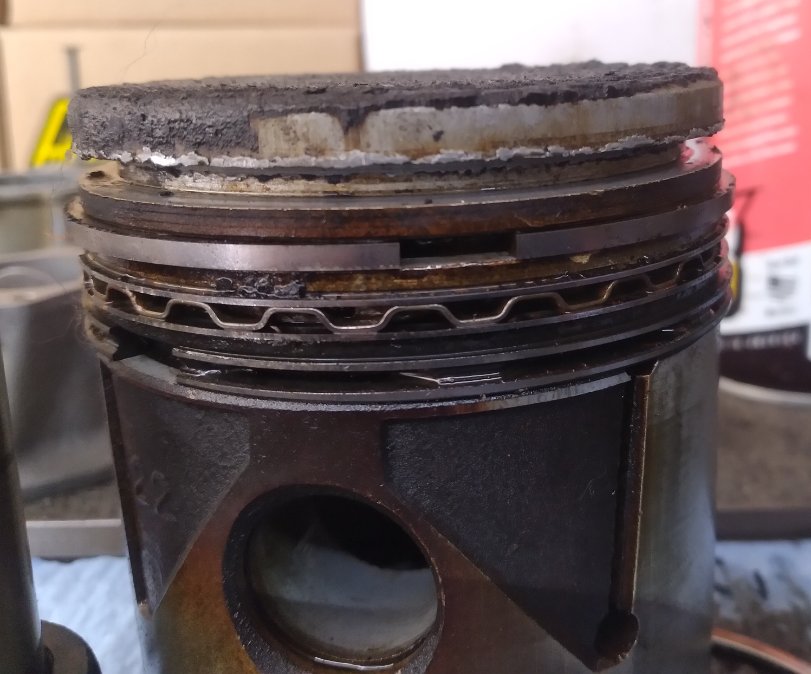
-
I found one on Ebay last winter for my car sold as untested. I got lucky, not knowing anything about clocks, I was able to repair it and get it working. I ran it on the bench hooked up to the battery out of my car and ran it through my Fluke DVOM. It ran for several days averaging only 1ma of current. Its been in my car all this season and have not had any issue with battery drain.
-
Engine Failed and Need Help With Bearing Identification
TravisL17 replied to TravisL17's topic in P15-D24 Forum
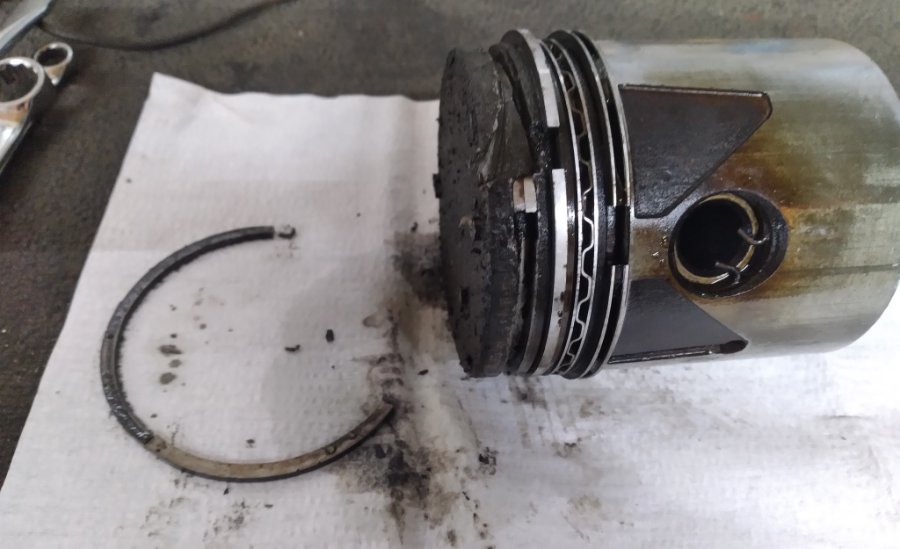
This morning I removed the carbon ridge from cyl 3, dropped the pan and pulled piston 3. The mic set im using only goes to 3" so I used a digital caliper for a quick piston measurement. Measured out to 3.25 on the skirt perpendicular to the wrist pin. Think its safe to say this is a standard bore. The top compression ring is in pieces and missing about 1/4 of it. Check out the piece of double decker compression ring! I'm still surprised about the lack of ridge, must be a lower mileage motor than expected. I will aquire a bore gauge and measure the cylinder properly.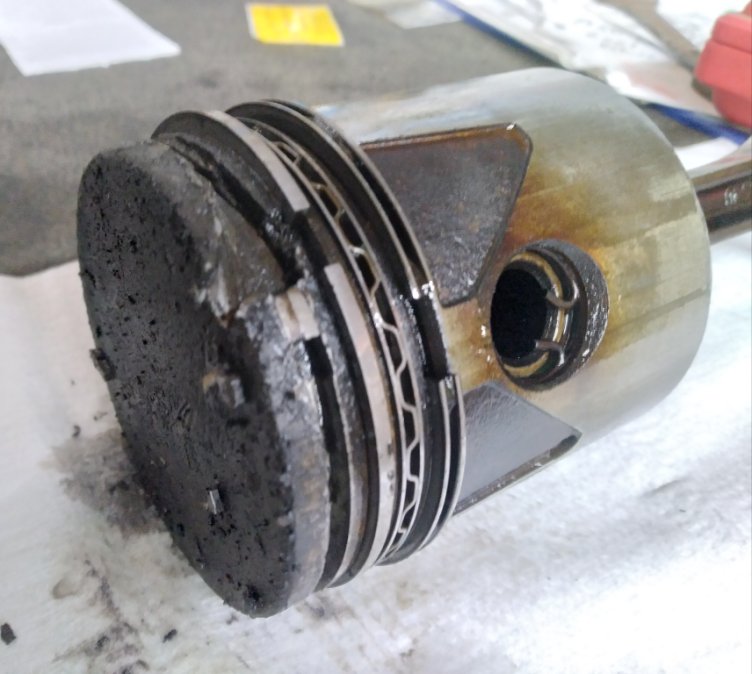
-
Engine Failed and Need Help With Bearing Identification
TravisL17 replied to TravisL17's topic in P15-D24 Forum
I do not own bore gauges. Either will borrow or purchase. I too am curious about bore measurements. I'm still surprised about the lack of ridge. There isn't much crosshatch left. I have a set of .030 over pistons, if I could be so lucky that this block is .030 over. Thanks for the info on cost. I was on Egge's website today and saw rebuild kits for about 1700 and seem pretty complete. Machining is not cheap, but it's a skilled trade. And craftsmanship is getting harder to find these days, so good machinists are worth their asking price. -
Engine Failed and Need Help With Bearing Identification
TravisL17 replied to TravisL17's topic in P15-D24 Forum
Update on my engine issue. I will preface this by saying that I was trying to do a quick and dirty repair to finish out the summer and do a proper repair over winter. Checked all the rod bearings- #3 was the worst and you could see where the babbitt was cracking and letting go of the steel back. Others had some scoring and embedded debris, but not beat up like #3. I looked through rod bearings from some of my parts engines and picked the best looking one. Also mic'd a couple journals and they measured just a bit under 2 1/16th (measurements are out in garage). Difference was small enough that I'm confident it hasn't been ground. I installed the "new" used bearing and checked clearance with plastigauge. Measured about .002 - about half a thou over spec, but good enough for what I was trying to do. Put it all back together and cranked without spark plugs to build oil pressure. Got 40lbs cranking. Started the engine and had the same knock.... I let it run and performed some tests that I was too afraid to do before, as I didn't want to risk wiping out the crank. Now knowing the state of the rod bearings I no longer had that concern. I shorted one plug wire at a time and found #3 barely contributing. However the noise did not change when shorting plug 3- seemed odd to me. I pulled the plugs and noticed #3 was now ever so slightly darker than it was on initial check. Checked compression and #3 has 45psi. Others were 112 to 120. Pulled the head and found this The debris was hitting the head and the noise could be heard in the pan. The impact with the head must have been what beat the bearing up. Hindsight being what it is, I had some warning signs for this failure that I chose to ignore. Heavier crankcase vapors, slightly rough idle and a very slight tick that I attributed to the oil pump or fuel pump. My guess is the ring was cracked for most of this driving season and finally let go. My new tentative plan is to buy a set of pistons, rings and bearings. There isn't much ridge that I've found so far and only light scores in a couple cylinders. Hoping to hone the cylinders, install new pistons and rings, new rod bearings, check mains and replace if needed. Trying to keep costs down. After doing some thinking on it, a full rebuild won't be in the cards (finances) this winter. I have my 51 B3D I want to get going too. Figure if I get the Meadowbrook back in service for a few hundred, I can still get the truck on the road for next year too. Tomorrow I will drop the pan (again) and get #3 piston out and do some thorough inspection.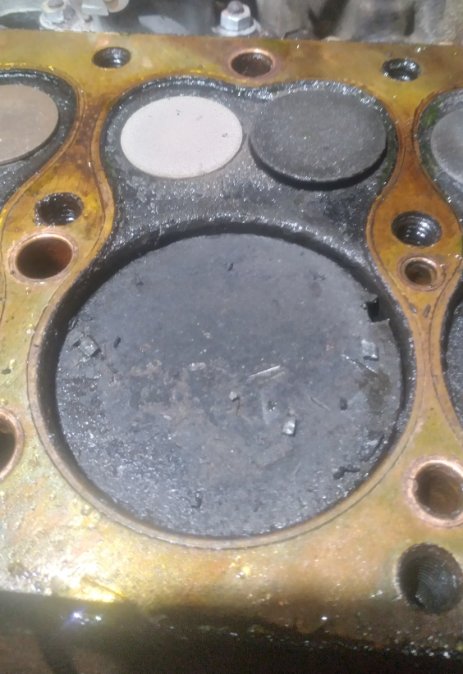
-
Engine Failed and Need Help With Bearing Identification
TravisL17 replied to TravisL17's topic in P15-D24 Forum
So, the number 3 bearing is different than the others I removed and the upper half was installed so the oil hole didn't line up with the hole in the rod. Plus the lockwashers on the rod caps are all missing. I did a Google search on the number on the back of #3 bearing and its standard size. I have a bunch of NOS bearings and a parts book from July 1950. None of the bearings I have will fit a 50 Dodge. I assume a 55 Plymouth crank is the same as a 50 Dodge. Anyone have parts manual for 55 that will confirm the bearings I have will/won't work for this engine? Also, anyone know what the standard rod journal should diameter should be. I can't seem to find it in my shop manual. Thanks for any info, its appreciated.

