-
Posts
107 -
Joined
-
Last visited
-
Days Won
6
Content Type
Links Directory
Profiles
Articles
Forums
Downloads
Store
Gallery
Blogs
Events
Everything posted by TravisL17
-
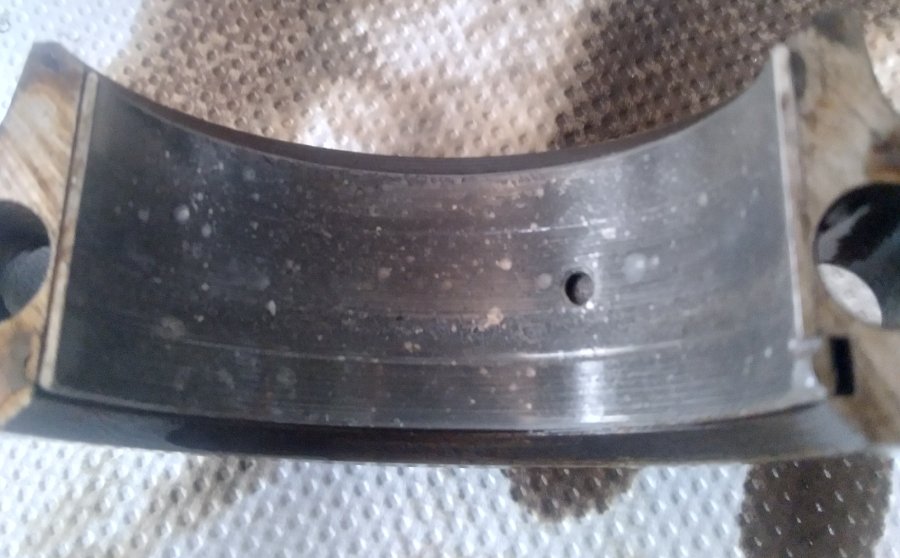
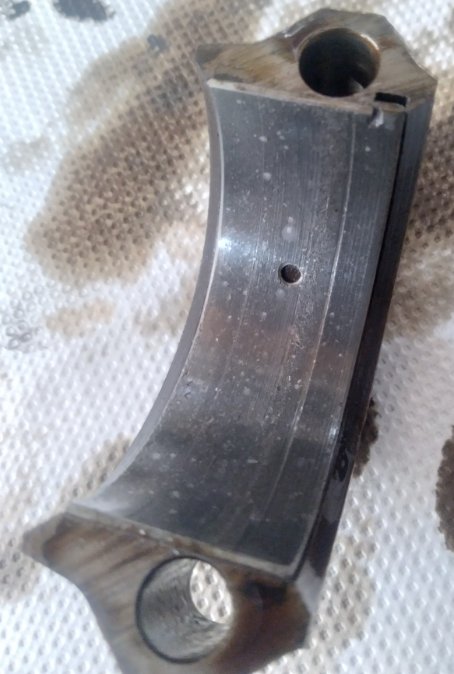
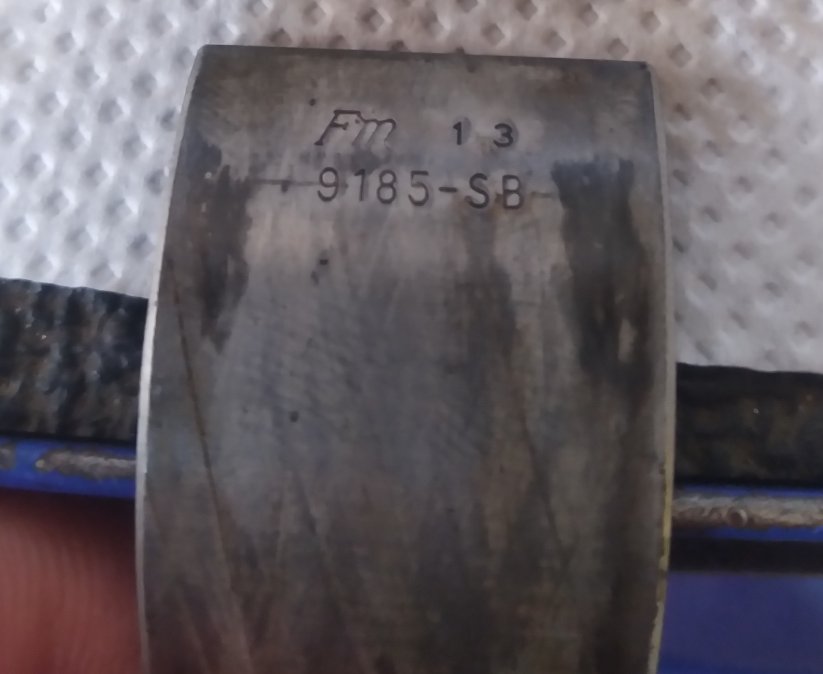
Decided to drive the Meadowbrook to work today since its not so hot and humid. 25 miles into my 29 mile commute the engine started knocking. Had good oil pressure the whole time. Thanks to roadside insurance I got it towed home and began investigating. Pan removal revealed that #3 rod seemed a bit loose. Pulled the cap and found this I need help deciphering what the info on the bearing is. Does the SB indicate standard size bearing? My plan is to go old school down and dirty with it. Clean up the crank journals as needed, put in needed bearings and finish out the summer with it. IF things go as planned, the original engine to the car will be rebuilt and installed over winter. The engine in question has a P26 serial number indicating a 55 Plymouth 230. Any help with bearing info and journal size is greatly appreciated. Thanks everyone!
-
Already got that tool made! Along with a long set of picks I bought a while ago. Some of the sediment gets pretty hard and takes quite a bit of force to break it free. What are your thoughts on the water distribution tube...let it be and see how it cools, or pull it out now. Are they prone to clogging up or do they corrode and fall apart? I haven't pulled the water pump yet, but do intend to replace it along with removing the radiator so I can back flush it. I've never pulled a water distribution tube, I've read on here that they can be real stubborn. Just picked up a plastic kiddie pool today. Gotta do some shop cleaning then the water sports will begin!
-
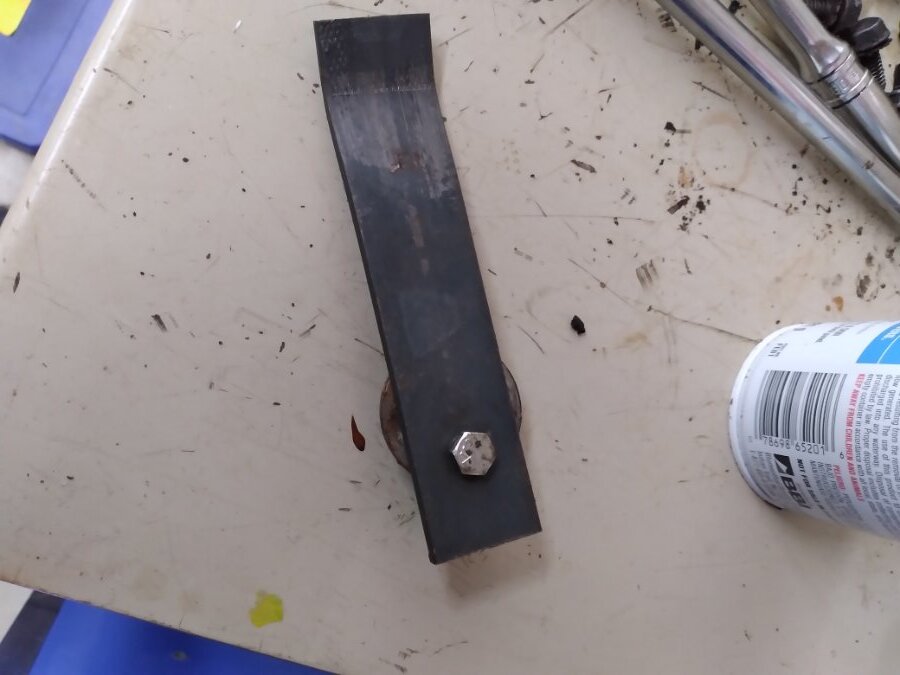
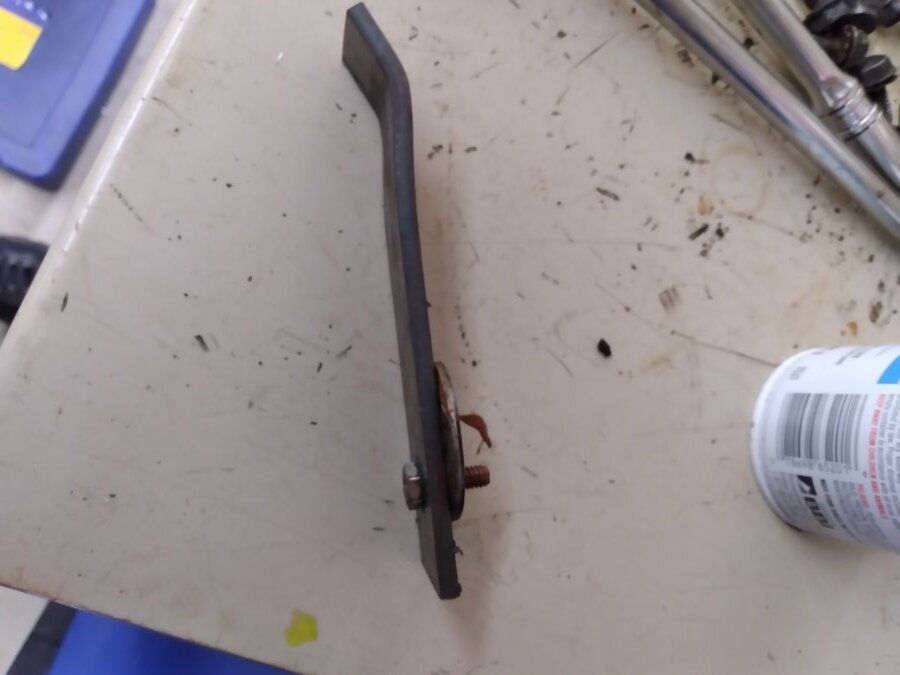
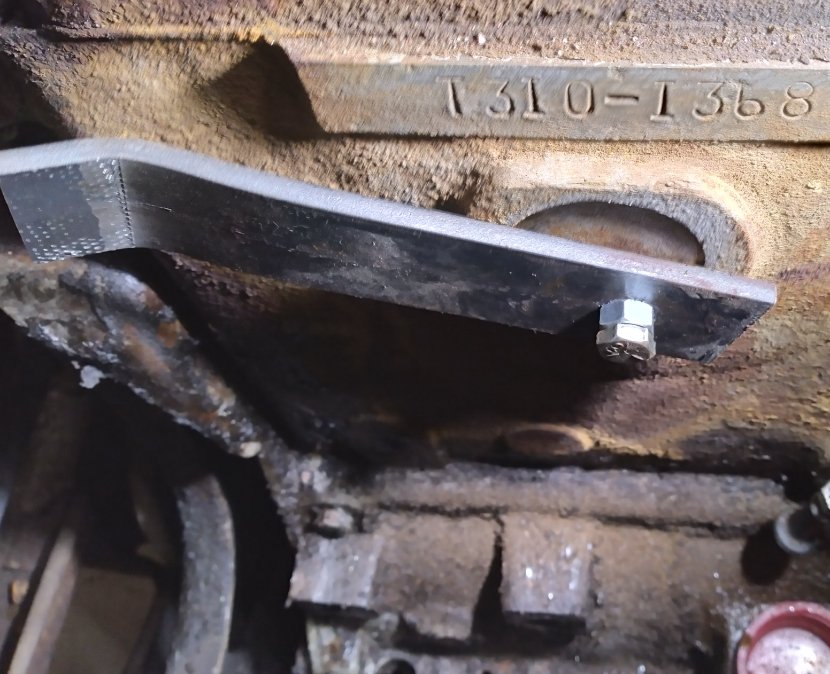
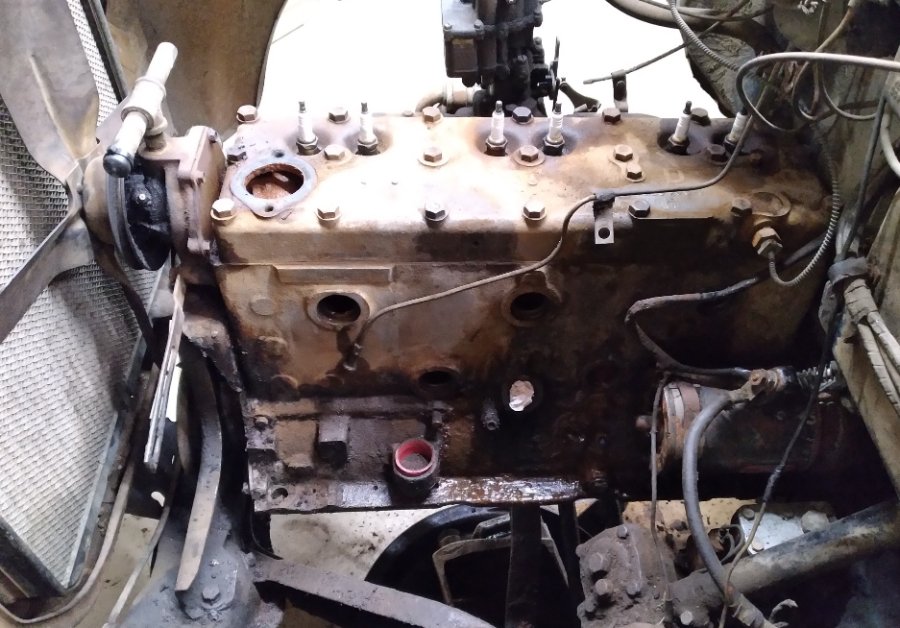
Progress update - Pulled all the stuff off the left side of the engine today and removed the core plugs to clean out the crud from the engine block. Plenty buildup down at the bottom of the block. Check out what was behind door number 4! I need to flush the block out without making a giant mess in my garage. I'm thinking a kiddie pool under the truck should work well. I've included some pics of the core plug removal tool that I made a couple years ago when I did this to my Meadowbrook. I drill a hole in the core plug and thread it with a 1/4 20 tap. Then put the tool across the plug and thread the bolt in. The bolt pulls the plug towards the tool and deforms the core plug a bit. Then I can either pry the tool off the engine with a screwdriver/prybar or grab onto the curved end of the tool with a pliers and use the tool to pry the plug out. Most of the work is done by the bolt so it doesn't take my effort to pop the plug out. I also started soaking the manifold bolts with penetrant. The exhaust manifold is badly cracked on number one. I think I have another manifold to replace it.
-
I thought of that too. Think it's possible to have that much buildup in the oil pan? Maybe lots of years running rich or regularly flooding the engine? The oil didn't smell of fuel or rancid gas. The color definitely seems like it could be lead. Good thing I didn't taste it!
-
It also makes starting easier in winter. I've seen a lot of different style coolant and block heaters living in MN, but never this style. Always fun to see something new.
-
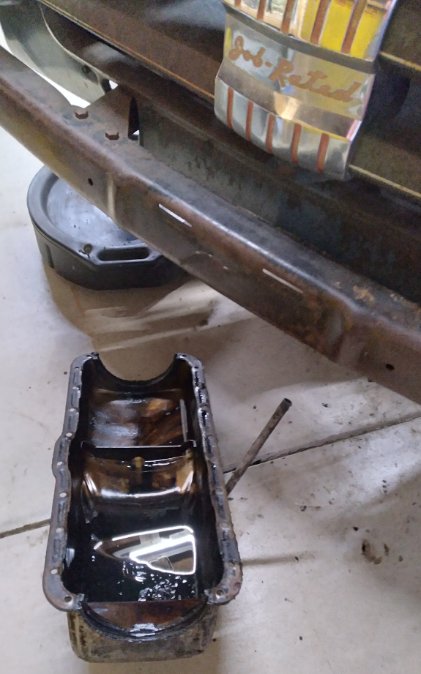
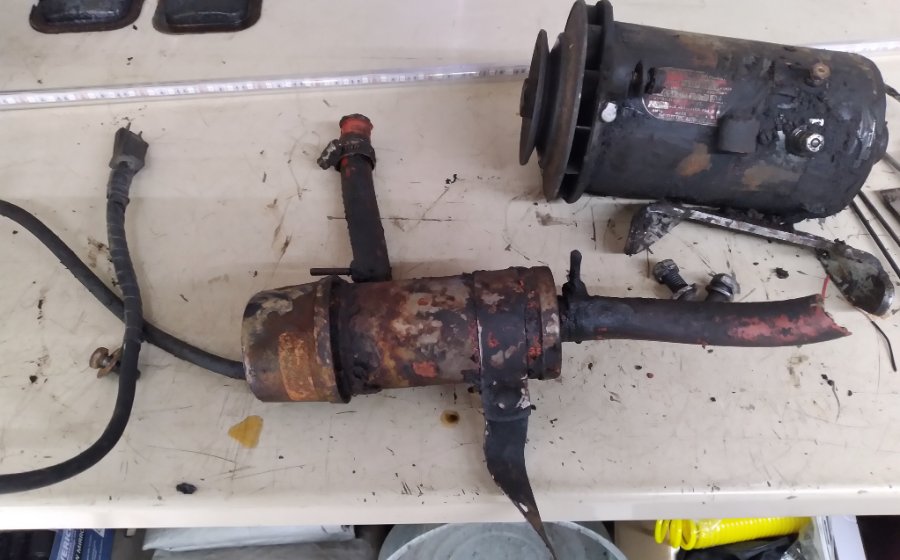
Made some more progress today. Got the inspection shields off the bellhousing and found an almost never ending mouse nest. It was even packed into the pressure plate and springs. Got it all dug out and removed. Then moved onto the oil pan. Got it removed, it basically fell off when I loosened the last bolt. One of my favorite automotive smells is the inside of gasoline engines, especially older engines. It may seem strange, but admit it- there are automotive related smells you love too! Anyways, no big surprises in the pan. Less sludge than anticipated. However, there's a silver buildup in the bottom of the sump about 1/8 to 3/16 inch deep. I can scrape a valley through it and it holds itself up for a good while. Rubbing between your fingers it has a bit of a gritty texture to it and somewhat tacky feeling. Its not magnetic either. My immediate thought when I first saw it was bearing material, but there is waaay to much of it. Then I thought possibly zinc additive or some other oil additive buildup over the years. Your thoughts? Also, check out the coolant heater that was under the hood. I haven't seen one like this before. It was plumbed into the block drain and T'd into the top side of the water pump where the heater hose hooks up. I will not be putting it back in, needless to say.
-
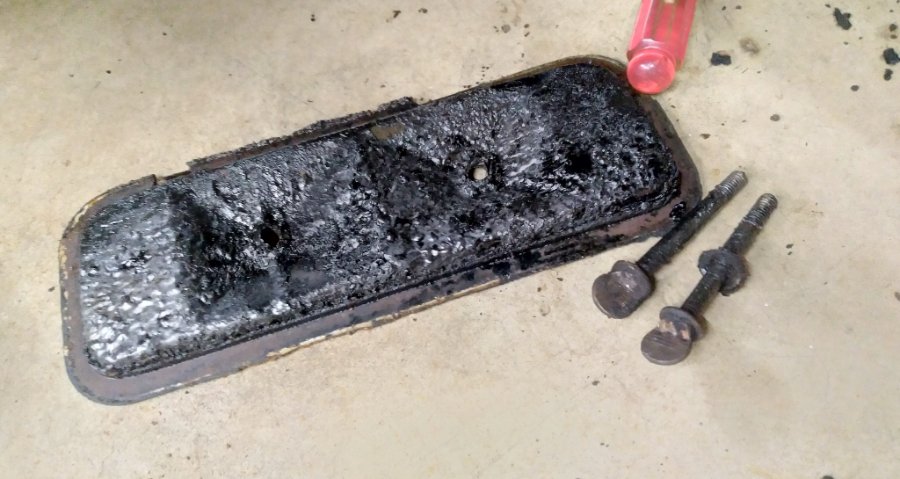
@Tooljunkie, checked valve clearance this morning before I started doing anything else. Exh had .009 , intake had a buildup of crap that I could see taking up the space between the tappet and valve stem. Got a .004 in and worked my way up until it was cleared out ending up at .009. I didn't have a helper today so instead of my thumb, I put a compression gauge on 6. With all the spark plugs out and the gauge on 6, I cranked the engine for about 10 seconds and listened for the slowdown when 6 would hit the compression stroke. Nothing. Tried cranking again and saw the oil pressure gauge climb a bit, so that's a good sign. After about 10-15 seconds of cranking, number 6 hit some compression! I removed the gauge, shot a bit of oil in each cylinder and turned the engine by hand a few revolutions. Then checked for spark and had nothing. Cleaned and set the points and we have spark! Gave the plugs a quick hit with a wire brush and threw them in. Cleaned up a few corroded plug wire terminals and connected everything back up. Grabbed a bottle of gas and squirted it down the carb. Had my wife run the key and starter and it fired! Let it run for about a minute or two, feeding it gas from a bottle. Wife reported the gauge showed 40 psi oil pressure. Not much smoke from the exhaust, and no strange engine noises. I think we've got a viable engine! The wells by the tappets have some sludge in them as expected. I'll clean them out along with dropping the oil pan and giving that a good clean out too. I drained the oil, other than being really black, there wasn't anything alarming to see. Spent a good amount of time today scraping decades of crud from the sides of the block and pan rails.
-
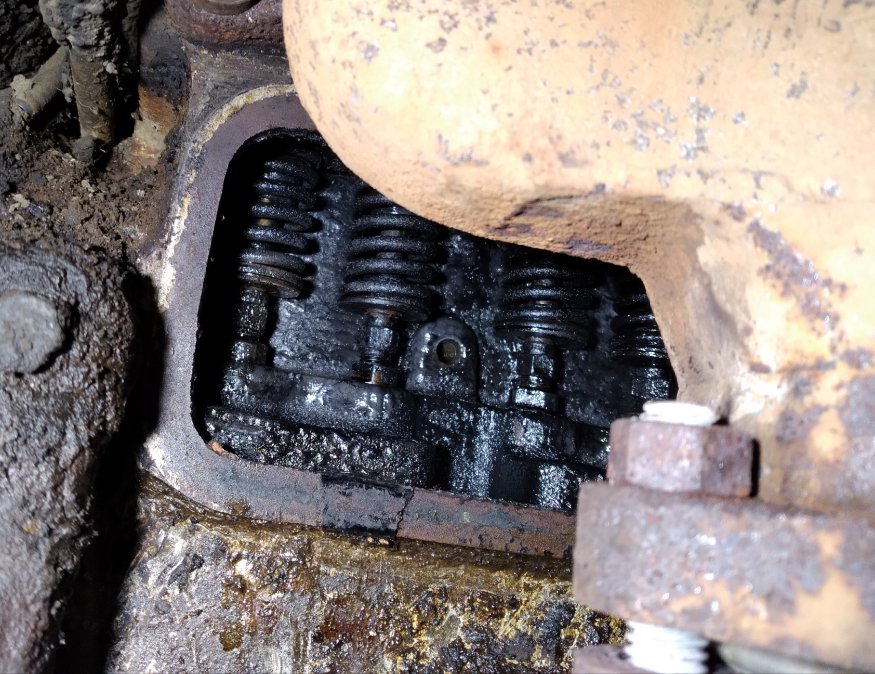
I decided to take the tappet cover off before pulling the head just to have a look at the valvetrain. Got the inner fender removed, acres of room to work now! Then sprayed some degreaser on the engine and scraped all the crap off the tappet covers and surrounding areas before removing the rearward cover. It appears the valves for cyl 6 are moving freely. I turned the engine over and confirmed that both valves are opening and closing as the tappets move. It's also very evident this engine wasn't very loved. Lots of carbon inside. I've seen worse engines, but it's still not great looking. Looks like pulling the head off will be next. Maybe the dead hole on 6 is why the truck was parked?? I will check compression on 6 one last time before pulling the head. Maybe the valve was stuck open, but cranking the engine and sitting for a few hours allowed it to close on it's own?? Probably wishful thinking.
-
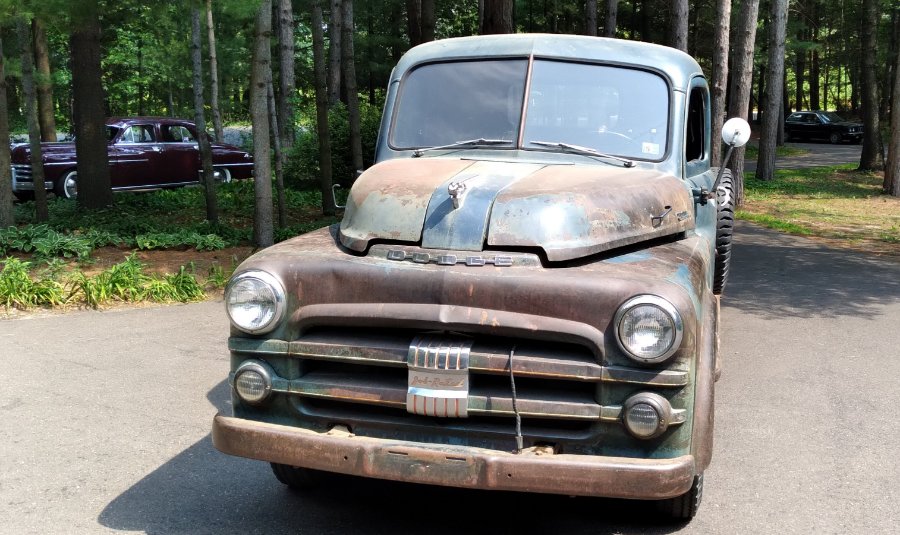
While moving it up to the garage I couldn't resist taking a few pics of the truck in the sunlight with the Meadowbrook in the background. Waaay in the background is the now abandoned project that delayed working on the 1 ton. Its an 84 BMW that's been in my wife's family for 30 years. Salt ultimately claimed this one, too much hidden rust all over to feel safe putting it back on the road. Truck is in the garage now, will start working on it this evening after dinner and when the heat breaks a bit.
-
After being sidetracked with a different project, I finally got to work on the truck for the first time since bringing it home. Disconnected fuel lines from the pump so the crap in the tank didn't get into the pump or carb. Checked engine oil and spun the engine by hand for several revolutions and it felt smooth. No tight spots or binding. Hooked up a battery and watched for smoke for a couple minutes, so far so good. Popped the dist cap off, found newer points and condenser. One of the many signs that someone spent some time tinkering with this thing before i bought it. Ran the starter with the key off and it cranked, but sounded odd. Seemed to have one cylinder that didn't offer much resistance to the starter. Cleaned the debris from the spark plug wells and pulled the plugs. All look the same, not worn and black. Had the kid run the starter while I put a thumb over each plug hole. Number 6 offers no compression. Time to investigate. Think I'll pull the headand get a good look at things, see what shape the holes and valves are in. First thing is to get it from the pole barn to the garage where I have better working conditions, more light, more tools and compressed air.
-
I've driven my 50 Meadowbrook a lot this year. Took it on a roughly 700 mile trip to Galena Illinois in early May. Been daily driving it to work a bunch, about 70 miles round trip. We'll be taking it to Iola Wisconsin in early July. I've clocked 2600 miles since late April. I agree, it never gets old driving it. I love the way it drives and floats down the road. @Worden18, you are partially responsible for the inspiration to drive my car as much as I have this season. Thank you!
-
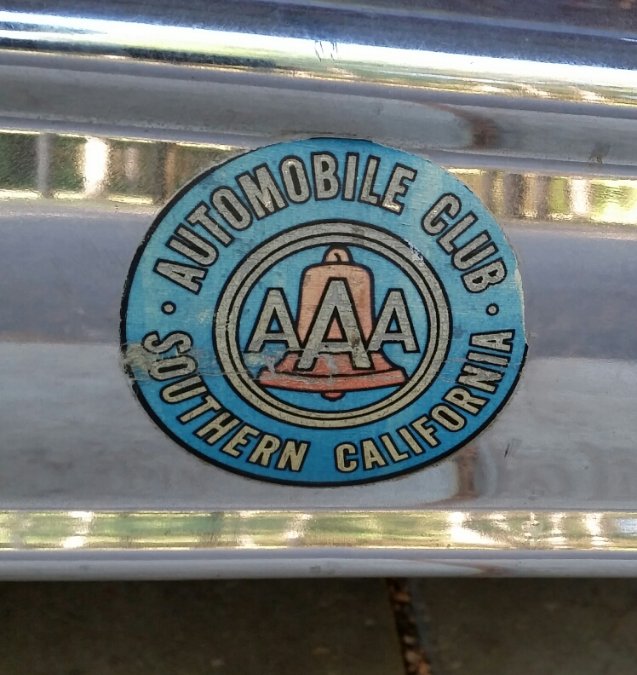
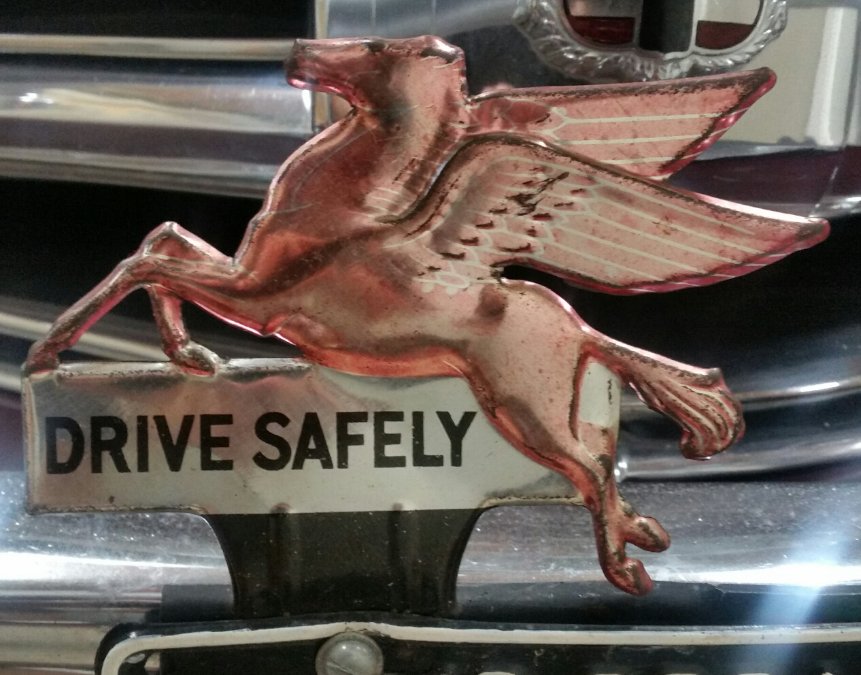
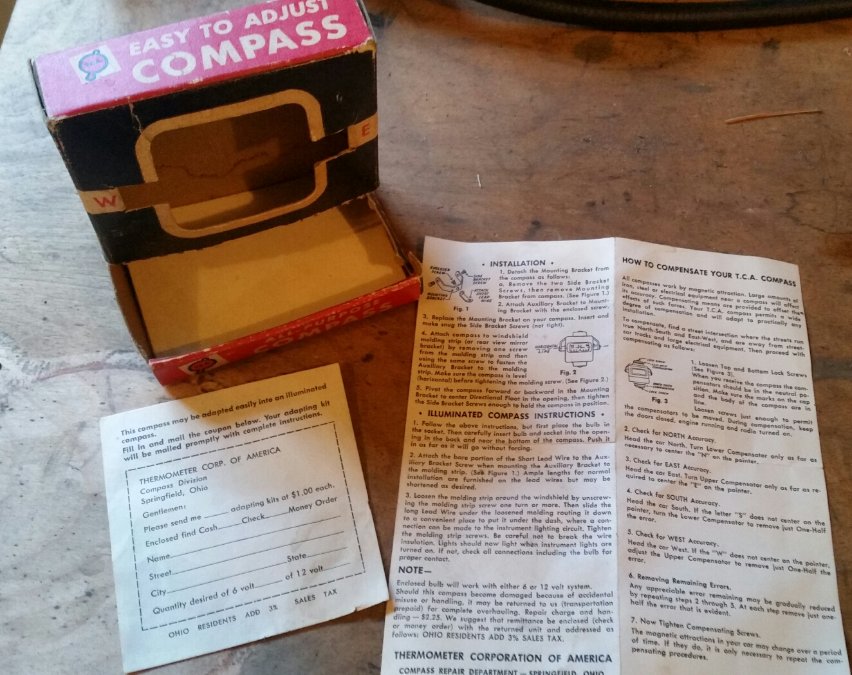
I've got a few items that came with the car when I purchased it. Being an original California car, it has window and bumper stickers from Southern California AAA along with a MN state parks sticker from 1982. Also have a Mobil license plate topper -no idea how old, and a compass with the original box and instructions. There's even an order form you can mail in for the adapting kit to make the compass illuminate! At only $1, it seems worth it to me!
-
I'll be there
-
That'd be great! I'd love to meet some forum members, people with an appreciation for these old Mopars. Cars or trucks, or both in our cases!
-
We were wondering what all the bicycles were about! There were a lot! I assumed it was some sort of vintage bicycle run since nobody was riding anything modern looking. That's quite a ride on a bike like that! We also saw a whole group of Mazda Miatas (what's the proper plural for Miata anyways?) out for a drive. Nelson Creamery is where we stopped for lunch. No cyclists had arrived by the time we left. I'm going to have to stop in at Elmer's some time. Another great reason to make the trip again!
-
We've done the eagle center in Wabasha twice. Lark toys in Kellogg is the one I know of, haven't been there yet. First time on the river road through there was 2 years ago on our way to Torquefest in Dubuque IA. Such a beautiful drive. We plan to take this same cruise again in the fall.
-
They are a Mopar accessory. I have the install instructions. They were in the car when I bought it. I'll have to ask the PO where he found them.
-
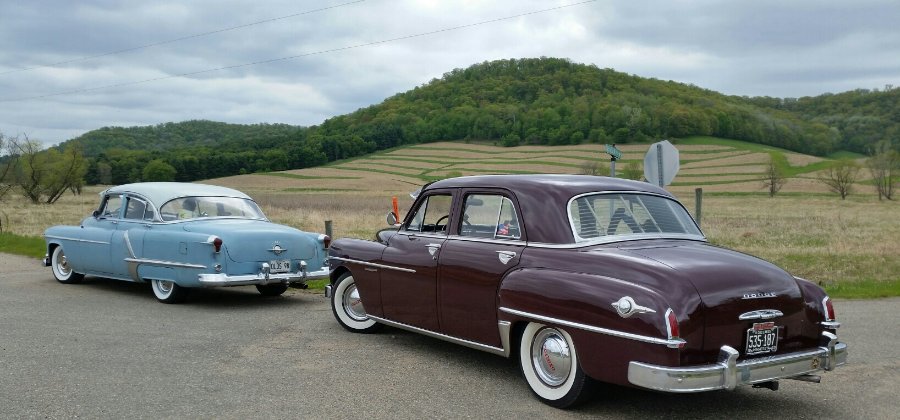
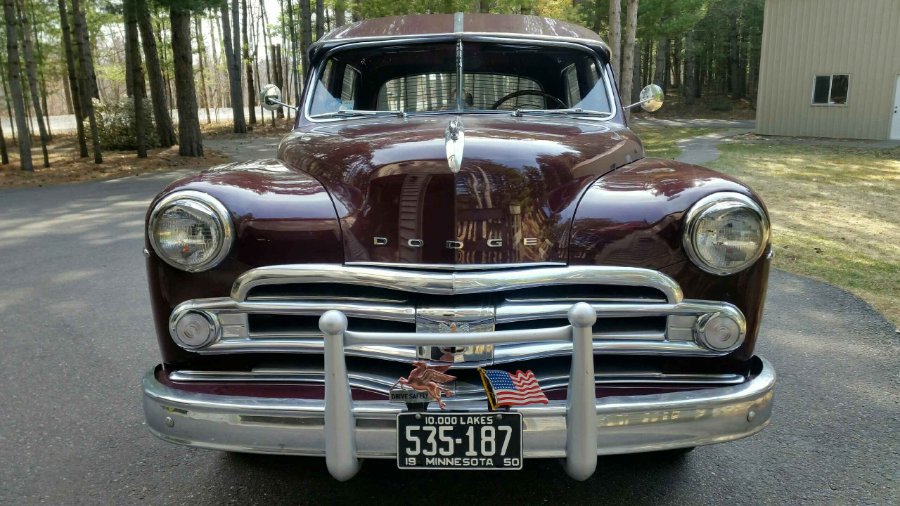
My family and I spent the day cruising with the couple that we bought our Meadowbrook from. We were driving the Meadowbrook, they were in their unrestored 52 Olds 98. They are the ones responsible for resurrecting the Meadowbrook from a storage unit and turning it into what it is today. It was their first old car they bought and owned it for 21 years, now it's our turn to enjoy it. We cruised The Great River Road along the Minnesota/Wisconsin border, stopping at a scenic overlook on Lake Pepin. Then we turned onto an old county road that wound through the back country hills of Wisconsin. He took us to the area where his grandmother grew up, showed us his favorite spot in the world that was so peaceful you could almost hear a pin drop outside. Then we stopped for lunch at an old creamery before winding our way back up the River Road to his place where we all sat outside in the sunshine and talked about cars and life. We've put almost 5k miles on our Meadowbrook in the 2.5yrs we've owned it, and today counts as my favorite miles so far. Get out there and make memories with your classics. You won't regret it!
- 18 replies
-
- 13
-

-
I recently went through this same issue. My old flasher failed, wouldn't flash any of the lights. Bought a 6v flasher from the store, indicator on dash wouldn't work. Used a jumper wire to power the indicator circuit at the flasher connector. Indicator on the dash worked, simple test to verify the wire to the indicator, the bulb and the ground for the bulb. Tried a second flasher from the part store, figuring I got a defective foreign made part. Same result, turn signals worked, indicator on dash didn't. Ordered one from Rhode Island Wiring, they said the part store 6v flashers don't work on positive ground cars. Put their flasher in and it works great.
-
Some of the best conversations about my 50 have taken place under those very circumstances, gas station stops and people reminiscing about a similar car they once had. You gotta love the smile it brings to a person's face when they see a car that takes them back to their childhood.
-
The store was closed, couldn't go in to look. I figured it out, 57 Oldsmobile.
-
Mine was also a continuous wire from contact plate to relay. On my car, the connection at the contact plate seems to offer some rotation, but it seems like the wire itself does most of the work when the steering wheel spins.
-
When I pulled the steering wheel off my 50 Dodge, I disconnected the wire at the horn relay and pulled the wire out the top of the steering tube. The wire has a male bullet type connector at the relay. When going back together, I found it easier to feed a piece of wire up through the tube, attach the horn wire to it and pull it back down. The hole at the bottom of the tube is small compared to up the steering wheel, which makes it difficult to feed from the top side going down. The horn wire on my car attached to the horn contact plate pretty firmly and didn't want to come off nicely compared to pulling the wire off the relay. I hope that all made sense.
-
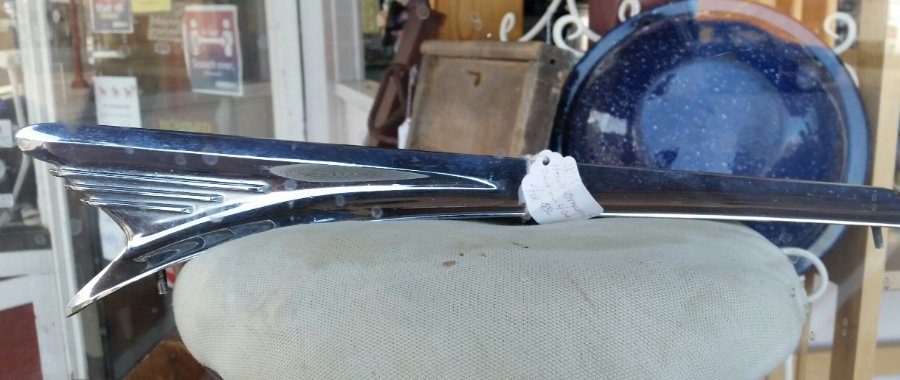
I was walking past an antique store and spotted this in the window. Anyone know what this hood ornament belongs to?
-
Very envious Keith, I'd love have a mild winter like that! We got another 40 miles in this morning. It could be my imagination, but it seems to run better with the new wiring. Probably better voltage and current to the coil. It definitely starts better with new battery cables.


