-
Posts
3,462 -
Joined
-
Last visited
-
Days Won
193
Content Type
Links Directory
Profiles
Articles
Forums
Downloads
Store
Gallery
Blogs
Events
Everything posted by keithb7
-
Congrats, thanks for the update. Welcome to the forum. Wow, what a fist post, and the statement above. You have great intentions, seeing this project through. This car is a good one to preserve considering how rare it is. We'd love to see some pics if possible. If you get a chance, next time you check in on your car, snap whatever photos you can. Even if it's tore down. Many of us here would enjoy seeing any pics.
-
Thanks for your reply Jerry. I did measure my fuel pump pressure. It is about 3.75 psi. Which I believe is about right. I have taken the carb apart to inspect the bowl and float system. I did not see anything abnormal. The float seems to be working properly. The float pin, the retainer spring and needle valve all appear to be moving freely. I reassembled and stated the car. After a minute or two fuel is seeping out of the carb, anywhere it can. Something is wrong. I'll get in there again and inspect further. Perhaps something is stuck at the float needle valve seat base. I did not pull that seat out and closely inspect.
-
It seems my rebuilt fuel pump works great. Too good. It’s over fueling the carb. There’s fuel coming out anywhere it can at the carb. Flooding the engine too. I’ll check the float although it worked fine with the 6V pump. I shouldn’t need a regulator, correct? Stock type pump see above.
-
Looked at all the various pump kits on Ebay. Found the closest I could. I rolled the dice. Kit quality seems good. The valve diameters were the only difference. In the past 82 years there’s a very great chance a lot of fuel pump swapping has occurred on my car. I seem to have about a 50/50 chance of getting correct parts from the other mainstream supplier I use. Ebay was a good a choice it seemed. Freight was much less. Fortunately I had lots of spare parts to make it work. Today I have my glass bowl pump dream fulfilled. Mounted and ready. Will it work? I think so. We’ll see. I think I am happiest about the fact I was able to make this kit work, and not have to wait 2 weeks for another trial rebuilt kit to arrive.
-
I am reminded again on the simplicity of these old automobiles. So many parts are interchangeable. I had ordered a kit to rebuild my fuel pump. I’d never done it before. Why not try? It’s 1930’s engineering, it can’t be too hard I figured. They had mastered the pumps back then. Yet 90 years later, humans can’t get the rebuild parts right. Lol. The kit I ordered was almost right. The valves that came in the rebuild kit were not the press -in type. The ones I received are the slightly smaller diameter, held in with retainer and screw, type. Arrgh...Lol. The trials we must endear for these old cars. Since local folks found out that there’s a new mopar nut in town they seem to be tossing old fuel pumps my way. I found 7 kicking around here. Different arms. Different glass bowls. Some no bowls. Between the various pumps, I may have a built a franken-pump that will work, and utilize all the parts in my rebuild kit. I have to soak the head at least overnight in carb cleaner. It was full of dry, cream colored dust. Like it just came out of Bryce Canyon. Rotten fuel left in there I guess. For 50 years probably. Is there any reason why they dropped the glass bowls? I think they look cool. I’d like to utilize one. Looks like it’ll fit. I was about to re-instal the oil pan tonight. Then I thought, I might as well clean the pump pick up screen. I removed it and pried the cover off. I found a nice mess of sludge under there. Glad I found it and cleaned it out.
-
I hope this ok here. I am not affiliated with this product. I just bought it to try it out and think there are likely many here who would really benefit from it. I sure will love this upgrade in both of my old Mopars. It's a great solution for the price. Simple very effective. I bumped into this idea a little while ago. A simple bluetooth circuit board. I did some more research to learn, you can find this stereo option that can run on DC power as low as 5V DC. I found one on E-Bay from China. They cost about $10-$15. Seek out Wuzhi Bluetooth on Ebay. It took about a month to arrive and should be covid free by now. I bought the 50Wx2 power amp version as a trial. I see that a 100Wx2 stereo power amp is also available. I am pleasantly surprised how good it sounds. I will hook this up to my old 6V 1953 Chrysler. Likely order another one for my '38 Plymouth. All I need is a speaker or two. It's simple, cheap, and then I can listen to all the songs I can handle via my iphone. I'll just hide it up under the dash. It's very small. Set the volume and leave it. Everything can be controlled through my phone. I am not affiliated with this product in any way. Just a happy buyer, thought the vintage car community could benefit from this. See my further explanation and demo here:
-
-
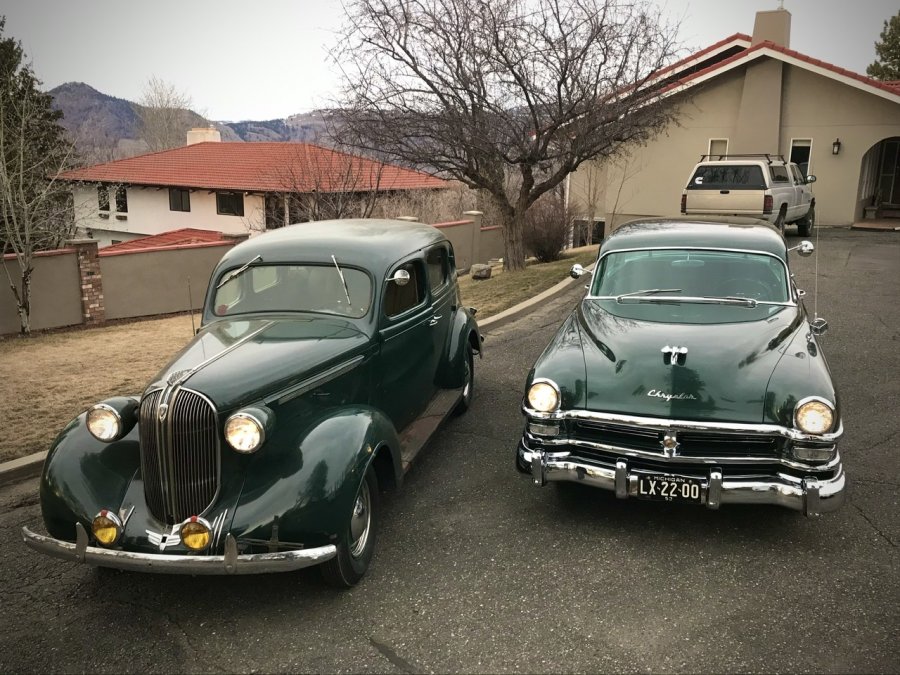
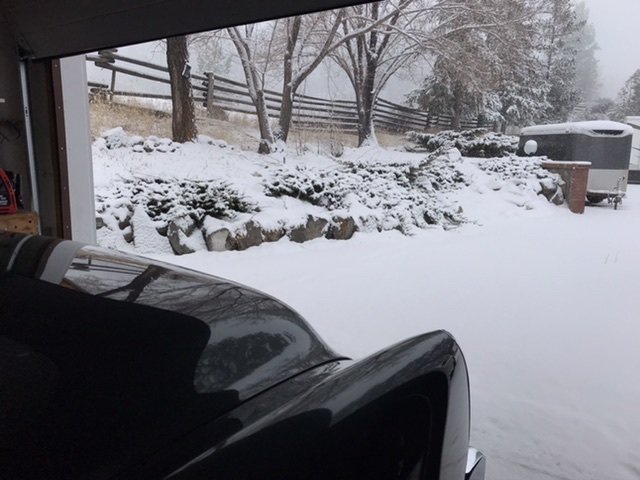
I am starting to go a little squirrely here today. It's been 3 weeks now working my job from home. It's getting to me. I've gone to grab a few auto supplies needed for my '38 project. Then straight back home. I've not set inside another store or business to spend a $1 in some time. My 1938 Ply project has kept me occupied mostly at evenings and weekends. If the weather is good tomorrow I think I'll go for a drive in my Chrysler. Somewhere. Not sure where. No visiting anyone. Just a drive I think. There is no snow left anywhere. All the roads are dry. The sweepers are out cleaning up all the winter sand and gravel off the roads. We're not officially under any public "lock down", but we stay home as suggested. I don't think I'll hurt anyone or pick up the virus when I go out for a solo drive.
-
What engine is in the '54 Savoy? 218 or 230 L6? I believe it would originally have had a Carter BBS on it. They have an automatic thermostatic choke. If you have time and are patient I am sure you could round one up for a decent price. I see pare junkers are available for parts, if needed on Ebay. Perhaps a couple old BBS carbs could be rounded up, and 1 good one made from the parts of both. Buy a rebuild kit and off ya go to rebuild it. That's working so far for me. I have a couple spare parts carbs as needed for each of my old Mopars.
-
I'd love a convertible, but no more '38 Plymouths until the one I am currently working on is all done! ?
-
-
Those lights under the head lights look like turn signals. Turn on your signal, and jump out to have a look.
-

Brake master cylinder - filling method and more!!!
keithb7 replied to johnjnr's topic in P15-D24 Forum
I've had my share of incorrect brake parts show up from specialty suppliers too. I suppose there is a chance that sometime over the past 82 years someone may have swapped in brake parts from other period mopar cars. The parts fit but are not exactly the same as the when new. ie, different bore sizes of cylinder, different lengths of master cylinder pistons. -
I have my limits...Sewing upholstery! This is where my better half steps in. Body work? I’m on the fence. I keep threatening to buy a 210v MIG buzzbox. I am reluctant, but do want to try. When I get to that stage, I’ll give it a shot. I have a friend. He was a school teacher. He’s retired now and can be found welding currently. He’s in the middle of a full body off restoration. He’s tapping on 70. He’s restored many, many cars. If he went to university, not trade school, he’s surely done alright. I’ve seen his work. Its great. I figure If he can do this, I gotta try too. He’s inspirational at the least.
-
@westaus29 I use google images as well. I agree, super easy. I do upload several photos to this forum. I use a computer often, and download the image from google images, then upload the photo here. I also use my iphone. The latest operating system allows me to choose the photo size to upload directly to this forum. Large or medium is works well and keeps me under the size limit here. I am finding your 1938 Ply photos interesting. As I too am currently going through my '38 P6. I see many similarities but also some interesting differences. The RH drive offers a different spin on what I have been looking, at and working with in my garage recently. Of particular interest, I notice that the master cylinder is of course on the RH side of the car. However the distribution block which houses the brake light switch is still over on the LH side of the frame. I see the brake line from the MC go back to the rear engine mount cross member, and cross over to the LH frame. Then forward to the distribution block. Your shocks appear a lot more modern than mine. Do you know what they were designed for use on by chance? Possibly built for a newer car than the '38, yet they fit the '38? I am interested in buying new shocks for mine. Any info you can share is appreciated. Keith PS if you get stuck, and are missing a photo, perhaps someone here may have their pre-disassembly pics to share. ?
-
@dpollo I did not know that. The seat has been recovered now, so I am not wanting to cut in for a speaker. With the oil pan off, when I turn the flywheel by hand, I can hear a little compressed air coming down past the rings. It bellows, amplified in the crankcase. Easy to hear. I suspect this is an indicator of blow by? I suspect any engine with some use will eventually allow this to occur. How bad? Depends on time in service and wear. It’s inevitable. The Compression, vacuum measured Engine sludge seem respectable. I’ll carry on as is. Maybe I’ll pop off a main and a rod cap and inspect those too.
-
Some sludge in the oil pan. Not bad. Can you name the metal piece I found in the bottom of the the oil pan? Seen at bottom of pic.
-
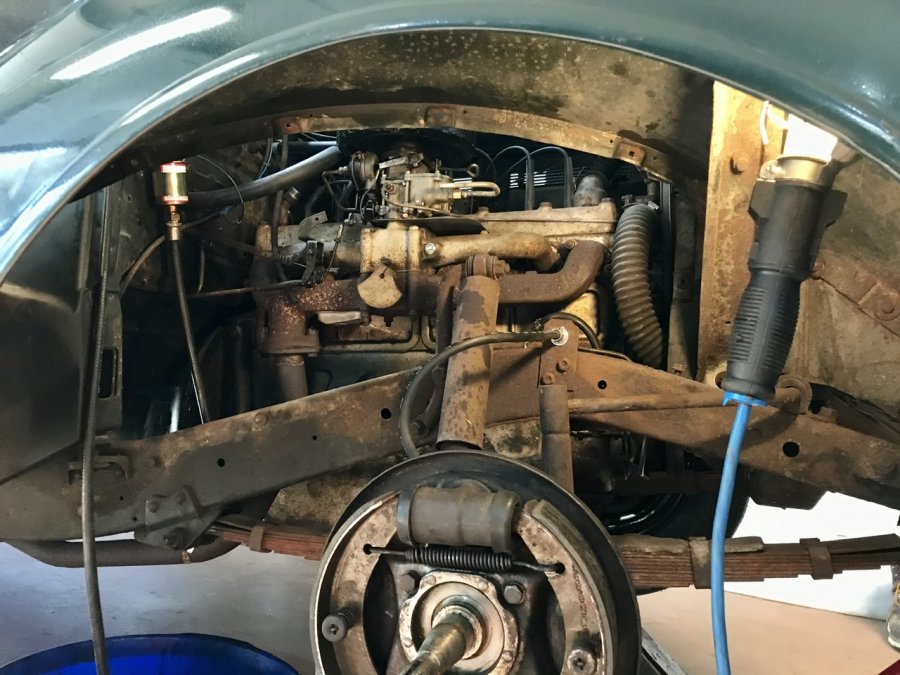
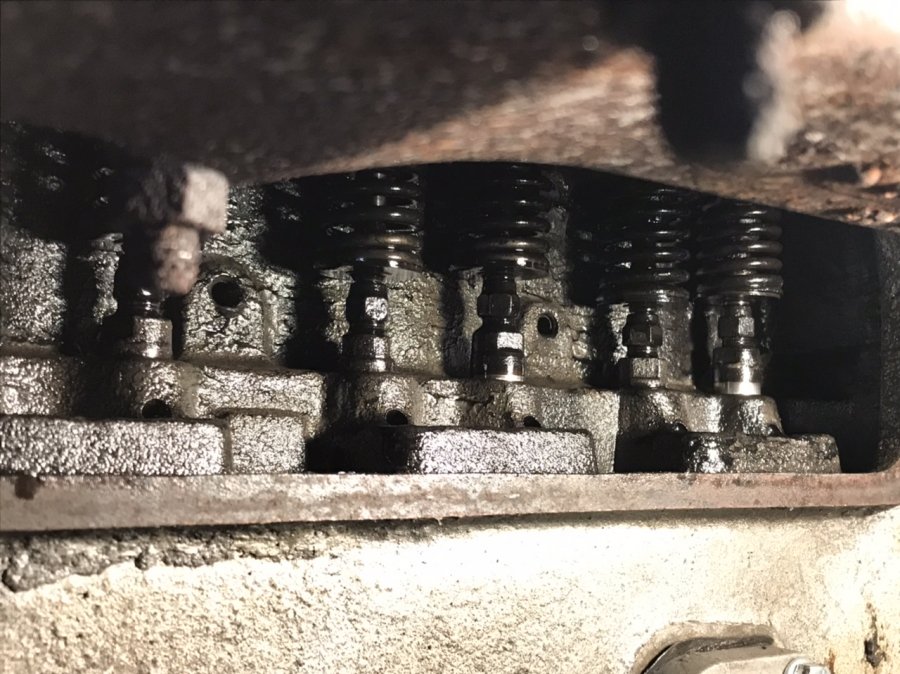
Tonight I’m in thru the fender window to access the engine valves. The crankcase is quite clean. Traces only of any sludge. I think it’s another clue that I have a low milage engine in this car. Earlier compression and vacuum readings showed well too. I will drop the pan soon too. Happy findings!
-
Someone way smarter than me informed me: First off: 1st gear and 3rd gear, are the same two gear ratios. The same two gears are meshed when in either 1st or 3rd. Additionally 2nd and 4th gears are the same gear set that are meshed. Same gear ratio when you are in 2nd or 4th. What you are really doing when going from low range to hi range, is changing the final gear ratio of the output shaft of the tranny. "Drive" on the shift console could also be called "hi range". Ok, so lets you start in 1st (or 3rd gear) in low range. You lift your foot and shift to 2nd gear, in low range. Now lets assume you clutch in and shift the console to drive (high range). The tranny stays in 2nd (which is also 4th) gear. All you did when you shifted into hi range was change the final gear ratio of the output shaft. So you cannot actually go up through all 4 possible gear rations from 1 thru 4. The tranny upshift goes, 1st, 2nd, 4th. It was designed this way. The only way to get into 3rd is either slam the throttle down when in hi range, and it will down shift into 3rd. Or, you are in hi range 4th gear ratio, and you coast to a stop. Then the tranny down shifts into 3rd. This can be confusing. It is weird to understand unless you understand the way this tranny works. Maybe another way to look at it is: There are only 2 gear sets on the input side of the tranny. Then you have a final drive hi-low gear option on the output end of the tranny. Your down shift problems are not really solved here, however it does explain why 3rd is skipped on the upshift. This is just a 2 speed tranny with hi/low range options. Many a man has scratched his head over it. Many will poke fun at it, however it’s genius. Those who don’t understand may ridicule it. The people who figured this out and designed it were really smart!
-
-
Thanks guys. I enjoy your feedback, and also enjoy sharing my progress. It is exciting as my project moves ahead. It is nice to know there are folks around here that really "Get" these old cars. I can commiserate with you all about the topic. Most friends, and family in my life sorta hover over the car. They think it's neat and want to go for a ride. They all sorta glaze over when I start talking mentioning the diff or carb work that I completed. I know I've gone too far when I start comparing the inner workings of my M-6 semi auto tranny in my '53, versus my 3 speed with cluster gear, countershaft tranny in my '38. Yet here, we can talk about it and you understand. We share a common language here. We're vintage car outcasts sort of. The weird guys who cling to the old, less popular Mopars. The cab in the '38 is cozy. Momma and I fit in there nicely. It sure would have been fun if we were teenagers, borrowing Dad's car in 1940! I am planning to install a custom radio. I found an old large box style AM tube radio that was period correct. Art-Deco appearance. About 1940. I gutted it. I ordered a Blue-Tooth circuit board with built in amp. It will run off 6V. My goal is to install 2 speakers, and the circuit board in the old radio box. All we do is jump in the car, the iphone automatically synchs up wirelessly to the radio box and plays all our favourite songs. That's the plan. We shall see. I will post photos and share that project when I get to it.
-
If I had to take my car somewhere else, for any work that had to be jacked up more than a couple inches, I would not own my vintage cars. I enjoy the wrenching very much. As much as driving the cars. If the wheels are still mounted, and the car is jacked up, it will not crush you if it comes down. If the wheels are all off, you can take extra measures to protect yourself. Lay down, and double stack two wheels and slide them under the frame. The car won't flatten the wheels if it comes down if jacks fail. You can use jacks, and additionally back them up with a hydraulic jack too. I do this often. My hydraulic shop jack on 4 wheels is often jacked up as a back up plan, beside the mechanical jack. For big jobs, longer term jacking, you can buy dimensional lumber and cut and stack pieces. It can't come down if you do it right. 4x4's are great. 2x4s work well too. The bigger the better. Cut 'em up in to manageable pieces and they are easy to store. You can stack to various required lengths as required. If you'd played with lego, you're perfectly qualified to proceed. Heck I've even taken a round, cut up tree piece that was destined to be split for firewood. Sits nice and flat when both ends have been cut with a chain saw. Slide under part of the car. It'll save you if jacks fail. Tranny out, clutch out, diff out, driveline out, all wheels removed, brakes ripped down...All in the past couple months here. Jacked up on all 4 corners, with extra precautions for months. Nobody else is getting under that car but me. I sure am not going to pay someone else to do it. Stop, think about being safe. What could happen? Remove the risks.
-
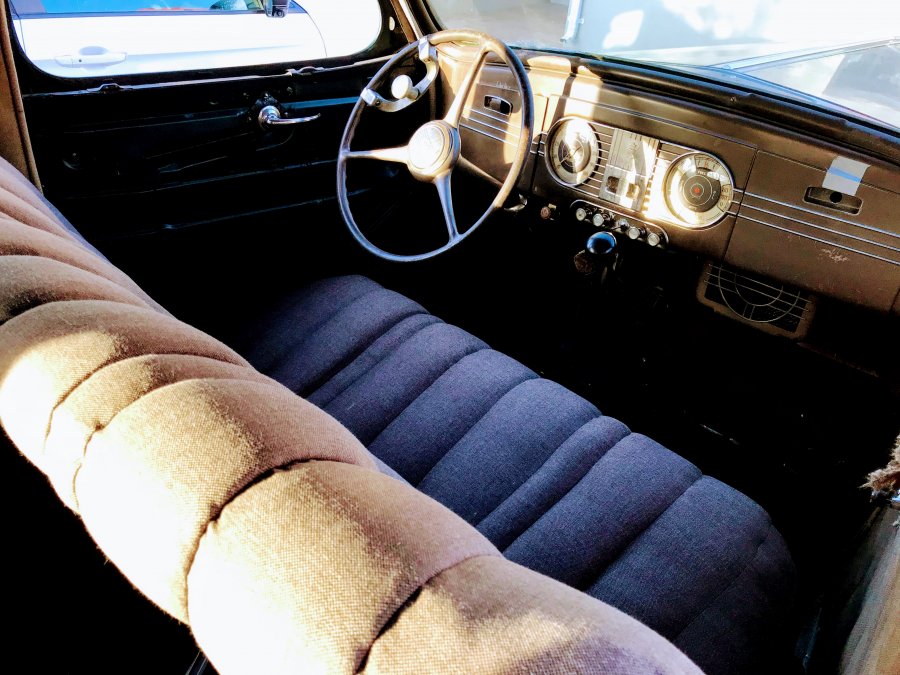
Couldn't wait any longer to put the seat back in a try a test drive. I invited Momma to jump in and enjoy her efforts. (She reupholstered the seat).It was very comfy. It was good to see her smile. Heat blowing on her feet, sitting in comfort for the big drive around the block. ? Part of me is surprised how far the car has come since I bought it. The members on this forum have been very helpful. Thanks for all your assistance so far. I'm far from done but the rewards are stating to show up now. If anyone has a glove box latch they'd part with let me know! The duct tape is just not doing it for me.
-
Today I tried the blower motor and heater core system. I works! I wired it up to read with the ammeter draw. Simple 10A on/off toggle switch for now. That was all I had in my parts stash. So I get hi fan speed or off only. I’ll look into variable resistor options so I can control fan speed. “Heat is a wonderful thing in the shoulder seasons”. - Said Momma.
-
Happy day! I’m feeling good. Reaping the benefits today from working on my ‘38. It’s testing well and continues to improve. The brakes feel great. I’ve only gone around the block so far. I’ve got some more work to go yet before I insure it for road use. Steady progress. Time to drop the pan and look for sludge. Then pick an oil, and set the valves.





.jpg.0eed492bfd7b277dd5b7d5309ba99557.jpg)
