


keithb7
-
Posts
3,462 -
Joined
-
Last visited
-
Days Won
193
Content Type
Links Directory
Profiles
Articles
Forums
Downloads
Store
Gallery
Blogs
Events
Everything posted by keithb7
-
After my pump pin walked out, a nice lite 2-3 day dosing of JB Weld on the new pump fulcrum pin ends worked wonders. 5 years and counting for me. No problems. In my experience either the straight or the bent arm fuel pump will work if you have the mounting space.
-
I just posted timing instructions here: https://p15-d24.com/topic/61588-reviving-my-p18-after-po-gave-up/?do=findComment&comment=662050
-
One could really mess with the major timing adjustment located under the distributor. Crank it way out spec so it fires for cylinder 4, before cylinder 1. Lol. Lack of reading and writing skills makes a very dangerous tinkerer. Pull distributor out. Remove cap, and all wires. Set #1 piston at TDC compression stroke as best you can. Your pulley markings should confirm. With rotor in place, pointed to 7 o’clock try and drop distributor down in place. If it won’t go, turn rotor to where it drops into place. Seating in the oil pump slot. You have a choice to make. This is where #1 wire sits on your distributor cap. Followed by 5,3,6,2,4 wires. Or better, take note where your rotor sits in relation to 7 o’clock where it should sit. Remove oil pump. Note the slot position in oil pump shaft. Turn pump drive gear with your hand to where you think the slot should line up with your distributor shaft. Re-insert oil pump but don’t bolt it down yet. Re-insert distributor. Seat it in the oil pump groove again. Is your rotor at 7 o’clock now? If not remove oil pump and adjust it again. Once rotor and pump are in proper place you’re done. Insert plug wire #1 in the distributor socket directly over where the rotor is sitting. Followed by proper firing order. 1-5-3-6–2-4. My Mopar head has the firing order cast into it. Hook up your spark plugs. Set your static timing with a simple go-no-go type of light. Or digital multimeter set to continuity beep. Start with your major timing adjustment under the distributor base. Lock it down as close to zero degrees as you can. Then set your minor adjustment, (easily seen at the side of your distributor) to about 2-3 degrees before TDC, static. If you can. Use your pulley markings for reference. If all the other parts in the ignition system work, voila! You should have it nailed down. Fire it up and listen to it purr. Season to taste.
-
Here is less rambling and more details to build your own brake tool. Share with eveyone you know! Lol.
-

Help Wanted Incorrect Parts - Axle Outer Grease Seals
keithb7 replied to keithb7's topic in P15-D24 Forum
4 years later...I took the rear drum off. What a mess. Wheel bearing grease everywhere. I am pretty sure other side is the same. I'll take it apart as well. The issue I was having in 2020, with the rear axle grease seals has come to fruition. @Dodgeb4ya It seems the seal is not sealing against the drum hub surface. Grease is everywhere. I'll order these now, and get 'em on the way. Thx for the tip @desoto1939 https://www.ebay.com/itm/134516601580?chn=ps&mkevt=1&mkcid=28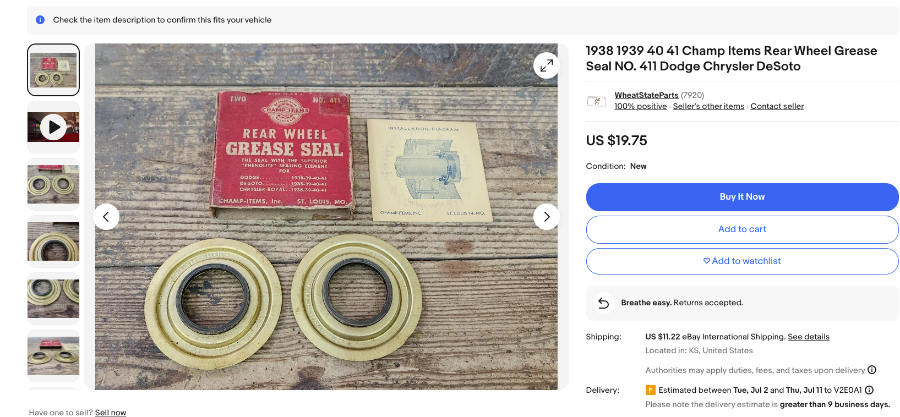
-
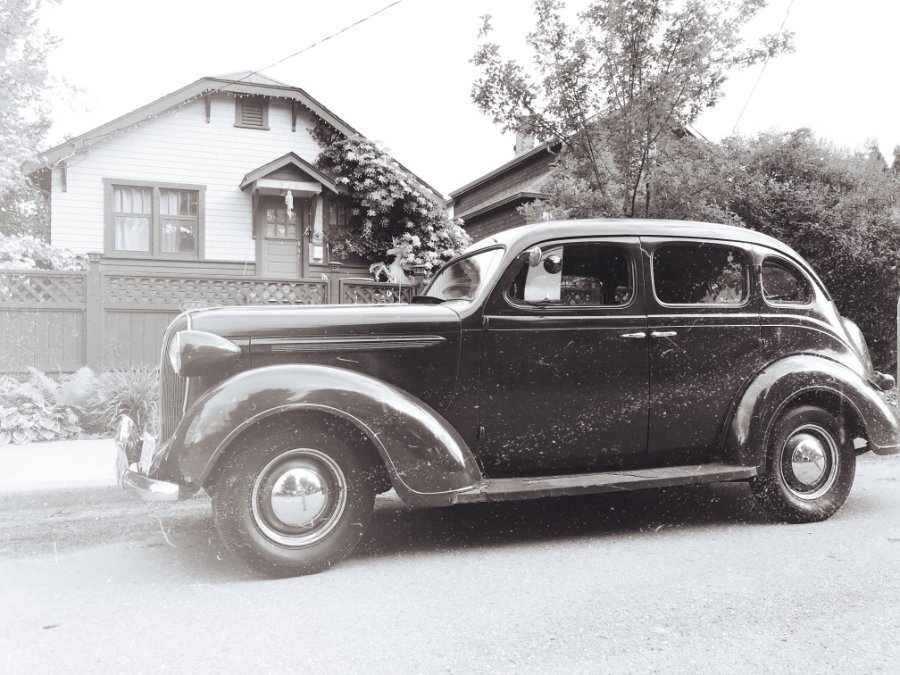
I like this game. I took this one a couple years ago. I used a iphone photo app to add the vintage marks, specs, and corner over-exposure. My 1938 Pymouth Deluxe P6. We should move this over to the main forum and start a new thread there.
-
Great suggestions! Pulling the distributor is a great idea. Take it apart and replace any old wires. Mentioning the spark you are seeing down behind the points, is a good clue to chase. Check the vacuum advance pot by pulling a vacuum on it. Replace the wire from the coil to the distributor housing while you are in there. Then you put the distributor back in when engine is set #1 TDC compression stroke. Turn your distributor shaft until the rotor sits at about 7 o'clock. Then mesh distributor shaft gear to the oil pump gear. Put spark plug wire 1 in the cap socket right over the rotor. Proceed with 5, 3, 6, 2, 4 clockwise. Then you'll have it set up right. Your crank pulley timing mark should be at, or very close to 0 degrees. If its not, someone probably put a different pulley on it. Draw your own line with a white paint pen. Then fire it up and check your timing with your timing light. 2-3 or so degrees advanced should be good to set it at. You can hear it, when its right. A vacuum gauge off the intake manifold is also a great way to set timing at idle. Rev the engine up a bit and watch the timing mark with your timing light on it. The timing mark should be advancing. Check and set your dwell by adjusting the points with a dwell meter, as per the manual specifications. 38 degrees dwell for my old Mopars.
-
Cool. What is the little cream & red wagon?
-
1950 Plymouth special deluxe not starting when hot
keithb7 replied to Rlopera44's topic in P15-D24 Forum
I illustrated the fuel boiling theory in a YT video I made. I was convinced that winter fuel boils at a lower temp. I am not a chemical engineer, I cannot prove it. A hot spring day, with winter fuel at the pumps still, or left in your fuel tank, add a heat-sink hot engine. Then turn it off for 10 mins. Try and restart it. You’ll likely experience what I found. While parked, raw fuel was percolating out the idle jet just below the throttle valve. Sitting and pooling in the intake manifold. Yes another guess. It is fun to participate in these threads and share our experiences. Honestly I’d be inclined to throw a new $15 6V coil at it. Rock auto. They’ve worked very well for me. -
Indeed. I do it all the time. Sometimes I insert a nice 4” block of wood between the jack cup and axle housing. Speeds up the lift process, and gets the car up higher before the jack maxes out. Just make sure mother-in-law is not in the back seat still. 😁
-
I just removed my transmission, clutch, flywheel, and engine oil pan. The tranny and flywheel can be done solo if you are in decent shape. (Muscles). Flywheel was easier than I expected. The hardest part was the starter mounting bolt. You could just pull the cylinder head and oil pan. Remove rod caps. Push pistons out the top. Hone. Wash vigorously. Perform valve grind by hand. I’ve done that. The hardest part might be leaning over your fenders doing the valve grind for all those hours. Definitely do-able.
-
Front seal leak might be attributed to a groove worn in the crank sealing surface. A speedi-sleeve install can often fix it. An oil pan gasket that was trimmed too short could cause an oil leak at the front of the oil pan. Loose oil pan mounting bolts could allow for a leak. Rarely the case in these old engines, synthetic oil will leak out or almost everywhere. Don’t use it in these old engines. A warped front timing chain cover can cause an oil leak. Over the past 80 year some people have really pounded in a new front seal. A proper press is better. It does not cause deflection in the front cover.
-
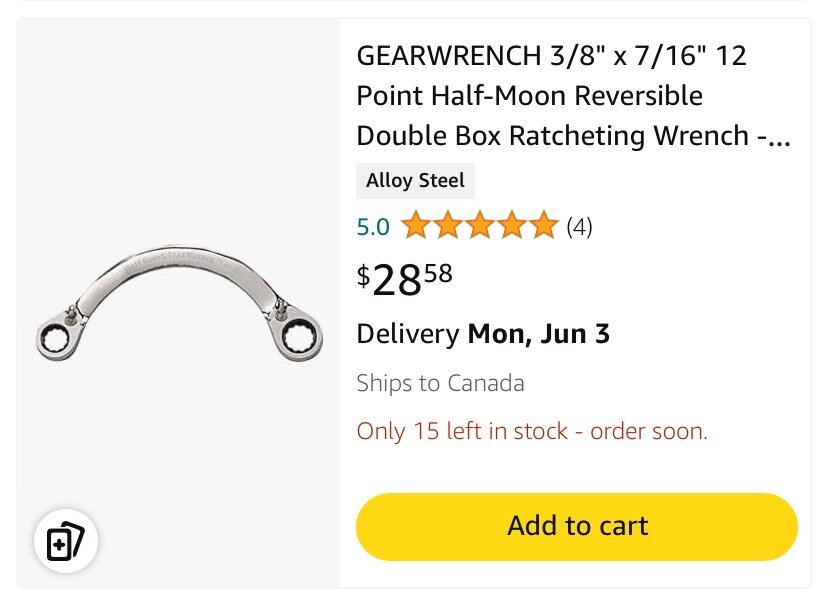
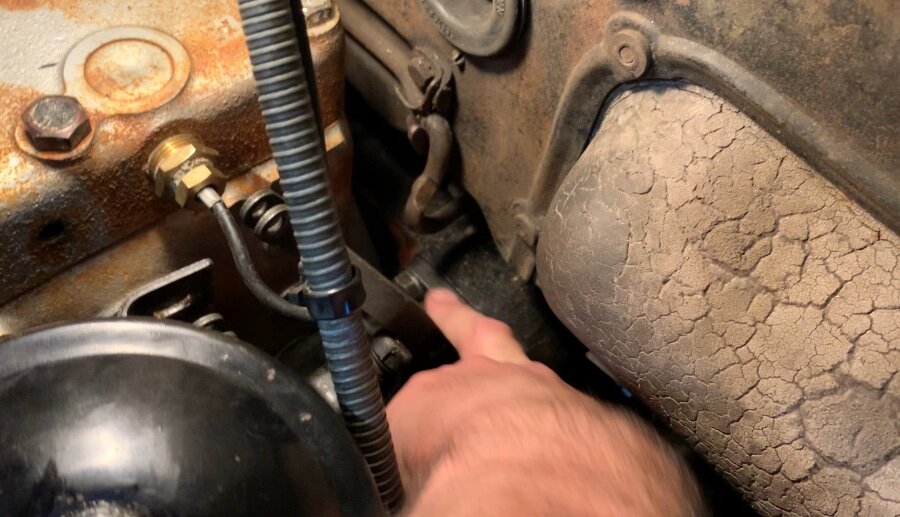
With my car, getting the lower outer starter bolt in and out is a breeze. Yes it holds the starter in position. That’s not an issue. It’s the upper inner starter bolt that takes years off your life. Looking at it again recently I am not convinced a half moon wrench will make it that much easier either. The problem seems to be compounded by the foot starter linkage. Even though the horizontal push rod assy is easily removed, the vertical steel supports are right in the way. Add to that the wrench has to travel down behind the cylinder head. Between the cylinder head and firewall, there is not enough room for my hands to fit. It can be done. I’ve proven that to myself 4x or so. It’s just quite a struggle.
-
To me a bent armature shaft adds up and makes sense as a possibility. Back firing?The starter drive pinion gear is attached to a one way bendix gear drive. If the engine flywheel tries to override and drive the starter gear it freewheels. Wouldn’t it protect the starter bendix from a backfire kick-back?
-
I think you are right @p15-1948 the larger ratchet head won’t fit down around the curvature of the cast starter nose come. There is a bright side to all the cussing and fighting with said starter bolt. It builds character, confidence and experience in us. Also removing the starter was a lot easier than replacing the engine rear crank seal and oil pan gasket. You’ll learn why and more details on that in my next upcoming You Tube video. Coming soon.
-
Something like this in the correct size. I think mine was a ⅝” bolt head.
-
45 mins to get the upper starter mounting bolt back in and tightened. 237 ci 25” engine with foot starter lever. I love the simplicity of the foot lever but getting a 5/8 wrench and your hand down in there? Oh boy… I’ve done this 4x in the past few years. It doesn’t seem to get any easier. Worked myself into a sweaty contortion artist. It’s all good, done. I’m just here looking for sympathy. Lol. Anyone have a trick for this task?
-
This post is referring to fuel transfer pumps. For carb rebuild kits I have used Carb Doctor and netted good results. The kits came with the inlet and outlet small chrome balls for the accelerator circuit. They are different sizes. Make sure they go in their proper locations. New plugs to hammer-in as well came with the Carb Dr kits. If I knew about original Carter kits, as seen above I’d have ordered one. OEM is usually the best.
-
Welcome to the group. This is the best place in the universe for flathead era Mopars. Looks like you’ve found yourself a great project. A good looking example. More photos and details would be appreciated. Does it run? What’s your plan? Revive it? Or hot-rod it up a bit?
-
I sometimes re-watch my own videos to review what I've forgotten. Lol. I was probably 25 in about 1996 the first time I could not, for the life of me, remove the wheel bolts from a home built trailer axle. Just the one side. The other side, the bolts came off easily. The other side no way. I broke off a couple ⅜ to ½" adaptors using a breaker bar. Then I gave up. I was trying to help someone with a flat on the side of the hiway. I shrugged and stated I was out of tools and ideas. Sorry. Call a tow truck. Much later in life I bought my first old Mopar. I came to realize what happened that fateful day back in '96. I think of it every time I remove my LH wheels decades later. They must have had an old dead axle, solid beam from an old Mopar under that trailer. Like my '38 Plym front I-Beam axle. We all start out in life pretty dumb. Education and experience, there is no substitute.
-
Do you have any photos? I've had good luck taking pumps apart, and matching up the diaphragms with kits on E-Bay for example. Look at the pics on the E-Bay ads. You'll likely match up a kit. A lot of models take the same kits. Note the slight differences in inlet and outlet valves too. Someone with a Hollander Exchange book might be able to tell you good info on those numbers you posted. My Hollander book is 15th Edition. It covers from about mostly 1930's and 40's. Your numbers are not listed in my Hollander book. Then & Now has a great selection ok pump kits will images too: https://www.then-now-auto.com/product-category/fuel-pump-kits/
-
I was thinking pressurized cooling system as my ‘38 has pressurized system. It does need a good burping when coolant is replaced. Previous owner added a pressure rad that seems to work well. Its a little undersized for the dog days of summer, up the long steep hill home. The pressure is working as it doesn’t boil over. Yet the gauge is up there in the 200 mark under those conditions. By-pass cooling system or not, I’m thinking the thermostat is wide open when coolant is hot and high ambient air temps. A fan shroud could help. I’m guessing an open fan a couple inches from the rad might be 50% efficient? A guess. One time I did leave part of a paper shop towel stuffed in the small by-pass tube of my other Mopar. I forgot it in there and reassembled all. It did run hotter. It took a bit of time then it finally flushed through. The pump vane chopped it up. I was scratching my head wondering why it was running hotter, after I put it back together. Soon I found the fibre remnants floating on the top of the rad level. Don’t do this! Lol.
-
If ambient temps are very hot outside, a different thermostat won’t make it run any cooler if the cooling system cannot remove enough heat. You could run no-thermostat, a 140, a 160 or a 190 rated one. Won’t matter much. They’ll all be wide open trying to allow as much coolant to flow as possible. If you like you can run without any thermostat and see what results you get. Just to learn. I always recommend you run with a thermostat in a healthy cooling system. It allows your engine to heat up faster. Reduces carbon build up and oil sludge. Runs at proper efficiency sooner. When it’s 100+ outside, once your thermostat opens its probably not closing again. “Engine was repaired”. Meaning what? What was done and who did it. I’ve seen people “rebuild” a flathead Mopar and not remove the pounds of scale and sediment in the block. When new rad, waterpump, hoses etc was installed, did you drive around for a while with the rad cap off? Let the coolant get hot and burp? Get all the air out of the system? I can drive my flathead and see 180 all day. Then park it and within minutes watch the temp gauge rise to over 200. It’s totally normal for a fully warmed up engine to do this. Especially noticeable on a hot summer day.
-
I see good new old stock original Mopar synchromesh gears (Mopar called them a clutch gears) on E-bay. If nobody will ship to Germany, I'll help out in buying one. I have shipped Mopar parts to Germany before.
-
Mine has no linkage. Floor shifter that goes directly into top of transmission. I believe mine pops out of gear when going down hill due to the worn synchromesh gear.


