Search the Community
Showing results for tags 'heater'.
-
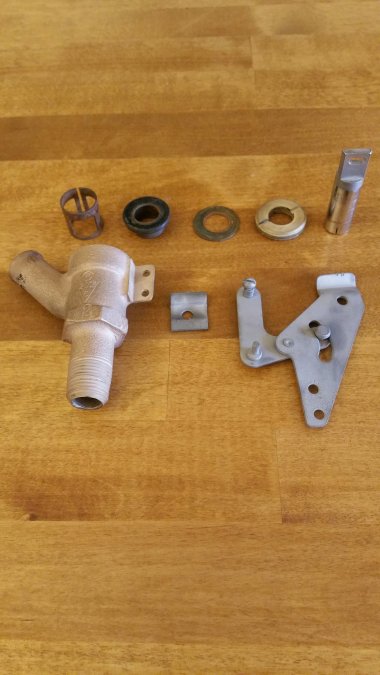
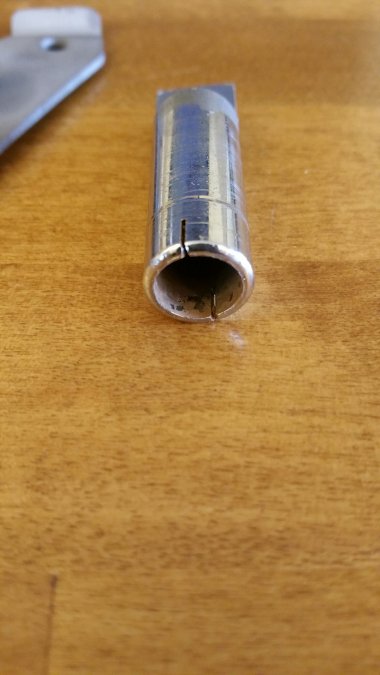
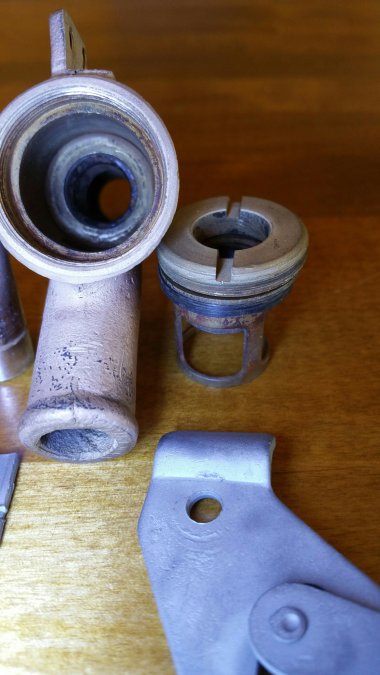
The seat of the heater control valve has some pitting and corrosion. I don't have a good seal because I can blow through the valve even when fully closed. Is there a way to refurbish the valve seat to prevent it from bypassing? On the other hand, the silvery colored tubular valve stem has two 1/4 inch slits cut into it at the seating surface which appear to allow a small amount of coolant to bypass through the valve even when closed. Why the engineers wanted to allow a small leak past the seat is a mystery to me. But the main issue is the valve seat.
- 29 replies
-
- 1
-

-
- heater valve bypassing
- heater valve refurbishing
- (and 11 more)
-
I need some advise I have a 1950 Dodge Coronet. I am having tail light issues. I think I need a headlight switch. I can not seem to find one yet. and would like to know what some of you do for replacements. I have spent many hours on the internet and can get close. Most all are still 12 volt. some will pull instead of turn . some have a fuse. I thank all of you for your help.
-
on my 1951 dodge , i have this cardboard heater box that connect the radiator heater to the inside of the car,, how can i fix this?? tape or can I still buy good one on the internet???
- 13 replies
-
I have a Model 65 heater which I intend to install in my 51 B3B. I'm trying to figure out how the simple-looking defroster valve works. It seems to me the valve should open up when the defroster cable is pulled out and it should close when the cable is pushed in. From my perspective it looks like it would work opposite to that. Should the cable be threaded into the top of the hole in photo 2 or come up through the bottom? Should there be a spring somewhere to help close the valve or does the cable alone open and close it? I'm scratching my head on this one.
-
The layout of the heater/defroster and vents of my recently acquired 1947 Chrysler New Yorker Sedan appears to be so basic that I am beginning to doubt whether this really is a New Yorker at all and it may be a re-badged long wheel base Windsor or some other model. I guess that I can check the serial number against some online references that I have browsed and I shall do so - but here are the things that I have noticed and maybe someone can tell me - New Yorker-or - not a New Yorker: A. I have the parts catalog and I have looked at the exploded view of the windshield defroster vents for a '47 New Yorker and I see that there is an uptake under the dash on both the left and right sides of the windshield. In my car there is only an uptake on the right side under the dash and by the time the air from the heater gets to the left side of the windshield - where you need it most- it is cool and blowing very weakly. From my inspection it looks like that is the way the car was built - it never had an uptake for the windshield defroster on the left side. New Yorker? or Not a New Yorker? B. My car only has one heater motor - the internal MOPAR heater on the passenger side under the dash and the defroster function is operated by a cable -pull choke-like switch attached to the heater and the heater function is achieved by opening up a small "door" on the heater. It is a very basic heater-defroster set up that one would find on a Plymouth (I used to have a '49 Plymouth). I have also noticed from pictures and diagrams that New Yorkers seem have an elaborate heater system with big vertical vents on the driver and passenger kick panels. It doesn't look like my car ever had them - or if it did they were removed and replaced expertly with period appropriate materials. Further, the "heat", "defrost" etc labeled knobs on the elaborate New Yorker dash are all fused and fixed in place and not connected to anything - I would have expected that these knobs would have been left out altogether if a 1947 New Yorker was offered new with such a basic heater/defroster set up as I have described above. New Yorker? - or-Not a New Yorker? Not trying to be overly fussy about this - I am very pleased with this car-if possible I was thinking of trying to restore the heater/defroster set up to conform with what options were originally available but I don't want to proceed upon the false premise that this really is a New Yorker if that is not the case or, in the alternative, if this basic heater/defroster set up is correct for a New Yorker then I will be happy to leave it as it is. If anybody has any information that can set me straight about this I would really appreciate it.
-
From the album: 1948 Dodge Town Sedan Options & Accessories
This is the heater with the defroster option & fan speed selector. The "Temperature" knob in the dash is a dummy. Water flow is controlled by a valve in the engine compartment toward the rear of the cylinder head. -
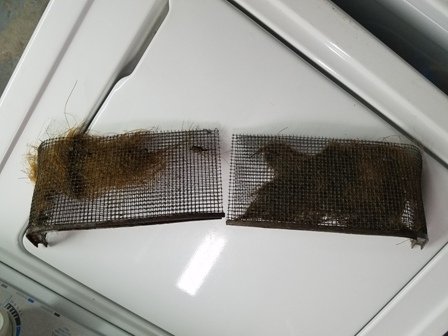
Recent purchase of a cowl vent housing under resto . My D24 came with the passenger heater only and several years ago I found a NOS driver side heater. This should tie the two together nicely when I'm done. Currently blasting and painting. Found a rubber bellows in Hersey a few weeks ago. Interesting 1940's TECH , The screen to filter out the bugs was lined with horse hair !
-
I have a 1960 D100 with a flathead 6. The return line for the heater runs from the heater to the head behind the back most cylinder on the passenger side of the head. Is this the original plumbing or is there another way to plumb the heater return line without running it into the head?
-
I was at a swap meet looking for some oil bath filters to restore. I found a gentleman that was selling each for $5, I picked up a cool looking mopar deluxe heater and he offered me a second for free! I'm planning on refurbishing them. I have seen a couple mopar deluxe heaters restored and they look pretty sweet. The second one I have never seen it has "airflow deluxe" on its front, the airflow emblem was cut to make room for the 12v blower it got installed. If anyone have some info on these please feel free to let me know.
- 9 replies
-
- Mopar deluxe
- Mopar deluxe heater
- (and 4 more)
-
It's been awhile since I gave an update but after struggling with the brakes and getting them to stop locking up I took the 39 Dodge on a weekend trip and put about 400 miles over the weekend; 200miles each way to the coast for a little car show and back. Everything held up pretty good and she handled pretty well and I was able to do around 55 the whole way. The only issue was the heat, not the engine heat but the little six volt heater in the cab with the doors that open to expose the heater core. That thing was putting off a ton of radiant head any easy way to disable for the summer driving but having it for cold weather driving.
-
I have a Roberts Gordon 80k BTU heater in my garage that has just recently started to backfire. When it is trying to ignite, it makes two loud bangs back to back and then stops trying to ignite until the next cycle. Anyone ever had a problem like this? It was recently converted over to natural gas using the kit from the manufacturer. I'm wondering if its a gas inlet setting that is off, or if there is a leak in the pressure valve. **Edit** This usually happens when it is very cold 10 deg Fahrenheit or below.
-
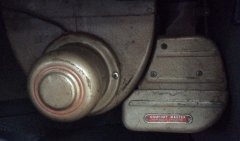
Can anyone identify this heater? it had been installed in my 52B3B. I'm removing it to install the Model 61 I've just restored. Might it be from a car? do you think it is even MOPAR? The yellow date stamp in the photos appears to say Jan 8 - 1963 or maybe 68. It looks way too rudimentary to be that recent. Might be a date of service etc. The core appears good - full flow and doesn't seem to leak. It has a manual defrost control that swings a bit tight. The vents are fixed with no doors.
-
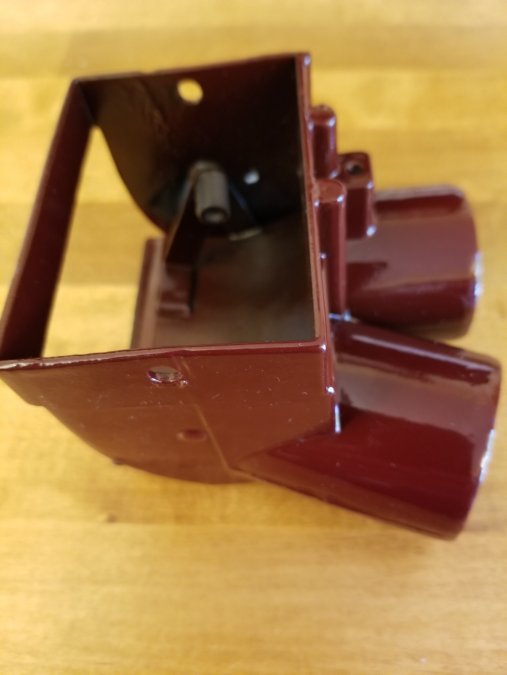
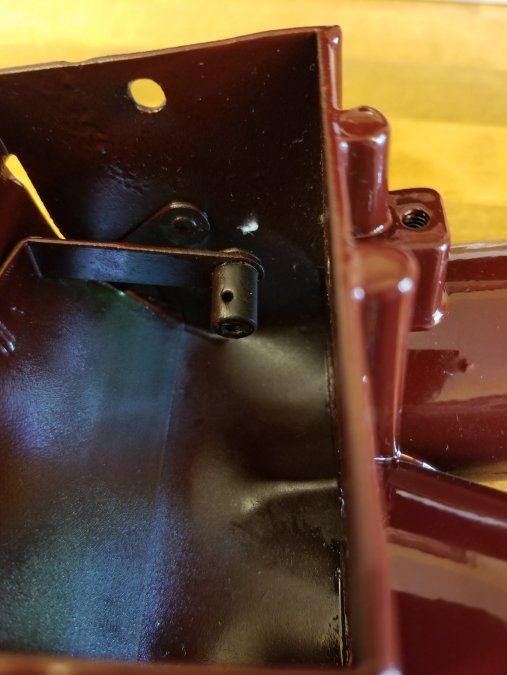
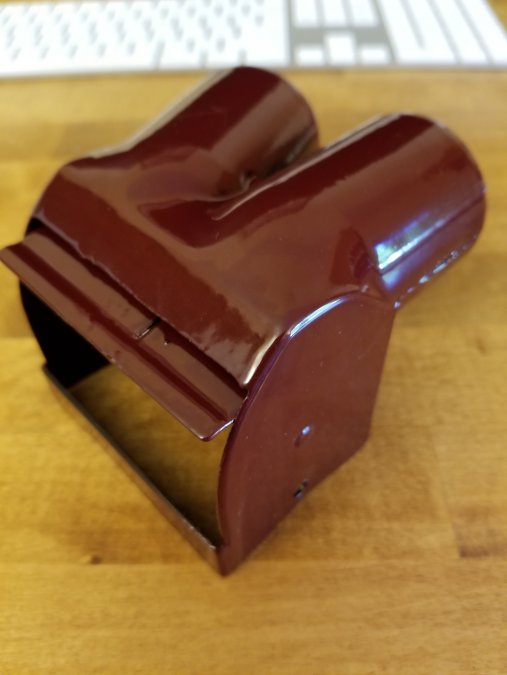
Thought I'd share my latest project with everyone. Maybe someone will find it useful. As we all know, the original cardboard duct linking the underhood heater core to the firewall on many of our cars is less than durable. I got my '51 Windsor with a galvanized steel, riveted, duct taped abomination in place of the original duct and I couldn't stand to look at it in the engine compartment (there are a lot of other interesting no-noes in this picture too; see what you can spot): Unfortunately, replacements are either very expensive or very low quality and sometimes both, so I didn't like that option. I decided to make my own out of fiberglass using the lost foam method. This is where you make the inside shape of the part out of styrofoam, lay up fiberglass on the outside and then melt out the foam core with acetone. More on that further down. First I needed to get the rest of my heater in working order. My heater control valve under the dash was missing and replacements are expensive and contain 60-year-old rubber, so I did some poking around and it turns out the 1975-91 Volvo 240 uses a very similar valve; in fact it's made by the same manufacturer, Ranco. I decided to see if that would work. Plenty of old Volvo 240s at Pick-n-Pull, so a valve was easy to find. It's hidden in the driver's footwell behind the plastic cover to the right of the gas pedal. You have to disconnect the heater control cable, two heater hoses, and extract the capillary tube from the adjacent heater duct. The right way to do this is to pull the whole dash out of the car, then separate the halves of the heater box and pull out the capillary tube. I expedited this by breaking the plastic duct around the capillary tube grommet and pulling it out the new hole. Apologies to Volvo enthusiasts. Back in my garage my Chrysler control cable needed the loop clipped off the end and then it was easily attached to the Volvo control valve: A couple differences between the original Chrysler valve and the Volvo valve: the pipe/valve assembly is rotated 180 degrees, so the inlet faces away from the direction the control cable comes from. This means either the control cable or the heater hose that connects to the cylinder head must loop around to the far side of the valve. The pipe/valve assy could be uncrimped and installed the other way, but that seemed like an invitation for leaks and my control cable was long enough to make a big 180 degree turn under the glove box. I installed the valve with the short (inlet) pipe facing the cylinder head: I also had to gently bend the inlet pipe away from the firewall to be able to fit a heater hose and clamp on it. I had to cut away some of the firewall sound deadener on the inboard side as well, to get a better angle. The original Chrysler part has longer brass pipes that aren't such a tight fit. I put a tinnerman nut on the firewall and one on the heater valve; one screw is installed from the engine side and one from the interior side, since the pipe blocks access from the outside. I coiled up the capillary tube (don't kink it!) and stuck it into the interior heater duct through a conveniently damaged area so it will pick up heat:
- 18 replies
-
- 3
-

-
- control valve
- fiberglass
-
(and 2 more)
Tagged with:
-
Found this heater amongst some parts I bought, not sure what its from. Its gotta be from a vehicle before 1937 as i believe the logo was changed after that.
-
-
I did this project in November and December before taking the truck on another 600 mile trip...sure made a difference in reducing the noise inside the cab! Thought I would share a few pics with ya... Previously, I had no floor insulation at all, and the original cardboard firewall pad was continually shedding itself all over the cab. I removed it in pieces along with the heater, e-brake handle, and starter pedal. The original green paint was in great shape and just needed a little cleaning. I got the new pad and floor insulation from Quiet Ride, where I think some others here have got it from. Man, was it tough getting that s.o.b. up in there! I had to cut several sections out to clear brackets and holes, and it took a lot of cuss words to get it to fit right. I had to remount the starter pedal to the inside of the firewall, on top of the pad because of clearance issues. Other work performed: - Taped up and plugged all unnecessary holes, and applied dynamat that came with the kit. - Cleaned and painted the floor boards, including under the seat. - Resealed around the gas tank filler tuber with the existing rubber (it was there, just had fallen down through the hole) - Sealed the rear floor to cab wall seam. Looks like a felt type seal was here originally, but mostly disintegrated. I discovered a lot of dust and engine fumes were entering the cab at this point, making it a critical seal. Filled the joint solid with polyurethane caulk. - Applied Dynamat to the floor, following it with the foil-backed insullation. All seams were taped. - Rubber floor mat: I got it from Fleet Farm like a couple others here suggested. It wasn't that expesive, and it cut like butter! It just smells a little bit...but I like it. Another note - I don't think the "Mopar 70" heater I have was made for this truck (see 1st picture). It doesn't fit too well under the dash, and the holes for the mounts and hoses were cut out roughly. Anybody know what this heater is supposed to go in? What does the truck heater look like?

