Radarsonwheels
-
Posts
1,232 -
Joined
-
Last visited
-
Days Won
17
Content Type
Links Directory
Profiles
Articles
Forums
Downloads
Store
Gallery
Blogs
Events
Everything posted by Radarsonwheels
-

1951 Fargo 400cid on Dakota chassis
Radarsonwheels replied to f_armer's topic in Mopar Flathead Truck Forum
Your truck is coming out so cool! Did you etch that shifter plate? Looks like fancy laser stuff but I know acid resist etching or sandblasting around tape or vinyl will do the same. What’s on top of that wrought iron blacksmith style shift arm? You twist that up from square stock with a torch? Super glad to hear you have a smooth runner and no bad vibes or teeth rattling at idle. My idle rattles my neighbors teeth ? It’s crazy how radical and slammed the fargo looks next to your dodge. Very cool. -
I get it close then drive it to someone with equipment to do it perfect quickly. I tried a bunch of homebrewed stuff and it works but its a lot of tweaking & trying. I used to put tires on rims myself too Im a glutton for punishment
-
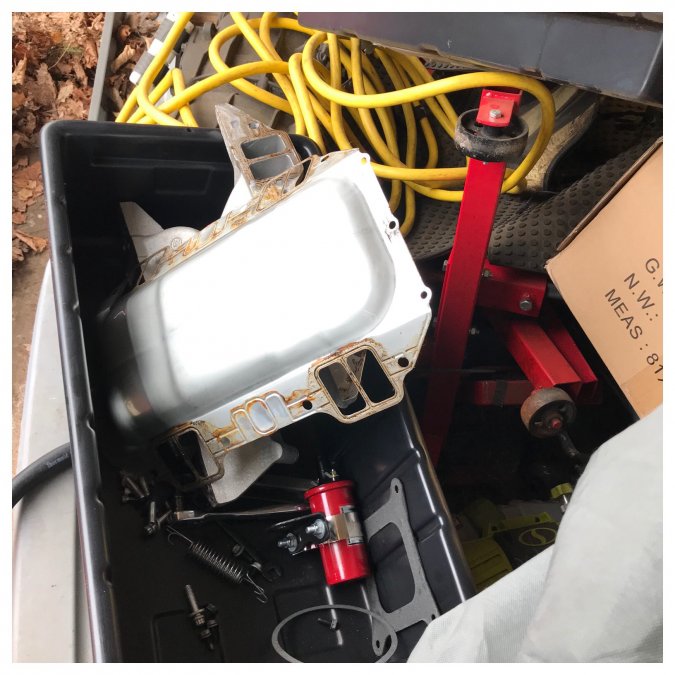
Gotta make a little tool roll to take on shakedowns! And I have to remember to tie the shifter cable farther from the headers- it was close before I took the trans apart ghis morning and I forgot to check it after. I’ve used peel & seal before, and fatmat too- never ponied up the big bux for the brand name before but this time I did. I’m gonna do everywhere under the rubber floor and behind & under the bench seat where it won’t be seen. Should make a huge difference in the resonance. I’d like to wrap the whole firewall but I don’t have a plan to hide it and the truck still gets water inside when it rains- I need to seal everything up.
-
And now that I only spent $17 on a fresh clean drain pan/jug so I could reuse all that B&M trick shift ATF I can actually still afford to buy dynamat!
-
I checked the brakes and steering and went down to the corner and back. It is not always easy to start so I didn’t want to walk home and my kid is in the house watching cartoons after dinner. I was more than a little nervous but the rusty rotors worked ok and the steering was pretty good too- a little more effort than the over-assisted 70s muscle cars I’m used to but nice. I live on top of a small hill in the middle of my block and it’s a 2 lane street that narrows when people park on the sides so I was just concentrating on making it home without killing the motor or finding a terrible problem the hard way. It’s got a loud thrum at idle that will take some dynamat to cure but it never threatened to die. The turning radius was decent (should be for a shortened dakota) and the power brakes seem to be working ok? Not amazing. Breaking them in from their slumber will help but the actual braking happens after a good bit of free travel and requires some force on the pedal. Maybe I will eventually go to a smaller bore master but time will tell. I’m super glad I extended the floor forward under the pedal so it could have more travel without a higher starting point. I hardly looked at the gauges but on the way back up the hill I gave it half throttle and good lord she’s got some stink! BIG milestone today.

-
Yeah I was pretty worried about the pump converter, & seals. I felt much better when I dropped the valve body and the trans above it drained a couple pints of fresh fluid. It did pull some up but it didn’t have enough to make pressure. I also always use plenty of grease when I rebuild rotor pumps both for lube and so it will have good suction. Honestly I had no idea what I could have smoked in there when it didn’t work! My first freak out was when I read that the pump doesn’t flow in Park which is how I did the whole break in. Then I felt a little better when I went back and re read my tf2 shift kit instructions- with the kit it fills the converter etc in park not just Neutral. The rear main seal definitely leaks and I need to put a new gasket between the head and passenger header but I’ll probably romp around the neighborhood soon to seat the rings and get an idea of the baseline tune. Then a post preak in oil change and back to sheetmetal work.
-
So stupid!!!!! edit: all back together it runs thru the gears nicely, stalls around 2500. First drive coming soon
-
Apparently it’s possible to install the atf pickup backwards and run the filter up to nothing, leaving the suction hole unfiltered and above the fluid level. I installed it as a unit with the filter and gaskets on the screws- never checked to make sure the passage went somewhere! Kind of an optical illusion that the center screw is not centered, but it is. Flipped it around. Cheapest fix ever still gotta go back together and fill it back up, and see if it will work now. It’s funny if I had overfilled it it probably would have worked until it sucked enough unfiltered ATF to clog someday.

-
I have 9 quarts in her now- I think something should be happening.
-
Fluid looks new but there’s no flow to the cooler in any gear. I ran back and forth through the gears slowly a bunch. I have 9 quarts in it so it should have done something by now. Stupid dipstick is impossible to read- after adding atf thru the dipstick hole idling in N it just always comes out wet. Even with a deep sump the pickup is extended to the bottom- it should have tried to shift or spat out the cooler lines after a minute in N with one line in a bucket. The torque converter install took a while- I didn’t pour a quart in like I usually do because I had the trans tipped up to get gravity on my side and didn’t want to make a mess. It took a lot of spinning around, pulling up and re-clocking to get the converter to drop all the way down but there wasn’t any force involved and after the trans bolted to the block the converter had to slide back forward a smidge to bolt to the new flexplate. So unless the pump and keyed TC snout are made of tissue paper I’m thinking it’s good. I know the flexplate is bolted onto the converter because I forgot to mark which of the 4 bolts was offset and it took four tries to get it- just my luck haha also I was amazed that it uses such tiny bolts compared to the ones that hold the flexplate to the crank and I wanted them nice and tight but took care not to snap them off. I used blue loctite. That was a long night I remember very clearly rotating the crank over and over trying to find the offset bolt and bolt it up. I wasn’t pulling the trans back off the motor though after how long it took to get the converter to drop into place into the trans! The only thing that messed me up reassembling the trans was I had the kickdown piston upside down or something and the little nose was sticking way up. I slept on it and figured it out the next day- something was upside down iirc. Everything else seemed pretty simple except for the valve body. The tf2 shift kit instructions were super clear and easy but some of the smaller valve body pistons were hard to figure out where they should go- the stock ones I cleaned and reinstalled. I could easily have installed one backward or on the wrong side of a spring. Or maybe a check ball went where it shouldn’t. I am tempted to just buy a tci streetfighter valve body and throw it in to see if that solves everything but when I built the trans I figured if I bungled the VB it’s easy enough to pull off compared to pulling the whole trans. I also crossed my fingers it would just work out... Anyway tomorrow I’m buying a brand new drain pan so I can salvage all this B&M trick shift ATF, draining the trans, pulling the VB, and looking for any problems that jump out. I’m going to carefully disassemble the VB and possibly blow air in the holes in the trans to make sure it applies the bands etc- especially if I find no problems with the VB. I’d like to use this to learn since I’m new to working on auto transmissions but if I have to throw $300 at a new hotrod VB it’s a better looking option than pulling my trans or driveline.
-
When you’re right you’re right. It was running super rich which I corrected but I burnt up 5-6 gallons of gas just on break in! After getting the high rpm break in period overwith I tuned the idle then went to try out my fresh transmission. The tires didn’t move at all, no jolt into gear, nothing. Then the afrs started going lean, the motor struggled, and died. Those glass fuel filters get a bad rap as fire hazards but they sure make it easy to see if you have fuel! I was out. I got some more gas and got the four corner idle happy around 1000 rpm which is just slightly choppy with the cam in there, checked and added a quart of atf idling in N, still nothing. My mistake: I did the whole break in with the trans in Park. I now know that the pump doesn’t run to fill the converter or lube anything unless you are in Neutral or a gear. I’m thinking I smoked it. 25-30 mins of varied rpm around 2500-3000 with a dry converter. The cooler lines are cold and shifting is doing nothing. I figure maybe I bungled the valve body rebuild but it’s looking more like I’m going to be pulling the trans and buying some new parts. At least the motor seems real happy. I gotta hurry up and get this trans right so I can give this motor some work to do!
-
Almost done breaking in the cam/lifters but my lower rad hose sprung a leak so I idled it down so it wouldn’t diesel on shutdown. It only idled for less than 10 secs but I recorded it! I can see the conversation now- “what’s that got in it?!” “It’s a (cough cough) stock flathead motor with exhaust and a cold air intake” hahah It sounds a little nastier than I expected!
-
Truck came! All new comp 8.555” replacement pushrods and I got a couple lifters soaking overnight in fresh oil. Still gotta get some bolts & maybe studs- at least grade 5 maybe 8 whatever I can find locally tomorrow morning before work.

-
I also think a lot of people that run aluminum heads are also running big cams and high spring pressures. I’m trying to use my cubic inches for power and keep the rpms down, plus the hydraulic flat tappet wouldn’t like high spring pressure anyway. And I would need max wedge or bigger port heads- at least the big ‘trick flows’ to make a screaming 512. So no exotic valvetrain stuff for me. The race crowd uses studs in their aluminum heads. I also read a lot of forum posts about how fsm says 25 ft/lbs torque and that is scary tight and folks go 15 lbs? A lot just snug them up by hand- I certainly always did before... So I dunno now I’m scared of pulling out threads. I think I’ll brakleen the holes and hand tighten with blue loctite.
-
Nope just one step ahead- was just talking to a mechanic buddy about weather blue loctite would work in such an oily spot. I’m thinking proper torque and re-torque after a heat cycle. I just gotta get that break in period out of the way with the flat tappet and I can actually start tuning, see if the trans works, get an alignment, rub the surface rust off my rotors with a bunch of ugly stops, find out if I have enough vacuum at idle for my power brakes, plus the little bit more welding and sheetmetal work I was planning to do before startup.
-
Yup- plenty of excitement this morning! At least I got almost two more gallons of water in there for a healthy 50/50 antifreeze mix, got it roughly timed, I know that the ignition, charging system, afr meter, & tach work. I was a little bummed when I double checked my pushrods by rolling them on a glass table- had to order a replacement. The one that smashed into the lifter didn’t look bent but rolling it told another story. I should be out messing around with the motor again in another week. I hope it goes smoother next time but a little three steps forward two step back is fine as long as I keep moving forward!
-
Here’s a video of us scrambling around- me trying to get him to raise the curb idle screw, filling the rad, watching for leaks, then the bad noise at the end when the rocker shaft loosened up and the pushrods slipped.
-
I went back out and fired it up. Toward the end of the couple minutes running it there was a rattle- well it was very evident now. It sounded like it was in the driver’s side valvecover and after it didn’t go away like a lifter that just needed to pump up I shut her down and opened up that valvecover. What a pleasure to be able to work on the motor inside the generous firewall recess! The valvecover came off quickly and I discovered that #7 exhaust rocker wasn’t making contact with it’s pushrod. It didn’t just slip off the side- it was 1/2” shorter than all the others. Also the last two rocker shaft bolts had backed out. At first I was worried they stripped out of the aluminum head but no they were fine. This is my first mopar big block and I am a believer now- it only took 30 mins to get the carb, intake, and valley tray off to inspect the lifters. There is no coolant in the intake and I used the brown stuff that never really dries to seal up the steel valley tray/intake shim. Good news/bad news. The bad is that when the shaft loosened up I took out both lifters for #7 cylinder. The exhaust lifter had the pushrod cup sitting next to it in the valley. The intake lifter had its pushrod cup stuck and cocked inside it. The good news is that even though the exhaust lifter puked its guts all the pieces are accounted for and I don’t have to drop the oil pan. Also the bottoms of the lifters and the cam lobes look perfect and never got a chance to mate in so new ones should be fine. I’m going to see if I can order a couple lifters and get back together next week to try break-in again. It’s wierd I was more nervous and anxious this morning before I started working. Now I feel relaxed about it. A little disappointed but just a little more work than planned no big deal.

-
My buddy stopped by this morning for extra hands & eyes on startup. Since my fuel filler is not vented I was able to prime the fuel system by blowing a few psi into the tank with my mouth on the vent hose. I ran it up into the rear passenger stake pocket and the top is folded over and stuffed back down to keep rain out. That operation works really great- I thought I’d need some gas in a squeezie ketchup bottle to fill the bowls but the see thru filter and carb filled right up- squirters deliver plenty!We solved a couple small fuel leaks and got started trying to light her off. It was acting stubborn and lighting fires in the carb for a few tries. Tried 180° out in case I boned the sparkplug wires on the distributor and no dice, so we flipped them back and re-checked the firing order. The battery got a little weak so we charged it and tried again while I twiddled the distributor and we got her lit off and brought her up to 2700. I set the timing and locked down the distributor around 35° with no vacuum advance. I marked my original distributor position and it ended up actually pretty close to there. Oil pressure was good. The pipes all got hot but nothing melted or spilled. I didn’t check the volts to see if it was charging. It was running super rich and gave a couple pops so we shut her down and with the throttle blades open real far it dieseled a little and gave a couple more backfires. It took another gallon and a half of water in the radiator so that’s looking good. I noticed the accelerator pump nozzles were weeping. Turns out the floats were both real high. Blowing into the gas tank vent acts nicely as a priming pump so the front bowl was easy to set without having to disconnect the coil and crank the mechanical pump but man that back float adjustment is tucked in. Pain in the butt! There is no getting a screwdriver on there so I made due with baby vicegrips. I think the rear bowl is good now? The front is dead on. My buddy left for work at noon and I had the battery charging while I set the floats but I want to give all that spilled gas from setting the floats a good amount of time to evaporate so I don’t burn this sucker down if it coughs out the carb. So I am inside smelling like gas but happy. It felt like five mins of high rpm break in time on the clock so far but it was probably more like 3- adrenaline rush! The fancy digital battery charger says 100% I’m gonna watch a dumb show or something then go give her another turn after any gas is for sure dried up. Here’s a pic of how tucked in my float is:

-
Thanks Farmer! I’m the king of 180° out
-
Not gloating about the unproven motor but as far as the wiring goes I’m psyched. Last motor I built I managed to set it up 180° out and didn’t get that immediate fireup that you want to keep lube on a new cam. ”love it when a plan comes together”

-
I got my dipstick tube secured to a header bolt, felt for compression and got #1 a few degrees before tdc, and ran all the sparkplug wires. I have to go open my shop in a little bit so no priming the fuel system and breaking in the cam (hopefully tomorrow) but I wanted to check and see if it would light off so I sprayed a shot of ether down the carb and turned the key. She spoke! Baby’s first words! No more cranking till I can get serious with the timing light and ready to crank up the curb idle for break in.

-
Yeah they do suck. All battery terminals seem to need a little cleaning once in a while though. I like the pellet of solder deal in your video that’s smart. My whole battery and mount need revision. When this one gets swapped out I’m going to go with a sideways mounted redtop for access and convenience.
-
Great minds think alike. I threw away the fuse holder, stole the battery terminal clamp off the old end, and stuck it back together. Now I’m ready to start finishing up my distributor. Again.