-
Posts
384 -
Joined
-
Last visited
-
Days Won
3
Content Type
Links Directory
Profiles
Articles
Forums
Downloads
Store
Gallery
Blogs
Events
Everything posted by JSabah
-
Well it looks like the PO recalled correctly. According The the registry’s website, I have a 218 ci 1950 Special Deluxe engine (a P20). still can’t find my dipstick but now I know what to look for
-
-
in order to change the reflector to a light, did the whole reflector lens have to come out, or were you able to remove the foil from the lens? Thinking doing this but my reflectors seem to be part of the housing , or someone rechromed them in and they won’t come out without damaging the chrome.
-
I have a Lighting Question or Woodie Owners (or those knowledgeable). My rear tail lights have 2 wires going to them and a socket that only has 1 pin (for a single element bulb). This differs from the typ Ply wiring diagram. I assume that one wire is the hot for the light and the other is a ground (as the rear lights attach to wood and therefor wont self ground). My new wiring harness came with (also) 2 wires for the tail light BUT the socket rebuild portion has a double pin setup - It looks like Im missing a ground wire to the tail lights. Did the original ('49 P18 Woodies) not have rear turn signals (or tail lights - which I cant imagine)? I see that the only brake light is a single brake light in the center on the spare tire door (housed with the license plate wire- is that correct? Have others simply added a ground wire to the new tail light housing so that there are 3 wires and gone ahead and used the double filament bulbs for the tail lights and turn signals and just kept the single brake light in the center or has someone cleverly added 2 wires and another socket to the tail lights for a brake light? Dont think it matters but Im now 12V ....
-
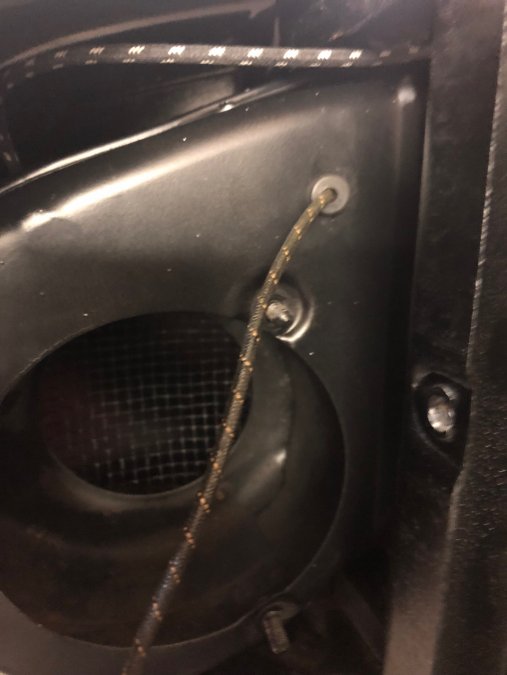
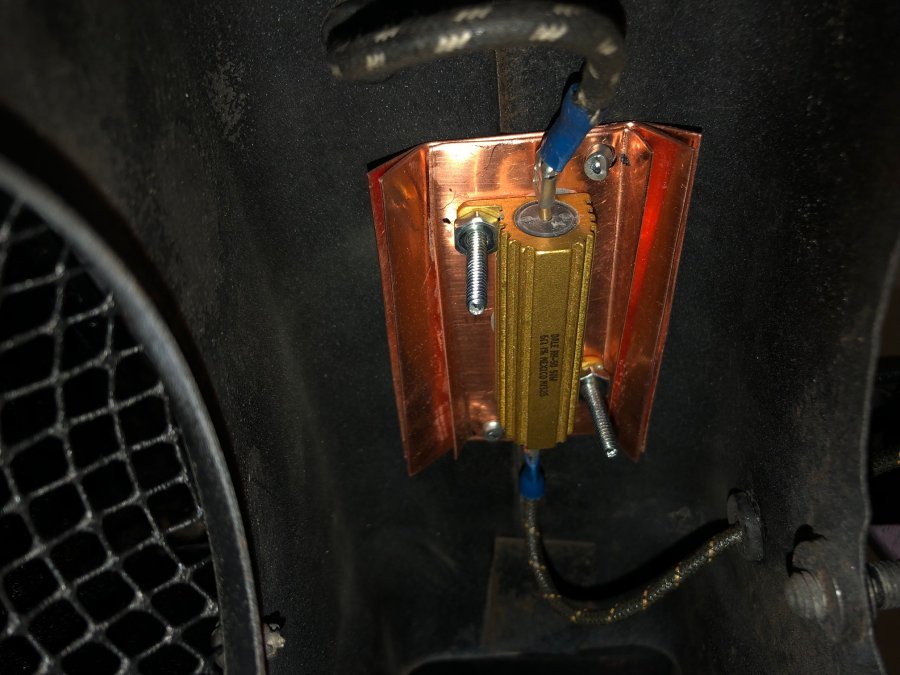
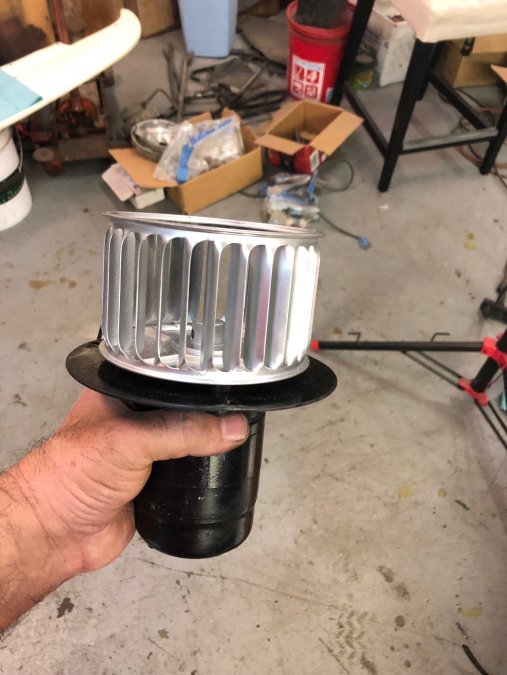
Thanks for all your input. I decided to try to step the voltage down, but also decided to try t make a heat sink out of some copper scrap I had laying around (I did buy some heat compound). Since the fan was out of the car it was pretty easy to put it in the plenum. Just had to drill some holes and use some grommets so the wires won’t wear. I think this should last.
-
In looking for a new dipstick I recall that the previous owner had mentioned that he replaced the engine in my ‘49 Plymouth with an engine that he had from a 1950. Is there a way to lookup the engine number to see what I actually have ( just want to make sure his memory is better than mine ). Here are the numbers that I found - I see that at one time I had the dipstick - but can’t seem to find it .... what other years used the same?
-
A bit of persistence after taking a breather (and maybe a bit of ocd) and the heater is in and pretty much done except for the front hose and installing the fan motor. Now I can work on squeezing the fuel line in.
-
Thanks for these. I ended up moving a bracket and shortening up the pivot rod (similar to your pic- but kept it in the other side.
-
Thanks for these. I ended up moving a bracket and shortening up the pivot rod (similar to your pic- but kept it in the other side.
-
Thank you.... sometimes not knowing what you are doing brings a different perspective Next one?!? Can’t even think about that. While this one was in for paint and new floors, I uncovered a little project that has been waiting for me while I did the woodwork- a 1965 Jensen CV8 (interesting car - google it.) but when I started getting into it, found I needed to take the body off and learn to make and weld ( I hadn’t welded since jr high with an acetylene torch) new floor panels .... now that car is on hold ‘till I get the Woody done ..... the Woody and the CV8 both came after I swore I’d never do another car after finishing my Daimler SP250 (another interesting car to google). When I’m done with these, I’m going to take up a hobby that takes less room and money- like painting or something... unless a ‘40’s or 50’s dodge Power Wagon comes my way ? Not the 1st time and won’t be the last time, I’m sure ... but I sure do appreciate your and everyone else on this forums help.
-
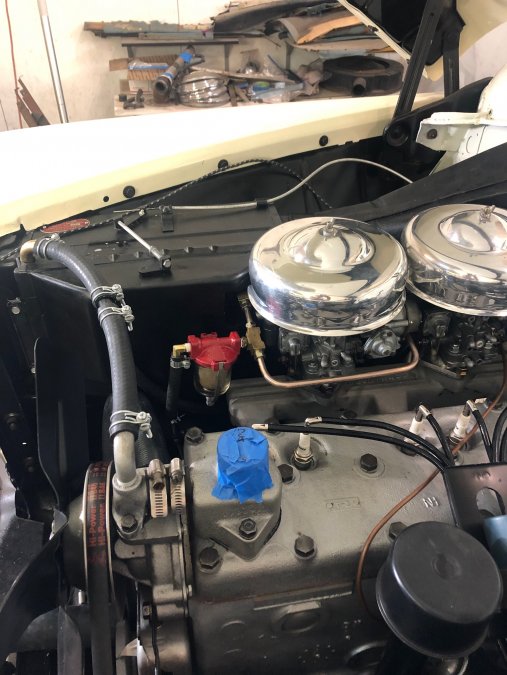
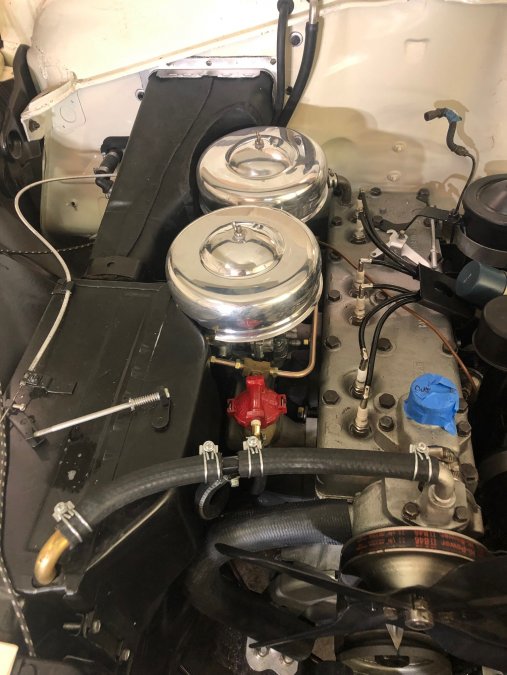
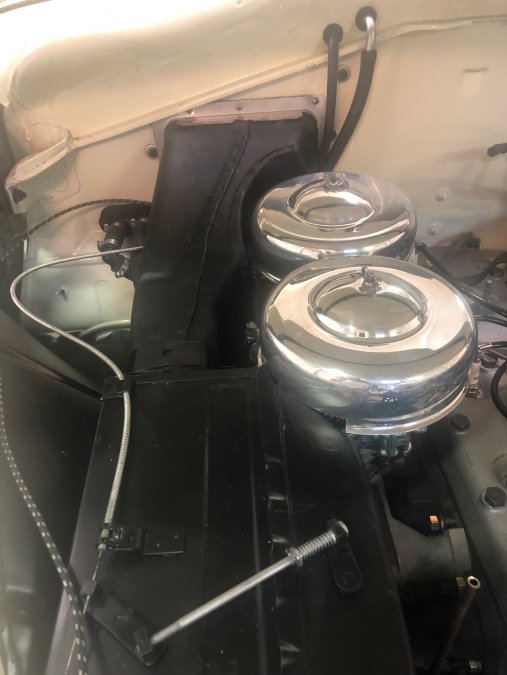
Well, I guess I just needed to walk away for bit. Went to figure things out today and found that it wasn’t so bad. Issues 1, the throttle linkage was fixed by moving the bracket that holds the swivel for the pivot rod to the inner side of the carb and cut the rod shorter. Had to take the heater out and getting to those bolt was the hardest part of that job. Once that was done, the heater went in easier , without the cover and then I could slide the cover on to see where the interference was (fuel line but since I was at it I have the manifold a bit of extra room too. Here are some progress pics.
-
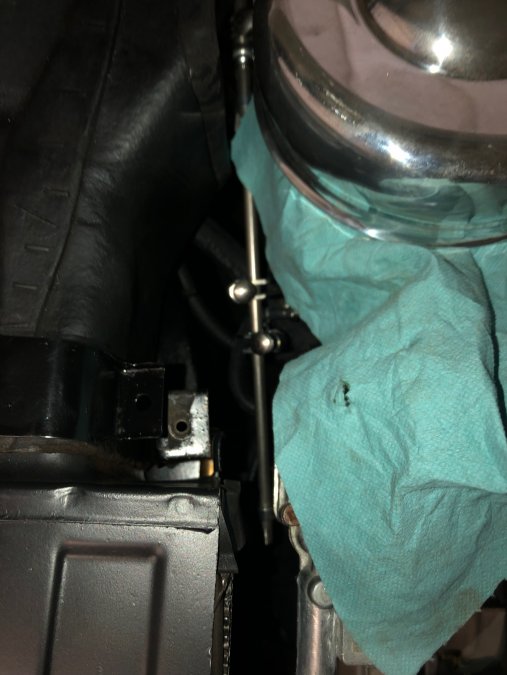
VERY frustrating day yesterday. I suppose it was because I had such high hopes of getting the heater and duct is so that I can finalize the fuel line/filter (which for me for some reason feels like a milestone). Well, after modifying the duct and rerouting the hoses, I finished the rebuild of the heater box and went to put it in only to find that I must have done my test fit with the inner fender loose ‘cause the box doesn’t fit. Does anyone one know if the carbs (motorcraft 32/36) can be turned around so that the throttle linkage is inward (along with the fuel line). I’m not sure that will fix all my problems - just the linkage not fitting. I think I’ll still have to modify the heater box to clear. Am I missing something here? Other options? Sorry, just venting. Pictures below show how little room I have - linkage is not connected and cover to heater box is off.
-
Thanks for the "pass". I am planning on using the 6v motors (even though what I read says to change them because voltage reducers don't work/last/???). I just thought that for somewhere between $6-$18/ea, I could save the trouble of having having to change burned out motors in a few years by reducing the voltage to them from 12V (new system) to 6 v ...since the draw/amps dont seem to be very high.
-
I'm changing my car ('49 Ply) from 6v to 12v. I have most figured out but am a little confused when it comes to the heater blower fan motor and the defroster blower motors. I have a fresh 6V battery and double checked the voltage with my multi-meter. Then I connected 1 fan at a time with my multi-meter in between set at 10A setting and got the amperage draw (both at startup and running ) I also checked the resistance across the motor. These are the results: Blower Motor 3 amp (5.74 Amp @ startup) 2.8 Ohms Defroster Motor 1.38 Amp (1.69 Amp @ startup) 2 ohms This doesn't seem to me to be too big of a draw to use a voltage regulator BUT almost everything I read says that fan motors have too big a draw to successfully use a voltage reducer. I found the following which is described for fan motors and looks to me (not saying much) to be a viable alternative than finding new motors (both of mine work fine): https://www.speedwaymotors.com/Electric-12-Volt-to-6-Volt-Reducer-for-Motors,15824.html. Im not sure but this looks to have the same specs (although there are variations that frankly I dont understand) and is 1/3 the price: https://www.alliedelec.com/product/vishay-dale/rh0506r000fe02/70201528/?gclid=EAIaIQobChMIqeH0vd7J5AIVj8JkCh0VPgcCEAQYASABEgKSuPD_BwE Being in So Cal, I don't expect to need to use the heaters too often, but you never know and I'd like everything to work ...without starting a fire. Will the 2nd item work? Thanks
-
I have completely new 6v harnesses as a lot of the old looked old and crispy. I’m sure under some of the old tape, I can find a nice piece. At the time I ordered the wiring there was a chance I was keeping the 6v system and knew I could use it for either. Only issues with the new harnesses - no bullet connectors and not sure yet if I need to change anything else (terminals, bulb holders etc)
-
Yes tying to preserve as much as possible. I suppose I could cut it as you say, splice a new wire on and try to reinstall the sleeve wo that from the engine bay it looks correct - with the casing going through the old style grommet/holder. I’ve done something similar on another cars hood release cables- fixed the outer sheath with epoxy putty in an inconspicuous place. Worked great and still lasting. Just thought if it were easy to change the whole wire, it might be better than hanging a splice (even soldered) Yes i I believe it goes to the coil but that is from memory so I need to double check my pictures and a wiring diagram.
-
If I recall the wire seems to be fixed in the stiff sheath.
-
Forgot to mention, I am converting from 6v to 12v
-
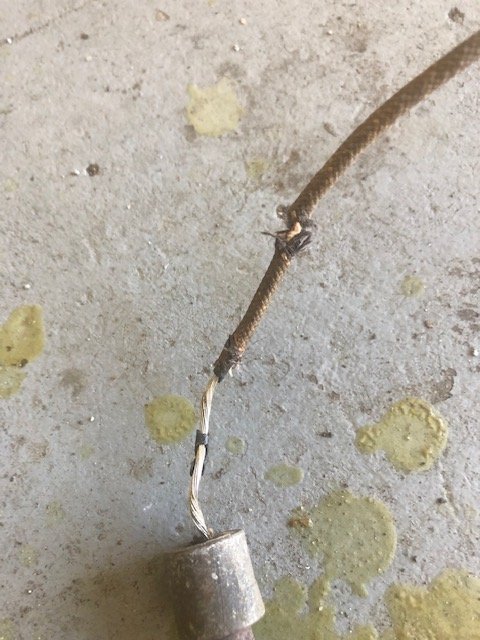
Below is my ignition switch pictures. You will notice the wire is damaged. I don’t see a way to replace just the wire (I have not tried taking it apart yet)....is it possible? I did a quick search on epay and don’t see anything that looks like what I have. If the wire can’t be changed, how much current runs thru this ( thinking I can save it with some heatshrink.... but would rather have the original wire appearance
-
-
Thanks. I believe they originally had about 95 HP. With the mods I’ve done if I get 10%-15% more it would be good therefore I think I’ll be lucky to have 115 HP.... and I think they probably used to measure at the flywheel not the rear wheels. I won’t worry about it for now. Thanks ... now back to air cleaners ?
-
I know this thread is about air cleaners but I have a question for those who went the duel carb route. I installed an Offy duel intake manifold (on my 218 motor) and got the carbs from Stovebolt (motorcraft). I also deleted the mechanical fuel pump and have installed an electric pump. My question is for those who have done something similar- did you have to change the standard 5/16” fuel line? I have not but I also haven’t got the car running yet so I started thinking I may end up with a fuel starvation issue and wonder what the fixes may be other than changing the fuel line - higher psi pump?... but that may be putting the cart before the horse Thanks and sorry to (briefly) change the subject
-
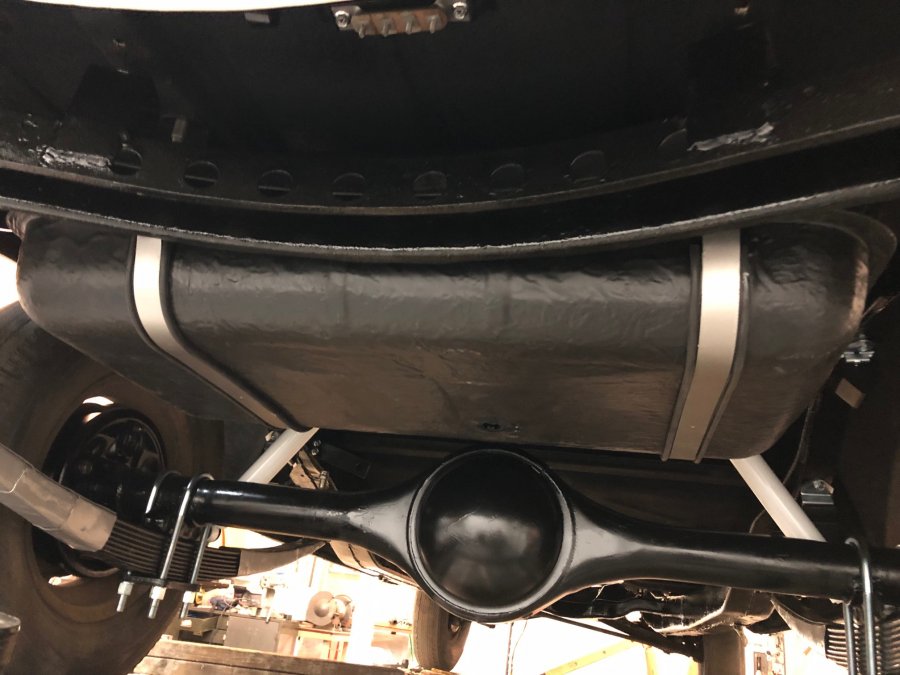
I recently had my tank done by renu. I took it to the local Renu dealer and they wanted over $700. Called the Renu dealer in (I think Stockton) and the price was around $370. Called the Renu dealer Wa (I think Spokane) and was quoted around $325. So I shipped it there. He was very responsive, keep his word on price and time and was conscious of the holes he had to cut and patch (I had asked him to cut as few as possible in inconspicuous locations) in order to properly blast and clean. It was coated inside and out- I didn’t really want the outside done as I wanted it to look original but because my tank was like Swiss cheese and no replacements are available (‘49 Plymouth Woodie - it is different), I did it. He also fixed the bayonet ring. Below are before (pin holes are circled in sharpie if you zoom in) and after (so you can see the coating texture)
-
-
You The airbrush paints were a combination of Createx and Golden .... whatever I had fro previous projects or found at my local art supply store. This place is a great source for materials and equipment- http://www.coastairbrush.com/ They also have great instructions and classes - I have no affiliation also, I had bought a wood grain stencil but found that with this method (and due to the size/length, freehand worked better for me. Just keep the distance between the airbrush and your work close (for most colors) so that the lines are a bit crisper. PRACTICE. I’m no pro (probably used the airbrush less than 10 times) and I did 1 day of practice varying the colors and technique until I had a feel for it, then doing the actual project (dash with glovebox door and interior windshield frame took another long day ( after the dash was stripped, primed and painted with the base color)


