JSabah
-
Posts
384 -
Joined
-
Last visited
-
Days Won
3
Content Type
Links Directory
Profiles
Articles
Forums
Downloads
Store
Gallery
Blogs
Events
Everything posted by JSabah
-
Great idea... thank you. Picked up a nut at a specialty store while getting some other items for $2.03. Had the rest in my junk bin ( I hate to call it junk ‘cause it often saves the day or at least a trip). After about 20 minutes I was under way adjusting.... thanks for the tutorial

-
That’s a great idea... and thanks for the offer. I didn’t know you can chrome printed pieces. Im letting him look a bit more bit I’ll start on drawing what I can.
-
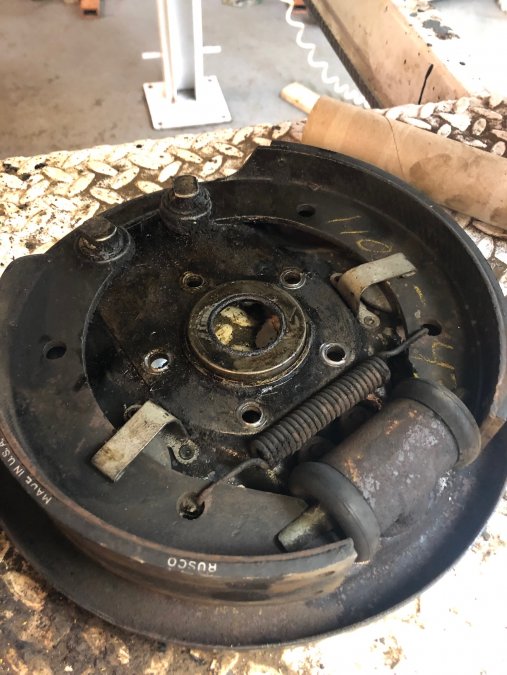
Had the bearings pressed on and half shafts in with the old (cleaned up) shims. Ended up with .003 float on each side. Then starred putting the brake together... pretty happy with the results for having never done this before. Need to make a brake drum measuring tool and make the adjustments.


-
It seems my chrome shop has lost a small part that I believe were only found on the ‘49 Woodys (Plymouth). The part is a rosette that holds a rubber bumper so that the metal tailgate rests nicely on the rear bumper guards. I don’t think I’ll be able to find them so I’m looking for either how to have them made or???? Here is a picture of the piece on the bumper guard and a closeup... I need 2 ?

-
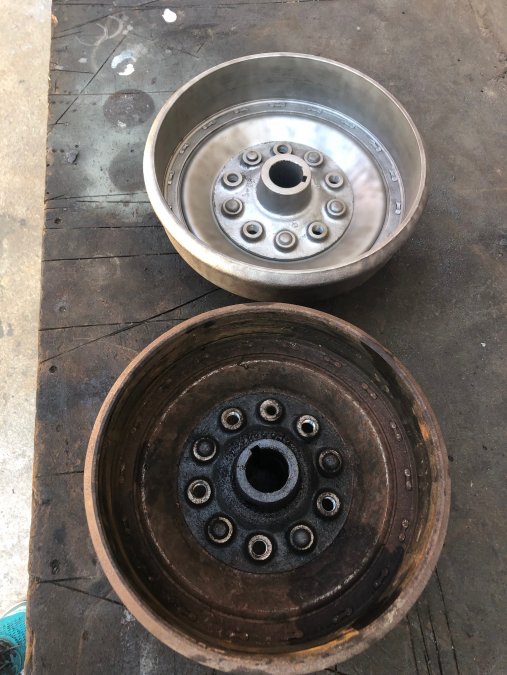
Thank you all for your help. I do have both right and left threads and lug nuts so thee drums are now black with 1 red center hub. I also painted the inside with my 2000 deg engine paint that I had left over just to keep rust from forming again... did not paint where the shoes make contact. Will start to put things back together next week after I get my half shafts back from having the new bearings and speedi sleeves pressed on for me.
-
Thanks.... so no red as in my picture?
-
Thanks.... so no red as in my picture?
-
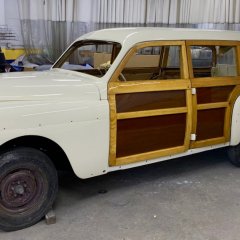
1st pic was before and after just for fun. second pic is what i think may be original colors...
-
Cleaning up the rear drums and was going to paint them black but I see some red on an old drum. What were they originally? Also, any idea how hot they get? The black paint I have is good to 1200 deg but I also have silver for 2000 deg.

-
looking at the Service Manual, I don't see where there are any instructions as to where to use ant brake grease , or what kind of grease. I see that the anchor bolts have felts so one would assume grease there but are there any other points? what about the piston cup/push rod (under the boot in the cup or in the "fork")? any other places. I thought I caught a very short mention in an old tech film but I haven't re-watched it yet ... thought Id get more experience/detail here. BTW this is re rear brakes on a 49 Plymouth Woody.....haven't got to the front yet. Thank You
-
I bought upper and lower rear engine mounts from AB and they seemed soft enough. I would call and discuss with them. I’ve received items that thru no fault of theirs were incorrect and they were fine with correcting or letting me return ( and refunded). I did have an issue with the new front (single) engine mount..... the studs were about 1/8” too wide but I just filed about 1/16 off each hole in the bracket. Should be ok but when I start it up for the 1st time (ever) in a couple of months, I’ll know more ?
-
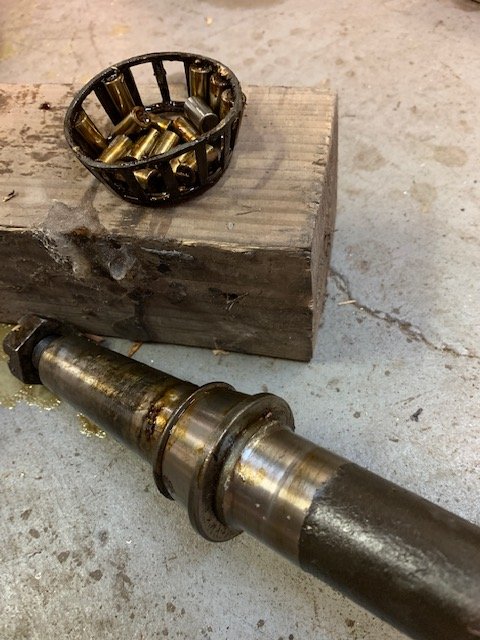
Timken ordered with outer race. Also ordered the leather seals. Thinking was- they lasted this long and in case there is any wear ( which I’ll recheck and consider speedy sleeves if so) on the axle the should fit the same. I don’t have a press. Do I need to take the bearing and axles to one or can I get them on with a mallet and block of wood?
-
Thank you all your your help. Turns out that I did have the inner seals in but I just didn't recognize them as they were different looking than my replacements. Also turns out that they were no match for the slide hammer puller that I borrowed from my local auto parts store. The bearings were a different story. The 5 ton puller I borrowed did not do the job but my angle grinder (being VERY careful not to cut all the way thru) and a chisel did the job in short order. Turns out that both my replacement bearings and inner seals were the wrong size, so Ill take this opportunity to ask those more knowledgeable than me (that being everyone) thoughts on which inner seal to get - the kind shown being held in backwards or NOS of the type i pulled out (National 50776) - which look beefier but being nos and leather....could be a little dry. Also Timken bearings (25877) or Chinese made. If Timkin, they seem to have different tolerances (standard or tighter tolerances)...std OK?. Finally, outer raceways changed as well (there doesn't look to be scoring), for an extra $15/ea I thought Id just be safe and get them...thoughts?
-
I just don’t see what to pull out
-
Hi Keith. I had seen your video before ( and watched it again). Being new at this it was helpful- especially using the drum as a slide hammer. Do I have an inner seal ( check my first picture) and if so I don’t understand where to put the claw as I don’t see any lip to grab. Any way you can clarify? I do see how to get the remains of the bearing off... just not the inner seal. Also do you put the outer seal on after the backing plate as it is actually an the backing plate or do you set it in the backing plate when on the bench prior to putting the plate on. Appreciate your (and everyone else’s advice) as I’m trying to eliminate as much of the error as possible in my trial and error. Thanks, Josh
-
So.... you see a seal in the 1st picture?
-
this is the inner seal i was sent (for a truck of a different year) sitting in the axle housing - doesn't look right - seems too small as there is lots of space along the outer edge...

-
I was able to remove my rear hub (with a big hammer and puller) as well as the brake backing plate and axle (used the drum as a slide hammer). I haven't been able to get my old bearing off yet (suggestions are appreciated but that really isn't my question here). My questions have to do with the seals. Hear are some pics of what I found but I don"t see an inner seal. Is it pressed in the axle housing ? i don't want to try and take something out that isn't there and damage/create more of a problem. Next question re inner seal is how do i know if i was sold the correct ones. I received (from Andy B ) F-173 which is listed for a '49 Ply (there is a F178 listed for a truck) BUT the inner seals I got were listed for a '36-'46 truck (which is F166 - maybe I should have got F168 for a 48-56 truck or even F162 for a 46-61 Ply). to make things simpler - I recieved 1 set of seals for a car and 1 set for a truck (not even my year) and id like to check and make sure I got the correct ones for a 1949 Plym. Woody.

-
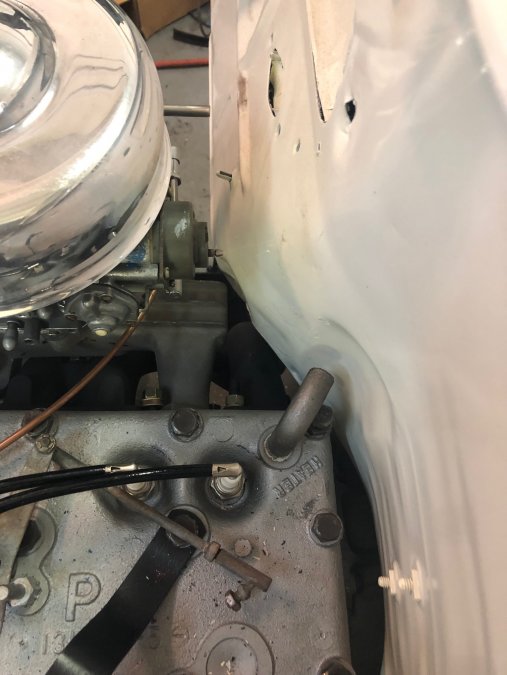
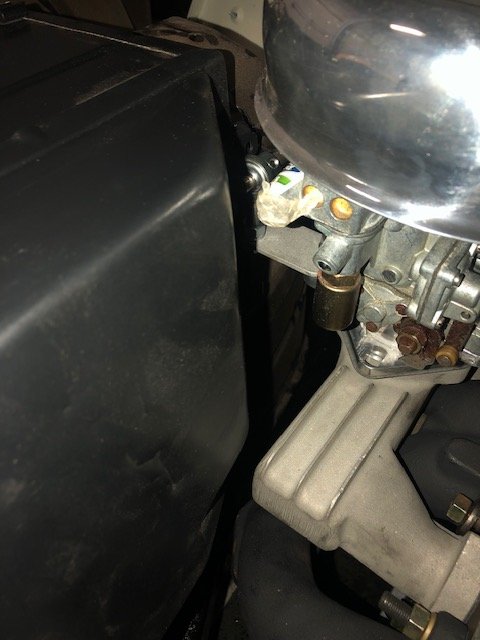
The space I now have around both manifolds is the same as other areas of engine to body clearance
-
I had seen this picture but couldn’t tell if the frame was put inside from the large opening or over the whole thing .... my new leather came with several zip ties around the edges
-
I didnt remove the leather seal, so now don't know how my new leather seal & retaining ring go on. does the retaining ring go OVER the leather and the spike punch thru? or am I supposed to somehow get the ring inside the leather ? I understand that the prongs fo in the bell housing and sort of spring hold it in place. Directions please. as I dont see it in the Plymouth service manual (218 engine, 3 speed)
-
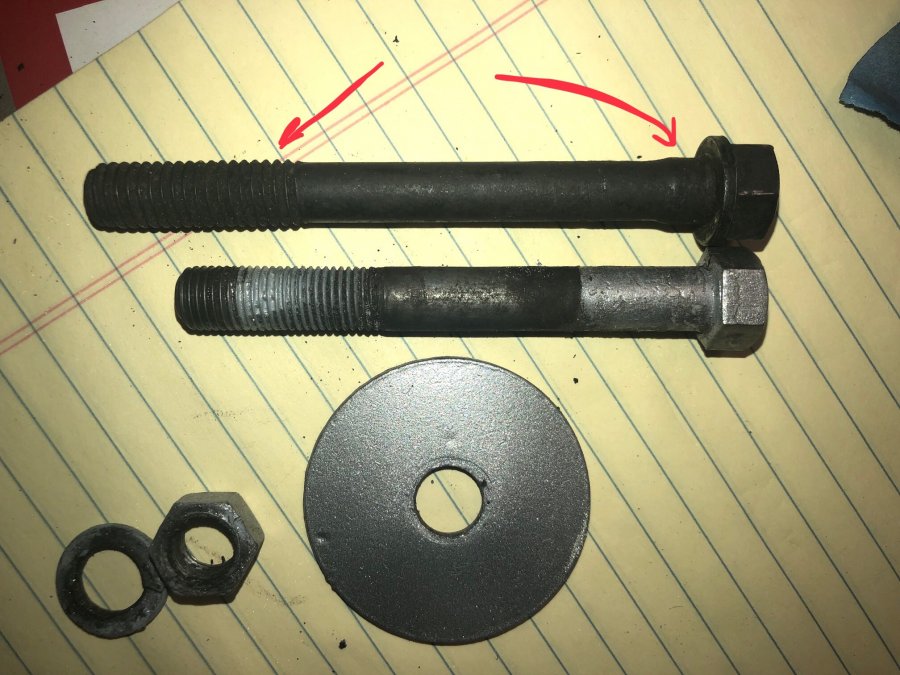
More confusion.... while I was looking for my heater parts I came across a baggie marked “engine mounts”. The bag contained 2 square U bolts that I presume go to the front engine bracket (see pic below) ... but which way - facing down a pictured or with nuts and lock washers on top? next question has me a bit more confused... in the baggie were 2 bolts (painted silver in picture) - problem is that they are too short for having upper and lower mounts. There are also only 2 discs that are the larger of the 2 sizes required (for the upper mounts) and nothing for the lowers (there are also 2 large thin rubber washers). The 2 longer bolts that I had kept with the trans/ engine parts are the perfect length for using both upper & lower conical mounts, a lower washer lock washer and nut.... but upon closer inspection I see that there is a shoulder (which fits nicely in the engine hole) and then the body is a bit thinner (which I thought was for in the distance piece) ant the threads widen out a bit (matching the shoulder). Other differences are that those are coarse threat and flanged. While those bolts fit nicely I don’t believe they came from the engine mounts .... any idea where they belong? They look a bit specific/ special. If they belong somewhere else, I can just get the right length grade 8 for the mounts.... but I don’t know where they belong/should go. Sorry for the long windedness

-
Looks like the heater box will fit ... I’ll just need to modify the duct ... or make a new on after seeing what the originals go for.

-
Yes that weld has already been repaired. I’ll take a look at the heater fit next week