JSabah
-
Posts
384 -
Joined
-
Last visited
-
Days Won
3
Content Type
Links Directory
Profiles
Articles
Forums
Downloads
Store
Gallery
Blogs
Events
Everything posted by JSabah
-
Turns out you guys had some good advice ... second time's a charm. New seal in and holding. Soaked in oil for a day, then put it on the yoke for a day. Still seemed very tight to get in so I removed the seal, put 2 layers of thin electrical tape on the yoke and re installed the seal for about 15 min. that seemed to make the difference. In the future, maybe I would jack the rear end up so that the pinion could turn as getting the yoke on with a twisting motion may have also been helpful (my lift is the drive on type). There was no need to sleeve in my case (80k miles)
-
-
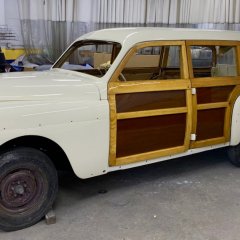
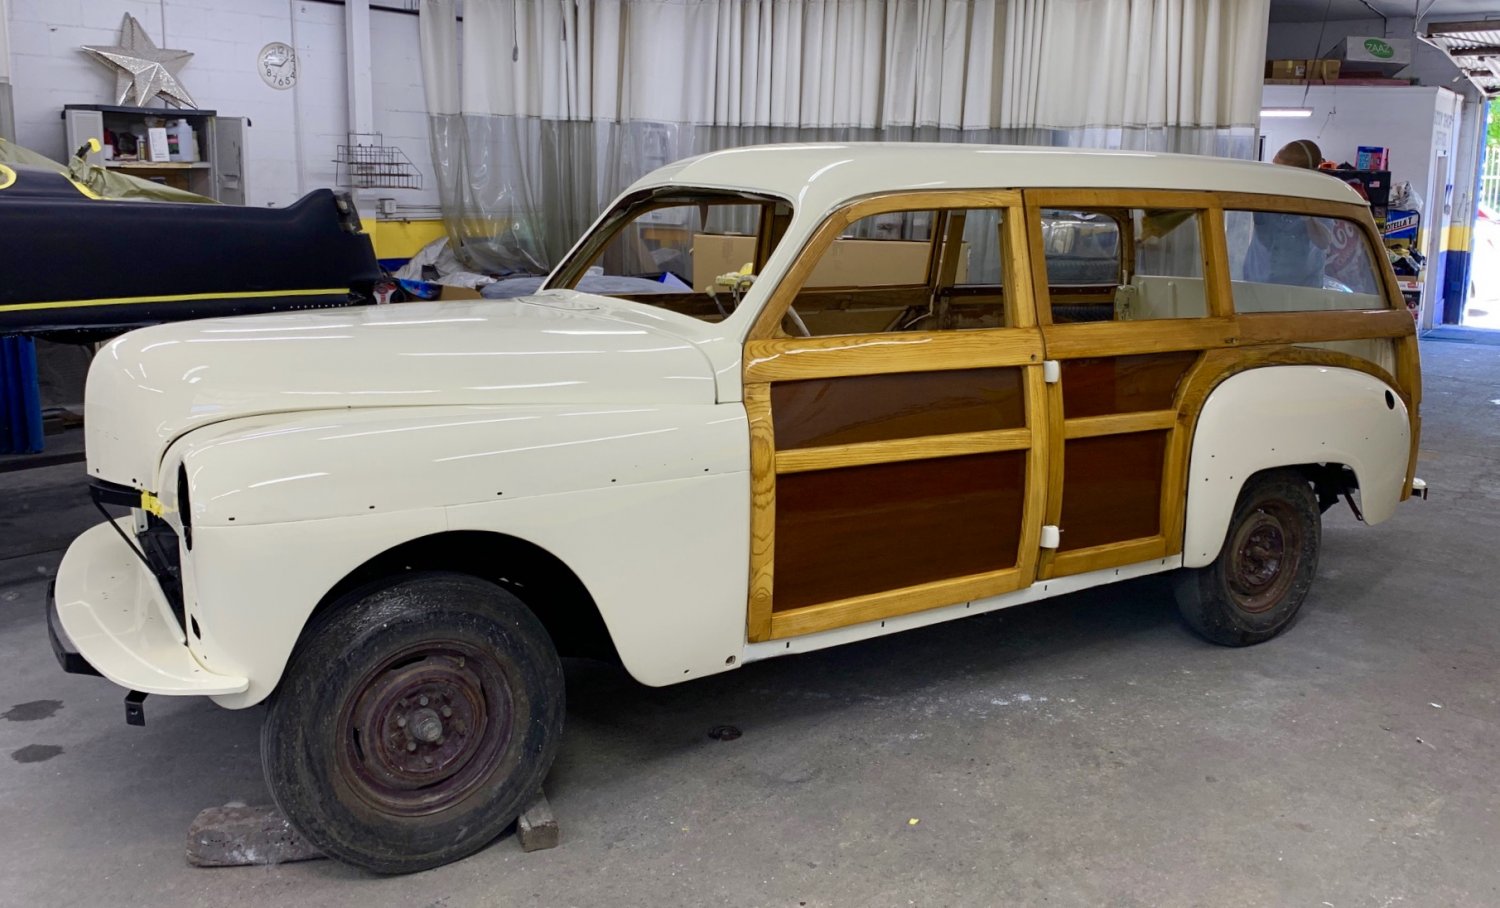
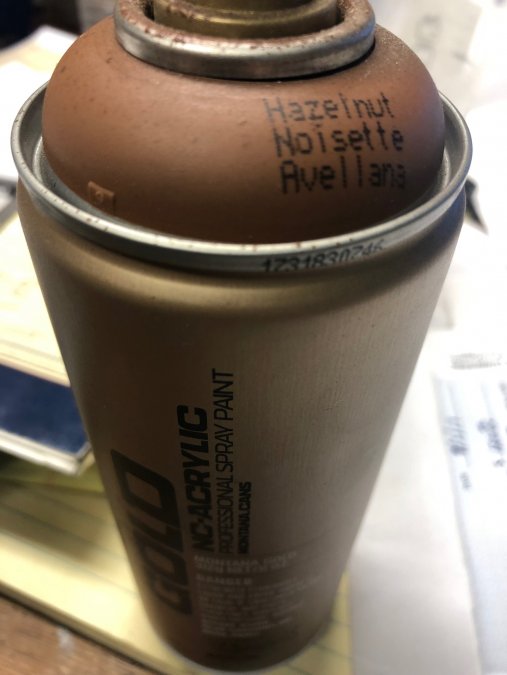
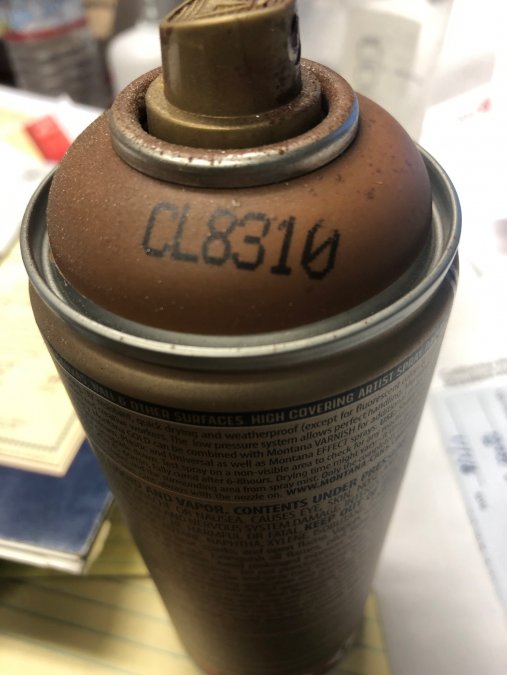
The base color used was made by Gold and the color was Hazelnut CL8310. Color is that of top of can
-
Glue used was wood glue type 3 for it’s waterproof attribute. 4 layers of 135 lb paper with glue approached about 1/8” which was strong enough and about the same thickness as the original material
-
In switching to a 12v system I think I’ve got it mostly figured out but would appreciate being pointed to a 12v heater fan that will fit in the 49 blower housing ( a range of years to look for with the same size & bolt pattern ) or in the alternative a way to step the voltage down from 12 to 6 ( and handling the amperage) that maybe I overlooked thank you
-
Hope this helps. Base color is important. For my test, I mixed my own colors to match the backside of the glovebox door, but then I found a spray can that was closer in color, faster and more convenient. I’ll post color by Friday

-
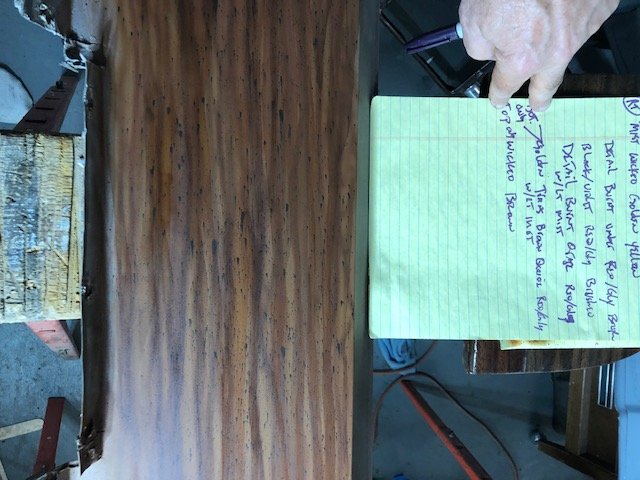
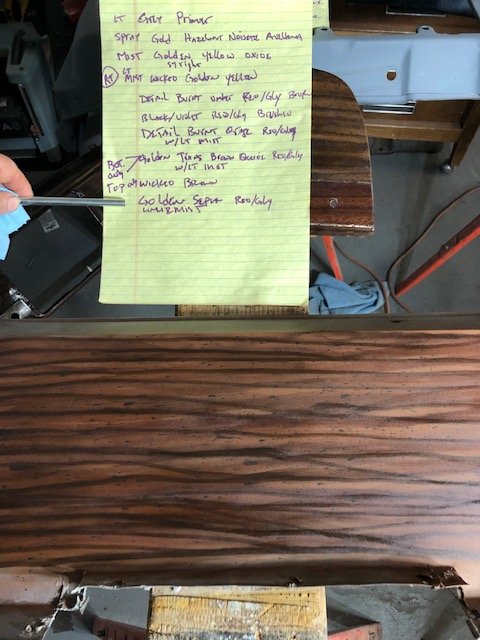
I found all but what the base color is while looking back at old phone pics. After base color airbrush Detail Burnt Umber in lines and immediately dry brush. In order to dry brush you will need to have thinned/preped your airbrush paint with a mixture containing some glycerin (as a retardant which buys you some time to do texturing with the dry brush). This goes for anytime I refer to brushing. Second color is Detail Black mixed with some violet. This should also be thinned with the glycerin thinner and applied with an airbrush splatter technique AND brushed in one direction 3rd color is lines of detail burnt orange brushed and then misted/filled 4th color is Sepia fill/ mist as needed and add some lines brushed 5th color transparent brown oxide mist to darken as desired 6th color (not sure I used this) brown red lines brushed The above was from my test ( I suggest you do a test on some Sheetmetal or sign blank). I’m sure I modified here and there but it is art so give it a try keeping notes and then go for it. Do the dash and interior window surround at the same time and keep the lines consistent over the glovebox door. Here are some pics of my test piece as I did it.( I don’t know how to keep the pics in any order ) 2k clear after.


-
Closeup of grain texture

-
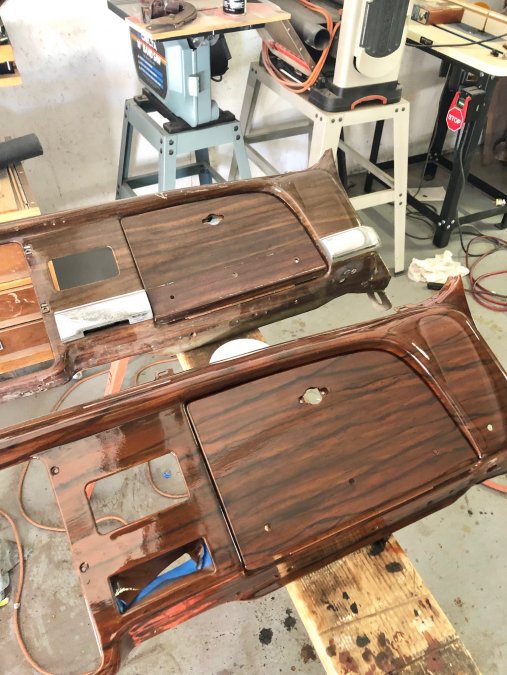
I’ve got just about the perfect colors and method ( with airbrush) but it is at my office which I may not get to tomorrow but will try and post by Friday. Below is that I did ( from bare metal) in the foreground and a spare original in the background

-
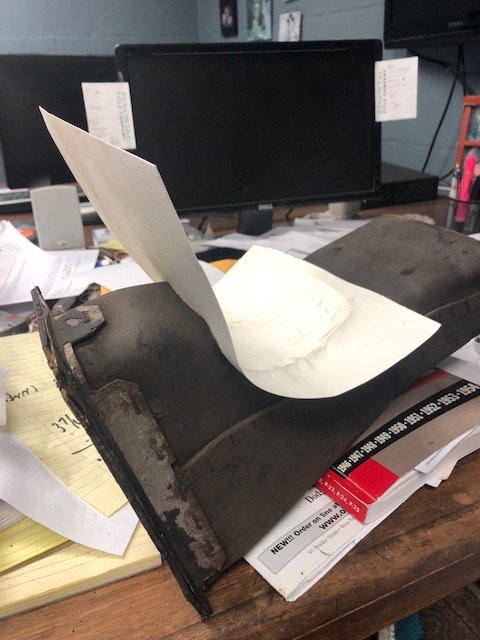
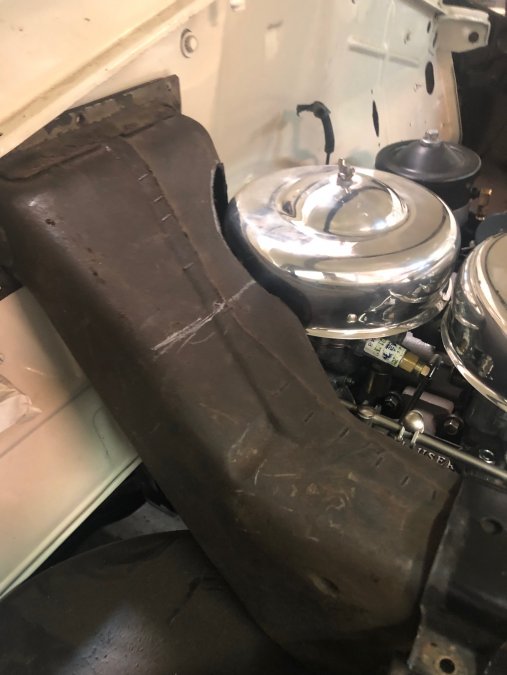
Trying to finish up this duct. I thought I’d post the method I used to close up the duct previously pictured. I was going to use fiberglass but decided to make cardboard to match the original to my best ability. I happened to have some watercolor paper that is 135 lbs. 1st I glued the edge of the cut duct with wood glue. After it set, I trimmed it to allow for about a 3/8” lip, which I then glued. I followed up with 2 more layers of the same paper but trimmed flush with the corner. The 4th and final layer was glued like layers 2&3 but trimmed similar to the 1st layer but after the glue set up, I was able to wet (dampen) the outer portion to form so that it didn’t need to be sectioned. Then a bit of flat black. (Sorry I don’t know how to change the order of pictures - they aren’t in the correct order)


-
Putting it back together is not faster than taking it apart..... just a little cleaner ?
-
First phase completed... I’m thinking I can patch thinks up with fiberglass and possibly even get the texture close. This was a bit of thinking things out and measuring. Now as I look at it, it MAY look better (closer it peri/original) if I keep the cuts/ new sides straight but angular as opposed to curved around the cleaner ... but that does look more “custom”. More thinking is needed I suppose.


-
following up on this older thread.... where do you find that the inner & outers should differ by 1/2". My manual simply says to measure the difference between inner and outer and compare that number to the other side. the diff should be no more than 1/4". I have a '49 Plymouth and the diff between inner an outers are 1 7/8" and 2" (not 1/2") and within the 1/4" variance. interesting that there is no accounting for differences in tires while in the back, they take that out of the equation by measuring spring plate to frame (nothing to do with ground levelness or tire inflation)
-
I'm ready to start on the front suspension rebuild and in doing research on the forum - looking for work arounds for not having the tools mentioned in the shop manual (C-594,C-608, and C-736), I see that having the correct tools makes a lot more sense.....anybody have any that they are willing to loan? Im in Los Angeles and can secure with paypal so you know yo'll get them back. In the alternative, please point me to a good tutorial on how to do the work without. Thank you, Josh
-
Thanks for all the help here. upon inspection, I may have slightly deformed the ridge of the seal with my wood block. I did drill a hole in the block to accommodate the shaft and apply even pressure, but i did that only after I had some difficulty. New seal is ordered and I'll get a better way of installing it. Also, as I mentioned, I did not soak as I thought you only did that with leather seals, buy I will now do so AND I'll let it sit overnight on the yoke. I had checked the fit and inspected the pinion/yoke - all good there. Again, thanks for the advice. I'm sure it will all be helpful next time around.
-
Here is the side of the seal that faced the rear

-
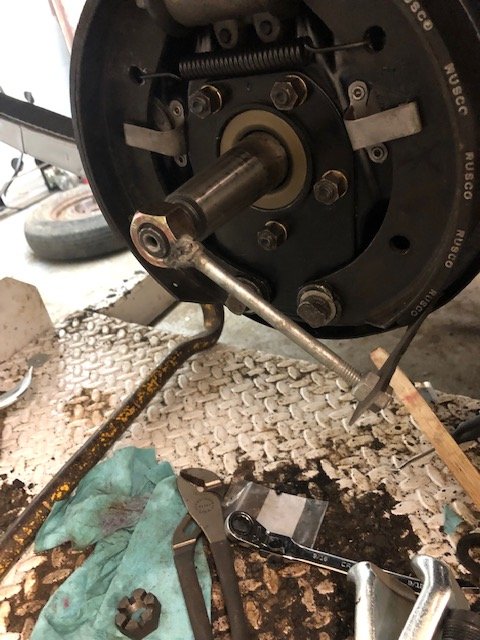
Is there a trick to installing a new pinion seal? I carefully marked the nut/shaft orientation, removed the nut and pinion ( with a puller) and got the old seal out ( probably the most difficult part so far). Then I carefully installed the new seal with a block of wood and a hammer. When I went to install the pinion, I mangled the seal as I later found when I took it apart again as it started leaking immediately after filling. Below is the orientation of the seal. Did I put it in backwards? Should I have soaked it in oil (I didn’t cause I don’t think it is a leather seal - looks like felt and rubber)? Greased it? Any advice is appreciated. I’ll be ordering a replacement tomorrow ?.

-
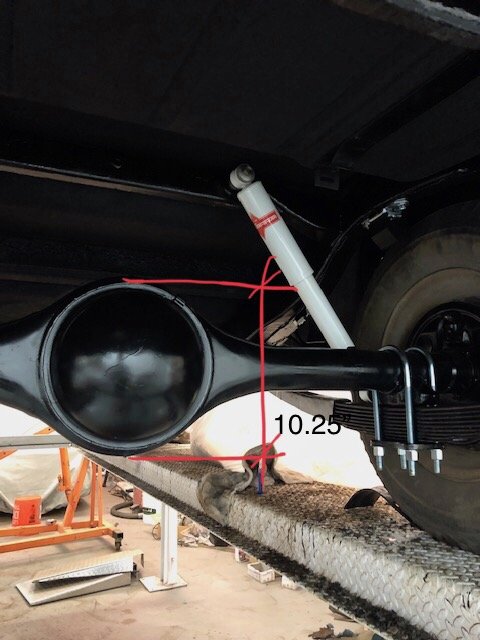
More identifiers. Outside measurement is 10.25”

-
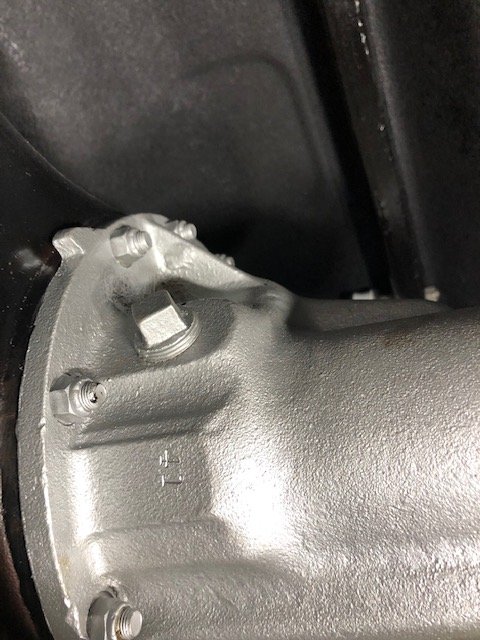
It doesn’t look anything like those on the website....

-
I was more interested in the size/ model of the rear end. I really know very little about the American diffs. I just noticed that the inner seal that was sent to me by those who know more was too small in the outer diameter and didn’t fit the 1/2 shaft either. I can tell the ratio by turning a wheel and counting the drive shaft flange revolutions. Thanks Josh
-
Brakes adjusted today (with my home made tool), bearing grease added via plugs on back of axle housing and started differential pinion seal replacement. Got stuck on torquing the axle nut and removing nut for pinion as I don’t have a 1 1/4” socket - will pick one up in the morning and soldier on.

-
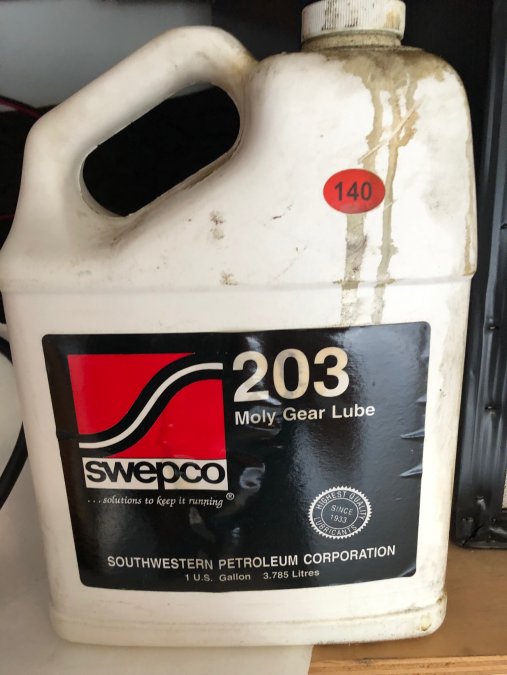
How can I identify what diff I have in my 49 Plymouth woodie ? It MAY be different than the cars as the inner axle seal and bearings that I ordered from AB were the wrong size. Also, is the oil pictured below appropriate for it - I have left over from other cars having the rear ends rebuilt and this is what they recommended for them
-
Interior door panels are maple. Rear side panel (which in not installed in the pictures) is also maple plywood and I veneered mahogany for the exterior. Exterior door panels are exterior grade ply also with mahogany veneered. Frames are all Ash which was bleached along with old ash in order to get it all to match, then toned (diluted stain) and then all varnished ( initially I varnished all seperatly so that all interior edges and frames were well sealed....something like 6 or 8 coats while apart, then another 3 after assembly. i like the color of your car. I did a color change from maroon to an ivory/bone white (similar to your color).
-
You are correct in that the tailgate is not supposed to touch the bumper.... Maybe the designers included this piece in case someone forgot to fold down the bumper. They were on my very original car and while I don't have my pictures with me at the moment (and can post better ones on Monday), I got these off the internet. 1st pic is supposed to say " missing" on the left and "there" on the right. Second pic shows the square hole in the bumperetts where it is supposed to attach with a small stove bolt


-
Thanks to Sam Buchanan and this forum, I’m on my way for less than $3 adjusting