-
Posts
384 -
Joined
-
Last visited
-
Days Won
3
Everything posted by JSabah
-
Thanks... I’ve given it a love tap or two. Good idea on the bolt (although it is just the angle of the picture which makes it look like the nut is touching - it isn’t) as I think the washer has flexed some. If it hasn’t given way when I get back in the morning, I’ll change up and use a bolt as suggested.
-
So I’ve read all the relevant prior posts but I’m out of ideas. I don’t have a steering wheel puller and neither did my local auto parts store. Since I have the type of wheel that has threaded holes (3/8 coarse- but only 2 not 3 as pictures in the workshop manual) I decided to use a 7 ton puller that they had. I was able to loosen the nut after spraying and with a 1/2” long ratchet. Left the nut on and had to use a washer under the puller. The 7 ton puller is cranked hard and nothing has popped. I sprayed it again and have left it overnight so we will see in the am. Any suggestions as to a next steps to remove would be appreciated. I suppose if I have to I will have to refinish in place. Thank you
-
Sorry if these questions sound ridiculous but in looking for a new voltage regulator and some listing titles are causing me to question myself.... (going from 6v to 12v neg ground - keeping a generator) 1. do voltage regulators care if it is for an alternator or generator ? 2. do they care if positive or negative ground? 3. is there an amperage max (I saw one listed for 15A)? If so what would you suggest getting - standard car, no stereo etc? looking for some that looks like standard equipment on a 49 Plymouth woodie (ie like what they used when they went to 12v in 50?51?52?) thank you, Josh
-
The seal on the A pillar where the hinges is no longer available so following up on an older post ( http://p15-d24.com/topic/50474-finally-done-1951-dodge-d39-business-coupe/page/2/?tab=comments#comment-535913 I thought in clear up how I handled some of the questions posed. I used the same Garage door seal. I cut it length wise about a 1/4” from the center ridge. Then I glued the factory flat edge to the car (using contact cement) with this bend facing down. Then glued the metal core to that piece and finally glued the other half (with the bent factory edge facing down and slightly over the previous piece. Below are pics of (1) the profile of the rubber as purchased, (2) showing where I cut (the pic with the scissors in hand), and a few others showing the orientation - note the metal core is not shown.
-
- 1
-

-
I’m in need of an extra wheel for my spare (49 Plymouth woodie). Anybody know where to get one (with the clips)?
-
NP. I was just confused
-
??? What trailer
-
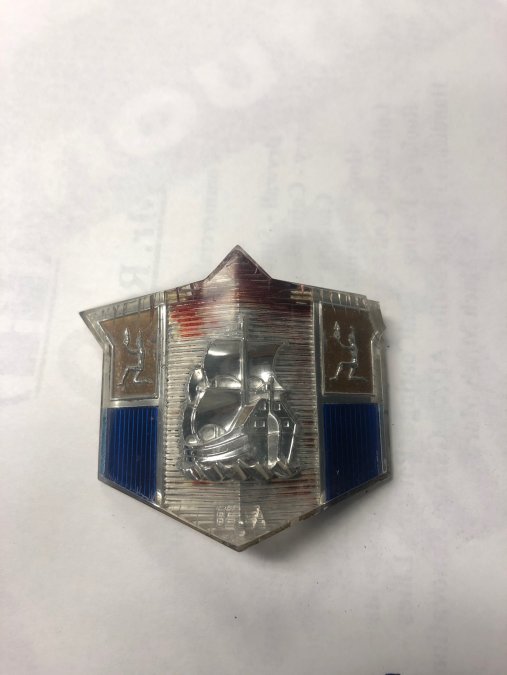
best advice I can give is take your time and make sure that the piece is as clean of old paint as possible..... I ended up doing it twice not realizing this. I was luky that I mainly only had the red to do. I used a Dremel on the slowest speed with a nylon brush. It got most of the paint off but not all. Be careful not to go too fast as even the nylon brush will file/melt down the ridges. I also used a watch siezed flathead as a scraper between the ridges. Holding it up to the light reveled that it still needed more work so I carefully used a little acetone on a paper towel and my fingernail to get the rest off. Acetone melts plastic so Very little and let it evaporate before hitting it a second time. Hold it up to a light and when you think it is clean enough you are ready for paint. I used my air brush as it seemed to be a little more even (I tried with a regular brush first). I only had a transparent red so I used that but I would have tried an opaque paint if I had it). I also had damaged the “gold” color a bit having thought that masking would be good (really not necessary to mask if you just have the one color) and did a couple of repairs with yellow ochra detail color. After it was well dried I sealed it with a brown rattle can paint. I used brown because of the transparent red used (just thinking black was too dark) and the gold repairs. good luck. Post pictures of your results
-
-
Are there any recommendations for a stainless trim repair shop/person? My (new) polisher doesn't do repairs and the previous guy did a poor job. I need to have holes welded as a PO had run screws through the trim instead if getting new clips. Looking for someone in the Los Angeles area/San Fernando Valley. In the alternative, are these pieces available - rear fender (long) trim on a '49 Ply (woody) -Approx 45" long
-
I recently changed mine (49 Plymouth woodie). I took my springs to a place that specializes in truck (you may be more familiar if I say lorry ?) suspension as when I did my Daimler SP250 they were able to supply and install them but unfortunately they were not able to do so for the Plymouth (strange). They said they were a very odd size and asked me to order them from the specialist (Andy Bernbaum in my case) and then they would press out the old and press the new in. Just my experience, hope you can find them locally. If you have to get them from the states, you may consider getting an extra just in case something goes wrong
-
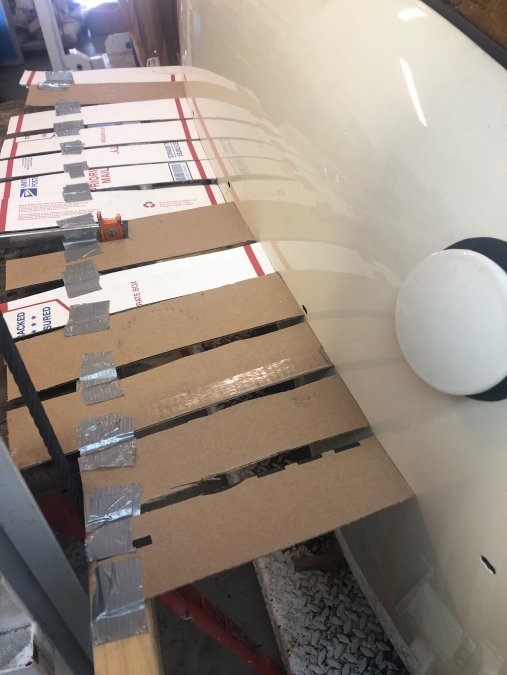
I don’t think you are confused. In any case, I figured how to make a template of fender and will make a wood buck to try and hand form it to instead of actually using the car and risk scratching the new paint. Added some more tape after I took the pics, but you get the idea
-
Nope, I want nothing do with him. It’s been over a year and he still has a few pieces - some of which he says he has and some he doesn’t know where they are. Also, his repair work isn’t great and I’ll have to have someone else redo a few items.
-
Do you know of any online videos of this? I’m having trouble picturing it.
-
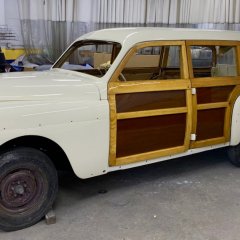
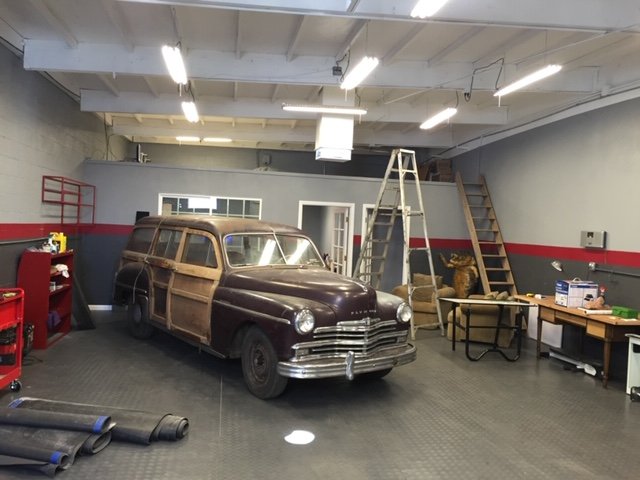
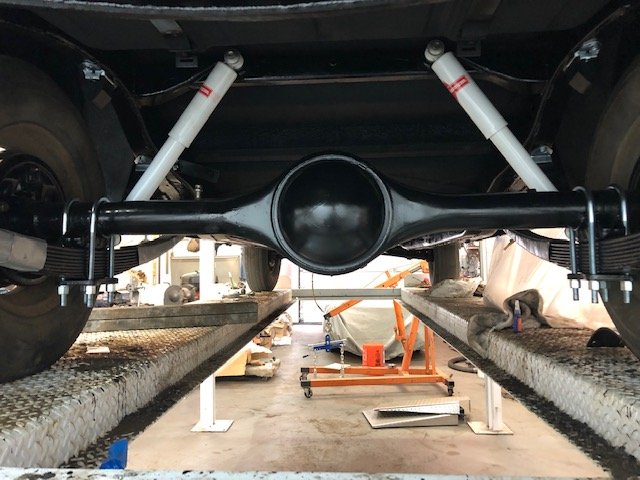
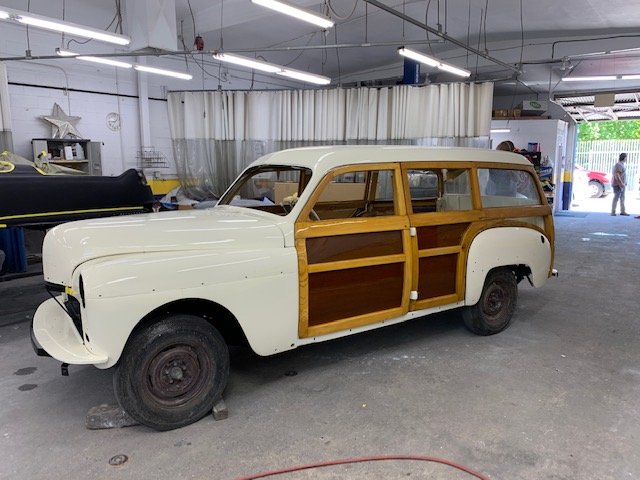
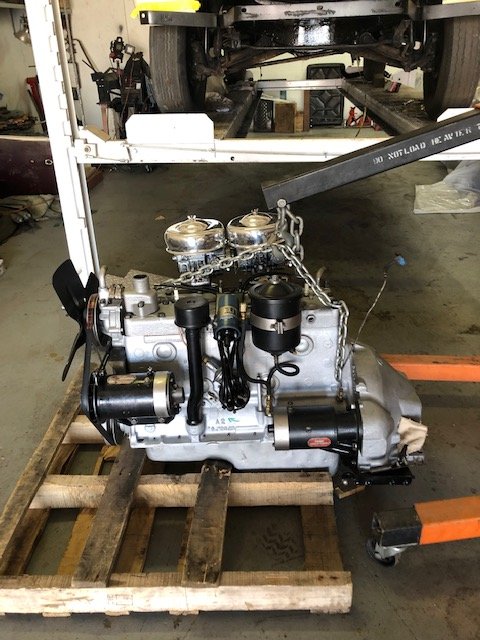
Thank you. Yes this is a true woodie (‘49 Plymouth). Found it on line several years ago advertised as a barn kept car in Washington State and started working on it about 3 years ago. The wood was in, unfortunately, worse shape than I had hoped so I ended up making templates from what was good and replacing the bad (about half the car). Kept the finger joint details and in general tried to keep everything pretty original. Also front floors were rusted. I did however change to an Offy intake with duel carbs and a duel exhaust..... for which I had to modify the heater box and duct a bit - but still used the original.... and went 12v. Rebuilt engine, rear suspension, brakes and most of the wiring is done. Still need to rebuild the front suspension and brakes, install the trans, dash and gauges, install seats and interior door panels, chrome and misc items. Goal is to be done by New Years as I have another project that I started while this was in the paint shop. For a hobby, this is starting to feel like work. Here is a a pic of how I got the car and a few more recent ones.
-
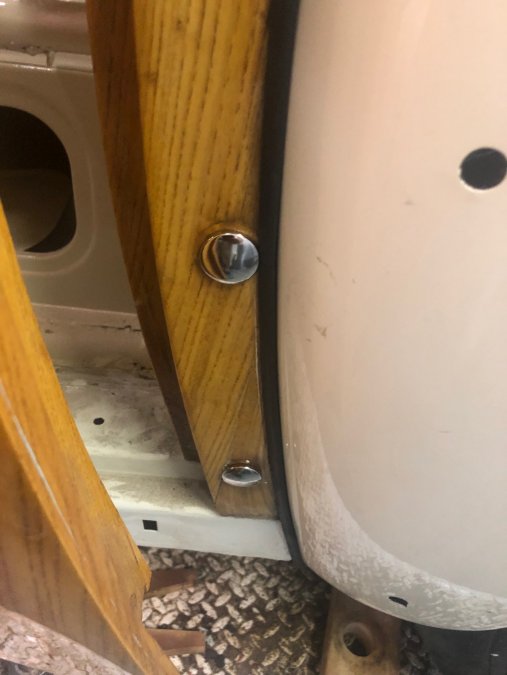
We are close. I just finished installing my custom made (from T weld nuts and Stainless Steel button covers) dome nuts and having to cut each bolt to length. Also finished scraping and then undercoating the inside .... yes, slow going.
-
Fill with lead? How would you do that? Use lead shot and seal with duct tape?
-
I want to get it closer 1st as the clips/bolts may not be that strong. Good luck to you too. Please post how you are getting along with this
-
So I went to start installing the long moldings on the front and rear fenders only to find that the polisher has somehow straightened them. Before I go trying to (gently) put some shape to them by hands, knee or whatever, I thought I’d ask if anyone has experience or tricks for getting them back to the correct shape. Thanks
-
This was very helpful... thank you. I was missing one end of the ball bearings (1 large and 2 small) so fortunately I didn’t have to remove the latch or the seat bolts just one rivet which prevents the larger ball from coming out (or being able to put the new one in). I think it is important to note that the large ball bearing is what keeps the small ones in place so put the small ones in 1st then the large. Then just replace the river with a nut/bolt. As I mentioned ,there were 2 small and 1 large missing from my passenger side rail. Then I found one small bearing missing from the drivers side .... so for another $0.83 (4 bucks total), 20 minutes of work (including painting them) and 2 trips to Home Depot, I got them all working like new.... and looking good too
-
You are correct... I miss typed. The part I’m trying is 50w max.
-
Good question. Since Electronics is not my strong suit so I looked at this several ways. 1st, I used my meter and Ohms Law and tried to figure it out mathematically (look at first post). 2nd I read and searched the web 3rd I saw that Speedway motors advertised this for this purpose Looked up the part number from the picture and found it on the Allied webpage so I could see all the options and specs. 20W seemed fairly large and it was the largest available before a large jump in price (100w) all the above pointed to the part I bought. That being said, I won’t really know if it works until I drive this car on the coldest day we have in So Cal .... so.... May never know ?
-
I believe that the two I listed in the 1st post are the same so I got them from Allied as it cost a few dollars less ... and that is what they seem to specialize in (electrical components) https://www.alliedelec.com/product/vishay-dale/rh0506r000fe02/70201528/?gclid=EAIaIQobChMIqeH0vd7J5AIVj8JkCh0VPgcCEAQYASABEgKSuPD_BwE
-
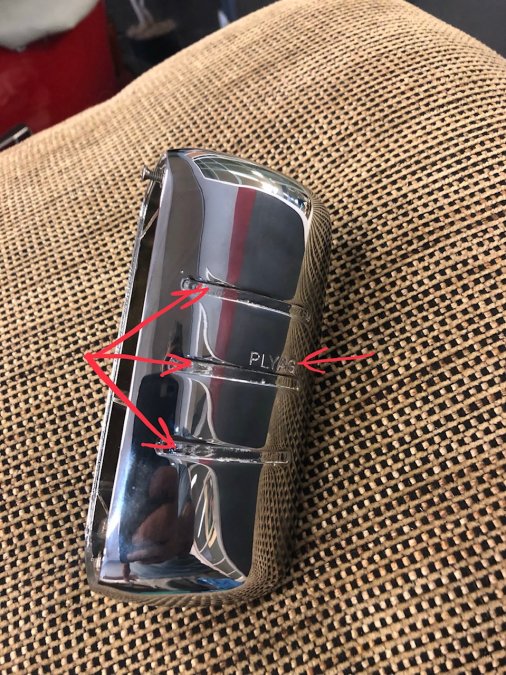
Ok, so now that we’ Got the process and materials down.... where to apply. 1)I know the 3 stripes on the tail lights are to be red, what about the “PLYAG” ... red, black or nothing 2) same question about the tail light lens holder 3) How about the 3 stripes on each side of the center brake/license plate light ? 4) do the 4 stripes on the rear fender guards have any detail paint? 5) how about the 3 stripes on each side of the front emblem holder? 6) same question about the horn ring. Please keep in mind that I’m trying to get this P18 Special Delux (woodie)as it came off the showroom floor. It has been tough for me to decipher what it was like back then from the color renderings/sketches and B&W photos so I’m hoping that the collective knowledge here will chime in. Thank you
-
I’ve had most of my chrome redone and was wondering what others have done in terms of the paint detailing. Items such as dash lettering, red details on tail lights etc. I don’t think most paints will stick to chrome unless self etching primer is used (which I’ve only seen in spray and can’t imaging masking off the small letters). Is there any paint that will stick and hold up? Was thinking about caliper paint. Any and all advice is always appreciated


