rhelm1953
-
Posts
104 -
Joined
-
Last visited
Content Type
Links Directory
Profiles
Articles
Forums
Downloads
Store
Gallery
Blogs
Events
Everything posted by rhelm1953
-
I', not surprised to hear that you have experience painting, looking at the quality of the work you are doing it's obvious this is not your first rodeo. As far as single stage vs base/clear my thinking is, if it's a vintage car and being painted a solid color then single stage is the way to go as the finish looks most like the original enamel. If you are going with a metallic color then base/clear is the only answer since you can't sand and buff with out disturbing the metallic.
-
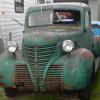
Nice work! I like cars that are built to a theme and not just thrown together with a mish-mash of parts used because they were cheap or available. I have a 39 Plymouth truck I plan to build as a late 50's custom if I ever manage to get other projects out of the way (so far it's been waiting 14 years). I never used to be a fan of green but I've got to say it's growing on me and the green you picked compliments the car and theme very nicely.
-
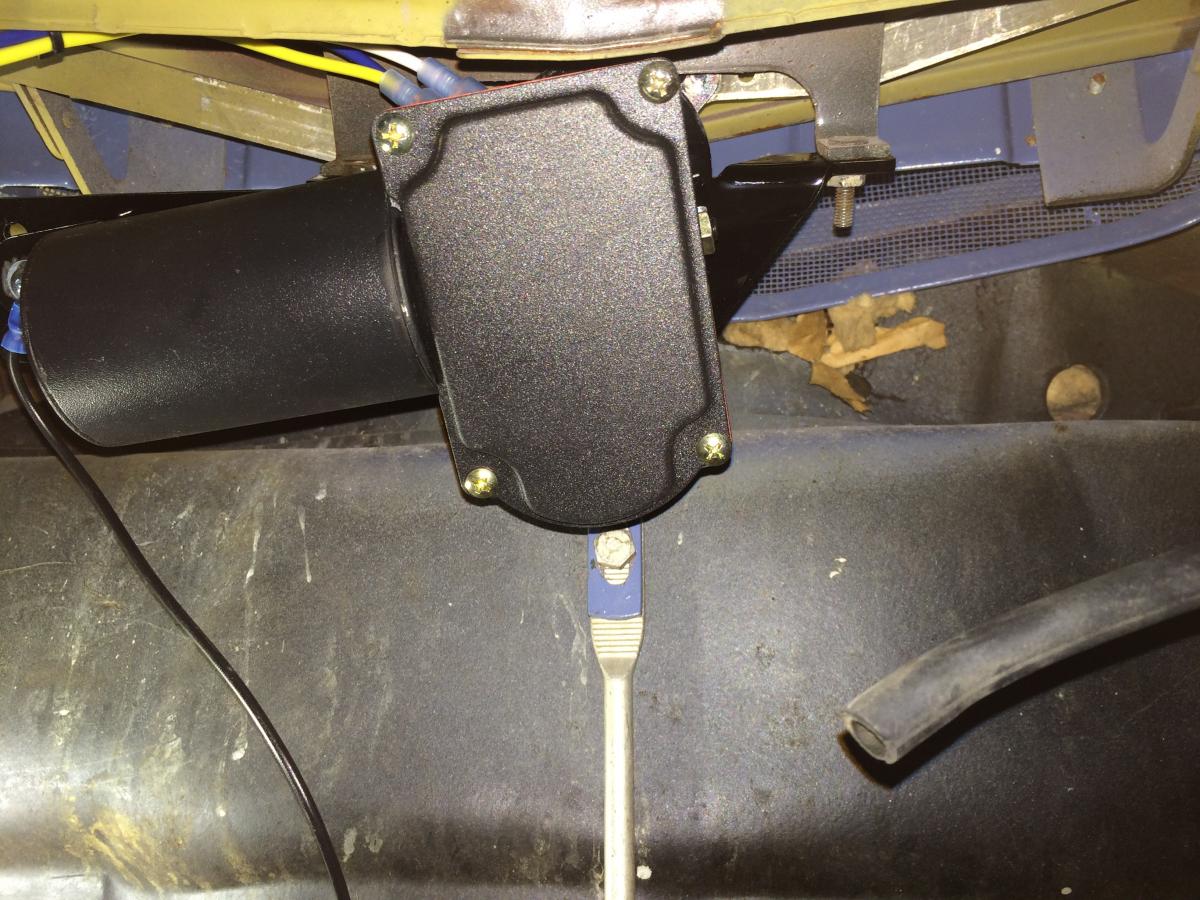
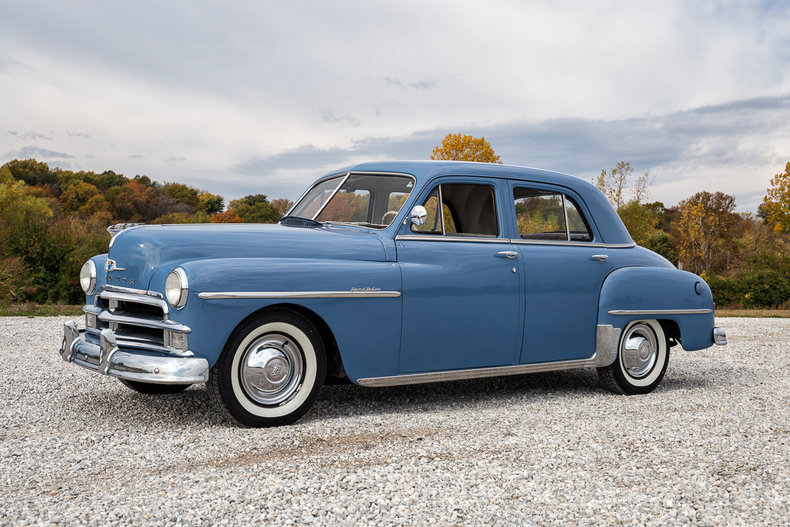
I converted my 1950 Special Deluxe to electric wipers using the kit from Newport Engineering. It was a direct bolt in conversion and even came with new grommets, washers and clips to attach the wiper arms. With just a little "hot rod" engineering I was even able to adapt the electric switch to use the stock knob from the vacuum unit so it all looks stock.
-
I'm currently considering a pentastar V6 for my 1950 Plymouth, similar horsepower and torque to the LTG. Naturally aspirated so I don't need to concern myself with turbo plumbing. Available with either an automatic or manual in rear wheel drive. The engine has been in production for a few years and I can get a low mileage changeover (engine, transmission and electronics) for under 3 grand. For a daily driver with enough oomph to pull our motorcycle trailer on road trips I think it's a good option, and I stay all Mopar.
-
Since you are asking the question clearly the current state of the interior is detracting from your enjoyment of your truck, so you are going to paint the interior. My suggestion is to do the same to the interior that you did to the exterior, give it a quick "touchup" now with the intent that when you repaint the rest of the truck years from now you will redo the interior at that time as well. Clean it up, mask it off, shoot it and get back to enjoying your truck.
-
To answer your earlier question, you will want the engine and transmission together to figure out the best mounting location. That way you can get your driveline angles, transmission and engine clearance, figure out your exhaust routing, shift linkage etc before you final weld anything in place. To figure it all out it's best to work with the whole package. I like the car, the 340 will make for a really nice cruiser.
-
1956 Truck 1/2 tom engine swap
rhelm1953 replied to Strandrunner's topic in Mopar Flathead Truck Forum
If the differential is in good shape there is no need to replace it although depending on the gear ratio and your intended use for the truck you might want to. Things you do need to change: New radiator with custom fan shroud New driveshaft Custom fab motor and transmission mounts Custom Fab exhaust system If the truck is not already 12V convert to 12V, even if the truck is 12V you probably want to rewire the entire vehicle upgrade the brakes, minimum a dual master cylinder and front disc brakes Depending on the size of the transmission you may need to modify the floor New throttle linkage and transmission shift linkage Depending on the layout you could have interference with the steering linkage and need to modify/change the steering column and/or steering box. Even if you don't need to replace anything in the steering you may need to rebuild it for safety. If you keep thinking I'm sure you will come up with more, it's a very doable project and helps if you have some welding and fabrication skills. Love the truck and with a V8 and lowered suspension it will make a killer hot rod. I'm not a big fan of "patina" but this truck I would not paint. -
In my Plymouth or on my motorcycle the slow road is my preferred method of travel! Nice find, it's a shame I'm on the other coast.
-
Can we better define what you mean by a terrible shake, shimmy, vibration? Understanding what you are feeling will go a long way to rule out what is not causing the problem. When you experience the vibration does the steering wheel jerk side to side? If it does then we can rule out a driveline problem and focus on the steering and wheels. If the steering wheel does not jerk side to side but you can feel a vibration in the wheel does it change with vehicle speed or engine speed, is it the same if you go 35 in 2nd gear or 3rd gear? If it varies with engine revolution then it's in the engine and could be motor mounts or an engine driven accessory, if it varies with vehicle speed it could be driveshaft or tires. Give us a better description of the problem and we can give better guidance on where to look. The free play you describe at the front wheels does sound like a lot and if your alignment is off could help set up a vibration, in that case you would probably feel it as a back and forth movement in the steering wheel. Better information = better help :-)
-
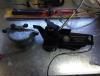
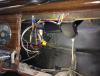
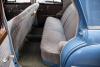
I had the same problem with the wiper motor on my 1950 Special Deluxe (P20) and I was not able to get the vacuum motor to work. I took it apart, cleaned it and got it to reverse on the bench with no load applied but in the car with wipers attached it was a "no go". I finally converted to electric using an aftermarket unit from Newport Engineering. It was a direct bolt in but because it is 12V only I also had to install a 6V to 12V transformer. the conversion was not cheap but now I have wipers I can depend on and since I live in the Pacific NW that's a must! I've attached a couple photos that may help with the mounting question.

-
You might want to reconsider using the Home Depot stuff on the roof as well. Once your 106 degree sun starts baking the roof the glue will get hot, soften up and the foil will fall down. The expensive dynamat uses an adhesive that is more heat resistant and even then I have had some problems with it staying in place on the underside of a roof or decklid.
-
1946-1948 p15 outer door handle disassembly
rhelm1953 replied to 1947plymouthrodder's topic in P15-D24 Forum
Excellent post, now I can get my door handles rechromed! -
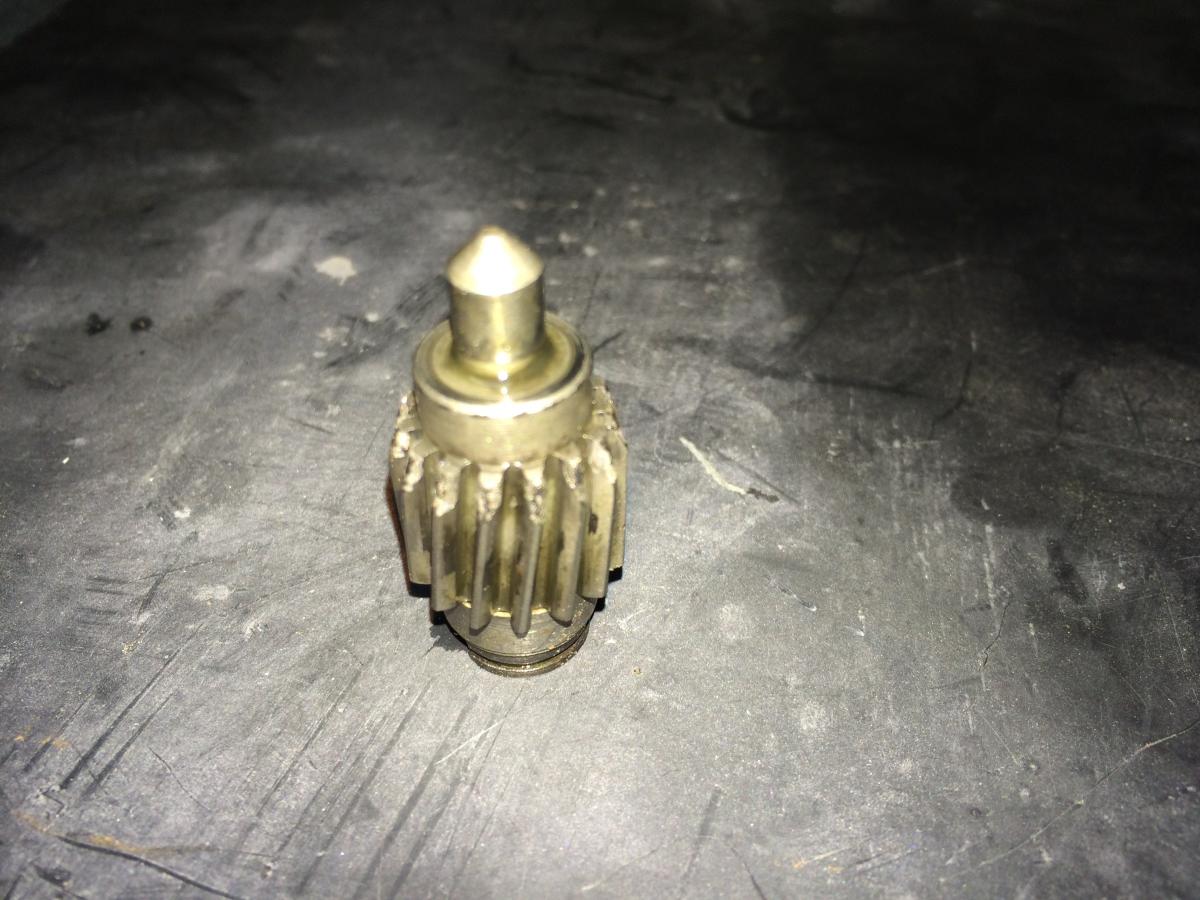
A quick update on my overdrive. I got a new gear from George Asche and when I opened the package I realized my old gear was the wrong one, The new gear was about 3/4" longer, the gear I had never engaged the speedometer drive gear, only the end of the gear teeth were making contact and that's why they were so beat up. With the correct drive gear for the governor the overdrive is now shifting as it should. I still don't have the plunger for the lockout switch so I have tie wrapped the handle on the overdrive cable so I can't try to disengage it. My plan is to get a machine shop to make a plunger for me and when they do I will get a few made. According to George the plunger needs to made from hardened steel or it will wear quickly. I have a shop I've worked with before for custom parts, I just need to get over there with a drawing. In the meantime I'm cruisin' in overdrive!
-
I'm with Jeff on this one, more likely a valve than rings if compression is really zero, even bad rings will give you something. A quick way to verify valves vs rings is a wet compression check. Squirt some oil in the dead cylinder and check your compression again, it improves then the problem is rings, if no change most likely valve. Could you have one valve set too tight so it's not closing when it comes off the lobe? Rich
-
Like the work you have been doing on the car and it looks great! However I do have a caution for you concerning the paint process. From your postings it looks like you sprayed the basecoat on the jambs, firewall and inside the trunk about May 4th and didn't spray clear until May 11th or 12th. That's a long time for the base to sit open. I don't know what paint system you are using but most I have used have a maximum open window of about 24 hours between application of base and clear. After that the usual recommendation is to scuff the base coat, reapply and then spray the clear within the 24 hour open window. The danger of letting the base sit to long is you won't get a good chemical bond and the clear will delaminate over time. Since we are talking about parts of the car that are not typically exposed to UV you may be OK. I recommend you review the product data sheets for whatever paint system you are using and plan your painting schedule to stay within the application guidelines. My usual process is to spray the base in the afternoon, allowing an hour or so between coats and coming back the next morning to spray the clear, also allowing at least an hour between coats. This lets me stay within the open windows for recoat while allowing time for the paint to outgas so I don't trap solvents. I've been doing this for 45+ years and while paint systems have changed a lot the one rule that hasn't changed is to read, understand and follow the product data sheet. If I have misunderstood your process or the paint system you are using does allow these long recoat windows then I hope you don't take offense and this post can serve as a lesson to others. To much work goes into one of these restorations to have it go bad at the painting stage. I want to see your final job reflect all the great work that went into it.
-
Headlights cycling on and off, 1950 Plymouth
rhelm1953 replied to rhelm1953's topic in P15-D24 Forum
Thanks for all the replies, I hate trying to track down shorts so I was hoping the circuit was a known weak link. Apparently not... Don, my basic trouble shooting procedure is to start with what I worked on last. It's a sometimes humbling exercise but quite often very effective. Guess I will be spending some quality time with my Ohm meter and test light. -
Driving home last night my headlights and dash lights started cycling on and off. Once I got home I left the car running in the driveway and the lights would come on for about 10 - 15 seconds and then go off for about 5 seconds and repeat the cycle. High beam, low beam didn't matter. I have just replaced the dimmer switch (low beam quit working) and I have wired in an overdrive relay according to the factory schematic. Overall the wiring is in good shape and it looks like the harness may have been replaced a few years ago. Has anyone else had this problem? Is there a circuit breaker in the headlight circuit that could be cycling? If there is a circuit breaker where is it and can I replace it with a 20A fuse? Until I have answers I'm not driving at night! Rich
-
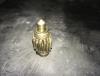
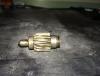
So I am still working to get the overdrive in my1950 special Deluxe connected and working as intended. I have replaced the bad lockout switch and have now realized that in addition to the switch being bad I am also missing the plunger that activates the switch. Does anyone have a plunger they would be willing to part with? If so let me know. As an alternative can someone measure their plunger, length and diameter. With the dimensions I can get one made, or several... Second problem, the governor is not closing to complete the circuit to ground for the relay. I removed the governor, chucked it in a drill and when I spun it up my ohm meter tells me it's switching. I pull the cover off and install it back in the transmission and the shaft rotates freely (it doesn't engage the drive gear). On close inspection I can see the drive pinion is damaged, see attached pictures. Does anyone know a source for the drive pinion and is this a common problem? If the pinion is bad what are the chances the drive gear is damaged as well. Is it possible to change the drive gear without pulling the transmission from the car. I now understand why the previous owner just used a switch to activate the overdrive but I am determined to make it work as intended. Rich
-
Anyone have a source for overdrive lockout switch?
rhelm1953 replied to rhelm1953's topic in P15-D24 Forum
Thanks to Earls ebay skills I now have a good lockout switch but now I realize the plunger is missing as well. Does anyone have an extra plunger for the overdrive lockout switch they would be willing to part with? If so let me know. If no one has a spare plunger can someone send me the dimensions (diameter and length) so I can get one made. I am now beginning to understand why all of the overdrive controls were bypassed and there was just a toggle switch to activate the solenoid... Thanks for any help! -
Anyone have a source for overdrive lockout switch?
rhelm1953 replied to rhelm1953's topic in P15-D24 Forum
Thanks Earl and every one, I compared the switch on ebay to the one from my car and it looks like a match. I've purchased the switch and should have it in a week. One step closer to getting my Plymouth back on the road. Included a couple of pictures because everyone likes pictures, plus I want to see if it works. I have also converted to electric wipers and will add a post on my experience.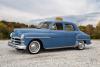
-
Anyone have a source for overdrive lockout switch?
rhelm1953 replied to rhelm1953's topic in P15-D24 Forum
It does thread in with two screws for the wires, I can take a picture this evening and post it. Yes, there were no wires attached to the switch, I tested it on the bench and in the car with the same results. -
Previous owner installed an overdrive transmission in my 1950 Special Deluxe but did not bother to install all the electrical connections, just a toggle switch on the dash to activate the solenoid. I've now installed the Overdrive relay and kickdown switch, added a seal for solenoid where there was none and am just about ready to test it out. However the overdrive lockout switch seems a bit sketchy, I measure about 20 ohms across the contacts when the switch is closed and that seems a bit high for a switch, I suspect an internal seal has failed and I have gear oil on the contacts. The switch appears to be a sealed unit and not serviceable and my on-line searches have not turned up a source for a replacement switch. Overdrive is Borg-Warner R10G, year unknown. Does anyone know a source where I can buy a switch, or for that matter is 20 ohms too much resistance? Appreciate any leads. Thanks
-
How is the ECI brake kit working? I assume it's dual master without a power booster and was wondering how the pedal effort was. I plan to go to disc brakes on the front and would prefer to not have to add a power booster if the mnual brakes stop the car well and don't require too much effort.
-

From the album: RHelm's Plymouth Collection
Plan to swap in the engine and overdrive transmission from the 1950 Plymouth when the 1950 gets upgraded to a Pentastar V6. -
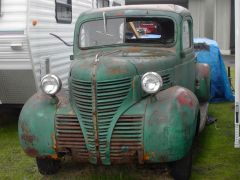
From the album: RHelm's Plymouth Collection
My next project for the last 13 years!