rhelm1953
-
Posts
104 -
Joined
-
Last visited
Content Type
Links Directory
Profiles
Articles
Forums
Downloads
Store
Gallery
Blogs
Events
Everything posted by rhelm1953
-
The oil pressure, fuel pump interlock is a good safety feature, my 86 Nissan pickup is set up that way from the factory. You will want to use a relay for the fuel pump so the oil pressure switch operates the relay and relay carries the current load for the fuel pump. You will also want some sort of over ride so you can prime the carburetor when the engine is not running.
-
To answer your question on sanding the clearcoat. The car looks like it is metallic blue and silver, with the metallic paints there is no way to sand the clearcoat and save the base, as soon as you touch the base with sandpaper you will change the reflective properties and the color will be blotchy once you clear it. This is probably in truth a plus, I believe the car will be worth more with a repaint is a stock color, no hot rodder wants 4-door Chrysler and no collector wants a bad flame job. It looks like a solid car and if you have to sand it all for the peeling clearcoat then a fresh basecoat in a proper color is a minor part of the total cost and will increase the value of the car.
-
1940 Windsor Coupe Triple Carb Manifolds-Which carbs to use?
rhelm1953 replied to JPetrakis66's topic in P15-D24 Forum
A 230 cubic inch flathead is about 3.6L, I would be looking at imports with 1200cc to 1600cc and see what they are using for carburetors. I have an 86 Nissan truck for my daily driver and it has a Hitachi 2bbl carb. The Hitachi is junk but you can look on line to find weber conversions for the 1600cc engine. I think three of those webers would get you in the ballpark for the correct cfm and jetting and the triple carb manifold will provide the most uniform fuel distribution. -
From the standpoint of brake performance the size of the line makes no difference. Use what ever was stock if you are restoring the brakes to stock, that will make finding the correct fittings easier.
-
So whattya think of this--P18 with a /6
rhelm1953 replied to drpreposterous's topic in P15-D24 Forum
Fargo makes a good point, all old cars are project cars, especially ones that have been modified. Take a good close look at the car, note what you like, note what you need to change for safety and what you want to change for aesthetics. Estimate the cost of your changes and make an offer on the car if it looks worth the effort to you. On the plus side you will have something you can drive an enjoy while you make your updates as long as the car is safe. If it does not look like it's worth the effort then walk away. On the plus side from the replies you got from this bunch of curmudgeons you know how the car will be received when you show up at your first show. :-) -
I think Plymouthy has the right answer, My 50 Plymouth was leaking gas from the carburetor after the car was shut off, I checked the float level, it was too high, and after resetting the float level no more leakdown. Having said that an adjustable fuel pressure regulator is cheap insurance when swapping in an electric fuel pump. I had to go to an aftermarket electric pump for my 1986 Nissan truck and wasn't sure what the pressure setting was. I had some driveability problems until I installed an adjustable pressure regulator and set it to the specified pressure for the stock Nissan pump. No downside to installing the regulator, they are inexpensive and easy to install and then you know what pressure you are sending to the needle valve. But, also check the float level.
-
To remove the old stud you can support the back of the drum with a piece of 2" pipe that surrounds the head of the stud and then you can knock it out with your BFH without hurting the drum, penetrating oil and possibly heat will make it easier. If you are removing a stud you want to save then you are better off finding someone to press them out. To install the new stud, it will have a knurled shaft by the head of the stud, slide the stud through the hole in the drum as far as it will go and then add a greased stack of flat wafers about an inch thick over the stud. Install your lug nut upside down on the stud (flat side down) and as you tighten the nut against the greased stack of washers it will draw the stud into the hub until the head seats against the back of the drum. I did that repair on my 55 Chevy when I was 17 years old in the public library parking lot after an over zealous tire jockey over-tightened my lugnuts and four of the five studs snapped off while I was driving, all I needed was hand tools and a few well-chosen non-literary words to complete the job.
-
The Great Frame, Sub Frame, IFS Stock, Truck I Beam Debate Thread
rhelm1953 replied to 55 Fargo's topic in P15-D24 Forum
Adam, What Car, Frame, front suspension are we looking at? At this stage of the build it looks pretty tidy. -
In 2001 I purchased my 1939 Plymouth pickup for $1600. My wife said I could buy if I could find a place to store it because I couldn't bring it home until I was ready to work on it. I found a storage lot that would let me store an untitled and unlicensed vehicle. That was 2001, it's now 2018 the truck is still in the storage lot, I don't even want to think what I've paid in storage fess but it's at least 4X what I paid for the truck and I still have at least 2 projects in front of the truck before I can bring it home. Now my advice, if it's not your dream car you've always wanted and could never find, file away the farmers name and let him store it for free. Check back every year or so to see if the price has come down or when you are closer to being able to start the project. Chances are it will still be there in a couple years in the same condition it's in now. If it's not then there are other 51 Plymouths out there waiting for you. Rich H
-
On a more serious technical note - will painting over sealing/mounting surfaces such as exhaust, intake, water pump, etc cause sealing problems? I copies some pictires from an old thread over a THE HAMB site and was wondering. Hope its ok with the OP that I borrowed these pictures. He might be on this site as well. I always make it a point to mask off the sealing surfaces, I honestly don't know if it makes a difference I just consider it the "right" way to paint an engine. After I clean the engine I also start with a good two part epoxy primer, epoxy has good adhesion and if the primer sticks the paint will to. I never considered beige/tan for an engine color but it looks like a nice choice. I always thought the stock silver was too easy to smudge and too hard to keep clean.
-
"One trip I want to do is from where I live in Lethbridge, Alberta to Vancouver Island to visit dpollo, also on this thread, who has helped me with advice and lots of difficult to find parts. About 800 miles one way. " I like the thinking, ya gotta love old cars with bugs in their teeth!
-
Nice job, you are a better welder than I am! Although that may be a rather low bar... :-)
-
That's a nice looking tank but you have many feet of welding to do with no pinholes to have a leak free tank. I've welded up a few oil pans when I needed to modify them for clearance and always find it a challenge to get them leak free. Have you considered brazing the seams once it is all spot welded together? The brass will flow into the seam and should give good fill and sealing, also the lower temperature will reduce the risk of a burn through. Or you are a much better welder than I am... :-)
-
I agree with Dodgeb4ya, my 50 Plymouth has the 3/4" rubber mount studs. I don't think the stainless screws are factory. This does not help Fastback50 with his question but if the screws are not factory then it is hard to say how they have been installed. If they are threaded stainless and no antiseize was used during the installation then the threads have galled and the only choice is to drill them out. I am surprised they are so hard to drill.
-
The chain lube is an excellent suggestion, I have a couple of cans for my motorcycles. The real question was how do I get oil to the hinge, the pivot point is buried up inside the fender and I don't want to remove and replace the doors just to oil the hinge. It looks like I might be able to get access if I pull the kick panels. Will that get me access to the hinge pins?
-
Does anyone have a good method to lubricate the front door hinges on a 1950 Plymouth Special Deluxe? My front doors are getting stiff and the hinge pins appear to be buried in the front door post. I would prefer to not just soak with penetrating oil and hope for the best.
-
At the risk of repeating my self I am going to repeat what I sad in a similar thread. I believe most of the Mustang II cross member kits have serious design flaws that will lead to failure if the car is used as a driver. If you think you must replace the front suspension then get a frame clip from a wrecking yard from a vehicle that was designed by real automotive engineers. Below is my experience with a Mustang ii conversion. From personal experience I am not a fan of the Fatman/Heidts/ etc style Mustang II kits. This style of kit uses a single 1/2" bolt as the pivot for the lower control arm. I put a Fatman kit in my 1970 Mercedes when I installed the Ford 4.6L V8. At about 50,000 miles the lower control arm bolt on the right side sheared off where it exited the back of the cross member. My wife was driving the car when it happened, fortunately she was close to home and only driving about 20mph when she went to stop for a traffic light, heard a "bang" and the car dove to the right. The lower control arm bent but did not come loose so the car didn't fall to the ground. When I pulled the broken end of the bolt out of the lower control arm you could see a vertical strip of fresh break about 1/16" of an inch wide, the rest of the cross section of the bolt was corroded. This is classic fatigue failure, a month before the bolt broke we had driven the cae from Portland to Reno for vacation at highway speeds, through the mountains. I know the bolt was seriously compromised during that trip and had it broken at 60mph on a mountain curve I probably wouldn't be writing this now. It's been 2 years and 10,000 miles since that incident and I recently pulled a bolt for inspection, it is showing signs of fatigue cracking at the same location it broke the last time. The other problem is the bolts tend to seize in the cross member from corrosion, mine were corroded in place and it took two days, $100 worth of drill bits and two 1/2 inch drills to get them out. I will not use another one of those kits on any car I build.
-
A Mercedes needed a IFS swap? I would have thought it was light years ahead of a kit.. Had to convert to rack and pinion to fit the wider modular motor.
-
From personal experience I am not a fan of the Fatman/Heidts style Mustang II kits. This style of kit uses a single 1/2" bolt as the pivot for the lower control arm. I put a Fatman kit in my 1970 Mercedes when I installed the Ford 4.6L V8. At about 50,000 miles the lower control arm bolt on the right side sheared off where it exited the back of the cross member. My wife was driving the car when it happened, fortunately she was close to home and only driving about 20mph when she went to stop for a traffic light, heard a "bang" and the car dove to the right. The lower control arm bent but did not come loose so the car didn't fall to the ground. When I pulled the broken end of the bolt out of the lower control arm you could see a vertical strip of fresh break about 1/16" of an inch wide, the rest of the cross section of the bolt was corroded. This is classic fatigue failure, a month before the bolt broke we had driven the care from Portland to Reno for vacation at highway speeds, through the mountains. I know the bolt was seriously compromised during that trip and had it broken at 60mph on a mountain curve I probably wouldn't be writing this now. It's been 2 years and 10,000 miles since that incident and I recently pulled a bolt for inspection, it is showing signs of fatigue cracking at the same location it broke the last time. mrewstory, at 35,000 mile I strongly recommend you inspect the lower control arm bolts, or just replace them. If you can get them out, mine were corroded in place and it took two days, $100 worth of drill bits and two 1/2 inch drills to get them out. I will not use another one of those kits on any car I build.
-
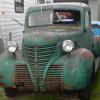
An engine needs three things to run, compression, fuel and spark, assuming of course that it's not frozen and will turn over. After that it's just a question of how well it runs. Step 1 does it turn over Step 2 does it have compression Step 3 does it have spark Step 4 add fuel and see what happens If the engine is not stuck and I want to decide whether to swap to a V8 or spend a little money on the flattie I would check the compression first, if the compression is bad then you probably need to rebuild the engine, if you have compression the engine can be made to run and if you can do a basic tuneup you have the skills to get it running.
-
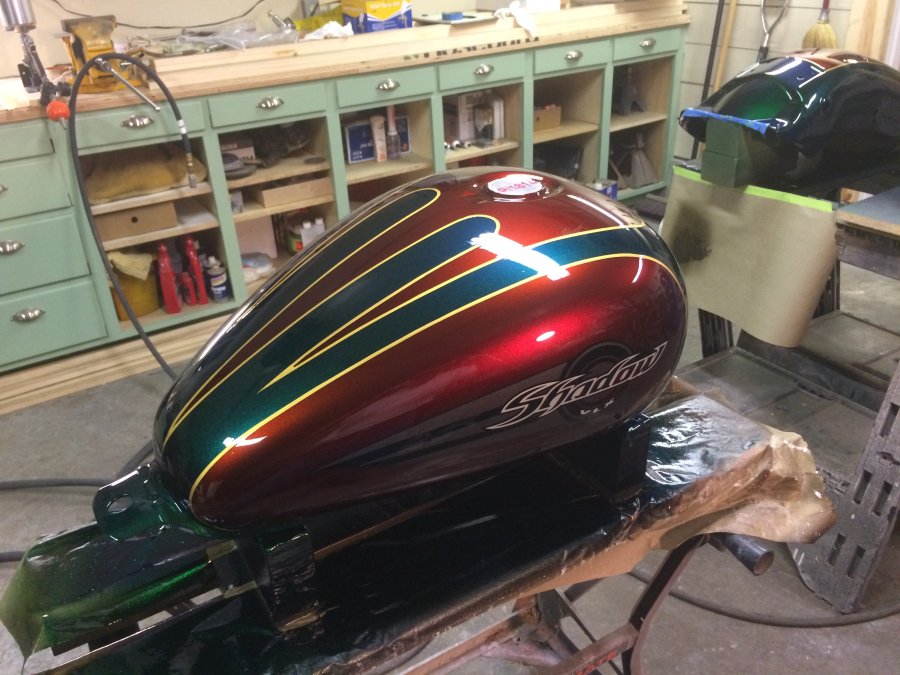
I like the green, it compliments the wheel and the car. Do you still plan to do it in paint or are you going to see how the pinstripe tape holds up?
-
Apparently someone fixed the poll cause I just voted... In 1973 at the age of 20 I had a 1950 Hudson Pacemaker, a 1960 Lincoln Premier, a 1955 Chevy 2-door post, a 1958 Austin Healey 100-6, a 1950 Chevy truck I paid $15 for with no motor and a 1967 Ford Galaxy 2 door hardtop I bought as an insurance rebuilder. Just to establish my affinity for oddball cars the 55 Chevy had a dodge 318 V8 with a push button torqueflight and Cadillac differential, because those were the parts I had available at the time. Today I have a 1970 Mercedes Benz with a Ford 4.6L modular motor and automatic overdrive from a wrecked Crown Vic police car, so I guess I haven't grown up much... Maybe one of these days I'll tell the story about working on the Lincoln for a week in a Iowa hog field so I could drive it out to Phoenix after it hadn't been on the road for ten years, or maybe I need to find a Lincoln forum for that story.
-
If you use one shot it dries pretty quick, I pulled the tape as soon as the paint was dry to the touch. Maybe 20 minutes at the most. I also just used the blue fineline tape. I put one strip of tape where I wanted the line and then applied a stripe of tape to either side, I pulled the center stripe of tape and got to painting.
-
I had my 50 Plymouth out yesterday, it's not sub-zero in Portland OR but I did have to scrape frost. The heater also works very well! :-)
-
That was the method I used to do the striping when I painted my wife's motorcycle. It works quite well and the advantage is you can get the tape right where you want it before you paint the stripes. You will still want to use a pin striping brush so you can can lay down long lines and get a smooth finish but they are not expensive.