


46BulldogDodge
-
Posts
33 -
Joined
-
Last visited
Recent Profile Visitors
1,215 profile views


-
Congratulations on the truck and welcome to the forum. There is a wealth of information among the collective members and eager willingness to be of help. Granted the tank may need to be replaced with the years gone by, but it may make more sense to check out the engine attempting to revive it. Use the search feature. Changing oil, filters, cleaning carburetor, checking spark plugs and coil are all on the typical list. A good battery and a starter that works you can fire it up with a dribble of gas into the carb just to see if it will run...only for a moment. After that there are many things to check out before it is ready for the road. Also check some of the posts that have many pages, meaning they have been running a long time, and read them from the beginning. All of us have been there to start! And others will add to this meager advice.
-
For a real eye-opener check out Kevin Foust's build thread of a 1941 WC on the Dodge Power Wagon Forum. Superb work with stainless on many parts including the rope hooks. He didn't cut any corners anywhere!
-
Remove the hinge pin to free up the broken part or unscrew the top half of the hinge. The piece could then be welded to the seat back frame....or else fashion new metal to be that lower half of the hinge. On my truck the original hinge was replaced by a typical "T strap" hinge available from the hardware store. The hinge doesn't normally receive a lot of stress...unless something larger is stored behind the seat.
-
In trucks the flap is welded to the seat back frame, allows the seat bottom to be adjusted forward/backward on the seat base.
-
The original clips will work on fabric that is not too thick if they have not been weakened by rust. They can lose their springiness. If you are using leather, Naugahyde, or thick fabric, the hog rings will be more reliable tightening the cover to the frame. The "fan" like piece is part of the easy comfort seat, optional I believe, open gives softer cushion feel and closed is firmer.
-
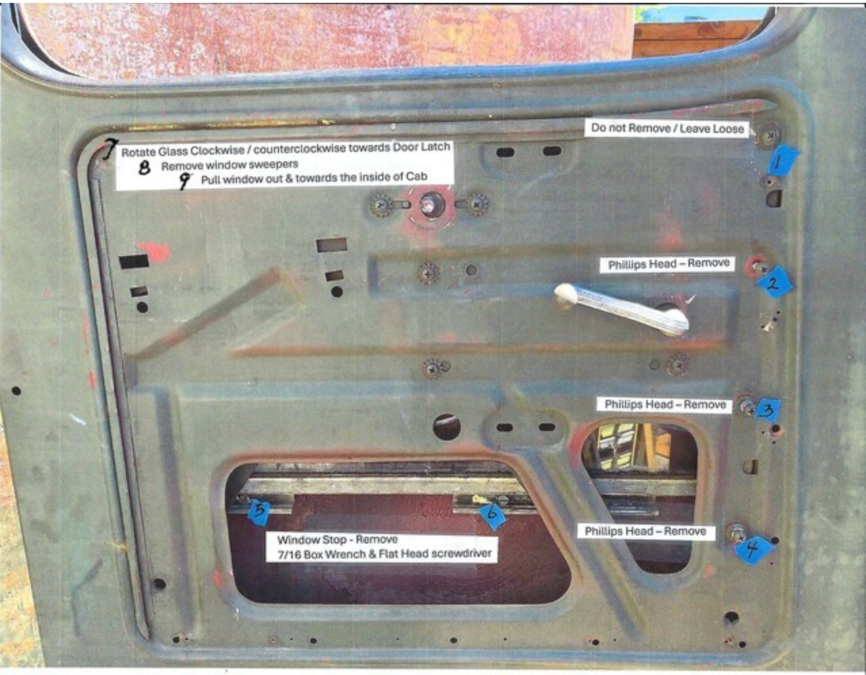
Karl posted this photo on the 39-47DodgeTrucks@groups.io forum and gave me permission to post it here. It will surely help anyone working on the windows of our civilian trucks or the power wagons 46-68. Dick Hultman, SW PA '46 WC & '57 FFPW
-
- 1
-

-
Stuck distributor '49 Plymouth P-18
46BulldogDodge replied to 37silverstreak's topic in P15-D24 Forum
One other thing worth mentioning is the tang at the bottom end of the distributor is a flat blade. So when you do free it up, note the position of the firing surface of the rotor....like the hour on a clock face. At top dead center on cylinder 1, the rotor should be at the 7 o'clock position. If you re-install 180 degrees out, the engine won't run. With new timing chain you want to make sure everything is in proper order. -
You are definitely in the right place! Great knowledge and guidance available. I can tell you that you most likely have a one ton + model because of the 6 lug split RING wheels. Split rims—definitely not on a Dodge. Pics are always great…and welcome to the forum! Dick Hultman SW PA ’46 Dodge WC & ‘57 Dodge Power Wagon
-
Here’s a suggestion, maybe just for research and understanding. Greg Coffin makes and sells a kit for power wagons that adds a booster and dual MC while keeping the hanging pedals. Check powerwagonadvertiser.com and search “Under-Cab Power Brakes and Dual Master”. It’s from Jan 2015! If you can’t get in that website, try the dodgepowerwagon.com forum. Click on Phil’s Archives and search the same title above…”Under-Cab… It will link you to the PWA article. The kit is available from vintagepowerwagons.com. Making it work on a car would be the next thought!
-
Installing horn wire on steering column
46BulldogDodge replied to dgrinnan's topic in Mopar Flathead Truck Forum
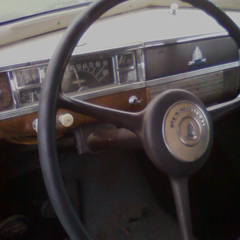
One last detail to the bottom…that hole is the end of a small tube that extends above the level of the steering gear lube in the box, making it nearly impossible to hit from above. -
Installing horn wire on steering column
46BulldogDodge replied to dgrinnan's topic in Mopar Flathead Truck Forum
Ivan beat me to it but....Look at the very bottom of the steering box, that's where you should find the hole. Fish a stiff wire up through that hole and out the top. Then attach your horn wire to it and pull the wire back down through the bottom hole. Dick Hultman SW PA 46 WC and 57 FFPW -
78% Nitrogen actually. ? Dick Hultman SW PA 46 WC & 57 FFPW
-
Confused ground short in the rear light wiring?
46BulldogDodge replied to OUTFXD's topic in P15-D24 Forum
Check this recent thread by Tired Iron on the innards of a turn signal switch, should help you understand the wiring a bit. Turn Signal switch inner workings By Tired iron, January 18 -
B1FA serial number decoding
46BulldogDodge replied to ranchracer's topic in Mopar Flathead Truck Forum
I'll be careful here...many have posted over the years about the apparent weakness of the person swinging the hammer on the number dies when these serial numbers were put on the frame...but engine block numbers were usually more regular, at least in a straight line. Just be gentle if you are sanding, scraping when cleaning it. If an "8" were tilted it could show up as a "3". Dick Hultman, SW PA -
If the shoulder of the hole is damaged, you might be able to get away with JB Weld as a sealant when the new plug is installed since the cooling system is not a pressure system. The less chosen, but successful for some guys, method is to use the rubber plugs that expand when you tighten the bolt through them. Even here a little JB Weld around the circumference of the hole could seal the deal.
