


Sharps40
-
Posts
759 -
Joined
-
Last visited
-
Days Won
5
-
When we bought Ol Bessy home she was hotrod low front and rear. (Top photo). Now she sits like a Grand Lady, stock height out back and just 1 in low out front. (Bottom photo)


-
Test ride went amazing. Nimble and stable to 80 mph. And noise plus squeaks, klunks all gone. With the pinion angle restored, all the vibes are gone too. Amazing.
-
Your welcome. Raining today all day but should be able to test ride tomorrow. Successes have commenced though, now i can slide under the car to work on stuff, without using a jack!
-
New and old ride height. (Factory ride height restored!) Remember to leave all the bolts (including the axle u-bolts) slightly loose until you have weight on wheels. Jounce the rear end several times then torque the front eye bolts, snug up the rear shackle bolts to compress the bushings. Finally, tighten down the axle U-bolts.....then go ride.

-
The new shackles and bushings. The old Cee Shackles measure 4 inches CTC. The new Boomerang Shackles (allow clearance of the aft cross member) are sold at 4 inches CTC but actually measure 4.5 inches CTC. Not a problem, thats only 1/4 inch lift out back. New grade 8 hardware, including grade 8 locking nuts were acquired. Some triming and reshaping of the inner shackle arm was required to ensure cross member clearance through out full stroke. Finally, a few washers are acquired to ensure the spring is aligned to prevent bind and breakage. (I used 3/8 thick shackles for strength since I knew I'd be trimming a bit. Not shown, a 2.25 in steel sleeve was used on the center bolt establishing a 2.9 in width across the shackles arms with the bushings compressed) The bushings shown are rubber, 7/8" outer, 1/2" inner and of a length needed for 1 3/4" wide springs. (EG just a bit longer so they smush up and lock tight in the eye/sleeve and around the bolts.) I did not smooth out the old threads in the frame sleeve as rubber bushing do NOT rotate in the hole....they twist a bit with the shackles turning on the bolt. And those threads are really more round bottom and shallow, shouldn't be any problem at all. Short leg goes up (Frame bushing) and the large Vee shape faces the rear bumper to maximize clearance and stroke.


-
The old shackles. These were righty tighty on both sides, yours may or may not be so try the socket in both directions and don't round off the head, they can be in the frame sleeve pretty darn tight.

-
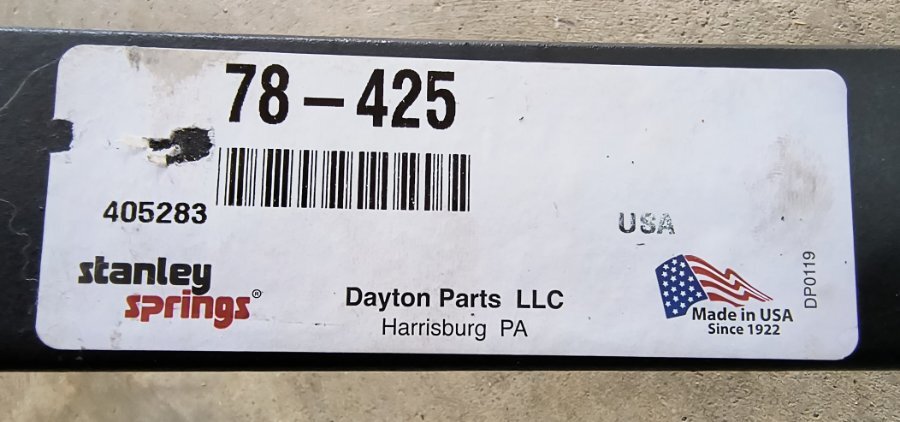
The new part number. Available from lots of places, shop around for the best price. These were under $400 the pair shipped. NOS springs are still available with the threaded eye but its getting darn near impossible to find a matched pair.
-
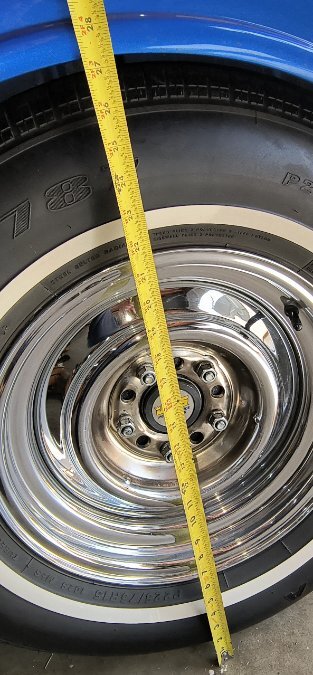
Better view. 86 road years is a lot of flexing and the old springs have quite a set. Remember, spring rate does not change with age but Arch will. You might have them rearched (Factory arch should be 8.5 inches) but finding a shop that can and given the low price of brand new springs, plus the upgrade to one additional leaf and the ability to convert from those hard to service threaded bushings.....

-
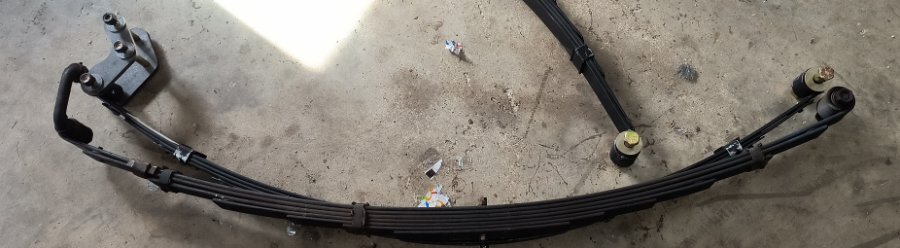
1937 Dodge D5 4 door sedan. old on top. New on bottom. Old is 7 leaf. New is 8 leaf (850 lb rate). The new made springs are for the 40s/50s Chrysler (heavier car) and others. All the measurements are the same. Sole difference is the rear spring eye is not threaded for the old steel Cee Shackles rather using the more modern Rubber bushings and shackles. The Cee Shackles were used on the 37 and many models before 1942ish due to a cross member just aft of the fuel tank. A leaf spring rides best flat or with 1 to 2 inches of arch. Passenger side was flat, drivers side inverted. Time to replace. 86 years is a good run.
-
Perhaps it's not difficult. But it does provide options for folks that don't want a permanent change or don't want to modify a good original distributor, etc and it's potentially less expensive. I posted as an option, not really looking to debate an opinion of what's easy or hard.
-
yes, inverted is required to operate points. Very simple as the component types and locations are specified in the schematics. However, for some, modifying the mechanics to slant 6 is easier and I understand. In any event, lotsa ways to skin the cat. Nifty idea to stash the inverter in the old regulator pack.
-
Here is a link to using a GM 4 pin control module to maximize your points distributor. A motorcycle article but applicable to cars too. Should work with any distributor and your 12v- ground system. Don't forget to heat sink the module at your preferred mounting location. There is an option here to toggle between points controlled ignition and module controlled ignition. e.g In the rare event a Genuine GM 4 pin module fails, you can switch back to points and move on down the road.....note, without a ballast resistor it'll be harder on your points but it'll get you to a parts store and you'll be back on electronic ignition likely long before cratering the points. A fine emergency back up, just the flip of a switch.... As you used relays to take the amp load off your headlight switch (you did didn't you?....shame, shame if not, safety first, you don't want a fire.....) you use this system to take the load off your points. Points should last as long as the rubbing block and since you remove the ballast resister (which limits your 12-14.2v- ground power supply to 6v after start up) your new 12v coil will be saturated at double or more voltage full time. e.g. the function of the ballast resister is to allow full voltage for start up and then reduce to 6 or so volts for running in order to keep the points from burning up.) When done, you have all the benefits of a powerful 12v-14.2v- ground ignition without the cost of an HEI, the difficulty of revamping a points dizzy to slant 6 electronic, or the potential and oft complained of failures of the Pertronix/similar style conversion units. Safe driving.... http://gpzweb.s3-website-us-east-1.amazonaws.com/Ignition/GPZheiModForPoints.html
-
Some background first.... I didn't know this and find it very interesting.....might well quick fix a road side break down for the bazillions of us running an HEI distributor. I run a GM HEI (Chinesium copy cause at the time I was assembling, A Genuine Item wasn't in the budget.) Since then I located in the spares at Dads house a fine condition GM HEI Distributor. I won't keep the entire dizzy in the trunk when traveling but the genuine gm module can be stowed against a road side breakdown. Comparing the two, I noted my Chinesium module is a 4 pin and the GM Module on hand is a 5 pin. Did a bit of quick research and it seems pin count really doesn't matter. Running a 4 pin dizzy I can swap in any 4, 5 or 7 pin module to mine and it'll work fine. Even the Buick 3 pin module can be wired to replace my Chinesium unit or used to control points dizzy should I ever go back to that. (I did further research and found even the common 4 pin can be wired to any points dizzy for nearly infinite points life and full 12v-14.2v power {ballast resister eliminate} to the coil at all times. Neat stuff.) Essentially, the common 5 pin uses one pin for spark knock....not needed on mine. A rarer, 2 year 5 pin, uses one pin to retard timing 5 degrees, not needed on mine. Same with the seven pin, just swap it in and ignore the additional pins. The odd 3 pin can be used but requires rewiring. So, nice to know I've got a spare in the trunk and if i ever needed a parts store on the road, there are many choices against their inevitable "4 pin shows in stock but ain't actually on hand" scenarios.
-
Been a while since I've posted. Ol Bessy (37 Dodge) is running daily on her new SBC and TH350 for three years now. Yep, i used all GM power and drive line for off the shelf, anywhere, parts availability and its saved my bacon on a long out of state trip on one occasion.....no waiting in a hotel for overnight delivery of an antique repair part....but, I digress. So, you still want/need to run the old flat head....but for reliability/other reason, you've converted and rewired from 6v+ ground to 12v_ ground. Good for you, if nothing else, a fine safety upgrade as you'll have much brighter headlights. {Most especially if you've properly taken the load off the switch using relays to deliver a full 14.2v to the lamps.) But, in so doing, you've likely not taken advantage of the 12v- ground capacity to upgrade your ignition and engine performance. Options include an expensive 12v hei, or a somewhat difficult conversion of your points dizzy to slant 6 electronic.....but there's an easier and more affordable way, and it can be hidden if your a "looks" purest.

-
Got Ol Bessy up to VA. First Dad has seen her together and first drive in nearly 40 years. After watching, you'll understand why we went with a 1st Gen Chevy V8. Dad will be 82 soon. And She is now the way he always wanted her........sometimes it takes a life time to get there. https://www.youtube.com/watch?v=SfrYDCttGW8&t=3s https://www.youtube.com/watch?v=kSnIt0hSwvU&t=11s
