Desotodav
-
Posts
1,912 -
Joined
-
Last visited
-
Days Won
14
Content Type
Links Directory
Profiles
Articles
Forums
Downloads
Store
Gallery
Blogs
Events
Everything posted by Desotodav
-
wrong vent window rubbers from steeles?
Desotodav replied to dontknowitall's topic in Mopar Flathead Truck Forum
Spot on mate - the different shape means that the rubbers for our trucks here in Oz need to be slightly longer. I heard a few months ago that there was a fella at Fleetparts in Toowoomba who was making a mold for our vent window rubbers. The frame in the photo you have shown is the USA vent window version. You would have to fill in the front section of your door frame to accommodate those frames. -
wrong vent window rubbers from steeles?
Desotodav replied to dontknowitall's topic in Mopar Flathead Truck Forum
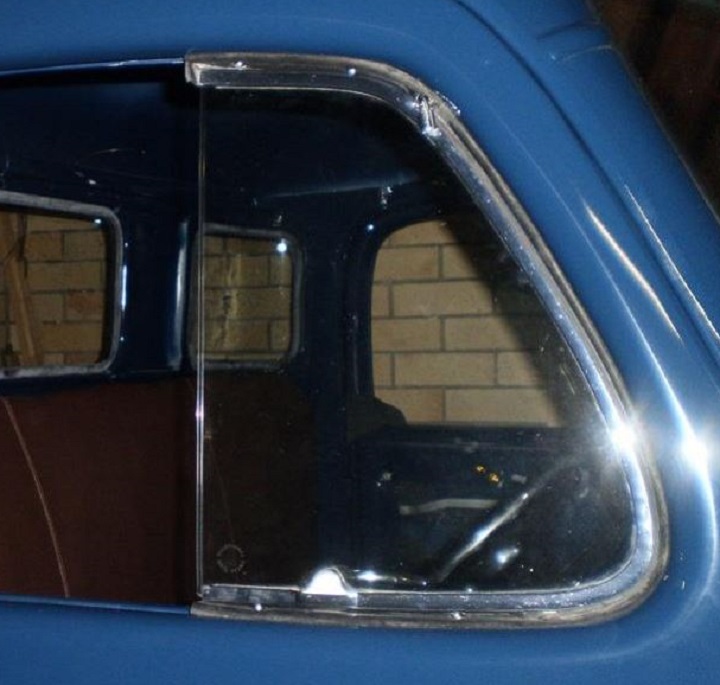
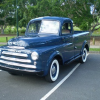
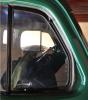
The Steele rubbers which you have won't fit your truck Ryan as those vent window rubbers are made for the USA trucks and not the Oz (import trucks) - there is a difference in the shape of the vent windows (see photos - blue one is mine and green one is Hank's). Our vent windows here in Oz are more rounded at the front, which is why we require the rubber to be slightly longer than the USA version. I got lucky with the ones which I got for my truck. I'll see if I can dig out details for you tomorrow for the correct rubber length - from memory, you can get them but you need to order them for a different USA model.
-
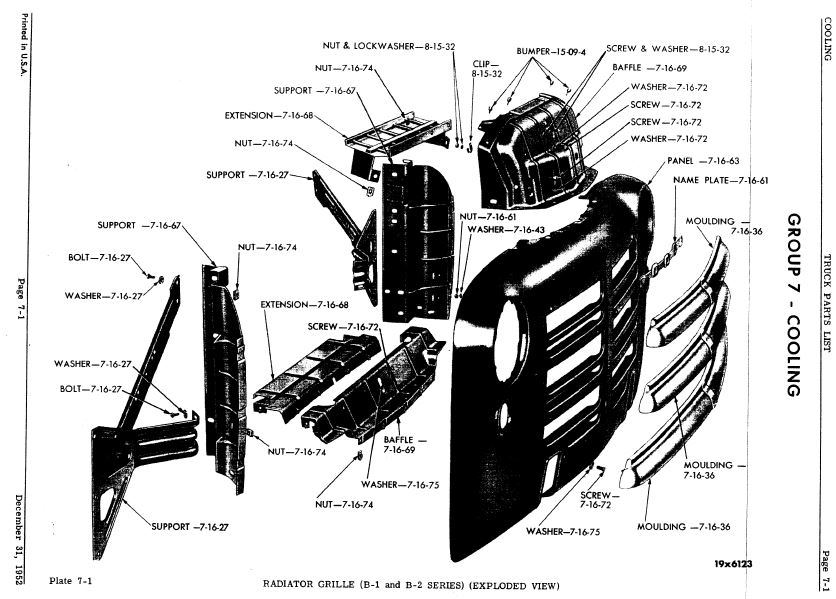
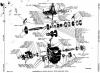
Pics from the manual...

-
It is a test Fred - and it appears that you are well and truly worthy of owning a MOPAR truck !!!
-
1953 Dodge 'coupe' truck project
Desotodav replied to Desotodav's topic in Mopar Flathead Truck Forum
It's been a couple of weeks since I've been able to get back to work on the 'Pop' truck. The work at present all involves getting the chassis ready for sand blasting/repairs and paint. It came as no surprise that both of the rear mounts for the front springs had their threads chewed out, so I moved the chassis outside and removed both of those mounts - I'll replace them with some new ones that I have. I expect to have the chassis down to the Sand Blaster within the next week or so. It will be painted in 2-pak black (like my blue 52 truck). Then I will start cleaning up the engine for repainting once the chassis has left the shed. I have the compete (original) brake line out and will have it replicated soon. I'l have to start thinking about refurbishing the axles and the brakes after that. I'd almost forgotten how much fun this all was!

-
So the PO of the house owned a MOPAR as well Don?... I see it left its mark numerous times on the floor of that garage! Looks to be a good sized 'man cave'.
-
Very nice work on the truck Barry.The bolts you ask about appear to be for mounting the lower front area of the inner fender guard (not shown in attached diagram). I wish you a speedy recovery mate.

-
Here's a link for you Todd... http://www.jalopyjournal.com/forum/threads/48-dodge-coe.836075/#post-9608000 Great COE by the way Jim. We don't see many of them here in Oz. I'm sure that many of us here will enjoy following along with your project.
-
Great pictures Paul (and Tod). Looks like the snow on the peaks has gone from when I was there with Hank and Blanca about 6 weeks before you.
-
That event looks like one that I'll have to add to the bucket list. Hope to see plenty of photos after you guys attend.
-
I installed a 160° thermostat a while back Fred and my truck runs at around 180° on the highway on a hot day. It seemed to run a bit hotter than that when I ran no thermostat at all - I was told that was because the water was circulating too quickly and not having time to be cooled in the radiator.
-
1948 Dodge Panel Truck: "The Brick Hauler".........
Desotodav replied to 48Dodger's topic in Mopar Flathead Truck Forum
Hey Tim, I thought that I had a set down at the shed. So are you going to pick them up from my place or should I drop them over? Why you gotta live so far away?

-
1953 Dodge 'coupe' truck project
Desotodav replied to Desotodav's topic in Mopar Flathead Truck Forum
I agree with you there Jerry. The shed is just missing a good hoist! I learnt the importance of having a large shed during these projects after struggling in confined spaces during my blue 52 truck build. I got a few truck parts ready and dropped them down to the Sandblaster a couple of days ago. It turns out that he is a bit light on with work at present so will be doing my parts soon. He even requested that I have the chassis down there soon so that he can blast it and weld up the 2 small chassis cracks for me (he is a great welder). I hope to be able to report back here soon with a whole lot of freshly primed/painted parts.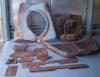
-
Isn't it funny how I get excited when I hear you guys are going picking again. Another great haul of parts - well done Mark and Ed. I just wish that we had more yards with older vehicles like that here in Oz.
-
You could try Andy Bernbaum's as they are in Mass... http://www.oldmoparts.com/parts-weatherstripping-chrysler-desoto-imperial-1940-1950.aspx
-
1953 Dodge 'coupe' truck project
Desotodav replied to Desotodav's topic in Mopar Flathead Truck Forum
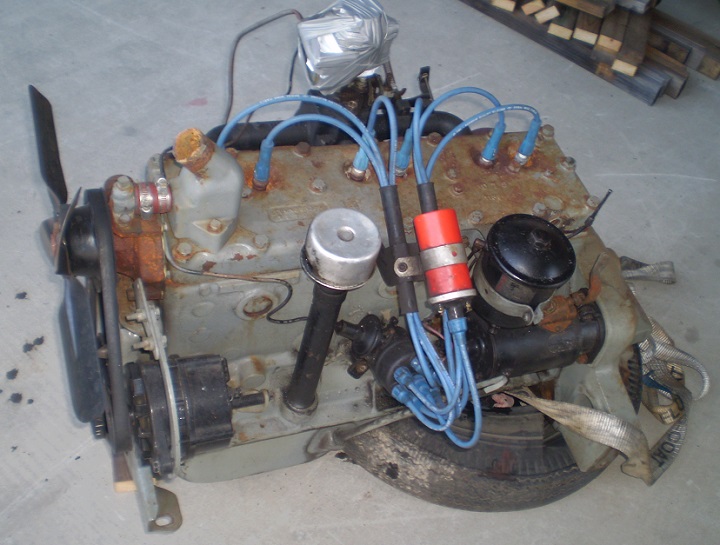
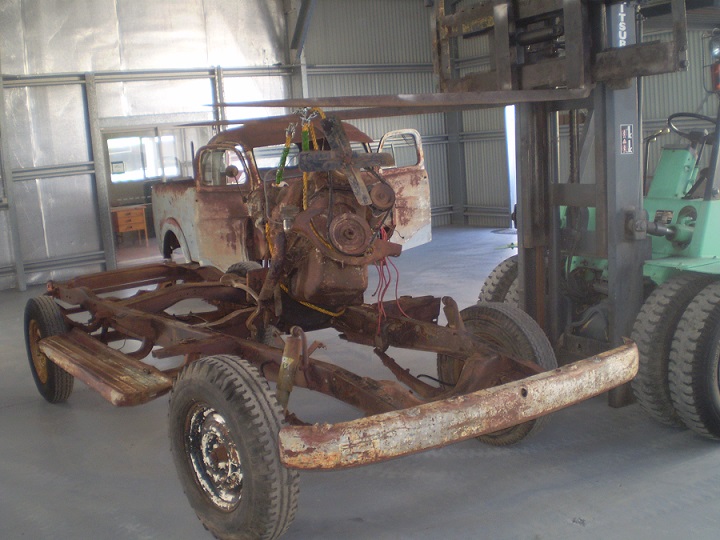
I would be pleased to play host to those of my forum family. Sounds like I'll need more beds! I pulled the motor out this morning - It may not have been pretty, but sure was effective! That old forklift of ours really makes the job a lot easier. I'll start stripping the parts off the chassis next so that it can go off for sand blasting and painting.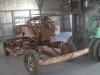

-
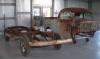
1953 Dodge 'coupe' truck project
Desotodav replied to Desotodav's topic in Mopar Flathead Truck Forum
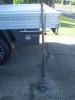
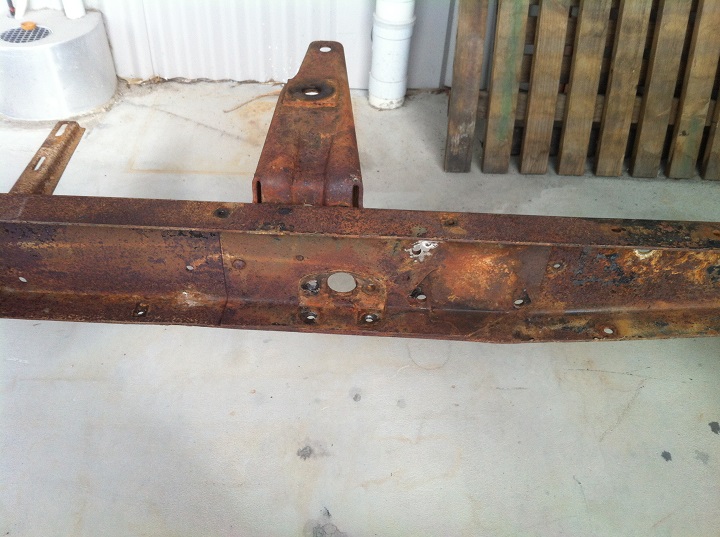
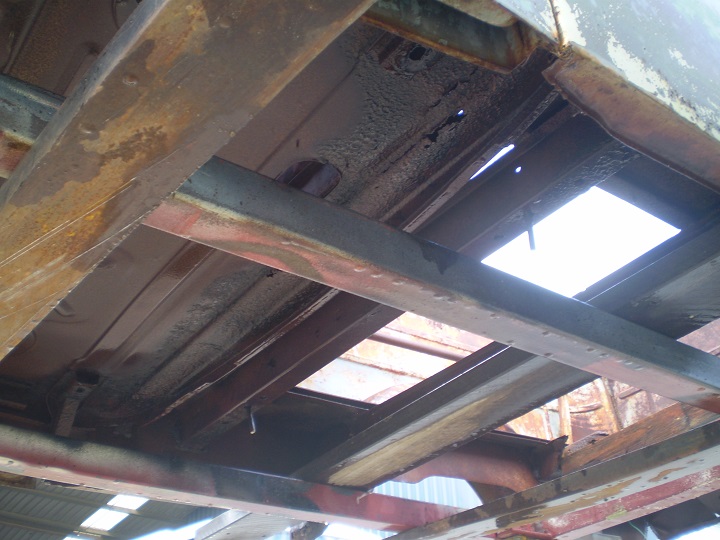
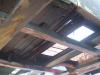
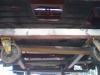
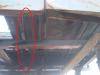
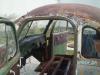
One could say that my reasons for this project are 'strong'. I've attached a few under-body shots which I took after water-blasting. It is a little hard to see though as the forks from the forklift take up most of the photo. The main under-cab problem that I have encountered with these style trucks is rust towards the back of the cab. If you look closely (in the photo with the red oval inserted) you will see a curved panel on the underside of the truck towards the rear of the cab - I'm not sure of the reason for this panel, but it appears that it would line up with where the back wall of the cab would extend down to if the truck was not a mono-body. This panel had a strange 'Z' folded piece on top which is spot welded to that curved piece of the floor which you can see. The moisture seems to get in there where dust and dirt are deposited and the trucks rust out there in time. I'll ask my mate Marty to fold up a new 'Z' piece for me again and it will be spot-welded to that curved floor piece. The process actually involves cutting that curved piece out and spot-welding the new 'Z' piece on top, as this seems to be the only way to maintain that original look in this area underneath. I'll see if I can get back down to the shed in the morning to pull the motor out. I'm working afternoon shifts at present and this allows me to play with trucks in the mornings.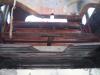
-
1953 Dodge 'coupe' truck project
Desotodav replied to Desotodav's topic in Mopar Flathead Truck Forum
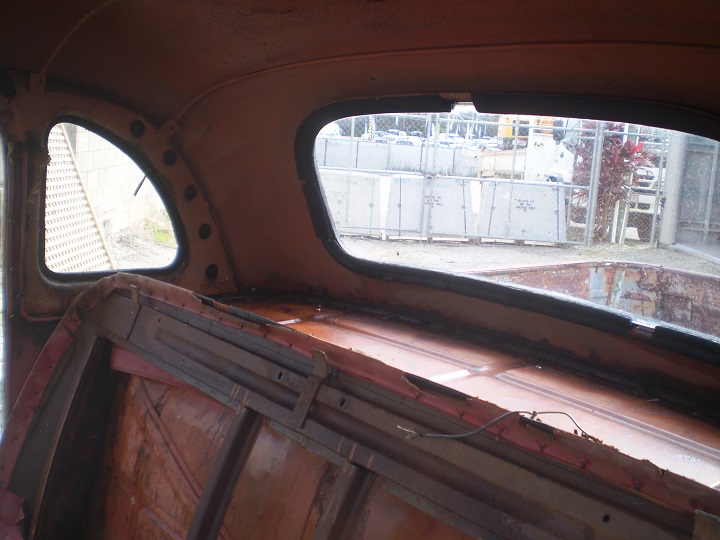
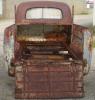
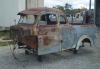
I spent a few hours water-blasting the Pop truck today. I was very pleased not to find any nasty surprises during the process. There is rust in all of the usual places, but overall the truck is in reasonably good condition for its age. The surface rust will be sandblasted off (hopefully in the near future) and the whole truck will get a coat of 2-pac primer. The majority of rust problems are in the rear u-channels that mount the body to the chassis. I believe that was a design problem as the timber placed in those channels fills up with moisture, and then that moisture has nowhere to go so it rusts out the channels. Both of the front lower corners of the cab have rust holes in them, which again is possibly a factory problem as the metal pockets in these areas fill up with dirt/dust and trap moisture. These are not major concerns though as I encountered similar (if not worse) with the blue truck restoration. In answer to your shed question Tim: this shed was previously occupied by a landscaper and is only 5 or so years old. My family owns this shed and the adjoining land (2 acres?). I am keeping the shed tidy during my Pop truck project as we have that shed advertised for lease. It has additional rooms attached to the shed space which include a bathroom, a lunchroom, an office, a reception area, and a huge external awning. I am very fortunate to have this shed available at present. It certainly makes the whole restoration process so much easier when your not cramped for space. I like how you have that big shed of yours setup for these projects too.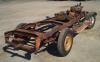

-
The new shed looks great PP. It sure is good to see the recycled Phoenix back in place again! So there will be a Studebaker truck in the stable too soon?
-
Check out this fella's favorite shed tool... https://www.facebook.com/photo.php?v=335893426565493 ... seems to be a hit in the kitchen too !!!
-
I reckon that they would be the same as ours over here Tim. Maybe I'll have to get a larger suitcase and do another BBQ trip?
-
I'll have to get on to Greg and see what they're worth. I would imagine that they wouldn't be cheap when you look at all of the painstaking work that's involved. Isn't it good to know that there are 'old skool' tradesman like him out there.
-
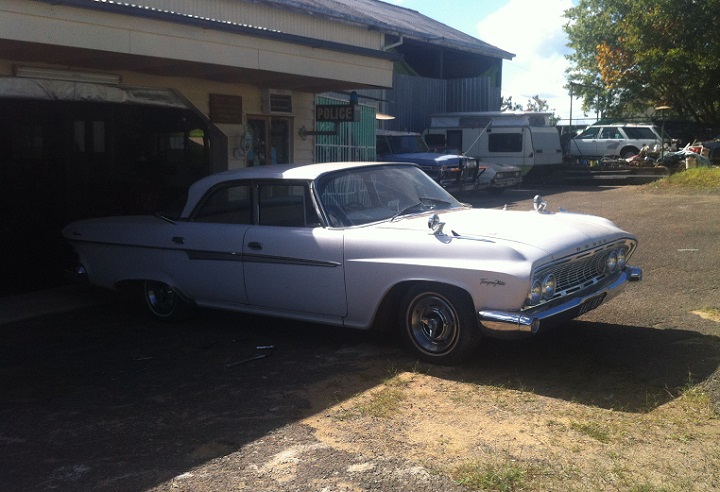
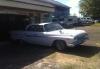
I went to visit another mate of mine with a 4-door 61 Phoenix today. It turned out that he actually had the car out of the shed and was preparing it to be registered again. His plans are to polish up the original patina paint and leave it like that. He also has another yellow one in his shed, along with a few 59/60 Plymouth's. The old barn that he has which he is converting into a 50's rock-n-roll diner is coming along really nice.
-
I watched video clips from the following links recently for a fella (not far from my place) making honeycomb radiator cores. I found them (part 1 and part 2) most interesting... enjoy...
-
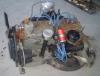
1953 Dodge 'coupe' truck project
Desotodav replied to Desotodav's topic in Mopar Flathead Truck Forum
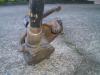
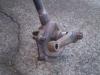
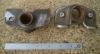
Here's a few photos of the steering box for you Jeff (taken after I cleaned it up a bit). It connects to the steering knuckle via a link rod on the right-hand side of the truck. I will send this steering box off for a sand blast, check-up/rebuild, and a paint down the track.