JBNeal
-
Posts
7,190 -
Joined
-
Last visited
-
Days Won
81
Everything posted by JBNeal
-
Practically all of my work planned for this winter has been on hold primarily because of the weather. We've been on the edge of the polar vortex swings thru the state that have brought more ice storms in the past 10 weeks than the past 10 years combined. My spare time has been spent working for friends & elderly neighbors doing house repairs & whutnot after each cold snap, and huddling around the Dearborn when it has been too nasty to venture outside. I did manage to take a dirt patch by the house that I have not been able to sustain any grass growth (because of the nearby trees) and spread by hand some crushed limestone over it 4" deep to park a few beasts. While putting in this stone pad, one of my neighbors from down the road wheeled up to the house and wanted to buy a couple of my parts trucks. A few days later, while doing some craigslist searching, I made contact with a guy on the other side of the county who wanted a couple of my spare flathead engines. After communicating back&forth with both of these fellas for several days, it looked like I was gonna have some cash in hand and clear out some inventory...and then *POOF* haven't heard from either of them fellas since. So the 230 I was gonna tear down to send to the machine shop in November is still on the engine stand, the PCV conversion project is still sitting in the box on the shelf, and the 1-ton wheels I peeled the old tires off of back in October are stacked up by the house waiting to go through some electrolysis. And after a phone call from a friend a few nights ago, it looks like I'll get to drag a L200 about 200 miles back to the house to replace its timing chain and a few valves and a malfunctioning emission control device on the fuel filler neck. So who knows when I'll be able to get back to the fun
-
Vapor lock or faulty batt.cables or maybe it's time for Coke bottle of H2O down the carb BTW watch your spacer thickness as it may affect your carb linkage
-
I spotted a Fluid Drive near Denton a few years ago that had seen better days...the hood was gone, but the larger bell housing with the rear-facing vent was the indicator. FYI I summarized some info from one of Bunn's books, as well as found some literature of an early Fluid Drive
-
YnZ terminal block 3- terminal $15 Vintage Power Wagons terminal block: 2- or 3- terminal $20 the new terminal blocks have the zinc plated mounting bracket, but a solid original bracket can be repainted (or dipped in vinyl). Rebuilding the terminal block can be done with the listed or other household plastics in place of the original paper-based insulating material. New studs can be made with zinc plated nuts & screws from the hardware store. I'm not crazy about the paper-based products on these old buggies cuz I live in a high-heat &humidity environment and that stuff just doesn't last around here.
-
those two hood ornaments are similar, but not the same. The one pictured on the Coronet has a tab on the tail end that the center chrome molding fits over, and that tab is not very aesthetically pleasing if it is not covered. I found one of each and have them in my stash, don't know what I'm going to do with them yet as they are not show pieces. One thought was to grind the molding tab off, epoxy the open end and paint it some snazzy color as the chrome on it is blistered...another some-day project
-
if you've got a bench vise, it's not too hard to rebuild the steering box if the gears aren't too chewed up. If that big roller bearing is shot, ya might could get a replacement bearing and have a machine shop or somebody with a press get the old one off & install the new one. Then rebuilding the box & making the adjustments are listed in the shop manual, with some more information here & there
-
the sheet metal on these old beasts can take the heat, so if they are warped, then they got purty hot. If there are cracks in the surface of the bare metal, then that metal is effectively delaminating and has been substantially weakened. As for the tires, one check is to see if the tires have gotten out of round by jacking up the wheel & spinning while checking runout visually. Also, dismount the tires to see if the bead has melted to the rim and inspect the inside of the tires to see if there are any blisters to the inner liner. Any defect is evidence of excess heat and the tires are prone to blowouts.
-
that is not surprising to see the draft tube nipple gone, as the tube is usually made of a slightly thicker material than the filter housing, and tube vibrations could cause the housing to tear. I was originally going to utilize the housing I had in the PCV valve circuit, but I reconsidered due to the lack of robustness of that design.
-
VPW can sell ya the parts, but they may not be exactly what you need as there are at least 2 different intake manifold setups for the PCV valve circuit. The fittings & hydraulic tube can be found at a good hardware parts store, with the hydraulic tube to be formed to your needs. The cast adapter occasionally pops up on eBay, but VPW usually has those in stock. If ya want to save a few bucks, you can make your own adapter using the draft tube as a base or get creative with a cast iron pipe tee & a close nipple, or you can make an adapter for that PCV filter housing to take advantage of its base. The VPW PCV valve will cost a few $$$, and finding a modern equivalent can be a bit tricky, as a PCV that is too small will not allow much vapor to pass, and one too large will cause the charge air mixture to be lean at higher rpms. Before NAPA redesigned their website a couple of years ago, it was possible to look at PCV valves by engine displacement & input/output specifications (threaded, hose barb, grommet seat), and I had compiled a short list of possible equivalents to the VPW threaded PCV valve. After NAPA redesigned their website so that it was not as easy to look up PCV valve specs, I located a lot of PCV valves on eBay that are dead ringers for the VPW valves. I managed to purchase a PCV valve similar to this NAPA valve, but have since misplaced that equivalent list and the original box to verify any alternatives. If I can get caught up on a few chores, I have a PCV conversion project that is similar to the original listed in the downloads section. I think I have solved the issue of installing the crankcase draw tube to the base of the air filter, which would require cutting a hole in the air filter base neck to braze the tube that draws from the crankcase filler neck. A modified original draft tube, along with the air cleaner modification, the assorted fittings & plumbing, and an equivalent PCV valve, might could get this material list cost down to less than $40. But I'll experiment on some spare parts and document that progress later
-
the vacuum source for the windshield wiper motor can be tee'd to accept the circuit with the pcv valve. As for that can, that looks very similar to a draft tube filter housing that I've seen on other flatheads engines, Plymouth, Dodge Trucks & Industrials.
-
HOLLYWOOD
-
additional information - partial PCV system upgrade?
-

Raising a pilothouse to a new level.
JBNeal replied to Jeff Balazs's topic in Mopar Flathead Truck Forum
hope he rolls up the windows if he wants to drive thru a puddle -
Flathead Engine Decoder
-
if ya compare the surface area of the entire cooling system with the surface area of the thermostat, and if there is just a little bit of crud in one corner of the head or a blind corner around a cylinder that wasn't removed, once the coolant agitates the system, that little bit of crud will break loose and collect on that thermostat and inside the radiator. I've come to accept that I'll never be able to keep the cooling system 100% clean, and as long as I'm running within the acceptable operating range of the cooling system, then that's good enough for me. One of the things I've learned in manufacturing is that ya have to take into account contamination in hydraulic systems, as they can be a killer if not all factors are taken into account. There is a breakover point with regards to efficiency, as more efficient hydraulic systems tend to be prone to contamination failure. These flatheads I reckon were designed with that in mind, as hydraulic efficiency is lowered to allow a greater rate of contamination. Since the coolant system is not filtered, there is a service interval suggested to remove contamination from the system. On a side note, I went through the coolant system in my '02 CTD at 125k when I noticed the operating temperature was not at 195 in the summer. A new thermostat, all new hoses, rad.cap and a coolant system flush was followed with driving on the highway for a couple of weeks with straight H2O, flushing again, running another couple of weeks with H20 & flush, then going 50/50 glycol. After a month, I noticed there was a little crud on the rad.cap, and after 2 years and nearly 30k more on the odometer, the rad.cap isn't much dirtier and there is a little crud in the radiator...all acceptable as the operating temperature is right where it needs to be, especially in the summer while hauling a heavy load on the highway with the AC blowing
-
scroll on down & you'll see the pic for the drum puller on the tapered shaft axles
-
this is why I tell folks to use straight H2O when they first start up an engine and drive it around like that for a few hundred miles in temps above freezing. Ya might think ya get stuff cleaned out, and then SPLAT everything is brown again...also, if something comes loose or malfunctions, all ya lose is water, not that high dollar ethylene glycol.
-
I had never heard polar vortex before, and a few days later, I see Al Roker give his knowledgeable & humorous explanation
-
I've got access to a blacksmith anvil, and the horn on that old iron flares out the filler pipe perfectly. But more common materials can open up the tube diameter: using a couple of pliers or almost-closed crescent wrenches can be used to work the metal outwards, or whittling a 2x2 down to a taper as a forming tool, maybe clamping a round bar in a bench vise and peening the tube over it...all ya need is for the tube OD to be a hair less than the crankcase hole ID. I have not needed to use RTV on the tubes I've worked over, but it won't hurt, and if it's a tight fit, ya won't need but to smear the RTV thin on the tube surface for it to work.
-
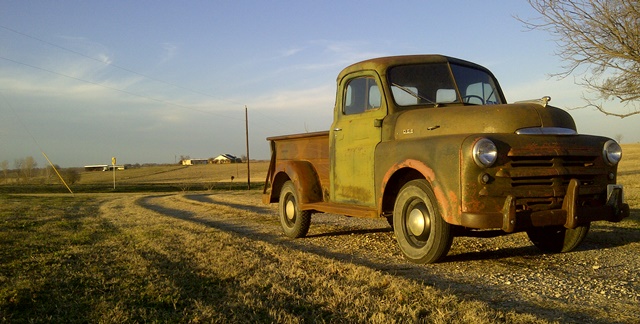
truck picture: finishing up some work around the house before the next gift from The Great White North:

-
VINTAGEPIC: found this B-1or2 and B-3 wreckers while cruising The HAMB
-
Thoughts on Mopar Flatheads 1 Thoughts on Mopar Flatheads 2 Thoughts on Mopar Flatheads 3 Links to Building Threads Experience Builders Flathead Gotchas Spark Plugs Engine Oil Engine Oil Filter Engine Oil Filter Installation
-
Williamson's re-worked my '48 temp gauge & repainted all of the gauge faces back in '99. The gauges were very dirty, paint flaking off & whutnot, as the truck had spent it's life doing farm work and had been parked next to the barn for 20yrs at that point. Since I got the truck re-fired, it has spent most of its time in the heat & dirt out here in the country, and those gauges are the jewel of that beast for the moment, a pricey investment I made that has been worth it. When I told Ron a few weeks ago that they looked & worked just as good as when he refurbished them, he mentioned that he has extended his original 1 yr warranty to a lifetime warranty that is transferrable to new owners. I asked him to clarify, so if my temp gauge poops out any time, I can send it back and he'll fix the bulb or whatever, and all I'll be out is shipping. Not a bad deal...it's also nice that he's in the next state, which helps on shipping (less chance of things getting lost in the shuffle since we both live near regional hubs)
-
Hemmings Motor News has quite a few listings in their services section for gauge repair...I've sent my Farmall 1206 gauge cluster off to Williamson's to repair an intermittent gauge, had a good talk with Ron and he knows his stuff...maybe there is an outfit closer to your zip code that could help ya out
-
I stand corrected...I grabbed a flashlight & took a gander at the Spring Special and it has that very plate...looked at a couple of my spare floor boards that came out of column shift trucks and they had the same cutout...so looks like ya got one less leftover part after all