


vintage6t
-
Posts
391 -
Joined
-
Last visited
-
Days Won
5
Content Type
Links Directory
Profiles
Articles
Forums
Downloads
Store
Gallery
Blogs
Events
Everything posted by vintage6t
-
This is the only picture I have from my 41 Plymouth. It's not too clear, but the vacuum advance is pointing diagonally up toward the front of the engine. It's next to the oil fill/breather tube. Vacuum line runs across the top of the head. In my case it's a steel line, but that does not matter. If you're using rubber, make sure it's made for vacuum and does not collapse when vacuum is applied.

-
1952 cranbrook convertible top stopped working suddenly
vintage6t replied to terry G's topic in P15-D24 Forum
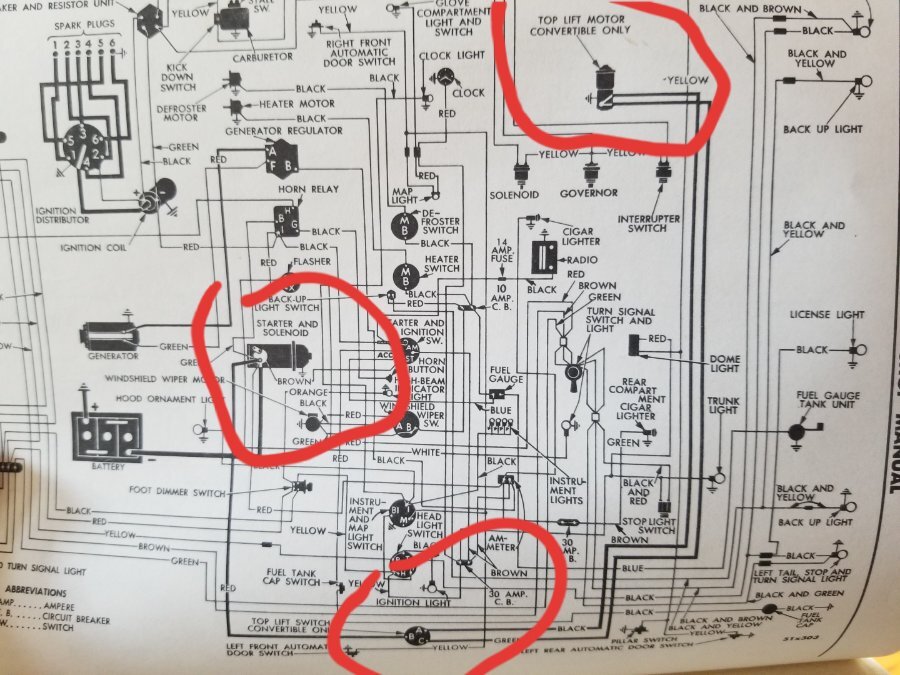
Not sure if it's apples and oranges but the schematic for my 50 Desoto convertible does not show any explicit fuse or breaker. Battery power connection at the starter solenoid terminal->top up/down switch input-> 2 wires, up/down respectively to the top motor.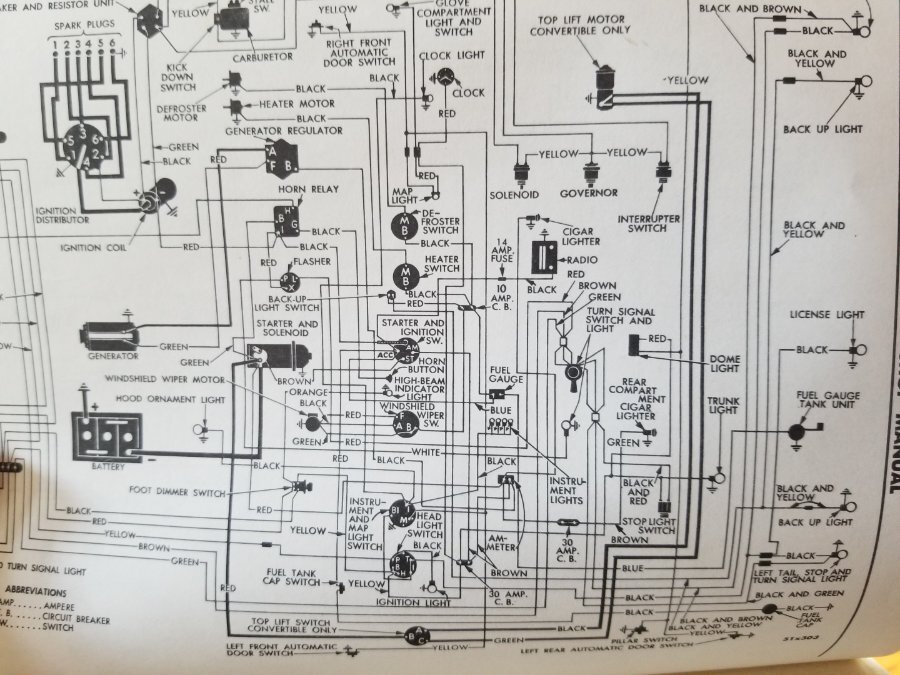
-
You can also leave it under tension for a day. Then go back and try wacking it again. Repeat a few times if needed. Another method is to loosen the nut a few threads and drive in a circle until you hear it pop loose.
-
I've used the attached link and formulas from other similar sites to successfully calculate strut force, length and mounting position for a number of applications. That includes hood struts for my brother's 52 F100. The key is to think about how the particulars of your hood relate to the given diagram. If I remember correctly the fixed mounting point of the strut will be down below the hood somewhere on the inner fender not at the top of the fender. Again if I remember, the moving end of the strut that's mounted on the hood will be located somewhere along the hood length between the firewall and hood center point. I might be able to get a picture of the f100 install but it may be a day or two. https://www.tghmarine.co.nz/stainless-gas-struts/how-to-calculate-gas-strut-lengthforce-required-and-positioning
-
That stickyness will also allow a lot of new dirt and debris to cling to the inside of the frame. Possibly trapping moisture. I think you'd be okay doing nothing. The frame lasted this long. I'm guessing your not going to be driving it in the rain and snow to the point it needs some kind of rust prevention. If you want to protect it, I'd continue to clean it best as possible with compressed air. Scaping with whatever tool will fit though any frame holes. Then using the same idea of a garden sprayer, thin down rustoleum enough to let it flow through the sprayer. Covering as best as you can though available holes will be good enough.
-
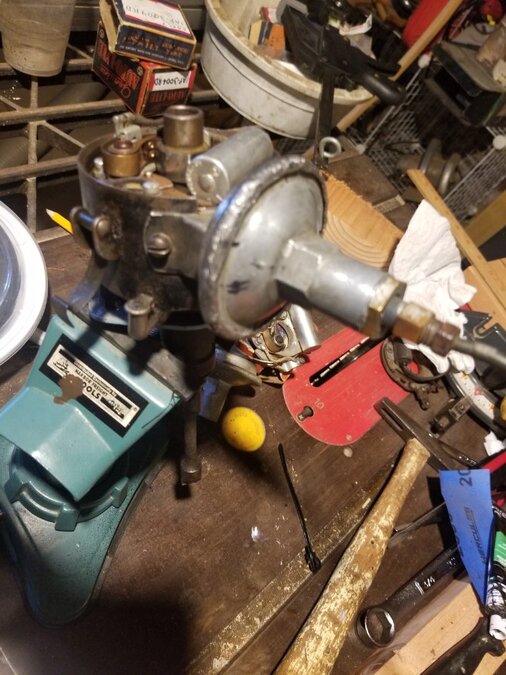
Looks pretty good to me. As long as you don't have a stumble when accelerating, it's probably fine. If you think it does need improvement before stretch the spring. 1. Take the carb apart and clean out the pump circuit to make sure there's no small debris clogging the output nozzle. 2. You can adjust the stream. There's a lever on the bottom of the carb that connects to the accel pump. There's three holes in the lever. Changing the hole where the linkage is connected changes how much the accel pump is depressed. The holes are account for seasonal changes. If I remember correctly the outer most hole will provide the strongest stream.
-
If I'm not mistaken the p15 is a 218 and the D42 is a 230. So the larger displacement and prob different compression ratio would have different timing curves for optimal performance vs. The 218. Therefore different distributors. Prob other design improvements between the two as well. Bottom line though is if it's not broke don't fix it. What I would do is setup your spare to be in working order and store it in your trunk. If your Petronix does go out on the road, the spare will be a quick and easy swap to get you going again.
-
I have. I used a donor diaphragm from another advance. The donor was a new advance with the same diameter that I had lying around. The original donor application was unknown. 1. Pried both cans open. 2. Removed both arms from thier respective diaphragms by drilling out the attaching rivet. 3. Riveted the old arm to the new diaphragm. Sealed the rivet with weather strip cement. 4. Sealed the diaphragm to the old can with weather strip cement. 5. Peened the lip of the old cover back onto the can. Between prying and peening the advance got kind of beat up but it worked fine. I took pictures of the process when I did it but looks like I deleted them. Attached pic is the finished working advance.
-
I'm installing a Explorer 8.8 disc rear and front discs in my car as well. It's a 50 Desoto convertible. Here is how I mounted the master cylinder for use with the original pedal. Your application is different but it may give you some ideas on how to proceed. Also since my car is a convertible, the frame is reinforced with an X cross member with a steel tunnel in the center for the drive shaft to fit through. Because the Explorer rear center section is offset by about 3 inches to the passenger side I couldn't use it as. That is because of limited side clearance in the frame's drive shaft tunnel. If not for the tunnel, the rear would have worked without modification. To better center the pinion, I cut and swapped the axle tubes and axles side to side. I basically did this https://www.trifive.com/posts/998087/ The car is not on the road yet, so can't speak to success or failure but thought I'd share anyway.
-
https://phoenix.craigslist.org/evl/cto/d/tempe-classic-burning-man-camper-car/7815140439.html
-
Asche 25" performance parts
vintage6t posted a topic in Ebay, Craigslist and External Site Referrals
On the HAMB https://www.jalopyjournal.com/forum/threads/asche-triple-intake-dual-exhaust-manifolds-and-reground-performance-cam-for-mopar-25-flathead-6.1328989/ -
On the HAMB https://www.jalopyjournal.com/forum/threads/chrysler-desoto-vintage-edmunds-engine-speed-parts.1256806/
-
Posted on the HAMB https://www.jalopyjournal.com/forum/threads/1947-chrysler-new-yorker-convertible.1327057/
-
Not mine, but posted on my local craigslist. https://hartford.craigslist.org/pts/d/bristol-1950-chrysler-town-and-country/7813718715.html
-
Glad it worked. Btw - rather than trying to scribe low and full, I just filed small notches in the side of the stick. Makes it easy to read.
-
I used this dipstick as a replacement. It was a good fit for the hole in the block. I don't recall if I had to cut it for length or not. You will have to do an oil change and add the correct amount of oil to mark it accurately for full. https://www.amazon.com/gp/aw/d/B0D9VH11N5?psc=1&ref=ppx_pop_mob_b_asin_title
-
I sold the car a few months ago but as far as I know the seat back is stationary b/c the roof folds behind it. It also helps to hide the power top cylinders. If it does flip down, I never knew that. The seat bases are hinged and flip up, as you mentioned.
-
Here's a picture of the folding jump seats from my 41 Convertible.
-
51 Plymouth with a 225 slant 6 drivetrain. On the HAMB https://www.jalopyjournal.com/forum/threads/1951-plymouth.1323749/
-
Just follow the above link. You should be able to see them regardless.
-
Posted on the HAMB https://www.jalopyjournal.com/forum/threads/1932-plymouth-pb-engine-trans.1322733/
-
https://p15-d24.com/forum/27-classified-ads/
-
Preparing for 1,000 mile road rally in my 1951 Plymouth Cranbrook!!
vintage6t replied to JAS12's topic in P15-D24 Forum
I live on the northeast side of Hartford, so not too far from your rally starting point. If you need any tools, garage space or possibly MOPAR specific parts while you're in the area, I'd be glad to lend a hand. Hopefully you won't have any issues but I'll PM my cell i# n case you do need something. Best of luck with the rally! -
Maybe have your coupler welded or pin it to each shaft. Then have it turned down enough to fit the hole in the block.
-
+1 This is the only way I know of to get a broken extractor or tap out. Grind it. It can be done with dremel and diamond grinding bits. Many many hours of grinding though. Your not so much drilling it out but really chipping it out.

