

David A.
-
Posts
205 -
Joined
-
Last visited

.thumb.jpeg.6ef7997bc12cdbc7a328734758328c5a.jpeg)


-
I have an 802 in my 50, B2B. It is a tight fit, but it does fit. I installed the radio before I put my soundproofing on the firewall. I had to cut a notch in my firewall cove.
-
48 b1c windshield garnish molding gasket
David A. replied to mikes48's topic in Mopar Flathead Truck Forum
Yes, I used fender welting when I did mine. As ggdad said, it isn’t really needed unless you are going for originality. -
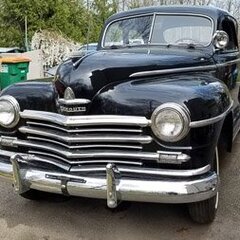
My apologies for the wrong information. I looked back through my old paperwork, and it was advertised as being out of a 48 Chrysler. I don’t know why I had it in my head it was a Plymouth. Thanks for catching my mistake!
-
I too replaced the 4.10 center section in my 50 B2B with a 3.54 out of a 48 Plymouth. As Merle stated the axle spline count changed sometime later, but I’m not sure when. For me it was an easy direct swap.
-
51 B3B build thread - after all these years
David A. replied to bkahler's topic in Mopar Flathead Truck Forum
Looking good! Those bed sides were the hardest part of my truck. It was a very long and tedious process. The worst part is that if you do it right, no one will ever know how much time and effort you have invested in it!!! -
Hello just reading a convo re syncros that shared in 2022. I’m curious do you have a contact for obtaining usable syncros. I have a 1951 dodge B3B.
-
Hi, sorry I don’t have a contact. The ones I had I bought off eBay and wound up not needing them. Good luck in your search.
-

Thanks sorry for the delay I was out of the country.
thanks for getting back to me -
I have looked and looked for those trans Syncros that you showed. That may be the last set out there. The fella you sold them to is a lucky guy.
-
-
Good weekend with the old Dodge
David A. replied to 47 dodge 1.5 ton's topic in Mopar Flathead Truck Forum
Nice looking truck! -
Sweeper Clips and Weatherstrip
David A. replied to Jocko_51_B3B's topic in Mopar Flathead Truck Forum
Enjoyed the video! -
Beautiful!!!
-
51 B3B build thread - after all these years
David A. replied to bkahler's topic in Mopar Flathead Truck Forum
I feel your pain. I spent several months working on my bed sides trying to get them as straight as possible. Mine were also stretched badly and bowed. I tried using heat and jacks but never could get them to straighten out. I finally took them to a custom car shop that had a frame machine. They used that and a torch and got them pretty straight. It still took me a long time to get all the waves and dings out even after that. it just takes a LOT of time and patience. -
Rebuilding Original Water Valves
David A. replied to Paul Hatfield's topic in Mopar Flathead Truck Forum
That’s the same guy selling the NOS valve that appears to be making reproductions. He even shows a moparpro.com add in one of his pictures. That is probably the valve he used to design his reproductions. I guess he wants to get it sold before he puts his reproductions on the market. -
Of course what works best for one person may not be as good for another. I didn’t have any help and this is the order I did mine. 1. doors- they are needed for fender alignment. It was easier for me to install all the door innards and glass after the doors were hung. 2. inner fenders- I set them in place so I wouldn’t risk scratching anything trying to install them after the fenders. 3. front grill piece- mounted it loosely and slid the radiator support as far forward as possible to make sure I had room for the fenders. 4. fenders- once tightened to the grill, you will need to shim the radiator support, and back fender support to make the rear of the fenders parallel with the front of the doors, and match up to the curved section of the door. Then slide the whole front assembly back towards the doors allowing enough room for the doors to open without scraping the fenders. 5. hood- I did have to enlist some help to put the hood in place. It was just too much for one person. 6. Bed- I assembled it first, then put it on the frame using a hoist. After the bed was in place I loosely mounted the running boards in place, then installed the rear fenders. Good luck!
-
I wish I lived near you. I would love to get some pointers on welding in patch panels. No matter how slow I go, I always seem to get too much warpage. You’re doing a great job! Can’t wait to see it finished.
-
That’s fantastic! Thanks for the pictures.
-
Greetings, proud new owner of 1953 Dodge pickup
David A. replied to Wild Jimmy's topic in Mopar Flathead Truck Forum
Congratulations! It looks like a nice truck.

