-
Posts
5,032 -
Joined
-
Last visited
-
Days Won
58
Content Type
Links Directory
Profiles
Articles
Forums
Downloads
Store
Gallery
Blogs
Events
Everything posted by desoto1939
-
If you are close to Chatham Ontarios this weekend they are having the National Desoto convention and Car show. Might think about driving over to talk to some of the car owners in regards to getting parts. The Desoto 6 had the bigger 25 inch block vs the 23 inch block that you have but might find someone that can answere your questions. Rich Hartung 1939 Desoto owner
-
Bingster: Only so much reaming or the dressing up of the inside of a wheel cylinder can be done. If done too many times the inside get enlarged and the cylinder will leak even after a rebuild. Ammco made a tool that you inserted into the cylinder to let you know if the cylinder has been honed to large. I have one of these tools look at the picture and this one is currently on ebay. The unit can measure from 3/4 upto 1 3/16. very useful tool to have. If the tool moves after the spacer is inserted into the cyinder then it is time to replace. you push a pin through the red handle inthe hole at the end. Then insert it in the cylinder should be a snug fit if it rocks back and forth then time to replace. Rich Hartung
-
I do not like the position that this fuel filter is on an angle. The issue is that when you unscrew the nut that holds the bail wire which keeps the glass bowl tight agains the metal body and gasket there is a potential for any gas to be spilled onto the manifold and also i can see a bubble or pocket of air in the glass bowl. I would prefer the glass sediment container to be mounter so that it is facing directly downwards and to help eliminate any potential spillage of gas onto the engine and eliminate any potential fire hazard. Just my 50 cents worth of safety and protection advise. Rich Hartung desoto1939@aol.com
-

1949 plymouth special deluxe p18 1st oil change
desoto1939 replied to Oliver Klozoff's topic in P15-D24 Forum
The wixx 51010 filter is what i use on my 39 Desoto. They were made for Mercedes cars. the lower the micron number the more cleaning of the oil. These filters are a bypass filtering system in our older cars not a full flow spin on style like in our modern cars. Rich Hartung -
So if you could get 56-62 mpg with an older car then why is the gov't not pushing the car manufacturers to get the same mileage results. There was a ford car that was donated to the Boyertown Transportation museum back in the 70's if i remember correctly. That car was set up to get 60+ mpg then and was during the Gas embargo era. So our technology is there but there is greed that is stopping this technology from being implemented. Rich Hartung
-
CHubby Checkers house was on Swedesford road just outside of Paoli Pa, which is near Valley forge PA. I would go past his house and driveway when going and coming home from work. Nothing on the house or anything on the mailbox to indicate it was his home but everyone knew his home that lived in the area. Rich Hartung
-
Hickory: What are you asking. All cars vaporise the fuel. The fuel come into the carb and then gets mixed with air. It is not a stream of gas but atomized fuel with air mixture. either with an up draft or down draft carb. Rich Hartung
-

1949 plymouth special deluxe p18 1st oil change
desoto1939 replied to Oliver Klozoff's topic in P15-D24 Forum
go to your dollar store and purchase a turkey baster. The baster has a rubber bulb on the one end and a metal or plastic tube that the bulb goes over. Take the old filter out of the metal canister. wrap some paper or cloth around th eold filter and put it in the trash. Not plase the baster into the canister with the small end at the bottom of the canister, squezze the rubber bulb. you will then hear bubbles of air then release the rubber bulb. The suction will then suck up the oil from the canister. Have another empty can to place the used oil into. Continue until all of the old oil is removed. Wipe out the inside of the canister with a clean rag. Install the new filter, put some fresh motor oil into the canister to cover the top of the filter do not fill to the top edge. Make sure the rubber gasket it in place. Tighten down the lid with the nut on the lid and make sure it is tight. All of the above should have been done after you drained the oil out of the oil pan. Make sure you reinstalled the oil pan drain plug. OK now then fill up the drain pan via the inlet pipe put inthe proper amt of oil. Start the car. Look for any leaks in the oil pan and the oil filter assembly. If any then shut dow the car and address the leaking issue. Dispose of the oil at an automiotive store that recycles oil. Now your are done. Rich Hartung -
Most people, unless you are a MoPar fan do not know about the engineering that was involved from the beginning when they started to produce cars and trucks. From the beginning they had hydraulic brakes vs the ford Model A braking system. They had hardened value seats from the beginning so you could run gas with ethinol from the 30 up till now. The mid 30 around 1936-37 had a more powerful horsepower engine then even the Ford V8. As you dig deeper you will find other improvements along the way. Rich Hartung 1939 Desoto
-
Sniper: Most old car owners did not know how to adjust the sisson chokes and or even know how they worked. Same issue that we have with our modern cars. Most current car owners do not do any maintenance or repairs on their own cars becasue they do not have the skill sets and or tools. So alot of owners added ina manual choke that they could control from their drivers seat when the weather was cold and they never reattached the connection rods. Now that some of us are mechanically inclined we now tackle the job and get literature and can also get on forums like the P15-D25 and ask questions and hopefully someone might provide some answers to get us working again. These cars are very simple as compared to our modern cars, but i still see a lot of car owners that do not know anything about their car and take it to a mechanic to get it fixed. The hobby is changing. The early collector did all of the work, engine rebuild, painting, interior, etc. Now we ship the car off for someone else to do the work. But when they breakdown on the road they have no idea how anything works, so call the big hook and have it towed to the mechanic. Just my 50 cents worth of input. I do have lots of experience and literature on these Sisson Choke and also the Sisson testing stand and adjustment tools. Rich Hartung
-
the sisson choke that you have is the model that fots 1949- 52 plymouth cars. This is the most expensive sisson choke because of the years it fits. The other sisson choke goes from 1937-52 but the arm is on the other side and this choke is mounted behind the carb and yours is mounted in front of the carb. You can not reverse the arms on the early version to fit the later Plymouth version. The later version Ply sisson choke if it is NOS will cost around $300 if you find one that is completely brand new. I have alot of factory information on these sisson chokes and how to set them up on your car. Rich hartung desoto1939@aol.com
-
This is a Desoto Airflow and not the Airstream model. very unique body style and a super great car to drive. The Desoto Airflows only had the flat head 6 cylinder where as the Chryslers had the flat head 8 cylinder engines. Rich hartung
-

LED Brake and rear and indicator lights D24
desoto1939 replied to Swiss Johhnie's topic in P15-D24 Forum
I have installed a third brake light and turn signal bar light in my rear window on my 1939 Desoto. The nice thing about the unit is that it is mounted to the interior side of the rear window and held in place via suction cups. It is a very simple connection to your tail lights. The unit has r/l turn signal flashing signals, full brake light and also 4 way flashing. The unit is around 14 inches long and about 2 inches wide. It is very visable. Since all cars now have the 3rd light installed i felt it was a better option for the car behind me and the light is very viable during the day and at nighttime. This is a real easy project and also a safety item for all of the older cars. The company that made might has 6 and 12 volt version and also positive ground versiions. Rich Hartung -
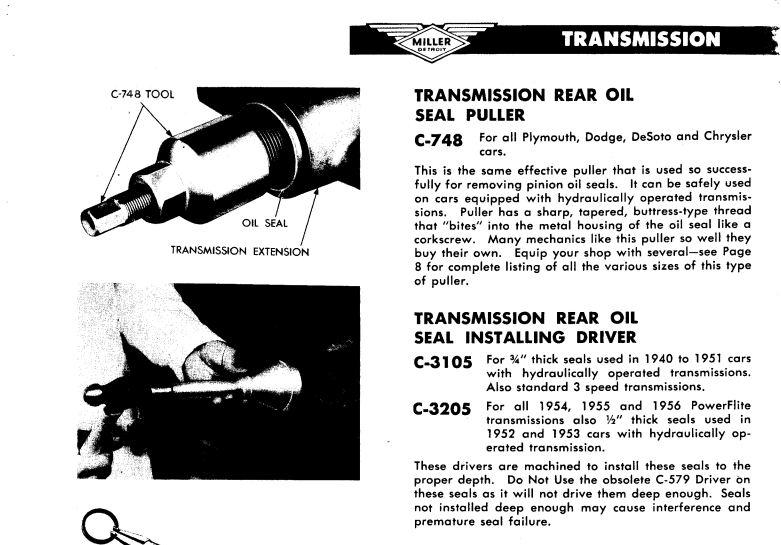
I looked at the tool that sniper just posted that he found on Ebay. i do not think this tool will work. Note that this toolis labeled as SP-3105 and the tool you want is numbered as C-3105. The C-3105 is a special drift to force inthe seals as a complete outer circle to matchup with the outer edges of the seal. The tool on ebay is not useable to do the job that you are looking for. Rich hartung
-
As stated by speedster that tiny plug was taken out and the factory miller timing light was put on and there was a rod that went down to the piston and when the piston came back up it would corollate to having the lining on the harmonic balancer at TDC and also for timing the engine. To set the timing on these cars it is suggested to use number 6 sparkplug wire and not number one, but either can be used. Everyone that has a service manual should read through their specific car model manual. You will be surprised at what you will learn about your car. Chrysler was very innovative about their engines. Rich Hartung
-
PCTX21: I posted the pictures of the install tool but you still have not stated what specific Miller tool number that you would need for your car. By identifying the correct tool number maybe someone can supply you with one and or even tell if one is currently on Ebay under the miller tools auction. Miller made many seal drivers so the number on the driver is very important, just trying to help. I might have the appropriate seal driver. Rich Hartung
-
Check your service manual for your car. It might show a picture of the appropriate Factory Miller tool that was used to drive inthe seal. Sometimes you can find the tools on ebay. The tool will have a number and it might start with C-xxxx. The below picture was taken from my Miller tool catalog the tool might be the c-3105 seal install driver. verify with your service manual. Rich Hartung Desoto1939@aol.com
-
I have attended many times over the past 35 years. If you are looking for prewar items they are fewer venders bring out the old items. Ed speigel was there from Pittasburgh. The show and parts is mostly around the muscle cars so be prepared to not find items for the early cars. Even Hershey in the fall is changing and the early parts are getting harder to find and purchase. This is not to say that you will not find any items but you will have to ask questions and look real hard and you have to know your specific parts. Rich Hartung Desoto1939@aol.com
-
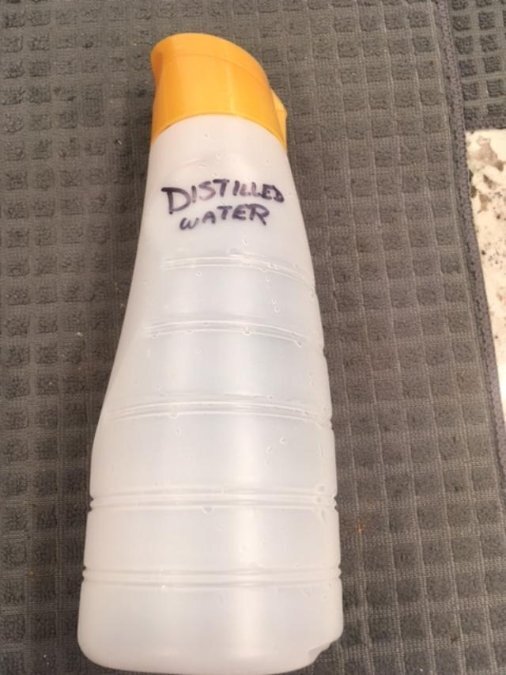
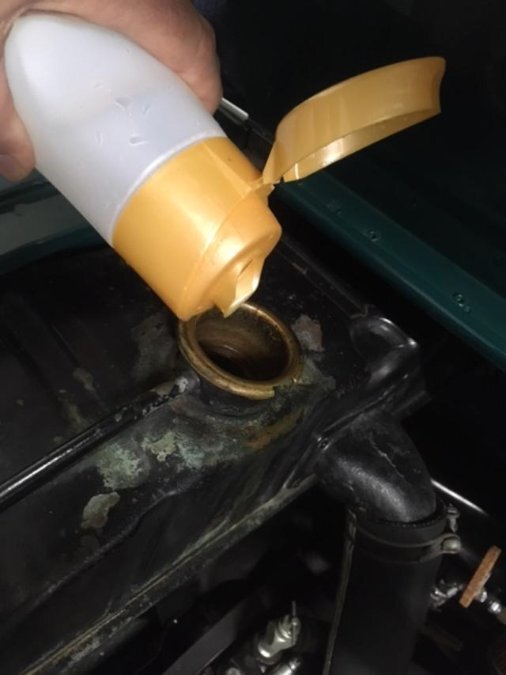
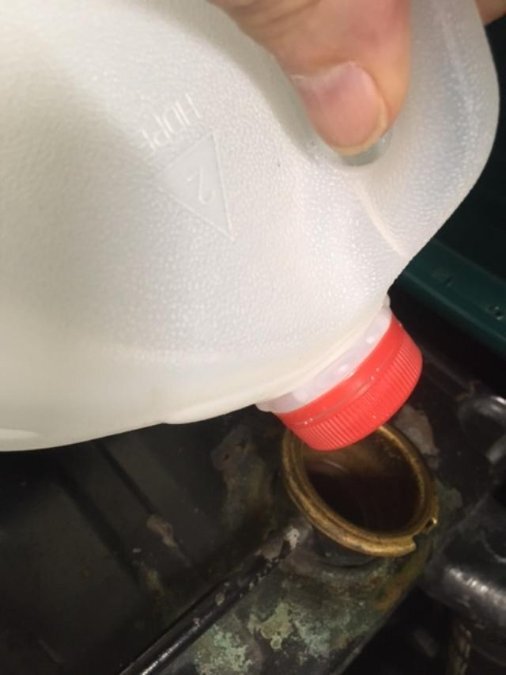
Easy way to add water to your radiator and or battery Easy way to pour water into your radiator or battery. On a lot of the early cars have what is called the butterfly style hood. This style hood has the hinge down the middle of the hood and the hood open up like butterfly wings. Also, the other style is called the alligator style because the hood open up like an alligators mouth and the hinges are mounted at the back end of the hood. Have you discovered that there is not enough space to use a gallon jug of distilled water to add water to your radiator or even your battery without spilling water all over the engine and battery. Even some batteries are under the front seat like on my 1939 Desoto so there is very little room to get to the removable caps. Most of us drink coffee or tea and like to add a flavored creamer. The lids on these bottles most of the time have a pour spout flip top lid. Refer to the pictures below of these bottles. The nice feature is that you now have a smaller sized bottle and you can control the amount of water being poured out of the bottle. So, the next time you empty one of these bottles clean it out so there is no left over creamer. Then take the plastic label off the bottler and label the bottle as DISTILLED WATER. Store the bottle with your other cars supplies in your garage. Only use Distiller water in your Radiator and Battery. Some batteries have sealed caps and others have removeable caps. Most caps can be removed to check on the level of fluid in each cell Refer to the attached pictures: Notice how easy to pour water into the radiator versus trying to pour from a gallon bottle container. Refer to picture 3 & 4. Rich Hartung Desoto1939@aol.com
-
my 12 v sear timing light provides me with amble light to see the timing marks. But i have the butterfly style hood and I keep the passenger side of the hood closed. I also do the timing test in my garage and also turn off all other lights and do my testing when the sunlight is not so strong. Have curtains on my garage window to also limit the sun light. Rich hartung
-
Don: On my 1939 Desoto that has the big 6 block my timing mark by the factory specs is 2 degrees before tdc. You are stating that you are now set at 4 degress advanced. So I am assuming that you are set at 4 degrees after TDC. Is this correct. I would assume maybe 2-4 degrees before TDC would be your proper setup for checking timing. The timing mark will be rotating away the driver side of the engine and this is where you would take the reading from the pointer. Which side are you taking the reading, driver side or passenger side when the engine is running. Rich Hartung
-
did you put the release value in backwards? Something is wrong inside the MC make sure you assembled it correctly. Rich Hartung
-
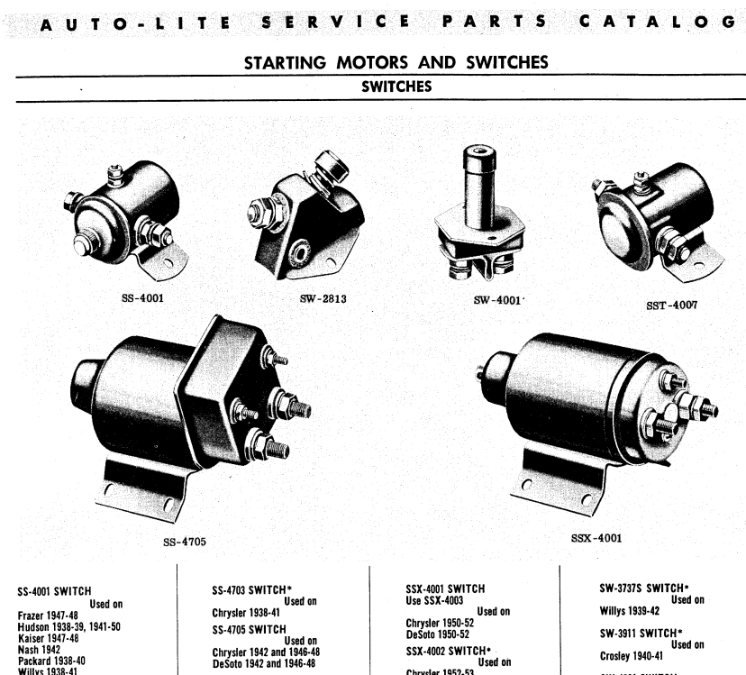
Don Here is the selinoid switch that you need. The autolite number SS-4705 and you are correct the Dodge/Plymouth is a different unit. These selinoid s are hard to find considering they were used from 1942-48. Rich Hartung
-
check the pin in the fp to see is the pin has come out of the body of the fp. rich hartung


