


billrigsby
-
Posts
1,132 -
Joined
-
Last visited
-
Days Won
8
Content Type
Links Directory
Profiles
Articles
Forums
Downloads
Store
Gallery
Blogs
Events
Everything posted by billrigsby
-
Version 1.0.0
12 downloads
Stromberg Carburetor Information, source unknown -

Version 1.0.0
11 downloads
Article from an unknown source -
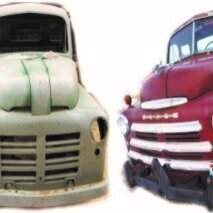
DODGE 98 Years of Building Tough Trucks & Cars.pdf View File Article from an unknown source Submitter billrigsby Submitted 07/20/2021 Category Marketing Brochures
-
FRAM is probably one of the worst if not the worst that you could use. An interesting project Oil Filters Revealed
-
Looking for 48' B-1-C bed cross-member dimensions
billrigsby replied to ketsair's topic in Mopar Flathead Truck Forum
Maybe HERE -
EBay
-
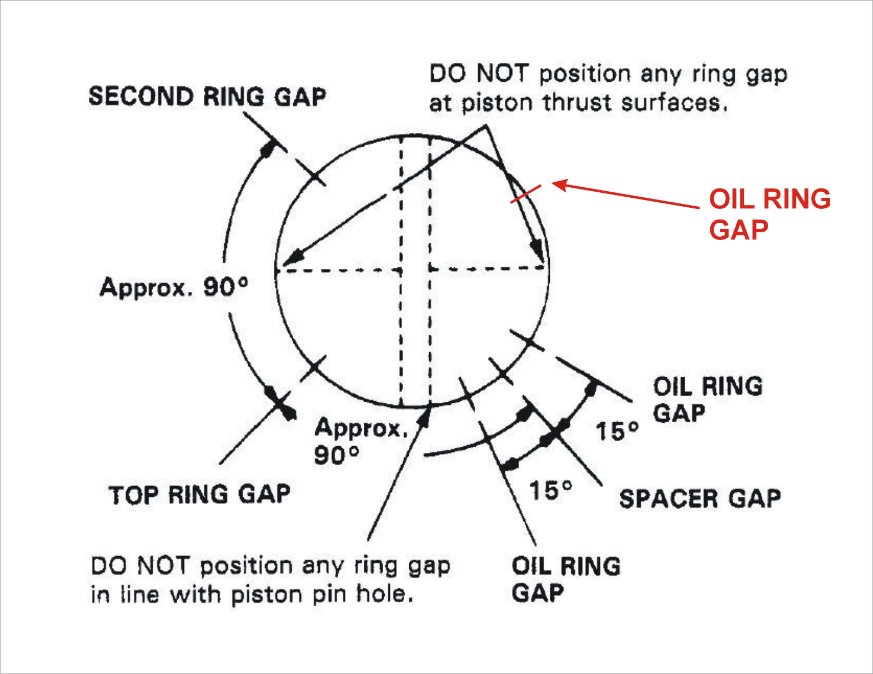
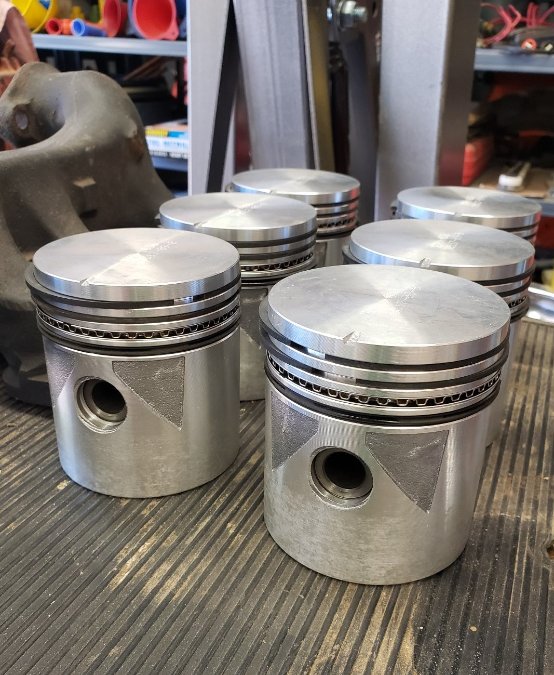
This engine was broken down so long ago I really don't know for sure, I do still have the pistons out in my crates I could dig them out and have a look. That diagram came from Wiseco pistons, I'm not sure why nothing over the piston pin, I also heard this on the Flathead page on Facebook. I did get a response from Hastings, they said what I have in my drawing is acceptable, as far as the thrust side of the piston it is my understanding there is a major and a minor thrust side and neither side should have a ring gap in that area, and again I do not know why.
-
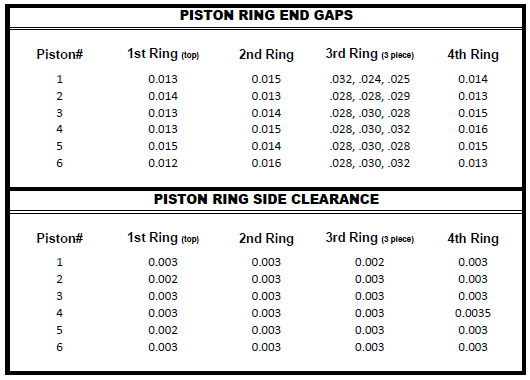
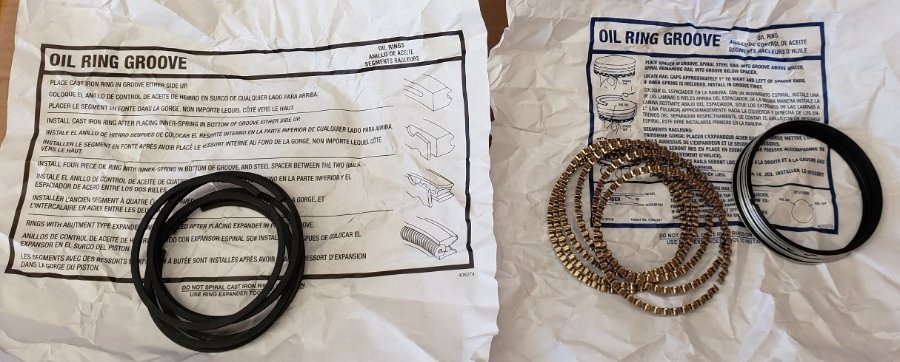
I have sent them an email, this was the best I found online, three rings only, added my fourth. With three different shop manuals, it is amazing how little information is in each. I guess a lot is / was common knowledge?
-
I cannot find this information anywhere How do you stagger the piston rings Top two compression rings 45° apart ? 3 piece oil, sheet says top and bottom 1" on either side of middle ring gap, but where to place that middle ring gap? bottom cast oil ring 180° from the above oil ring? I saw no ring gap above the piston pins. Any thoughts?
-
FINALLY - My 1948 B-1-D Build Thread, 33 Years Later
billrigsby replied to billrigsby's topic in Mopar Flathead Truck Forum
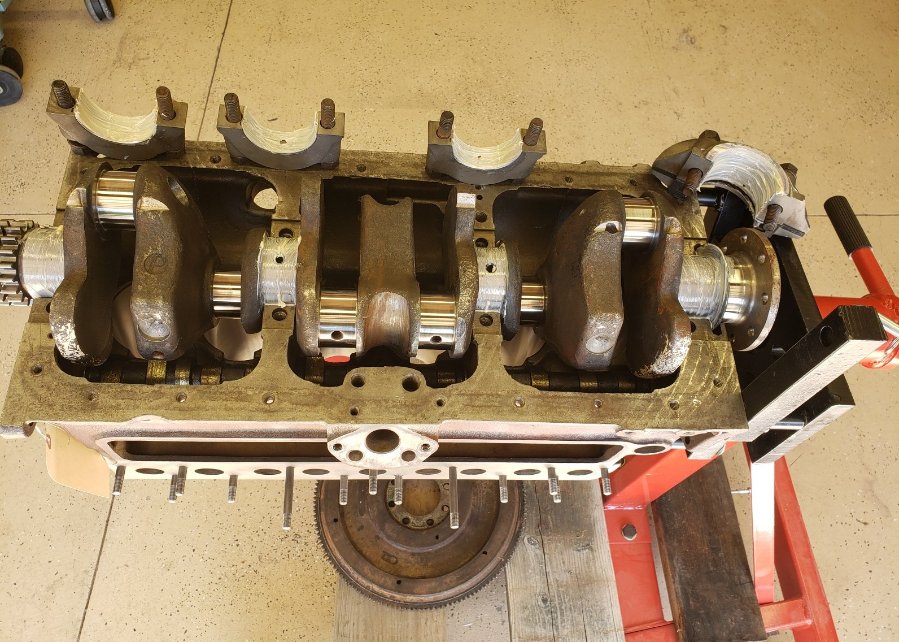
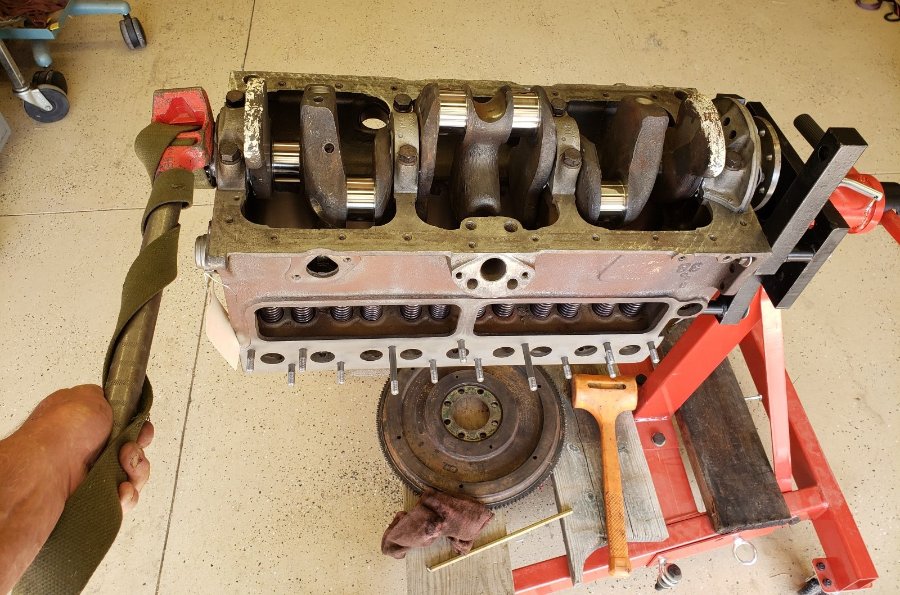
Crankshaft is installed and spinning smoothly. Everything lubed up Coppercoat on the rear main seal Test spin after torqueing all cap bolts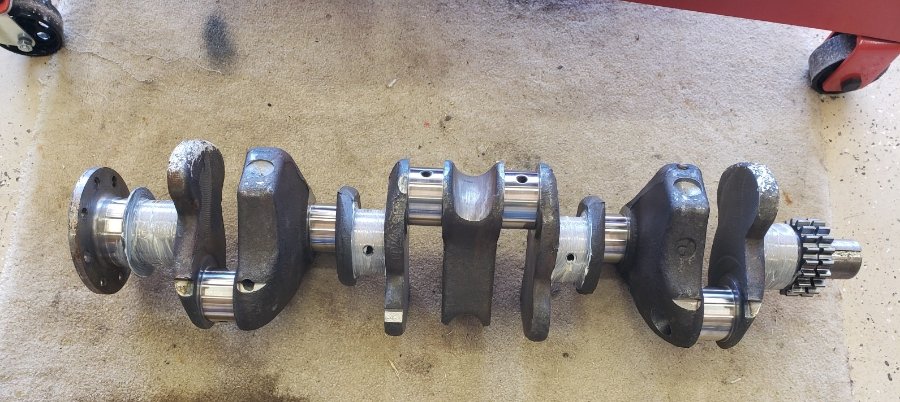
-
Pilot House B series part manual
billrigsby replied to ggdad1951's topic in Mopar Flathead Truck Forum
Pages from Dodge Truck B Series Loose Leaf Parts List Service Pages 23-1 through 23-4 attached. Pages from Dodge Truck B Series Loose Leaf Parts List Service Pages 23-1 through 23-4.pdf -
Thanks, I have seen some of them, never knew where the complete set was.
-
FINALLY - My 1948 B-1-D Build Thread, 33 Years Later
billrigsby replied to billrigsby's topic in Mopar Flathead Truck Forum
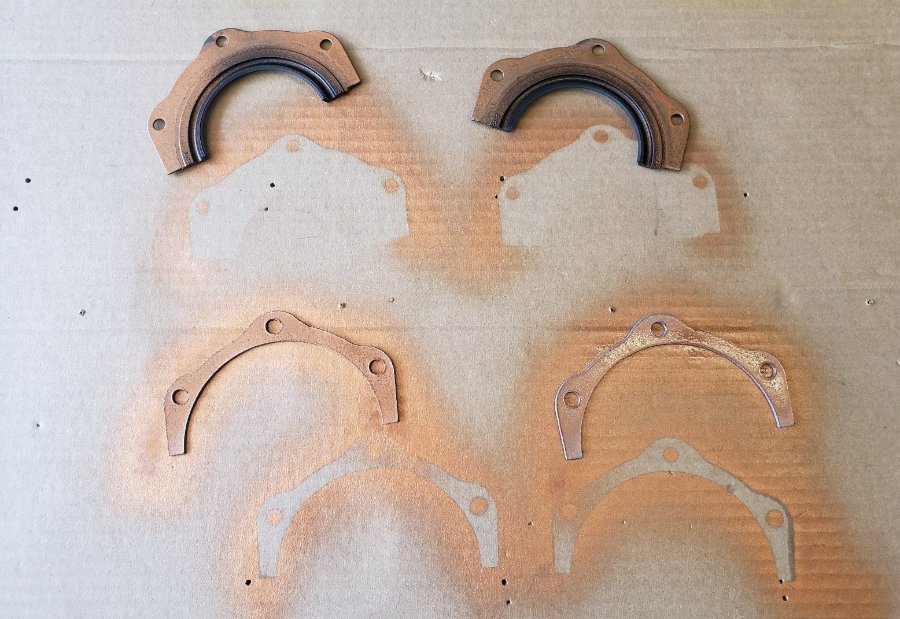
After 'much-a-do' piston rings are installed Still at a quandary over the rear main bearing and seal Measured specifications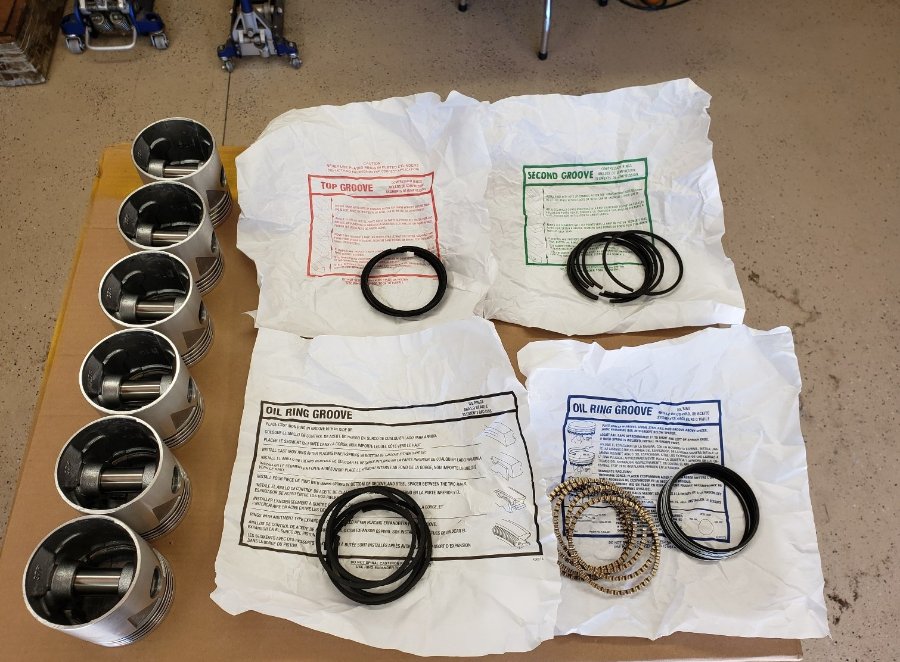
-
I am then, either blind or stupid because I can't find that, but I got them in, that's what counts.
-
Well that was a quick response..... That is the way the stock 48 engine piston looked to me.
-
Rear Main Seal and Bearing Questions
billrigsby replied to billrigsby's topic in Mopar Flathead Truck Forum
Also not too sure about this step in the rear main bearing, it is about .005" Take a fine file to it? All of the others feel fine running a finger or fingernail over them.
-
I sent Hastings an email, no phone support. ? They were just wrapped in the instruction sheets, four packages in a box, no semblance of order.
-
I have read and re-read the included sheets, both only state 'oil rings' there are two styles. I understand how they go on the piston, but nothing states which location (3rd or 4th) either go. I'll send the manufacturer an email or call being Friday.
-
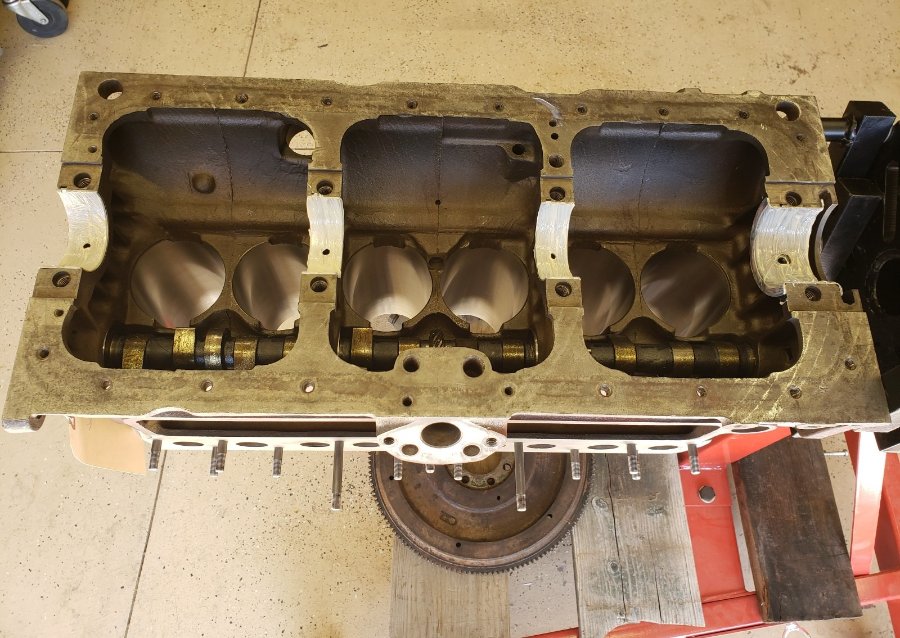
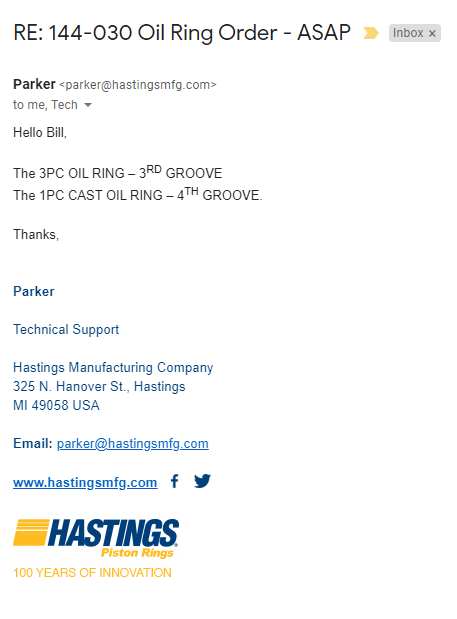
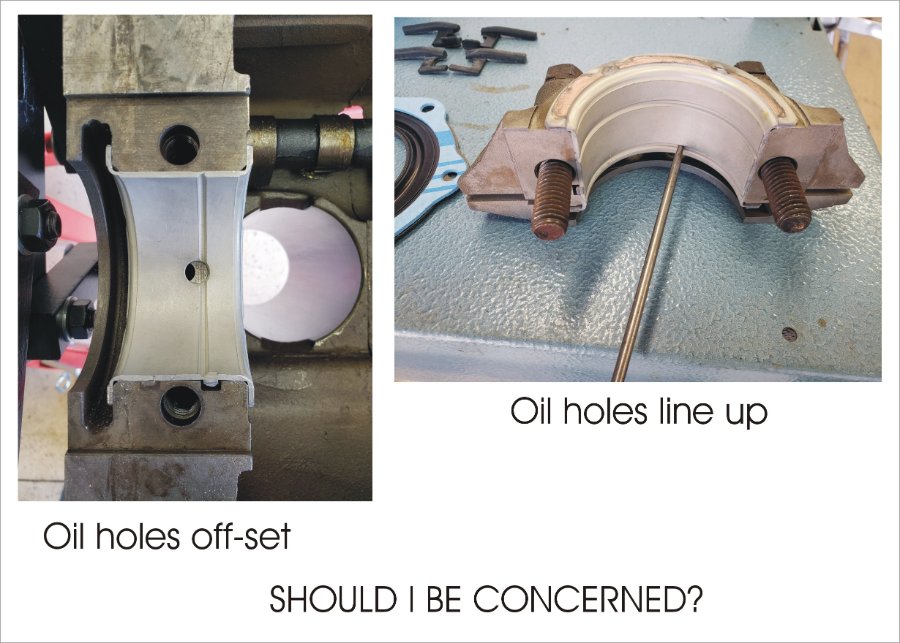
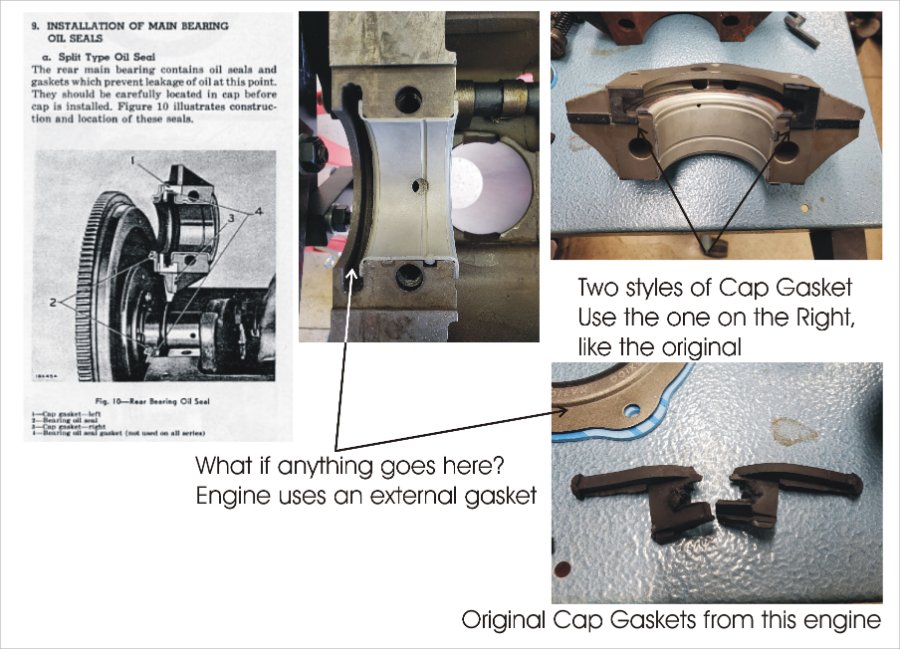
I started dry fitting the crankshaft bearings and seals and already have some questions, the first one is, the rear main oil hole does not line up properly I'm wondering if this is normal or something I should be concerned with? Secondly I am not sure what cap gasket seal to use, I think I should use the same that was in the engine but my kit came with two so I am questioning this. And finally I'm wondering since I'm using an external rear main seal does anything go in the slot for the V-shaped part of the crankshaft runs? I am sure I will have a boat load of questions if I cannot even get the crankshaft in without a few!

-
Searching everywhere to determine the order the oil rings go in. The First and Second came clearly marked, but the last two are just called 'oil rings' From the bad photo of the ones that came out of the original engine it looks like the 3-piece goes above the single one which would be on the bottom. Any thoughts?


-
FINALLY - My 1948 B-1-D Build Thread, 33 Years Later
billrigsby replied to billrigsby's topic in Mopar Flathead Truck Forum
I have finally decided to stop avoiding the inevitable and start the engine build. I have never attempted an engine build of this magnitude I have built small go-kart engines and small motorcycle engines 500cc and less in the past so I have been spending a lot of time reading studying and making sure I have all my ducks in a row so I don't make any big mistakes. Doing this once only (hopefully).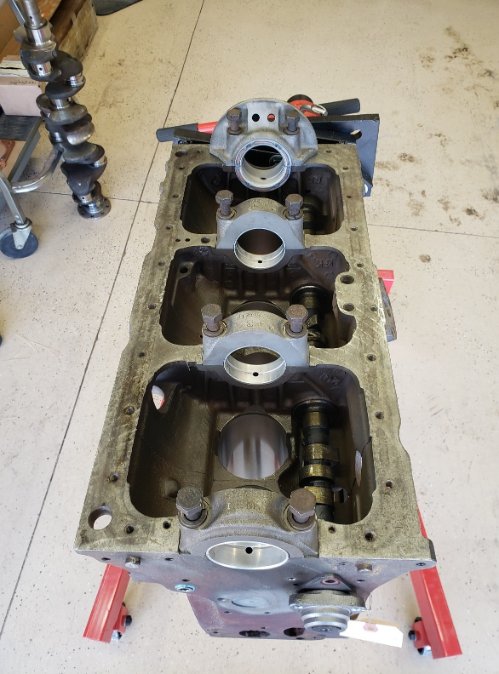
-
51 B3B build thread - after all these years
billrigsby replied to bkahler's topic in Mopar Flathead Truck Forum
The way that trucks coming along and looking, somehow I don't think that little green switch plate is ever going to bother you -
51 B3B build thread - after all these years
billrigsby replied to bkahler's topic in Mopar Flathead Truck Forum
I've been wondering about this is that switch plate for the air, defrost, heater controls supposed to be painted to match the body color? I have a couple of them and they're both black with no sign of ever being any other color. -
51 B3B build thread - after all these years
billrigsby replied to bkahler's topic in Mopar Flathead Truck Forum
Using a drill press? A Dremel works good for making the 'starting point' if a punch don't get you there. -
NOTHING, I REPEAT, NOTHING goes to the trash until the Fat Lady Sings (Project is Complete)! Pictures are nice, BUT NOT a Template!! Learned that the hard way with my first Austin Mini Cooper resto. ? ?


