


wagoneer
-
Posts
411 -
Joined
-
Last visited
Content Type
Links Directory
Profiles
Articles
Forums
Downloads
Store
Gallery
Blogs
Events
Everything posted by wagoneer
-
This search engine statistic is priceless! What great SEO you stumbled onto! Young people are attracted to your 38 because it looks like a zzTop hot rod in that bright green. young people relate to hot rods and hot rods look like cars from 30s Invariably I get 3-4 thumbs ups, nods, waves from people young and old around town, and they love it when I honk the horn - which is louder than probably any other car they have heard. Your stats are sound for the restoration market ; financially able, and interested In Rebuilding American cars - almost always has been dominated by 40+ white male in the USA usually 60s and 70s vehicles. Go to antique 30 and 40s, and the age level rises to 55+ Empty nesters With spare time, cash, and nostalgia. 50s in the 60+ range. these numbers may just get older based on vintage solely because number of vehicles are dwindling. How many 1910s, 1920s vehicles are out there or being restored by thirty-somethings? Not many. Aside from the current boom in model Ts that are hitting all age groups (I too am on the lookout for a nice model T), in 20 years, soon we’ll see 60s vehicles will be attractive to 55+. younger generation may like the old ones but only in future electrified restomod. jay Leno’s recent young mustang guest being an exception
-
oh Don, I’m doing exactly what your doing on my workbench now . I hope your points adjustment in the sky has perfect dwell. just let me know where to get replacement vacuum advance shims... mine dropped out as I was removing my distributor. im doing a bench adjustment as you are showing and I saw on YouTube from “UTG”. I like the vacuum advance adjustment mechanism - have the same pump.
-
He came back to me regarding the Windsor - No. Truck only at this time though probably would be a good starting point given the existing work others have done. Just need to change how the rack mounts.
-
I sent the seller a message asking two questions: 1. Does the original steering column + remote control shifter in Dodge B2B connect into the new steering box. 2. Do they offer a similar option for the Chrysler Windsor. His answer was simply 'Yes'... which I presume was for question #1. Follow up for #2. even for $1,000, that's probably worth it for all the engineering and parts time spent fabricating and putting all the parts together ourselves, presuming it works as advertised. I'm considering it now for my B2B.. as it's for my wife... ? As a bit of an aside, I've seen kits for power steering, power windows, disk brakes with in-place dual master cylinders, 6v Alternators with 100amps, A/C that could easily adapt to our rides. You can do 12v conversion, or there is a handy 6v->12v modules for USB ports. Unless you really need an infotainment center in the glovebox Only missing bit may be overdrive (see Merle's thread) or gear reductions in our differentials to really give it 75 mph comfortably. If I knew more (which somebody certainly does), I'd probably go and have the gears made to the necessary specification [ e.g. https://www.rushgears.com/services/prototypes ] . I guess these old gals do need a bit of a makeover, but nothing that would take away from their original charm while bringing them to the comfort level of "modern" day highway life. I've seen a lot of chassis swaps here, but for all the work, rather add on the updated modern necessities
-
Going on the original theme here, I saw this remanufactured version of a power steering rack on eBay that fits the 48-53 dodge trucks. Is this just a packaged version of what others here are cobbling together ? https://www.ebay.com/itm/123886369175

-
I’m gonna regret this..
wagoneer replied to Mark D's topic in DPETCA - Dodge Pilothouse Era Truck Club of America
This classic Mopar game is a slippery slope, and these trucks are especially so. First a Windsor for myself... then a B2B for the wife, then a parts truck... Great looking panel truck! A B2B with a bed cover?! That's a unique find. I do have a question whether white is really a factory color though. It's not in the official color, but the cab of mine has white metal on the inside and on parts of the outside. According to the internet there is a cream color, but no white white like you have...and me. -
Here is an example of one that is compatible with both 6v and 12v for $30. https://dcmclassics.com/lighting/409-le-733-turn-signal-switch.html
-
Today was another great day for Elise. First Crank! Building on IWOYTD, I took out my starter, (and my master cylinder), tried a replacement starter switch to realize it was the wrong year (1948-49 MAW-4004). My engine has the MCH-6106. I had to unfreeze the original switch and reuse it. Two days of soaking in PB Spray as well as liberal exercise of the switch made it smooth. The longer spring returns the yoke and disengages the starter gear from the flywheel (<50 yoke has a spring on it for same purpose). I realized why when writing - the biggest surprise is that my engine is NOT a truck engine - it's a D24 from 1951 in my 1950 chassis and cab! That's probably why the previous owner thought it was a 51. I finished wiring in the gauges, installing the radiator, filling up the fluids, and stomp the starter ... nothing... silly ground. Apparently the frame is NOT ground for this truck, so I wired it temporarily to a bolt on the engine. Stomp...engine spins without disastrous crunching, clunking, clacking, clicking noise! Just enough to test for compression ...tomorrow, and order a new ignition coil. Spin but no spark. The more I look at the truck, the more I like about it. I also decided I'm going to go through every accessory, and repaint the engine, transmission, and exhaust with the high temperature silver from Bernbaum (2000 degrees!), and all the black accessories with 1000 degree grill black. I'm undercoating the frame with rubber paint in a can. I'm thinking the cab and fascia I will use a primer + single stage paint with multiple clear coats. My short list of to do items till first turn-over and first drive: 1. new coil 2. turn over and start 3. hook up gas tank, gas sending unit, gas gauge, and start from gas tank 4. connect carburetor throttle, choke 5. rebuild and hone/electrolyze brake master cylinder 6. rebuild brakes 7. toe boards 8. accelerator pedal install (toe boards are a prerequisite) 9. Fix Brake pedal rub against body (somehow pedal is too high and rubs against top of opening in firewall) 10. replace pinion seal and pinion wheel bearings. 11. horn 12. drop the pan and inspect the bearings. 13. Repaint engine, transmission, exhaust Tips I wish I knew for those removing starter on B1B/B2B or possibly newer: 0. Two bolts - engine side, master cylinder side - very very narrow space - not enough for a socket. 1. Unbolt the oil filter from the block, and take out the oil filter return 2. Get a 5/8 offset wrench to get at the engine side bolt. That will save you a lot of headaches fighting that bolt 3. Frozen bolts - Map torch to heat it up, Freeze off - cold spray in a can, and PB Spray to penetrate. 4. Taking out the master cylinder makes it super easy to reach the car side bolt...but it's a pain to take off the master cylinder (My cap was frozen too).


-
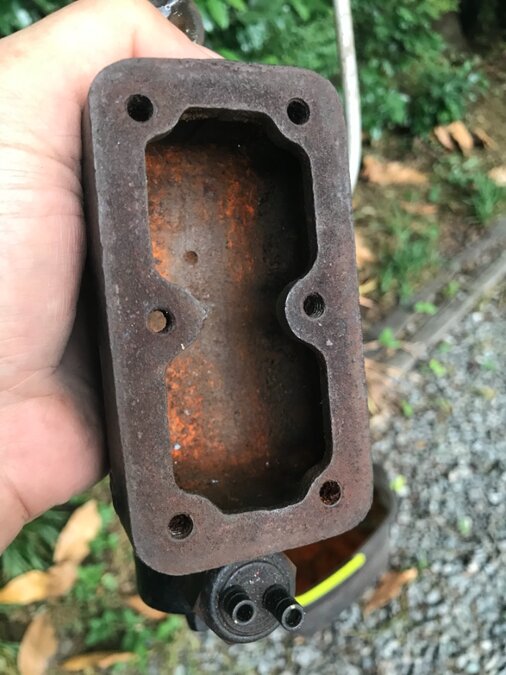
That’s a great link @JBNeal that’s a good suggestion for the other rust remover thread potentially especially for my bag of rusted nuts and bolts. the electrolysis is super easy and freeish. I have everything at home. im thinking of using a dremel tool to clean it out . id rather not take it all apart .
-
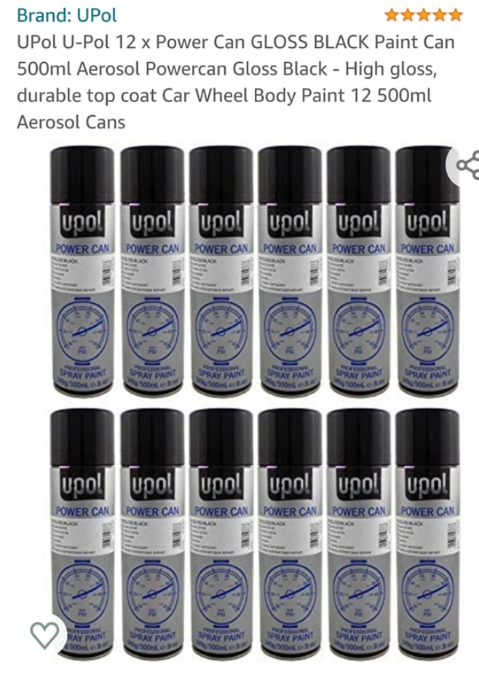
Well, it’s been awhile and I’ve finally gotten started on this new truck of mine - I’m calling her Elise. I’m going to change this thread to be my build thread so I don’t need to create superfluous topics . After a very success international work your truck day, I am following up with fixing my starter and the sorting my master cylinder. getting the starter out may be the most painful task possible - I’ll detail steps later but it’s a pain and you need bent wrenches or you may hurt yourself or at least hurt the truck and move the oil filter out of the way... and the master cylinder. anyway this topic is about rust rust in the master cylinder resovoir. What to do about it. this truck amazes me. I’m pretty sure somebody spent a ton of money and time putting all new stuff in and then had to abandon or sell it. Master cylinder was never used - bone dry. No residue in lines either. Same with starter. two years of sitting froze the starter switch , the mc cap, and the brakes but it’ just needs a little tlc and paint that I’m giving it . Can really paint it because brake fluid will eat it. Rustoleum? suggestions?
-
I have a slight variation to the topic here - I have some parts and a bag full of original fasteners that look a bit rusty . Would you all then recommend a bath in acid to clean them up and some kind of clear coat (wouldn’t that cause binding in the threads?) fasteners are an interesting twist here - would the fasteners (screws, bolts, nuts) rust faster ? after stripping of surface rust, I usually put a thread sealer on but maybe not for something like fender bolts exposed on both sides. Thoughts?
-
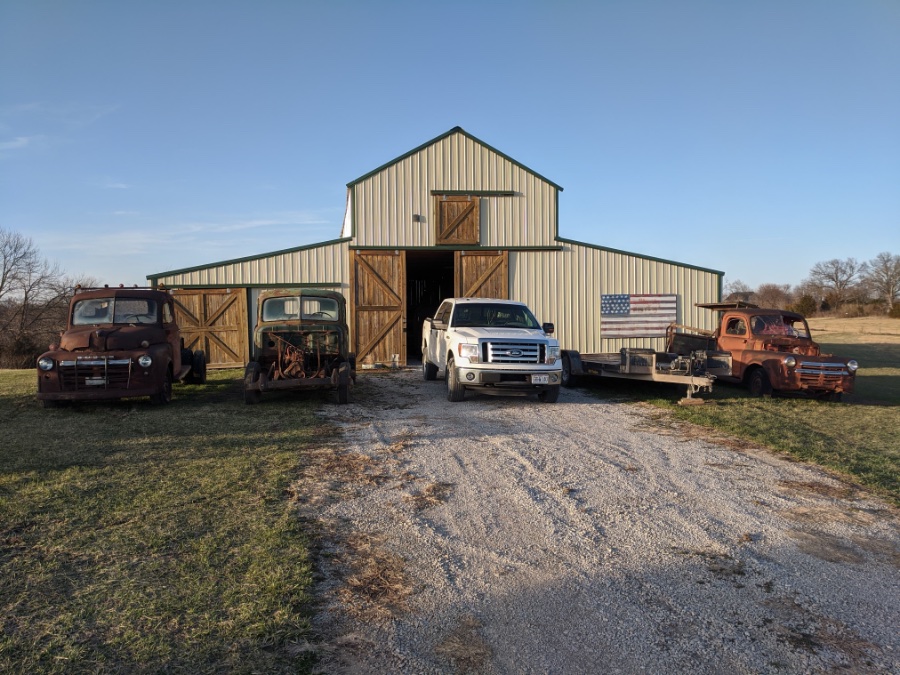
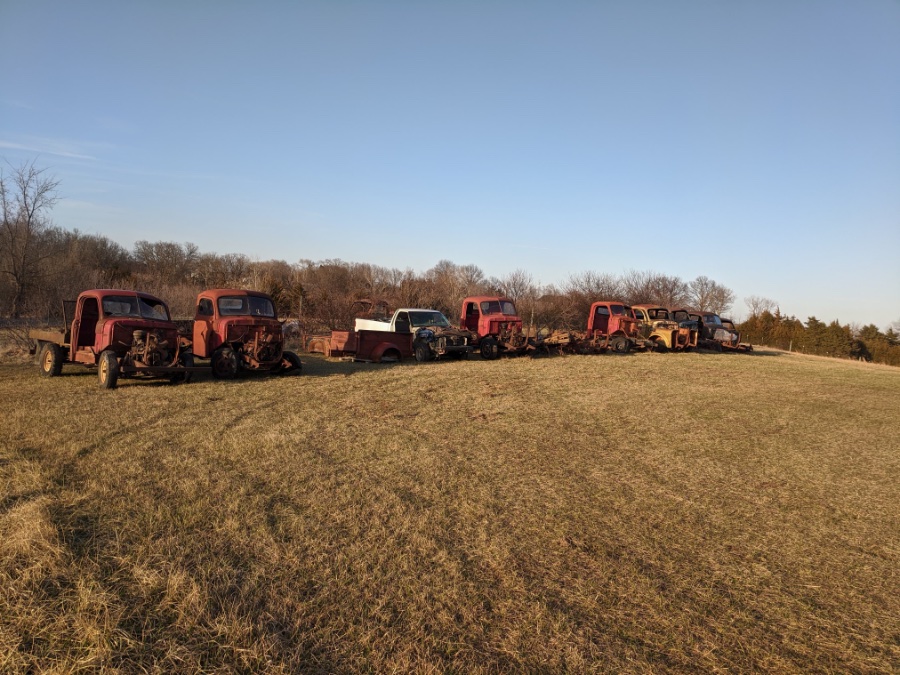
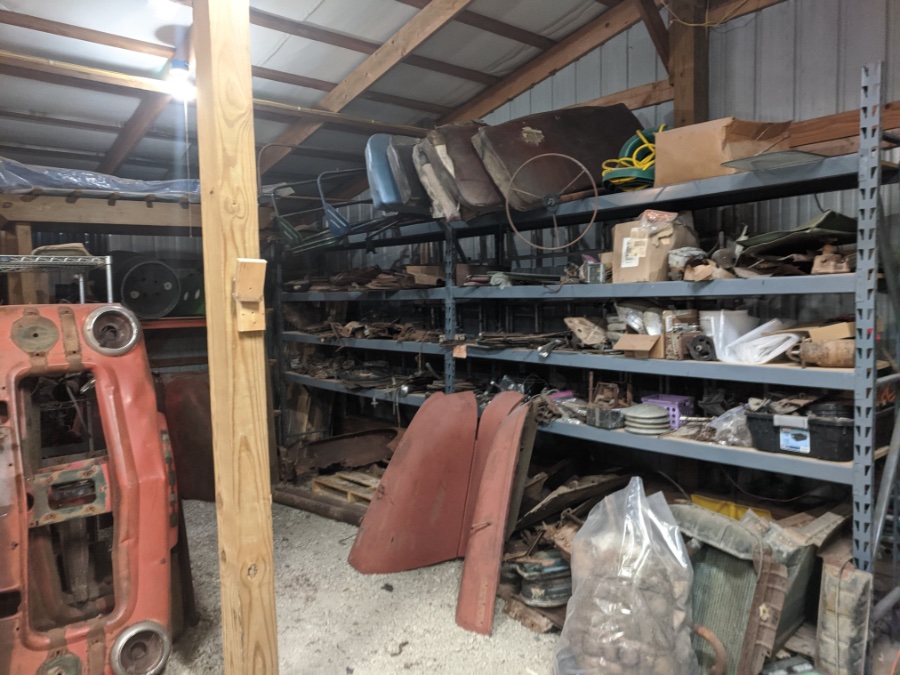
Recently, I discovered Doug Crozier on Facebook selling Dodge Pilothouse trucks that need saving, and selling parts for those who are saving their own. I can attest he's a great source for good solid parts, and really great value. If you have a 48+ Dodge truck, he's got a warehouse and a field of them waiting to help you. He's helping me piece mine together bit-by-bit. He'll sell you parts, but he also has several whole trucks he's holding out for people willing to save them. In Doug's words: Reach him on Facebook through Facebook Messenger (douglas.crozier.92) or call him and leave a message (nine-one-three seven-zero-six two-six-nine-three)
- 1 reply
-
- 1
-

-
I had to raise it to about 750 to prevent stalling at the stop light. When I put down to 450, I would stall out at the stoplight...unless I pressed the clutch in, then things are fine. I can see the drag in the engine because my generator slows down and starts reading negative amps. I put a tach on, and I saw the speed would slow down to around 250-300 (when nominally set at 450).
-
And an overdrive (if you can find one). I've been reading my fluid drive chapters as bedtime reading (That confusing cross-section of fluid drive finally makes sense -- talk about a rorschach test), and the thing to know is that everything inside that fluid drive costs a fortune. Fluid drive seals - $525 (why?!), clutch assembly $155. Front and Rear runner bearings - not sure, but certainly a pain. I have a slight fear that my runner bearings are going, and that's why my stoplight idle is dragging so much on the engine. aside: When stopped at a light with brake on, and in gear, where in the fluid+m5 semi-automatic system does the engine slip so that the power doesn't rip apart something? Kind of in the same vein as don't do burn outs above. Whatever is supposed to slip to keep the idle smooth... isn't slipping as smoothly as it once was.
-
Also, be aware that different fluid drives adapt to different size clutches. Dodge trucks and Royals use 10" clutches, and Windsors use 9.5" clutches. The bigger trucks use up to 12 7/8 inch clutches. Doubt your sticking a B2Y fluid drive in your D-24. ? Shop manual would be your friend here. The fluid drive unit itself should be compatible with the same size clutch, now whether the fluid drive mates to your transmission is a housing question.
-
51 B3B build thread - after all these years
wagoneer replied to bkahler's topic in Mopar Flathead Truck Forum
@bkahler Have you considered going with the waterless coolant like EVANS? Your system is perfectly dry right now, so it's perfect time to put in the good stuff that won't corrode your engine insides or your radiator. Less water the better. Use the engine flush as @jbneal suggested to clean out the junk and then put the waterless coolant in. It is more expensive, but with 21 years of hard work, and a beautiful restoration (that I am in the middle of myself), a few bucks on the good coolant would be worth it. -
How neat to see newly made crankshafts, and how quickly they make those engines and spray the wheels (like with a water hose practically). It's a river of molten metal going where? Fascinating how they turned pen-and-paper into precision engineering. These Plymouths from 39 are going 75! Also - here's the link -

-
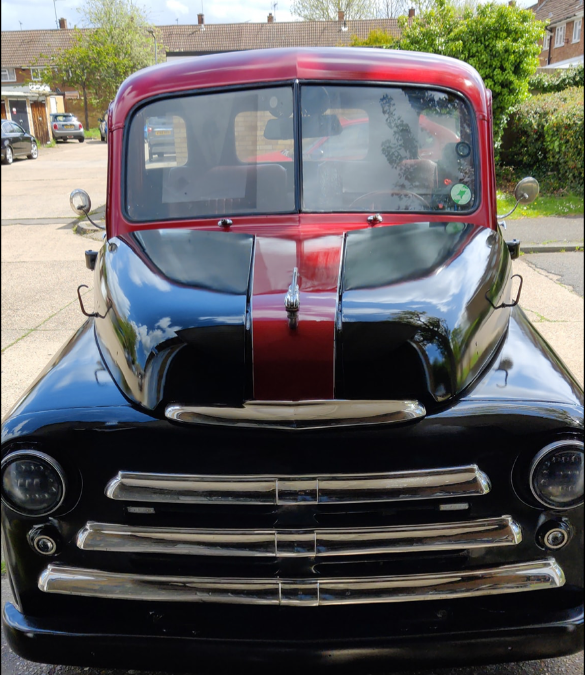
Saw this on Facebook - pretty good for rattle can paint job https://www.facebook.com/photo/?fbid=10226483517494666&set=gm.10158348436718719
-
39 TF-37...So It Begins (Lots of Pictures)
wagoneer replied to TooManyIrons's topic in Mopar Flathead Truck Forum
I spoke to the director of MMC Detroit, and he says that the historical archives office is closed for the foreseeable future . They lost their digital access to their archive too. He was uncertain whether they would open back up at all given the new stellentis ownership structure, and if they do, he estimated it would be in 2022. Bummer -
10th Annual International Work On Your Truck Day!!!
wagoneer replied to 48Dodger's topic in Mopar Flathead Truck Forum
Got my 50 b2b months ago (see other thread) and haven’t had a chance to work on it properly until today. 1. First objective: fix the shift linkage and shifter orientation to be correct complete 2. I was inspired then to install my carburetor check 3. A visit from an old mechanic friend to talk about paint also inspired me to Go the extra mile - I was very close to turning over the truck, I just needed to wire the truck up , connect all the lines, and put some oil into the block Check 4. I hooked up a battery, hot wired my ignition switch (no key and the stupid ones they sold me are not oem style for 50) stomp on the starter .... crickets , nothing. Doh! Silly starter switch button doesn’t compress... no joy tonight but maybe tomorrow after a good soaking in penetrating oil. Overall: A grand day working one on My truck . She’ll be running again very soon! Happy international work on your truck day to you! -
39 TF-37...So It Begins (Lots of Pictures)
wagoneer replied to TooManyIrons's topic in Mopar Flathead Truck Forum
Anybody getting results from Historical Archives? I sent an email to Danielle and it bounced... Does MMC Detroit have some of this info - their site is very confusing - https://www.mmcdetroit.com -
How do these methods recommended compare to something like Rustoleaom Rust Reformer Spray Paint or Rusty Metal Primer (not sure exact difference). I have used those recently for spray painting a metal wheel barrow with very good success, but if I were to use it on the frame or out of the way surface, or even on a panel and then prepped it with any kind of surface smoother.
-
What a great piece of equipment to preserve and use! Like our favorite vehicles, the best are the working vintage.
-
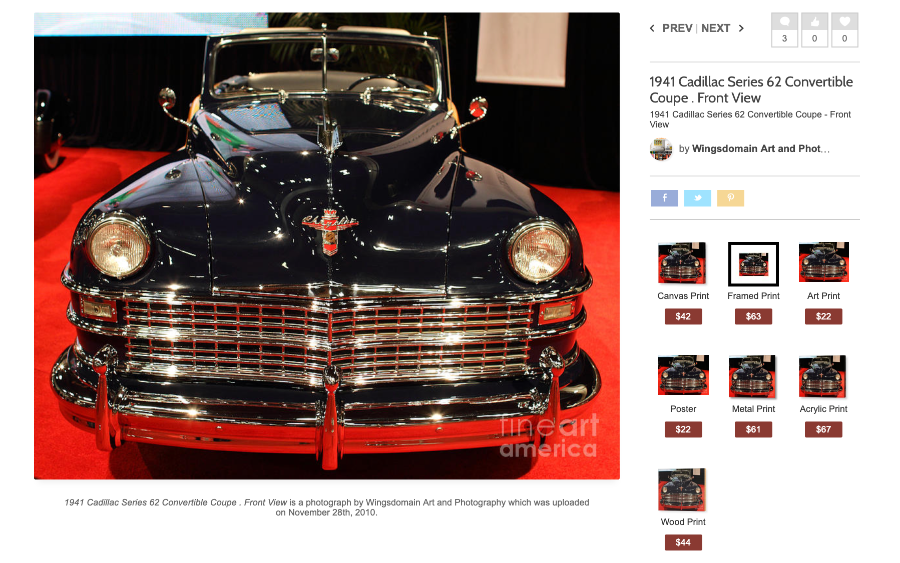
https://pixels.com/featured/1941-cadillac-series-62-convertible-coupe-front-view-wingsdomain-art-and-photography.html It's been up there for 11 years...wrong! I'll take a wood version!
-
- 1
-

-
Well I did it again...1938 Chrysler Businessman Coupe
wagoneer replied to keithb7's topic in P15-D24 Forum
What a find! All in on prewar for you? We'll see a bit more in the next videos . You should say to your wife that the 53 is for kyle, the 37 your own, and the new 38 is just for her. Therefore, all three need to stay home. Regarding the fuel pressure regulator, Does the car have an electric fuel pump too? Those npt brass bits seem to leak at the threads, and I've had bad luck getting the npt threads to seal with teflon tape. I had one on mine to prevent the carb from getting overwhelmed when both mechanical and electric are on. I was seeing issues with gas coming out of the carb when both were on. I just run the mechanical these days anyway.
