DonaldSmith
-
Posts
2,471 -
Joined
-
Last visited
-
Days Won
25
Content Type
Links Directory
Profiles
Articles
Forums
Downloads
Store
Gallery
Blogs
Events
Everything posted by DonaldSmith
-
From time to time I've caught snippets of the misadventures of Austin Powers, but I didn't catch all the double meanings. So this is another one? I've led a sheltered life.
-
You said that you jumped the wire from the gizmo to the spring, and the horn blows. It sounds like this was with the plastic spacers in place. With the wire plugged into the "Y" shaped gizmo, and the spacers removed so that the gizmo is contacting the spring, does the horn blow? It should. If it doesn't, rocking the horn ring won't do anything. I don't know why I would imagine that there would be no continuity with the spring contacting the gizmo, but who knows? Maybe someone coated something with a clear spray. It's wild guess time, and this is my WAG.
-
I share your bafflement. I misunderstood your post #23. Plastic spacers - good. Everything is OK, til the horn ring is installed. Hmmm. I had an incident with my DeSoto horn. With the horn ring installed, it would only honk the horn if certain parts of it were pushed. There is a cup that the spring fits into. I had the spring on first, and the cup last. It pushed things off center and prevented parts of the horn ring from being effective. But your horn ring rocks perfectly. Double Hmmm.
-
Shag-o-mania!
-
"In the day", some jurisdictions did not allow the driver to enter the car by the left door if the car is parked in the street. So the dome light was activated by the right door only. Some cars only had the key in the right door. The small light under the dash was called a "map light". It could also help when fumbling with the keys. t
-
Wait a minute! If the spring is held away from the gizmo, the horn should not blow. This is the normal condition. If your spacers are metallic, they are shorting the spring to the gizmo. The horn ring is metallic, but it is isolated from ground, and never contacts the gizmo, so in the normal position the lugs of the horn ring push down and hold the spring away from the gizmo. In the normal position the horn does not blow. Now, the horn ring, when pressed anywhere, is supposed to rock, pulling one of its lugs away from the spring, allowing the spring to contact the gizmo. Maybe something as you assembled it is keeping the horn ring from rocking. It's counter-intuitive. The horn ring assembly is what's called a "normally closed" switch, but which is usually held open by an outside force.
-
Here we go- (My head hurts, and my eyes are burning from looking though the French dictionary,but here's my take.) The New Chrysler Chrysler Windsor Four-door Sedan including special équipment… You will love its Quiet Comfort and Pleasant Drive! Look into the magnificent new Chrysler! You will find that it has been conceived to assure more security and comfort while providing greater efficiency. The dignity of its lines, and of its spacious bodywork and sumptuousness will please you. The new Chrysler, although more spacious, doesn’t take up more space. It maneuvers even more easily in dense traffic, in parking, in garaging. The new Chrysler drives smoothly, without effort. In the Chrysler “Royal”, smooth power is transmitted without jerks, through the oil of the Fluid Drive, minimizing the frequency of gear-shifting. The Chrysler “Windsor”, with its “Presto-Matic” transmission, is driven without changing gears. Upon seeing the magnificent new Chrysler, you will agree that it is well the car that meets your idea of comfort and pleasant driving, and also your innate sense of style. Choose a Chrysler and the pride of the true connoisseur expert that you are will increase each time that someone says to you: “i see that you drive a Chrysler” (Edited)
-
I'll give it a shot- without referring to my LaRousse: The new Chrysler... Chrysler Windsor, four-door sedan You will love your seating comfort and pleasant ride! Examine the magnificent new Chrysler! You will find that it was conceived (designed?) to assure more security and comfort all in giving a better (rendition?) The dignity of the lines and the spaciousness and sumptuousness of the bodywork will please you. The new Chrysler, well more spacious, does not occupy more space. She maneuvers herself more easily in dense traffic, in parking, in the garage. The new Chrysler drives sweetly (easily) without effort. That's enough for now- my head is starting to hurt. Someone fluent in languages can fix what I have started and pick it up from here.
-
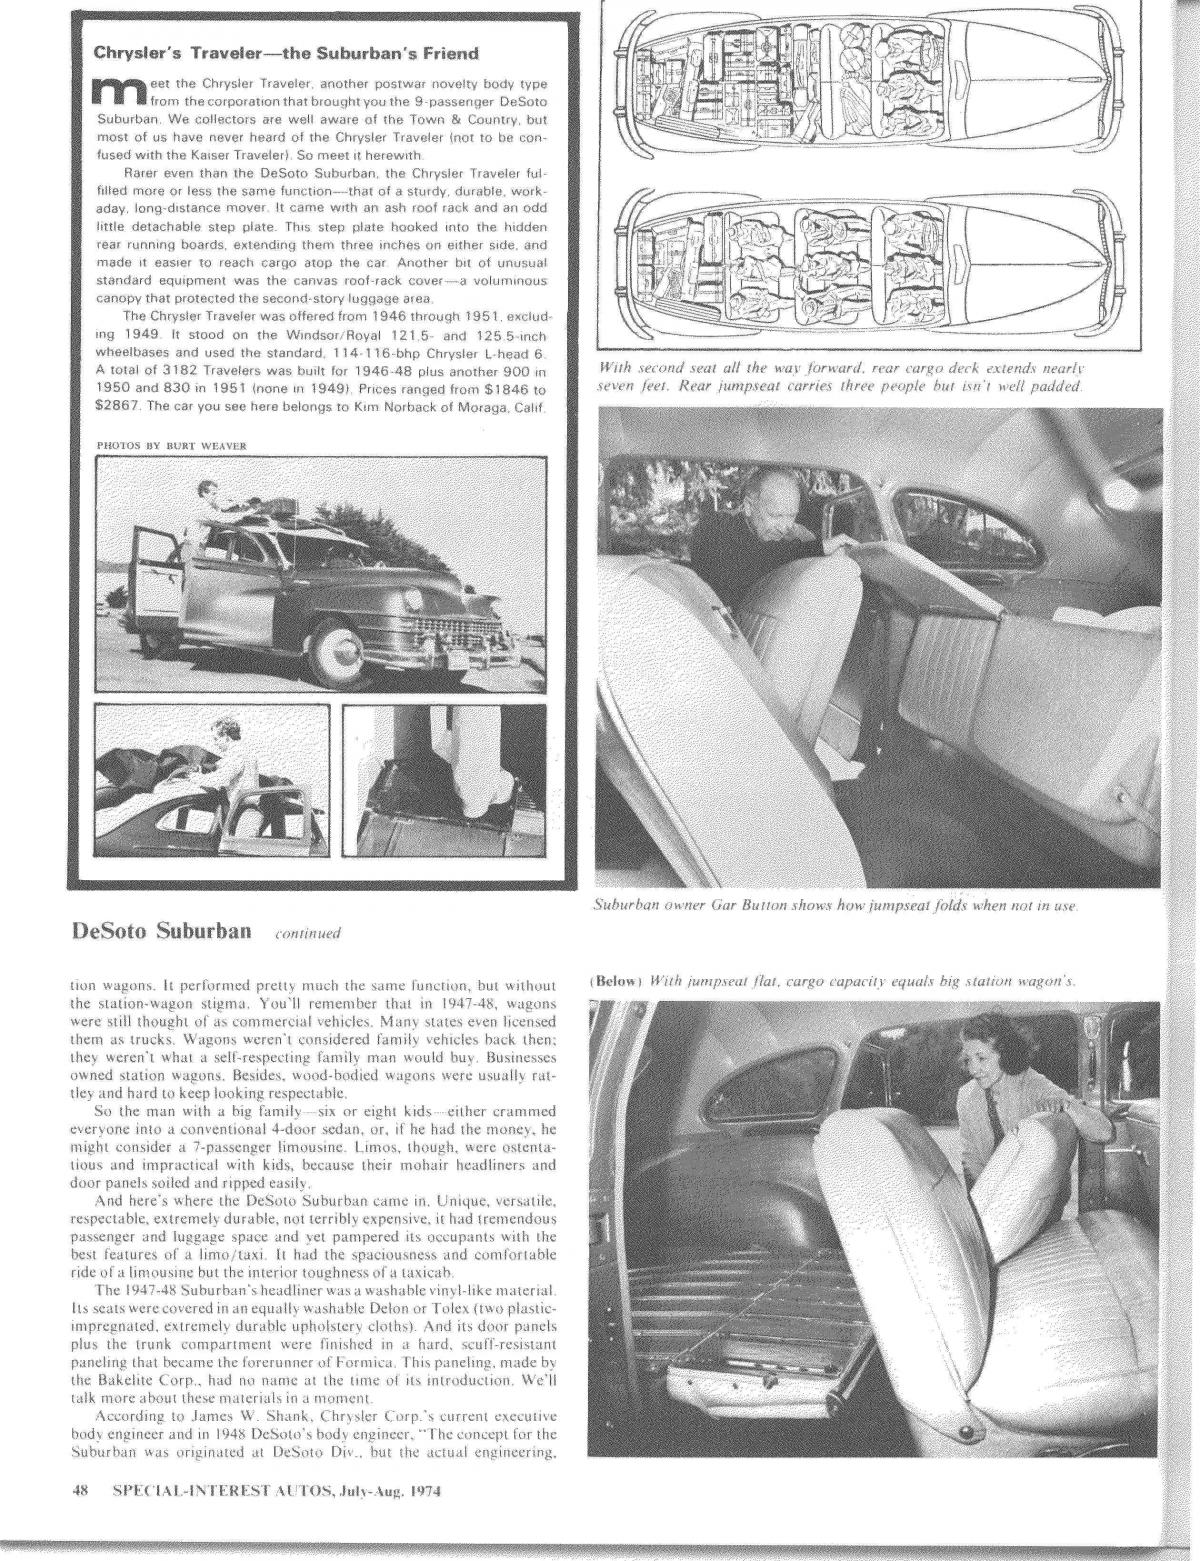
Did the Chrysler Traveler have a fold-down rear seat, or other access to the trunk? The Suburban was a long-wheelbase car with three rows of seats, the third seat being a small folding seat. The 49 and later Suburbans had a full size rear seat that closed off the trunk when in seating position. There was also a DeSoto Carry-All, based on the standard sedan, with a folding rear seat. Here is a brief side-bar feature on the Traveler, from an article on the Suburban. It doesn't mention a folding seat.
-
The 3-leg gizmo and the wire are not grounded when the assembly is, well, assembled. The spring is always grounded. The horn ring has three lugs which hold the spring away from the gizmo. Push the horn ring, and one or two lugs will pull away from the spring, allowing the spring to contact the gizmo, the circuit to be completed, and the horn to honk.
-
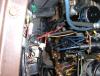
That engine seems to be sitting kind of low - you are going to need a giant, tall air cleaner to fill the space.
-
As I figured out on my DeSoto, the wire through the steering shaft wants to be grounded, to close the circuit to the horn relay and honk the horn. The wire is plugged into a metal gizmo which the big spring wants push against. The spring is grounded through the steering shaft. The three-spoked ring keeps the spring compressed, so that it doesn't contact the gizmo at the end of the wire. (The steering wheel is insulated, so there is no ground where the ring is connected to the steering wheel.) Push the horn ring anywhere, and the three-spoked thing is tipped, allowing the spring to contact the gizmo and complete the grounding. Until the ring is fully screwed down, the horn circuit is grounded, so disconnect something to keep the horn from sounding. Otherwise, it would add more urgency to the assembly. Pardon the technical language.
-
That's not a barn find, no doo-doo or mice gifts. It's an insulated-heated-air-conditioned-storage-facility find.
-
I used Borgeson U-joints on my column adaption for a power steering gearbox. They caution that the angularity of the shafts should not exceed 35 degrees. I just made it by juggling the location of the steering box.
-
That's a lot of amps to push through a voltage reducer. Usually the kind of resistor the boys are used to are for low-amp items like gauges. And it may be counterproductive. For the same oomph, 2 volt systems need half the amps as 6-volt systems. So by the time you reduce the volts, you have half the amps as a 6-volt system. There are threads here about jump-starting a 6-volt car with a 12-volt source, but the caveat is that radios and other stuff must be off, so they don't get fried.
-
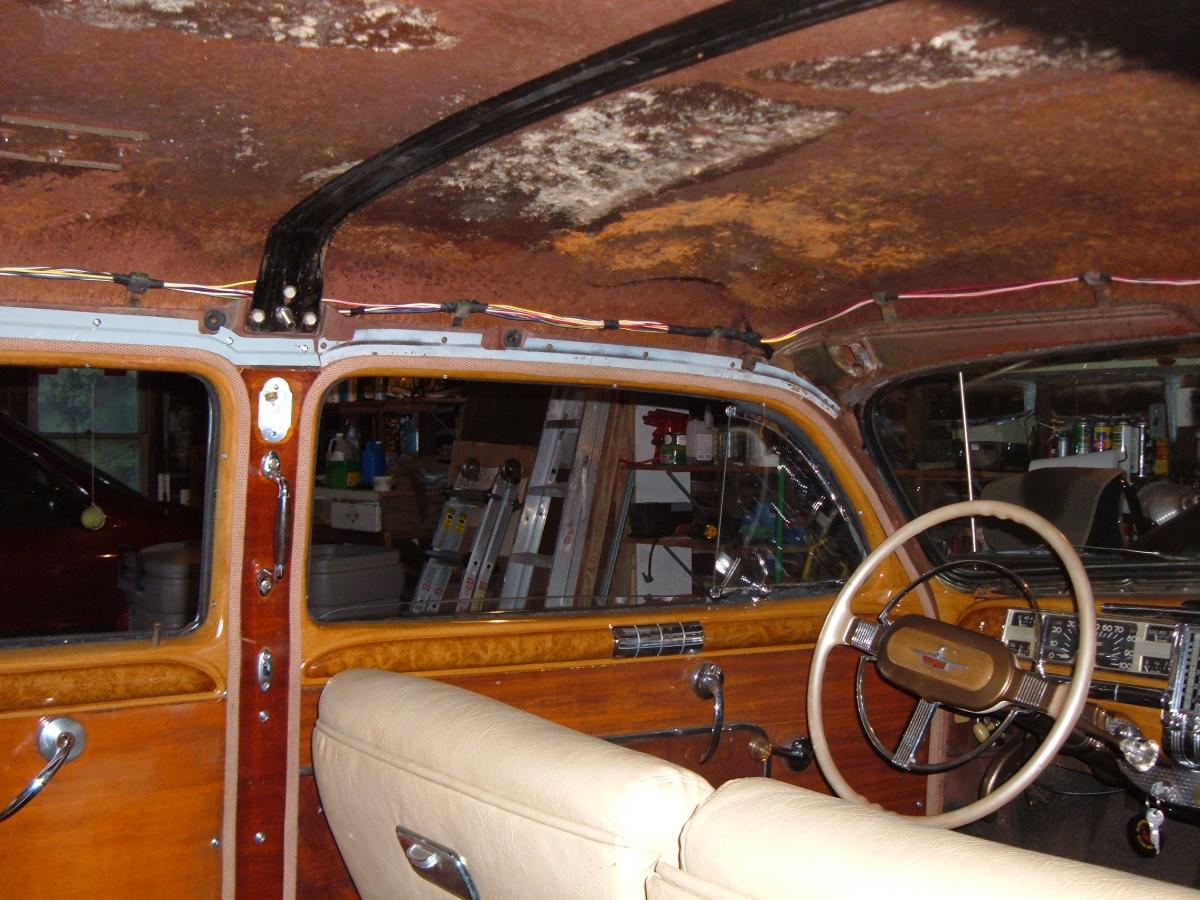
Here's photos of the new wiring in my DeSoto. I removed the headliner. (I probably should have found another way; I didn't get the headliner tight enough. Oh, well. While the headliner was out, I primed the exposed steel roof and stuck on an insulating duct wrap.) I had problems feeding the bundle of wires through the windshield post. I think I wound up using a pull cord to pull each wire through.


-
I didn't like the idea of loosening the water pump bolt to adjust the alternator, so I used a stud (or threaded rod) and nut to secure the water pump, with lock washer, and sealant on the threads in the block. Then I loosely threaded a nut on the stud after the alternator arm was on, and drilled through the nut and stud. I ran a cotter pin or just plain wire through the nut and rod, to keep the nut from backing off. No leaks at the water pump, and alternator arm free for removing, replacing and adjusting the alternator.

-
It'll buff out? (Edit:) Or dip it in CLR?
-
It sure looks like a 1950 Dodge, from the rear fenders. The '49 Mopars have the tail lights on the fender seams. and the trunk seems to stick out. The '50s and later have the fenders extended back past the trunk, and the lights are on the ends of the fenders. (My dad had a '50 DeSoto.) I didn't check front grilles. Other threads have discussed the practices of various states on the registrations. Cars manufactured in 1949 would be registered as 1949, even if they were the new '50 models. Feuden Wagon, be sure to check your serial numbers when ordering parts. You may have a '50. (Serial numbers are another topic, engine vs door post.) Oh, and welcome to the forum. Lots of good info here, and some laughs from time to time.
-
I noticed the wood-grain panels on the doors of the Chrysler barrel-back, and the wood-grain garnish moldings. The panels may have been an early plastic laminate by Bakelite. Mine are. I couldn't see if the open trunk has the formed panels. So I see the heritage of my Suburban. I wonder if any station wagons had the Bakelite panels? I suppose the typical woodies have real wood door panels.


-
 I second the emotion. Cut back the base, not the screw. Pertronix said to remove the screw, but it wouldn't come out. in my frustration, I attacked the screw it with the Dremel. I left enough screw to allow reinstallation of the points.
 -
My wiring diagram also shows the PRI going to the positive side. Hmmmm. Of course! Conventional ignition system: Ignition circuit to the (-) pole of the coil - "Hot"always on. Ground circuit through the points back through the block to the (+) post of the battery- circuit intermittent with the distributor lobes. Points break, coil fires. Pertronix: Ground to the (+) positive pole of the coil - always grounded - negative from ignition circuit, black wire interrupted by igniter, to white-black wire to the (-) post of the coil. Igniter breaks he circuit, coil fires. So, the Pertronix is the opposite of the conventional.
-
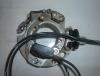
Here are photos of my installation, 6-volt, positive ground. Ignitor in distributor: Remove the points, condenser and wires. The eccentric screw (to the right of the igniter) interferes with the igniter. Cut back the igniter base or the screw. The igniter has two little studs that fit in the screw holes for the points. The two igniter wires have to fit where the one wire came in. I cut out part of the grommet for the wires. The black wire goes back to the ignition switch. The white wire goes to the negative (-) post of the coil. The positive (+) post has a wire going to chassis ground or battery (+) post. Now, I have the M-5 semi-automatic transmission, so I was concerned with providing the ignition interruption for the shifting. I called Pertronix. They said, put a 7-ohm, 5-watt resister in the circuit from the PRI (primary) contact of the transmission relay to the negative (-) post of the coil. this shorts out the ignition for the shifting, without frying the igniter. I found a 7-ohm, 12.5 watt resistor from Mouser Electronics, an RH0107R000FC02, 3 bucks plus 7 bucks for shipping. I checked with Pertronix and they said that 12.5 watt would be OK. So I have two wires coming out of the distributor, the black to ignition and the white-black to the (-) post of the coil. I have two wires to the (-) post of the coil, the white-black wire from the igniter in the distributor, and the wire from the 7-ohm resistor in the circuit back to the PRI post of the transmission relay. I have one wire from the (+) post of the coil to ground. A picture is worth a thousand words, but some photos need a few words to explain what's going on. The (+) post to the left at the top has one wire to ground. The (-) post has the thin white-black wire from the igniter and the wire to the resistor and transmission relay. The resistor is mounted on the frame, on a heat sink. Below the coil the thin black wire to ignition is somewhat visible. (My photo got rotated from the position I wanted, sort of looking over the fender. I hate it when that happens.)
-
I'll have to go out to my car (hibernating in the garage) to see how I hooked up my Pertronix wiring. Stay tuned.
-
With 3D printers, could a part be scanned and a model be made, for casting a new part? Of course, this is way beyond my expertise or budget. Jay Leno could probably get it done. I saw an episode where he was showing a 3D printer at work. One can dream.