Jim Yergin Posted June 10, 2008 Report Posted June 10, 2008 I have installed the hood on my '41 P12 but am having trouble getting it to fit correctly. There is a 1/2 inch gap betwen the rear edge of the hood and the finished front edge of the cowl. In other words, the fabric webbing on the cowl ledge shows. I have loosened and then even removed the three bolts on each side that hold the hinges to the hood but cannot get the hood to slide back any further. Am I missing something? Does anyone have any tips or tricks that will help me? Thanks. Jim Yergin Quote
Young Ed Posted June 10, 2008 Report Posted June 10, 2008 Have you tried loosening the latch at the front? Quote
Don Coatney Posted June 10, 2008 Report Posted June 10, 2008 I also have a gap where my hood meets the cowl. I just learned to live with it. Quote
Plymouthy Adams Posted June 10, 2008 Report Posted June 10, 2008 first, look closely at your hood...unbolt it if you have to and verify that the hood will fit the opening with proper gaps to begins with. If you have had this car apart for painting purposes..were the hinges removed from the car..? Have the fenders been off..how about the radiator shell. The rad shell is the key to alignment for the opening..this may or may not have to be shifted left to right on the frame mount..moved up or down if you had shims to begin with and the actual gap at the nose for the hood is shimmed at the fender/shell joint. Centering the shell will give you equal lengths left and right and thus square the opening for the hood. Moving the hinge front to rear will make minute adjustments and base line can be with with a tape measure...compare one to the other. The width of the rear hood is adjustable by the edge of the hood where it bolts to each hinge...the bow is set and stabalized by the cross support. Quote
Young Ed Posted June 10, 2008 Report Posted June 10, 2008 I'd have to check but I'm pretty sure my holes were slotted on that front latch piece. The hood should have a uniform gap along the cowl but you shouldn't be able to see the cowl lacing. Quote
Jim Yergin Posted June 10, 2008 Author Report Posted June 10, 2008 Thank you all for your replies. It does not sound like I am missing anything. Everything was off the car for painting including the hinges. However the fenders, radiator shell and the hood sit squarely all the way around. It is just that the hood sits too far forward by about 1/2 an inch. Even with the hinge attaching bolts removed it does not slide all the way back. I think the next step is to remove the hood and determine if there is something keeping the hinges from sliding in the passageways where they attach to the hood. Jim Yergin Quote
Jim Yergin Posted June 10, 2008 Author Report Posted June 10, 2008 Norm, Thanks for the suggestion. I already tried to adjust the hinges but that did not change the gap. Jim Yergin Quote
greg g Posted June 11, 2008 Report Posted June 11, 2008 How does it line up at the front???? Maybe you shrunk it. Remember the Hood will be open at the show. Perhaps if you can't get it sorted, the combined resources of the group can get it where it belongs. Quote
randroid Posted June 11, 2008 Report Posted June 11, 2008 Jim, Mine has the same problem and I've been able to determine that the hood sags and wont allow proper adjustment. To keep the rear edge of the hood from catching on the front of the cowling I've had to adjust the hood all the way forward, making it a real mutha to open and close. The solution to my specific problem is to find a hood brace (hey, Shel, how you doing, my very good friend?) to keep the center of the hood propped up. Now that I'm determined to to paint it this summer, a brace is becoming a high priority because the rear lip of the hood has become deformed a little and any new paint will go away with the first closing. Once a proper brace of some sort is in, it'll be a walk in the park to slide the hood in place where it will open and close easily. I have a new neighbor who is a goose hunting guide during the season and a welder the rest of the year; his welding equipment fills the bed of his truck and between the two of us I bet we could get something fabricated. Good luck! -Randy Quote
randroid Posted June 11, 2008 Report Posted June 11, 2008 Norm's Coupe, Point taken and I don't entirely disagree with what you say, but you must take into consideration that my hood is shaped like a 'W', probably from being trod upon in the past, and without a brace of some sort there isn't a chance in Hell of it ever closing properly. One thing I will do before it's painted is to disassemble the two halfs and bend the vertical parts that mate in the middle toward each other. I think it's worth a try (I just thought of doing that as I was writing the first paragraph) and it might just force the 'W' out of it. If I go 'over center' with the bending, at least a hood brace would pull it back down while maintaining an upward pressure on the shape. After all, scraping the cowl wasn't acceptable when they were new so there must be something that can be done to resurrect the original shape. -Randy Quote
randroid Posted June 11, 2008 Report Posted June 11, 2008 Oops, Read the last post as hood being shaped like the letter 'M'. I just re-read the posts about government and oil prices and have 'W' on my mind. -Randy Quote
Jim Yergin Posted June 11, 2008 Author Report Posted June 11, 2008 I thought I had found the problem when I discovered that the replacement trim molding clips I am using to attach the stainless trim band along the edge of the hood are longer than the originals. It appeared that in the holes for the clips in the vicinity of the hinge attachments the extra length was blocking the hinge from sliding forward all the way. I removed the offending clip on each side but even with the hinge moved forward to the maximum allowed on the hood, there is still a gap at the cowl that allows the cowl webbing to show a little. It also looks like the hood is up too high at the cowl. I have tried to adjust the hinges where they mount to the cowl but without success. When I have more time I will play around some more with those mounting points and try and create more adjustments. At least the hood latches now. I will take Greg up on his offer and take advantage of the "brain trust" gathered at Sully on Sunday for ideas. Jim Yergin Quote
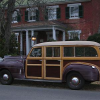
Don Coatney Posted June 11, 2008 Report Posted June 11, 2008 "brain trust" Jim; Keep in mind that we are forum members. Brains and trust may not apply:D I really look forward to seeing your woody arrive at Sully. Quote
greg g Posted June 11, 2008 Report Posted June 11, 2008 Notice I didn't mention brains in my post.....I did however verify that my BFH is in my travel tool box........................................If you substitute the implied "force" for the more polite "get" it in place you will see the resources I'm talking about. Quote
randroid Posted June 12, 2008 Report Posted June 12, 2008 Norm's Coupe, I remember that post; that's what got me to first realize there were such things as hood braces. What I think I'll do, however, is try bending the vertical flange I mentioned in my last post and see how it works. I'll take lots of photos and maybe none of us need hood braces. It's worth a shot. -Randy Quote

Recommended Posts
Join the conversation
You can post now and register later. If you have an account, sign in now to post with your account.