Jims50chrysler Posted December 30, 2007 Report Posted December 30, 2007 Pretty hard to take Pics in the garage but kinda gives an Idea of what I am working on. Jim Quote
daddyo23 Posted December 30, 2007 Report Posted December 30, 2007 Don't feel bad, Jim. You have more of a spare tire well than I do at the moment:o Wayne P. Quote
Joe Flanagan Posted December 30, 2007 Report Posted December 30, 2007 I have the exact same situation with the tire well in my trunk. I'll soon be fabricating a replacement. How are you dealing with yours? Quote
Jims50chrysler Posted December 30, 2007 Author Report Posted December 30, 2007 Well I am thinking about getting rid of the well all together for a couple reasons 1. it is alot easier to get rid of it then rebuild it. 2. It will allow me to relocate the tank and give me room to run dual exhaust on each side of the gas tank. Here is a pic of the left side of the trunk it is going to require some work funny thing is other than a small hole on the drivers floor the floors are in fantastic shape, still has factory paint on most of it and it is shiney. the other pic is of the dreaded steering wheel and (other than where I ripped up the carpet to look at the floor) the usable interior. Quote
Plymouthy Adams Posted December 31, 2007 Report Posted December 31, 2007 Jim pictures of my elimination of the wheel well sent to you PM...including the new pedestal to angle mount the spare Quote
Jims50chrysler Posted December 31, 2007 Author Report Posted December 31, 2007 Got them thanks Tim JIm Quote
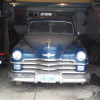
Normspeed Posted December 31, 2007 Report Posted December 31, 2007 Jim, I like the color, are you planning to stay with the blue? Looks like a really nice coupe, I look forward to seeing how it progresses. That dash sure looks nice. Quote
Norm's Coupe Posted December 31, 2007 Report Posted December 31, 2007 Actually, the trunk doesn't look so bad. Nothing a little sheet metal and welder can't fix up in a day or two total working time. Quote
Jims50chrysler Posted December 31, 2007 Author Report Posted December 31, 2007 I am thinking of going with the blue again but it likely won't see good paint untill next year sometime I am just looking to get it on the road for a bit in the summer to get all the bugs worked out then back into the shop for a proper body and paint over next winter. Norm's coupe as I said earlier this car is in fantastic shape and you are right it won't take very long to fix the floors this is alot better than my '46 ford that I had I spent a year just putting in floors including jacking up the body and replacing the rocker boxes then I spent an afternoon putting carpet over them...alot of unappreaciated work under that carpet. Pat S. you have a diffrent rear window, mine has two chrome bars running down them my license plate mounts on the rear bumper the trim and taillights are a bit diffrent and mine has skirts but you are right your car is pretty much the same thing probably alot of parts will interchange.....(hmmm hows your steering wheel? ) Jim Quote
Joe Flanagan Posted December 31, 2007 Report Posted December 31, 2007 What I'm going to do is try and rebuild my wheel well. Been scratching my head over it for the last few days but I think I have a plan. I will post pics. There are some tough shapes in that thing to try and recreate if you're not a sheet metal mechanic with access to shop equipment. Quote
bob westphal Posted January 1, 2008 Report Posted January 1, 2008 My P-15 had the same spare wheel well problem, too. I found and cut out another well in good condition. When i got ready to replace my well, I said Ah, Shucks! I think I'll just glass it and I did. It was a whole lot easier and works great. Never work too hard and you'll live longer to play with old cars!! Quote
Young Ed Posted January 1, 2008 Report Posted January 1, 2008 Its funny how some parts survive on certain cars and other parts don't. My 51 has basically no floors left to the tranny hump. The 1/4 on each side of the trunk opening has a hole you can put your hand through. The spare well is perfect though! Quote
55 Fargo Posted January 1, 2008 Report Posted January 1, 2008 Good drainage and air movement Ed, my rockers and some of the outer floors were rotten, the trunk and spare tire well were pretty good, the area right behind and under the back seat looked like swiss cheese, because there was no back window for 25 years, all the rain and moisture sitting in this area with no where to drain, result=rust and rot. Quote
55 Fargo Posted January 1, 2008 Report Posted January 1, 2008 Joe, can you post a close up pic of this area, so maybe we can suggest a repair procedure. I may have a tire well, would have to cut it out and ship to you from Canada. Would you be interested if it is in good shape..............Fred Quote
55 Fargo Posted January 1, 2008 Report Posted January 1, 2008 Sorry Joe, trudged through knee-deep snow into the backend of my property to my 47 Chrysler partscar, the tire well is not in good enough shape, it's not rusted too bad, just a big crack through it, and a little beat-up.........Fred Joe, can you post a close up pic of this area, so maybe we can suggest a repair procedure. I may have a tire well, would have to cut it out and ship to you from Canada. Would you be interested if it is in good shape..............Fred Quote
55 Fargo Posted January 1, 2008 Report Posted January 1, 2008 Oh heck, that be just extra weight and a place for snow, mud and gravel to collect anyway, and now your feet can stay cooler with the floor breeze Quote
1just4don Posted January 1, 2008 Report Posted January 1, 2008 Looks like the floor or bottom is the BAD part from the pics,of the tire well. How about a strip of nice clean metal cut proper width and just bowed welded into place?? Would it HAVE to be rounded on the edges?? IF so any decent blacksmith could do that in half an hour!! Scrub the rust and debris from the inside and shooter black or what ever color trips your trigger!! Little caulking and I doubt you could even SEE it in there!!(Make SURE any caulking or sealing is 'paintable') OR spray some undercoating on it first Quote
55 Fargo Posted January 1, 2008 Report Posted January 1, 2008 How is this for rockers Ed, my buddy welding in supports and working on rockers. Quote
Young Ed Posted January 1, 2008 Report Posted January 1, 2008 That's bad looking too. I'm going to be quite the welder if I get to all these projects. Quote
mackster Posted January 1, 2008 Report Posted January 1, 2008 You guys are gonna hate me. I cut my floor to put a floor shifter, but I couldn't get it to work with the m6 tip toe shift transmission. so I had to cover it right up. (not completed yet.) but my floor was better than anyother old car I have ever own. Quote
55 Fargo Posted January 1, 2008 Report Posted January 1, 2008 No Big deal, just weld in a plate, mine was in real decent shape too, just surface rusted...........Fred Quote
Plymouthy Adams Posted January 1, 2008 Report Posted January 1, 2008 As Fred says..just weld it up..full perimeter...and with carpet/floor pad in place will not be seeen..if someone jacks up the car and points this out..most jacks go down rather fast with a twist of the wrist... Quote
Jims50chrysler Posted January 2, 2008 Author Report Posted January 2, 2008 That Steering wheel is fantastic Pat S. but I am sure it is out of my price range...I wonder what would be involved in doing it myself?? as far as repair procedures I find it very usefull to manufacture the parts out of cardboard first for example in the wheel well I would make the bottom piece out of cardboard (easy enough) then I would make each side by tracing a garbage can lid or something that would give me the proper radius for the bottom of the spare tire well once I was satisfied with the "fit" I would then manufacture the parts out of steel and weld them together to make the repair panel. another thing that I would check is Princess Auto up here has a selection of trailer fenders perhaps one of these turned upside down might be enough to do the trick. I have used the old cardboard trick lots of times to build very complex pieces I think the toughest parts were the front sections of rocker box for my '46 Ford I had to buy one from Bitchin products then make my template for the other one off of that one, another part was the dog-leg in the bottom of the "A" pillar on the same car that was a tough one but it came out pretty good. Hope something here will help Jim Quote
Joe Flanagan Posted January 2, 2008 Report Posted January 2, 2008 I spent the weekend fabricating a new wheel well for my trunk. I took pictures and will post them later. It turned out really well. To get a clean surface to weld to I had to do a fair amount of blasting. It's tacked in right now and next weekend I'll go back and finish it up. Did a few test patterns until I got the shape right. It wasn't near as difficult as I had anticipated. I used a thin cutoff wheel and made cuts on either side of the bottom of the wheel well. Then I slid a piece of sheet metal through each slot, got under the car, and traced the arc of the wheel on both pieces. Slid them back out, made the cuts, and it was pretty accurate. I noticed I have a thin but soled layer of grease on the underside of the trunk which has totally preserved it against rust. I do have to clean it off because I want to paint the underside, but from the rear axle back, the metal is coated with this stuff and is in good shape. Also evidence of the animals that liked to hang out in the garage where the car used to be stored. When they passed under the differential they left a lot of hair in the grease that's coating the pumpkin. Cats? Opossums? Raccoons? Quote

Recommended Posts
Join the conversation
You can post now and register later. If you have an account, sign in now to post with your account.