


Radarsonwheels
-
Posts
1,232 -
Joined
-
Last visited
-
Days Won
17
Content Type
Links Directory
Profiles
Articles
Forums
Downloads
Store
Gallery
Blogs
Events
Everything posted by Radarsonwheels
-
 It’s supposed to snow later and I am cringing at the salt on the ground in my driveway but it’s better than black ice! The pedestal is finished and tied in to the rear wall of the cab. The under side of the central plate was painted before welding it in. I have to check the fit of the seat frame and see if I want to weld bolts sticking up to use as mounting studs or what. The corners behind the B pillars are not fully welded and I think I might lay a curved rod in one corner to make welding it in easier- there is a 1/8”ish gap there. All in all I really took my time with the fit ups of all the parts and the welding was much easier for it. I still have to tackle the odd openings in the corners around the rear cab reinforcement stampings (bottom pics) and make a filler plate for where I got a little overzealous clearancing the body and cab for the driveshaft. I cut the tombstone shape about four inches too high! Unfortunately this is all the easy part. If you all were wondering what the trans hump and firewall are going to look like I’m right there with ya! I have some ideas but I think I’ll just put it together a piece at a time.
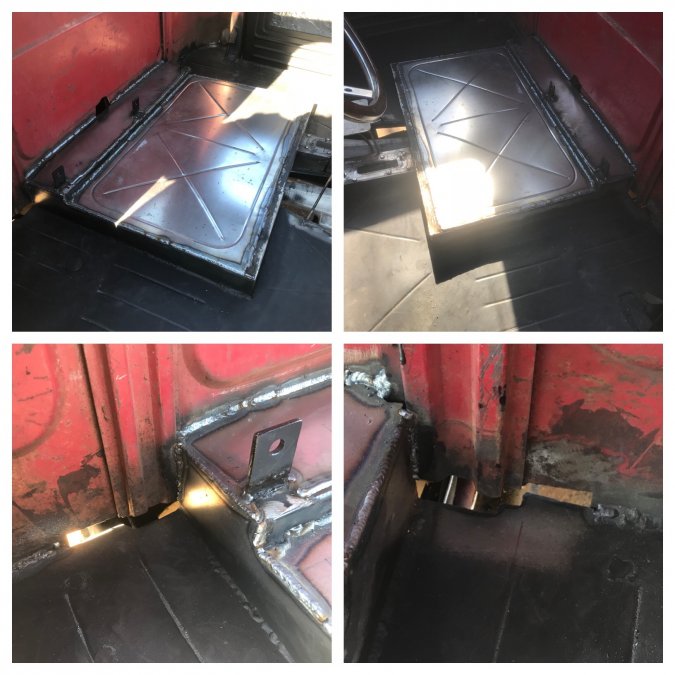
-
Thanks! I meant to get some while I was at the welding supply but I forgot so I got some rustoleum cold galvanize at lowes while I was getting more spraypaint. It’s not the $20/can stuff and definitely not the good copper based stuff. I found it coated really nicely but came off exactly like the stuff on scratch off lotto tickets- a fingernail or coin takes it right off. It also is zinc so I didn’t want to burn and breathe any of it if possible even though I was welding outside. I did try striking an arc thru some of it and it worked OK but not half as good as clean steel. So I ended up using it only around the welds and where is would be sandwiched between the layers of steel. I cleaned most of it off through the holes becore welding. I would use it again for the backs of things like maybe a wheelwell patch on a more modern car that has inner fenders- spots that will be inaccessible for the purpose of painting but murphys law says water will get in. It just doesn’t have the strength to use where it could get scratched off by road debris.
-
Good luck! Hope it’s something inexpensive.
-
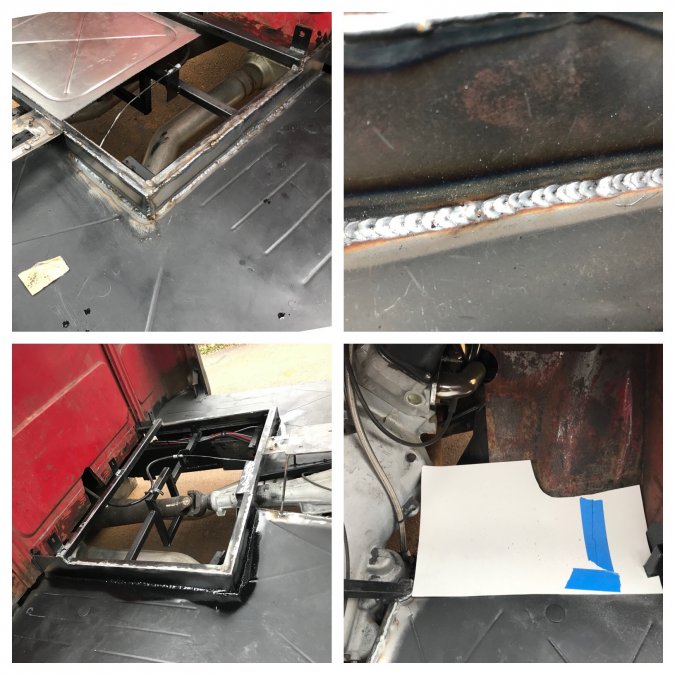
The sides and front of the seat riser are welded in. The upper panel for the back is cut and mostly fit but I ran out of time and had to go open my shop. Supposed to be terrible weather this week... I also got started making a template for the passenger toe board.
-
Here’s a mockup of the seat riser with cardstock filler panels, then the panels cut out of 16g

-
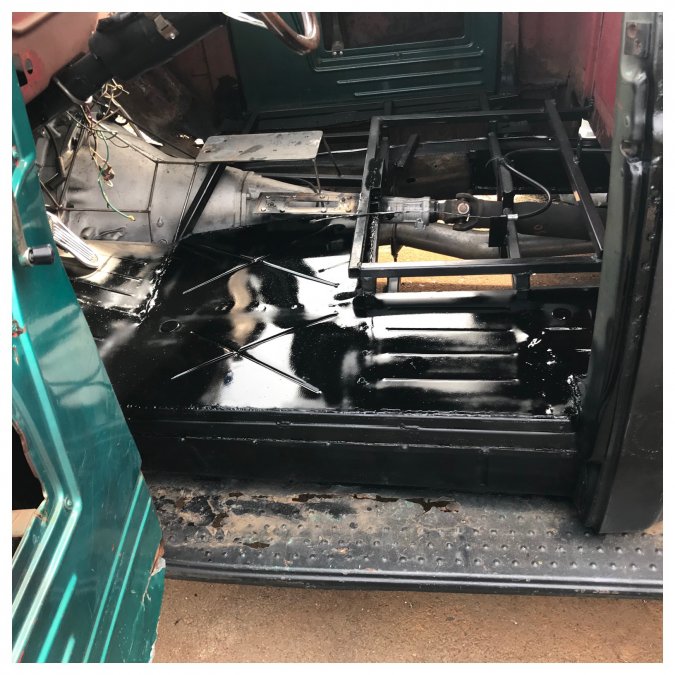
And the passenger side is in and painted now too. Next thrash I get to weld in the top plate for the bench pedestal and start making templates for the passenger toe board, and pedestal sides and back. Inner fenders/splash aprons and the whole tunnel/setback will come after that. I also gave the sparkle green doors a quick spray bomb- I couldn’t take the Christmas decor any more.
-
Sanded and painted to keep the rust gremlins away
-
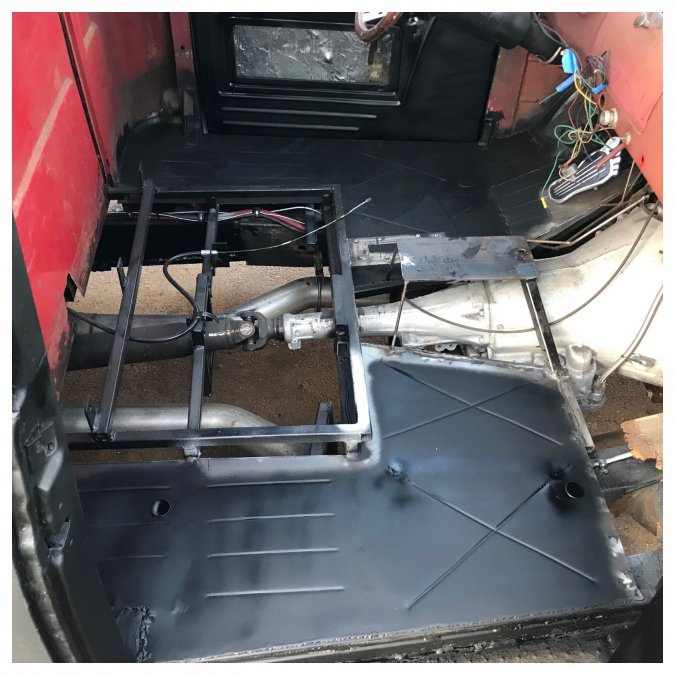
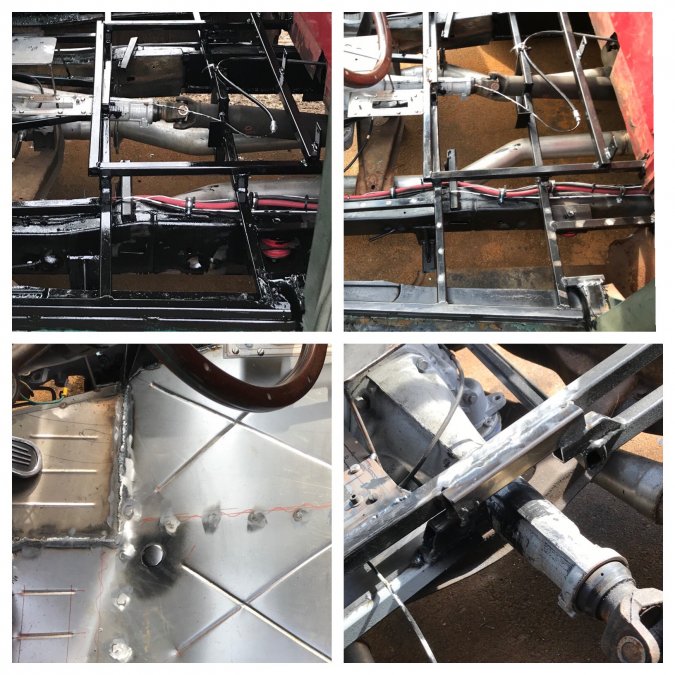
The house across the street is for sale! 2 car attached garage... I got the driver’s side floor in and fully welded except for in the nook where the gas filler used to pierce the cab. It’s kind of a shame- I was just getting super good at taking the pan in and out! I also cut out the cross bar that sits above the transmission tailshaft and re-connected it to the bench pedestal crossbar 1” higher. It had a good 1/2” of clearance in the rear of the bar but because of the slope of the trans it only had 3/16” in the front. I’m running poly motor mounts and a rubber trans mount so it -should- have been fine and not banged around but it only took 30 mins to be sure it never will with access from above and a sawzall.

-
Cabbage Hauler - WD-21 Build Thread
Radarsonwheels replied to Jomani's topic in Mopar Flathead Truck Forum
So clean! That thing is going to be beautiful -
1947 Wd-21 Project Thread
Radarsonwheels replied to hemijosh426's topic in Mopar Flathead Truck Forum
Sure hope so! That is a super cool build -
I snuck an hour in the driveway today. My cab floor frame has been outside and bare metal since june or july or something and was starting to have some surface rust that I sure didn’t want to trap where it could fester when I weld in the floor. I wirebrushed it all pretty clean with a drill then busted out the Por15 and slobbed the whole under floor area and anywhere that will never be seen again unless I remove the cab. I’ll have to reinstall the floor pans, mark where the rosette welds will be, pull the floor, sand the paint off, and hit those spots with weld-thru primer. The peace of mind will be worth it.

-
And it won’t turn? You have oil on it right? Tighten them one at a time to try and find the problem and don’t force it if it isn’t smooth. With no pistons installed it should spin on the muddy side of freely depending on the oil you use. A thou or one and a half doesn’t leave any room for error tightness wise but should last a long time in a stock application?
-
Do you have mics and inside gauges? Definitely figure out if it’s one or all of the bearings causing then problem.
-
Thats a carter?
-
Oh man that brings back memories! I could only find a ball & ball rebuild kit for some kinda 30s military truck or something and ended up making my own gaskets out of cork and leather. It worked ok and restoration is awesome but I gotta say the repop weber from langdon’s stovebolt with electric choke ran perfect like efi.
-
Thanks CO54 I’m glad you’ve been enjoying my addiction to this build and oversharing about it on here. We all know once you drive it around the block for the first time the work is just beginning It’s been a mountain of neverending work- most of it fun or at least satisfying. It’s pretty cool to see the light at the end of the tunnel! Speaking of which, my headlights and front turns need a harness made for them- I used to just run high and low beams both on all the time and the trim rings and mounts are in really rough shape... never. ending.
-
I filled out their options and to get all the good stuff on it but not their most $$ options it was $22,000
-
The only wierd thing is that it wouldn’t be more work to backhalf it and install a fancy front subframe like the rms. Anybody that can afford that chassis is having it put together at a pro shop? The needle bearing uca pivots do sound fancy though and to have it all scienced out to stick that hard in a turn is pretty cool.
-
How to keep running board painted??
Radarsonwheels replied to Dodgeed's topic in Mopar Flathead Truck Forum
Jeez my passenger running board is in decent shape but my driver’s board is swiss cheese by the door. Must have rubbed off the paint there pretty well by the 1960s from getting in & out. Yours is a good problem to have! Maybe powdercoating would be a good solution? -
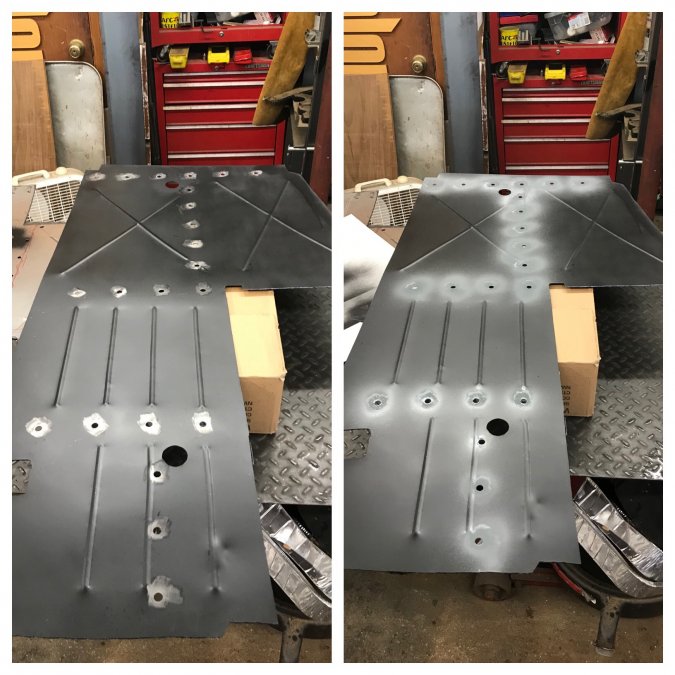
Got the bottoms of the floor pans painted. I wiped them down with acetone, painted them black, sanded around the holes, then painted that raw metal with weld thru primer. I also had to re-up my welding supplies- got 12lbs of .030 wire, a new bottle of shielding gas, and spent like $50 on the deepest reach set of vice grip welding clamps I’ve ever seen. I’ve done the ‘press down with a hammer handle’ thing and even screwed panels in with self tappers then removed them and welded thru each hole instead of clecos, but this should make the job neater since I can use both hands on the torch.
-
I eventually did find some 1 1/4” stainless plugs for a few bucks. Hopefully they fit and last well!
-
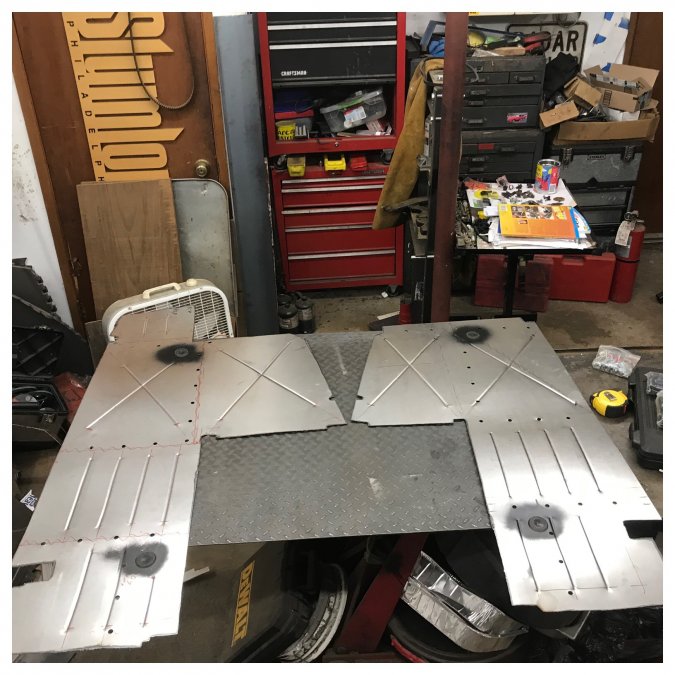
Got the floor frame traced onto the panels in place, removed them, and drilled every 3” for spot welds (rosette welds) I dont want moisture to get inbetween the sheetmetal and frame! I think I’m gonna paint the floor and frame then just clean around the holes and thru them a little bit with a wire wheel. I thought about seam sealing it but it might be better to just let water have somewhere to go so it can dry? For some reason I never messed with weld thru primer maybe I should. edit: After some web browsing and asking around I decided to paint the frame, sand the top clean, and paint that with weld thru primer. I’ll also do a stripe of weld thru under the paint on the bottom of the sheetmetal near the holes.
-
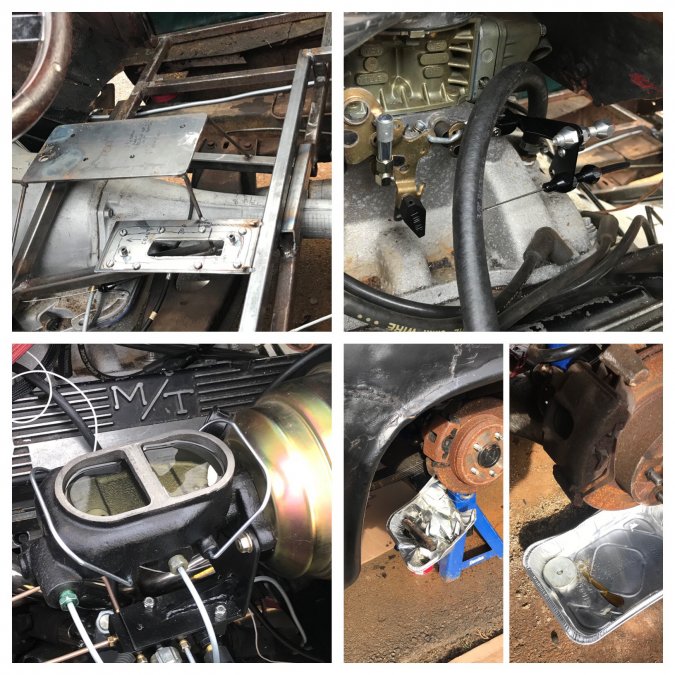
I had some trash behind a copper washer on the front passenger caliper banjo bolt. I pulled it off and cleaned it up with brakleen and scotchbrite, and re- gravity bled that corner. Now the pedal feels decent, won’t go to the floor, and sustained pressure doesn’t make any new puddles. Got the firewall pierced for the throttle cable fitting. Check off the woah, back to work on the go!
-
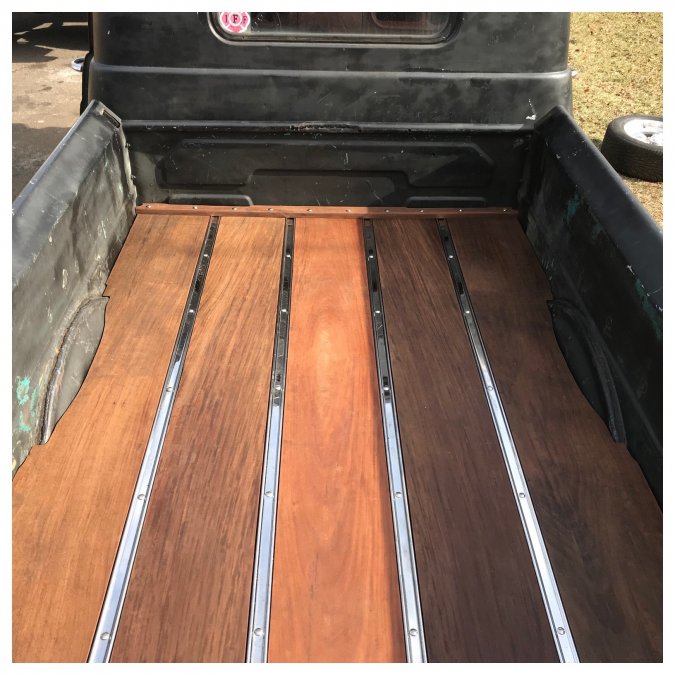
Wednesday is my Saturday and it’s nice out! My buddy came over and helped me tighten down the two front deck mounts and all the nylock nuts on the two central shovel strips that are a two man job since I went with round holes and 1/4-20 stainless machine screws instead of squares and carriage bolts. Now the wood deck is fully mounted and solid. I rolled my front fender lips with a combo of hammering and a neato roller tool. The tires should clear well as long as I go easy over bumps during sharp turns. The parking brake lever mounting plate is tacked in and should work nicely in my console. I got the lokar brackets and cable ends mounted on the carb. The kickdown (or mopar snobs will correctly say ‘throttle pressure’) cable housing needs to be cut down a little to show more inner cable at the carb end and the throttle still needs to pierce the firewall above the pedal before I tune it’s length. Half the fiddly linkage is done though and the trans side got done ‘last year’ haha. I started gravity bleeding the new four wheel disc brakes. Everything is new and empty between the bench bled MC and the calipers which were full of old fluid. I’m re-using the dakota calipers and I mounted the 90’s jeep ZJ discs on my early 70s ramcharger 9.25 rear. The adjustable proportioning valve is wide open to encourage flow. Maybe I’ll get lucky and have a pedal after I close it all up but that almost never happens. At least it will be close and any old fluid thats dirty and or water contaminated is all getting flushed. The dark wood on the passenger side of the bed pic is just in shadow from the afternoon sun.
-
Got some odds & ends done before work. I confirmed that the ends fit my gauges and plumbed the copper oil pressure line and the mechanical speedo cable from the block & trans thru the firewall with nice rubber grommets. I have the carb linkage stuff laid out to do next for the throttle and kickdown.

