Radarsonwheels
-
Posts
1,232 -
Joined
-
Last visited
-
Days Won
17
Content Type
Links Directory
Profiles
Articles
Forums
Downloads
Store
Gallery
Blogs
Events
Everything posted by Radarsonwheels
-
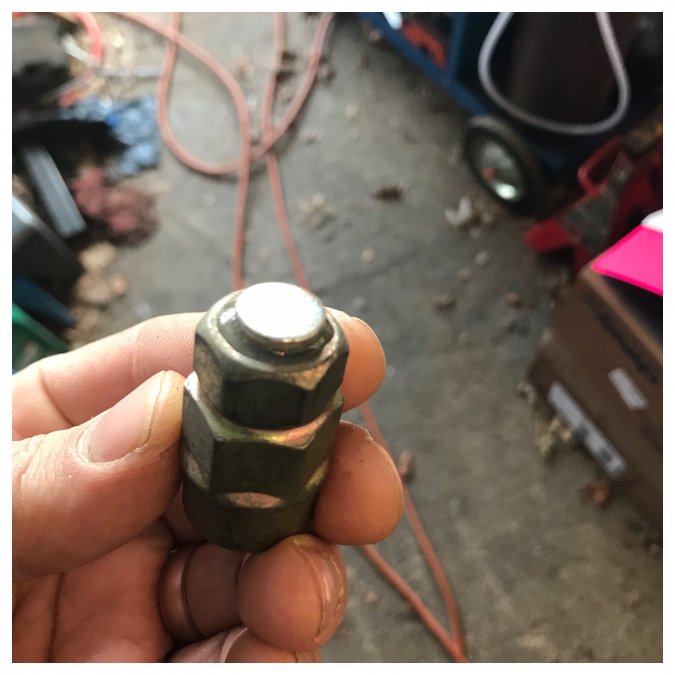
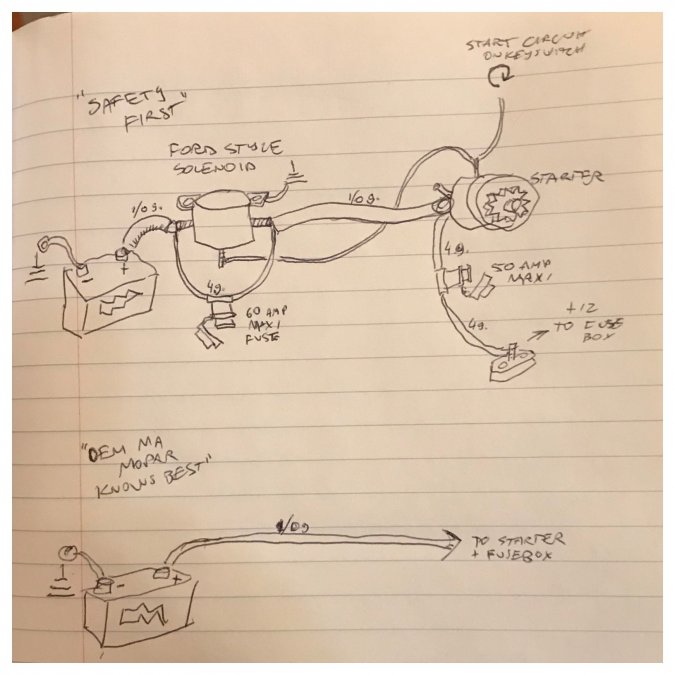
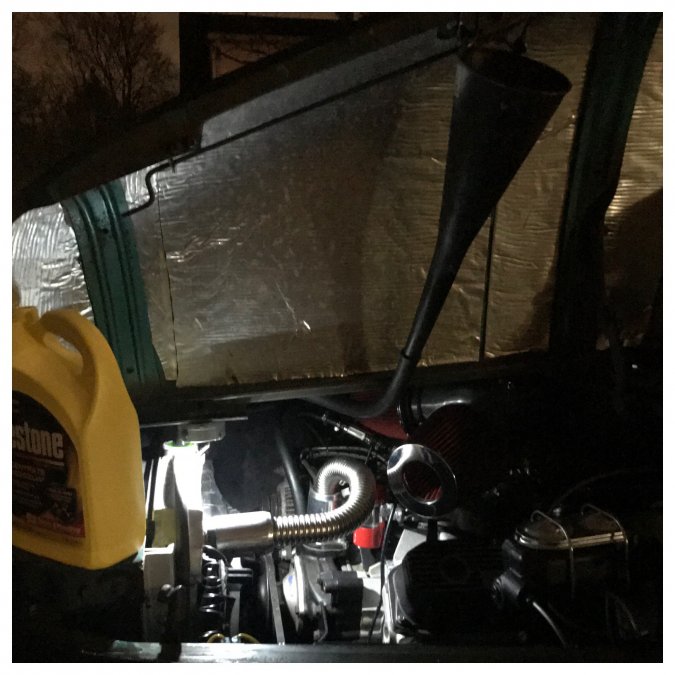
 I tried to bump my starter to get the motor to #1 tdc compression stroke so I can set up my distributor and wires- I also decided to do it the ‘right’ way and clock the slot in the intermediate gear to 12:00/6:00 so the wires will lay right and it will be factory correct. “Tried” because I only got three or four bumps in a row with my hand over the plug hole to feel for the compression stroke before blowing the 150 amp fuse on my 1/0 gauge +12v cable by the battery. And I put it in an awkward spot too. I got it off and now I have to decide between ideas I have to fix it: 1- ‘safety first’ run a ford style starter solenoid near the battery that gets triggered by the starter trigger wire, then connect the two big lugs on the solinoid with a smaller fused circuit. That way it will run through the fuse except for during cranking. 2- ‘oem ma mopar knows best’ run that sucker straight from the battery to the fat lug on the starter. Every oem setup I worked on was like this but usually only a short run of wire. I’m strongly considering this because of its simplicity. I feel ok about it because my fat positive cable runs through a heater hose everywhere it touches the frame then inside a generous amount of rubber lined p-clamps under the cab. It’s not near fuel or able to move or rub. Plus I have that negative disconnect switch I can flip if there’s ever a problem. And it’s already the right length to reach perfectly to the battery. 3- buy a much bigger fuse and hope the starter doesn’t pop that. This would be a good option if I was confident about it but I think there’s a reason I bought a battery with a ton of ‘cold cranking amps’. Also I’m feeling foolish for not just buying 50/50 antifreeze or at least using an empty one to mix 50/50 myself before pouring. After letting it sit overnight the radiator is still brimming and only a tiny bit of that is water. I need to drain a gallon out and replace it with water- from what I’ve read it will not cool well pure a/f concentrate. Or I can just run the motor until it sucks in some coolant and add water them. I was trying to catch up to Farmer who’s already plowing his snow with the bumper of his big block truck but setbacks are the best when you’re already in your own driveway on jackstands not in a ditch somewhere with $11 and no phone. After I restore power the next operation is trying to run all the fans and lights at the same time and see how that goes. I did find a loose connection on the back of the alternator so I’m glad I was poking around there. The charge stud had a burr on it and felt tight but needed another turn to hold the ring terminal tightly. That coulda gotten pretty hot.
-
Yup that’s why I won’t have flowmasters on a daily driver. I bought my 09 challenger 6.1 6 speed used and it came with the stock resonators sitting in the trunk with just the stock mufflers still underneath and straight pipe where the resonators were. It sounds awesome but the drone at 80 in 6th gear is unbearable. Luckily 5th works just fine up there and I stay under 70 most of the time. I had the tti x pipe on my 408 smallblock stroker but it did lose some of the oldschool uneven firing order sound. I want that burble and I feel like this will have more of a powerful low rasp than the screaming revv of a smallblock with 4.10s. I am a mopar or nocar guy but I love the sound of a chevy 454 with 3.55s. I never heard a motor with my specs run- whatever it sounds like I will be a proud papa at least until it gets boring or grates on me. I figured four to six gallons of antifreeze would do it but only got two of concentrate in there before the radiator and hoses filled and it bacame time to wait for the air in the motor to escape through the pinhole in the thermostat.
-
Thanks DJ! I have the full exhaust installed but it’s kind of an ignorant setup- usually the strategy is to neck down as the gasses cool but mine goes from 3” at the block hugger collectors, down and back under the cab to 3.5” for a couple feet then into dual 3.5” flowmaster super 40 mufflers. After the mufflers I have slash cut turn downs so the impulses get that nice sound slapping off the ground and also aimed a little out and at the rear tire contact patch in case I want to do an australian style billowing smoky burnout. I’m definitely not the burnout king though- I’ll powerslide a turn here and there and I’ve been known to chirp a green light or an upshift but tires cost $ I don’t know what it’s going to sound like but in my experience the 2500+rpm for 30 mins flat tappet cam breakin period is loud no matter what pipes you have. The real payoff for me is when that’s over and you get to hear what the idle will sound like and check out the throttle response. I’ve gotten into the habit of doing the initial break in in three ten minute stints with cool downs inbetween but with this cool weather if I don’t have any leaks to address I might just get it overwith in one loud annoying fingers and toes crossed session.
-
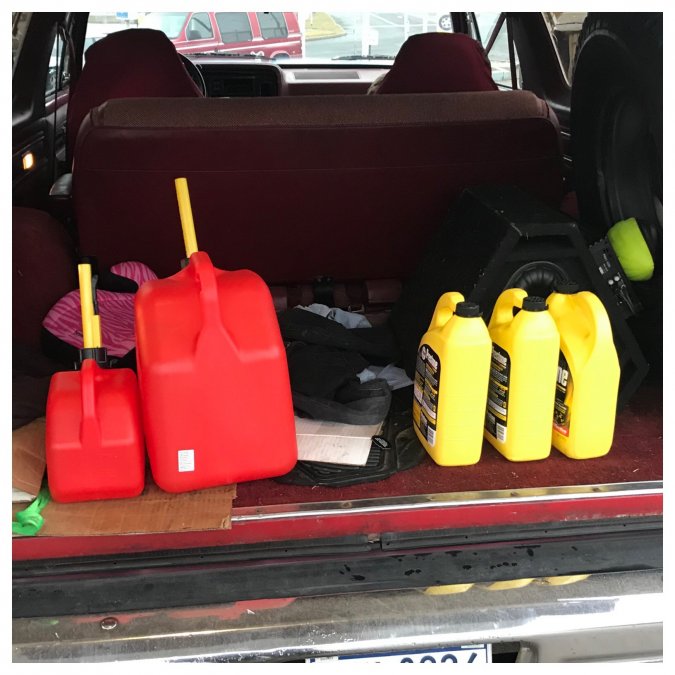
I think I’m going to blow into the gas tank vent line to prime the lines up to the pump- first into my new 1 gallon can so I have some gas around to fill my float bowls then I’ll hook up the line to the pump.
-
Getting close! One gallon didn’t really register on the fuel gauge but six did. It’s not quite a quarter tank on the needle but at least now I know what “time to look for a gas station” looks like. It’s supposed to be a 19 gallon tank. When my buddy owned the truck he added a champion radiator and fabricated really nice aluminum brackets for it but he didn’t pay attention when he ordered the radiator so it has a center fill and drain which make it really fun to fill and drain. No big deal though- how often do you really have to fill or drain the radiator? I need to hook up an overflow jug so it can properly stay full. But it’s still empty now. I couldn’t believe a gallon of concentrate was like $19 but 50/50 premix was $17! I always just bought concentrate and dumped it in followed by filling the empty jug with hose water to get my ratio right. I’m wondering if it will make any difference if I bother to go to the grocery store to get distilled water? I also meant to get some water wetter and forgot. Maybe I’ll put a couple drops of soap in to lower the surface tension but I don’t think additives will be the deciding factor if I end up needing more cooling. I still need a soft line between the mechanical pump and the end of my hardline which comes up into the engine bay over the passenger frame rail. I flared a bubble into the end of the steel line to make it a secure 3/8” hose barb.
-
Ooooooo
-
Roxanne - She don't have to put on the red light.
Radarsonwheels replied to FlashBuddy's topic in Mopar Flathead Truck Forum
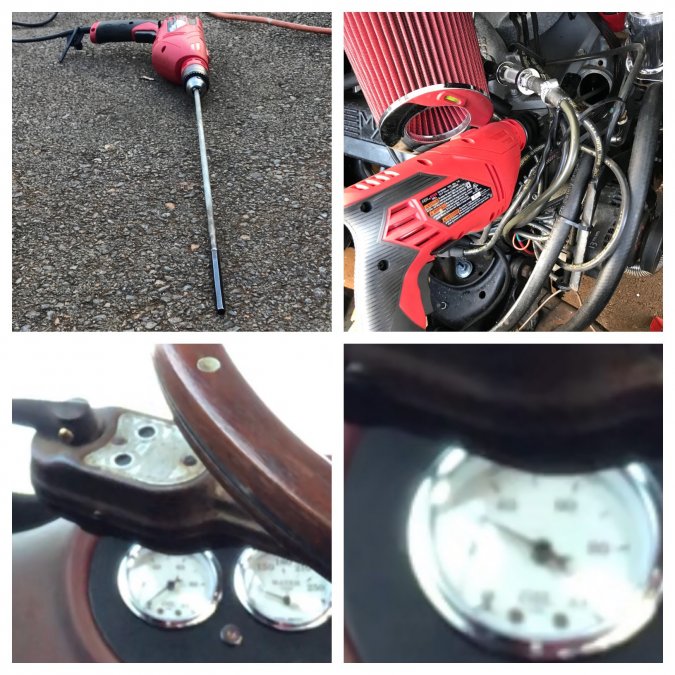
That tach is super cool!! -
Looks sharp. Did you already say what cam you went with?
-
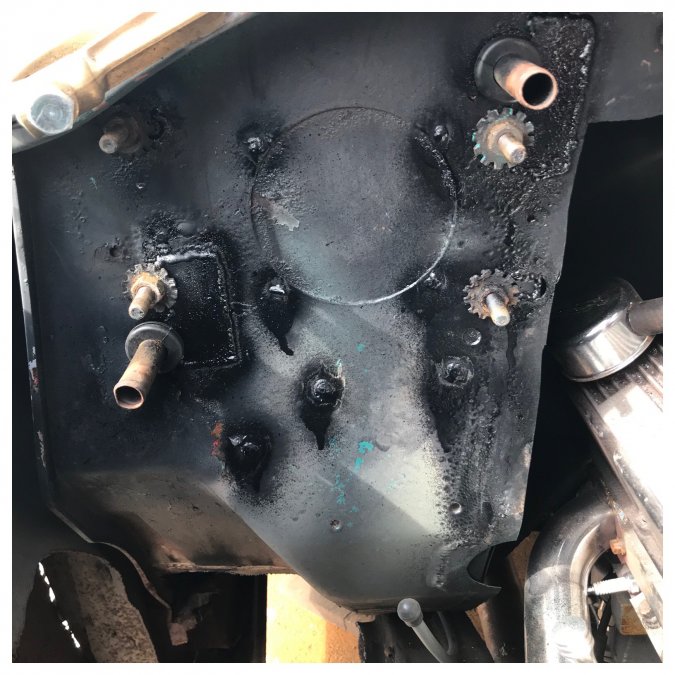
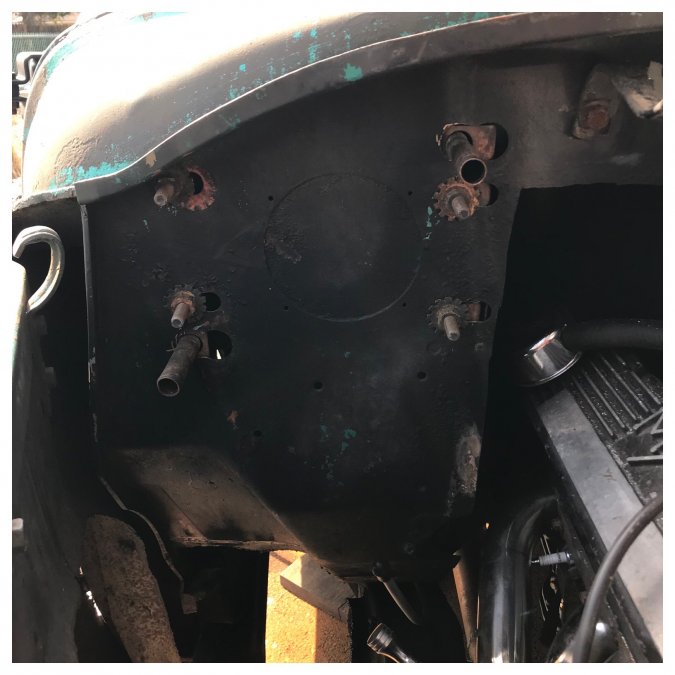
Firewall slots are welded up! The new rubber grommets for the heater nipples got squished tight to the firewall by the hoses. It’s ready to get filled up with antifreeze.
-
Yup, the old tapered grommets are pretty hard. I’m going to use regular style new grommets. All my wires are plenty thick for their loads I just worry about startup spikes blowing fuses. I didn’t try to save weight on pretty much anything in this truck. The only skinny wire carries ohms back from the fuel level sender. I’m confident that my wires are all protected by appropriate fuses. I guess I’ll just try try turning everything on after warmup lights, rad fan, wipers, heat, brakes, turns, see if I pop anything and go from there. I have done relay-overkill before with a big alternator, cibie h2 headlights, dual spal rad fans, electric rear defrost in my 72 demon. It worked great but I feel like the benefit was minimal.
-
I finished wiring the blower fan tonight. I took an ignition ballast resistor and stuck it on the firewall behind the dash. I already installed an on/off/on toggle on the dash fed by its own fuse so I put one wire alone on the ballast and sistered the other to the ballast output. I turned it on and it gave one good hard twist before knocking out all the power in the truck! Troubleshooting my new harness was pretty easy but I’m gonna run it down in case somebody reading sees something I did wrong in terms of my fuses. My remote battery under the bed has a big disconnect switch on the ground side which then goes to a stainless bolt welded to the frame rail. The same rail has another stainless bolt welded in the engine bay where all my harness wires are grounded. The motor cab and box are all wired to the frame too. My 1/0 gauge positive cable has a 150 amp fuse right near the battery in case the wire ever grounds out it won’t start a fire. From there it goes right to the big terminal on my starter. From the starter I have a 4 gauge wire to an insulated remote positive battery post on the driver’s inner fender with a 50 amp maxi fuse inbetween. That post has the constant +12v hot feeds for the fusebox, msd, and the charge wire from the alternator. The constant hot bus on my fusebox feeds my horn relay, brake lights, and keyswitch. After verifying that my brake lights still worked with the cab otherwise dead I found that the 20 amp blade fuse that feeds my keyswitch had popped- killing all my accessory and run circuits. I threw a 30 amp fuse in and it held fine- at least with the lights and fan off... I am not sure what I can get away with here- I have more accessories to deal with than my usual stripped down old car electrics I deal with. I am hoping I can use a 40 amp fuse to feed the key switch and not pop it when my radiator fan, heater, wipers and headlights are all on. Maybe I should throw a relay in there for the radiator fan so it can draw directly from the alternator? I also bought some extra 50 and 60 amp maxi fuses for my remote positive terminal. I could take that fuse out and be ok too but I like it protected. I’ll have to so some research on how much draw I might have.
-
6v heater fan wiring polarity confusion
Radarsonwheels replied to Radarsonwheels's topic in Mopar Flathead Truck Forum
That makes sense. I was worried that it would be possible to hook it up wrong and shorten its life but since it’s already 455 dog years old and I’m hooking it up to double power I guess it’ll be fine or it’ll die and I’ll have to make a 12v unit fit. Thanks -
Howdy fellas I’m stuck on a wierd part of my build. I decided to beat my 6v heater motor to death with 12v before I convert it so I disassembled the box, stripped the rotten cloth off the wires, soldered on new leads, and re-insulated. Before installing the motor I held the wires to the terminals on a small 12v battery so I would know how to wire it. I want it to blow not suck! When I connected it the fan spun clockwise and air blew out the defroster output. Great right? The confusing thing is that when I reversed the polarity the fan still spun clockwise and blew the same!? I never dealt with an electric motor that did that. What gives? Is there a right and wrong way? I didn’t mark the wires since there are only two and I planned to test it to make sure it wasn’t grounded out inside the case. Thanks! scratchin my head, Radar
-
Looks like one more good day of fabrication & metal work and I’ll have the firewall & heater buttoned up. Then the fuel just needs a soft line between the steel tube that comes up under the passenger toe board and the mechanical pump on the block. The carb, filter and tank are already plumbed. Still never picked up antifreeze I’m gonna need some soon and some fresh gas too!
-
No time for metal work but I primed the oil pump. I got oil pressure on the gauge and spun it for a minute to fill up the passages in the block. I had packed the pump with grease so the drill didn’t spin free for long before I felt some resistance from the almost freezing break in oil.
-
I figured it would be a nightmare getting six holes to line up with the heater studs and nipples so I started by slotting the holes outboard until it fit again, put the heater back together and mounted it. The studs can get sealed up with fender washers but I will have to weld patches into the nipple holes to seal up the firewall. There are also a few random bolt holes in the firewall from stock stuff that need filling- maybe the old throttle linkage or something lived there before. Doesn’t matter they gotta go. I re-wired the stock 6v fan and it spins just fine. Curiously it spins the same direction no matter which wire is hot and which is ground- anybody know why or how? Does it matter which I hook up? In the interest of getting on the road I decided to put off doing a restoration and 12v conversion on it. I figure it lasted 65 years so far and it has its own fuse/circuit so the worst thing that happens is I can fix it up later. Gotta go to work- Looks like unless I get home early it will be another whole day’s work finishing the passenger inner fender and firewall but it’s much closer now.
-
The 5/8” wrench drive sparkplug sockets work perfect! Also final torqued up the brake pedal pivot bolt and finished the wideband install and calibration.
-
U-G-L-Y we don’t need no alibi! It was hard to reach/see to get a good weld on the o2 bung but after two passes with the mig it is sealed up ok

-
Yeah!
-
Yup. I just unplug them and thread a big 6 point wrench on there then add heat and sometimes a second wrench hooked to the open end for leverage. If that doesn’t get it usually by then the whole pipe is wrinkling and you’re better off throwing a new length with a new bung but that’s on oem stuff with salt and a million heat cycles. My personal junk gets a little antisieze!
-
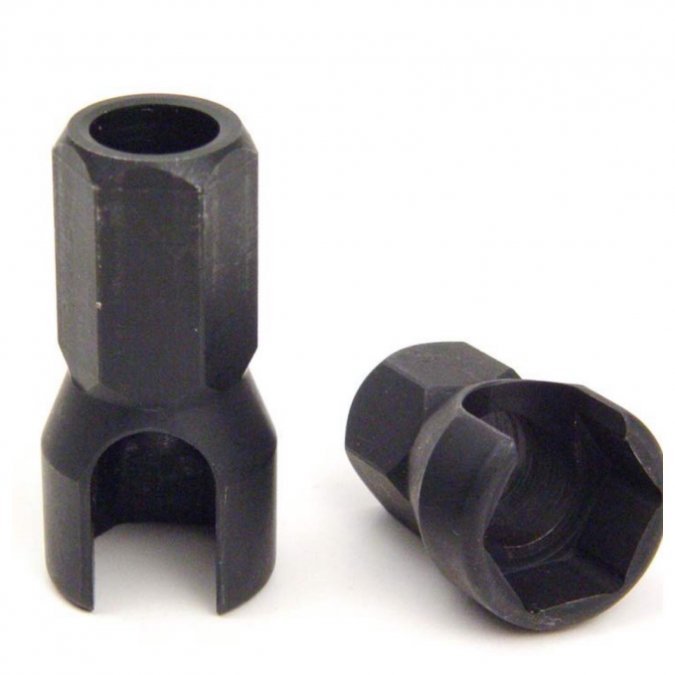
I also got bad news when I went to tighten all the spark plugs in anticipation of first fireup. I first installed them on the bare motor to keep trash & dust out of the cylinders. I checked the plug wires and the boots don’t touch the new headers although it’s close on 1,2,7,&8. What I didn’t check was tool access! A regular 5/8” socket is just too fat on the ratchet end to get past the headers and the plug holes are countersunk into the heads so I can’t get a wrench on them. I was about to start making my own offset stubby wrench out of a slice of socket welded to a handle when my buddy told me about these- should solve my problem without dragging out the torch to ding the headers.
-
Agreed. It is ugly and once the carb is tuned I won’t be looking at it much. They are super helpful for carb tuning though. If I get tired of it I can just make a new plain radio delete panel or maybe someday I’ll fill the holes and paint the dash & interior. For right now I’m focused on clean installations of all the systems on the car and getting this sucker on the road. If I get tuning soon it will still be cold enough out to throw off the tune when spring weather comes! I am still looking pretty hard at the holly sniper throttle body setup but it’s like $1500 said and done so I’m gonna try and make the 950 double pumper work before I get crazy installing efi. If the cold no choke startup and drivability end up being tempermental or too much of a chore I will probably be sticking one of those on there in which case the o2 sensor bung in the exhaust will come in handy.

-
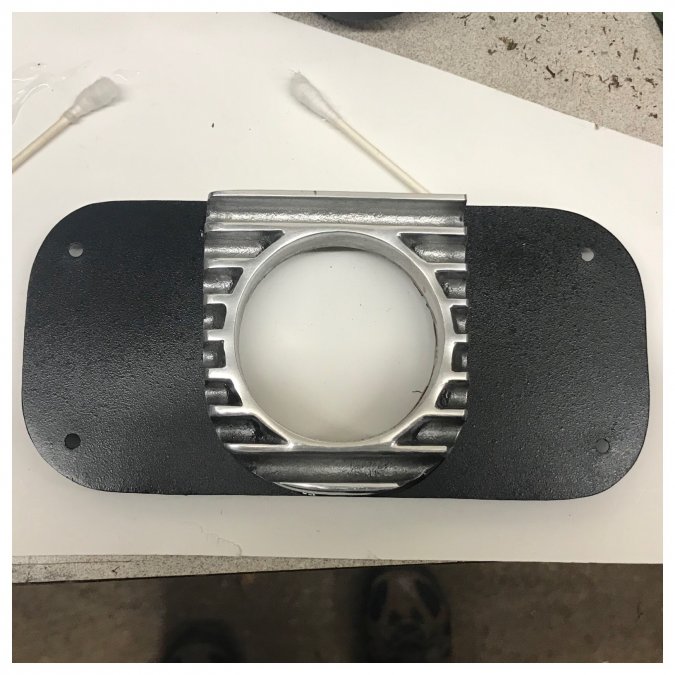
I like that idea. This super post space age digital o2 gauge is getting installed by the same guy that wouldn’t buy any speedo that had a digital odometer instead of rolling mechanical numbers. I just went in the garage and messed around with some parts- I cut a single gauge pod out of the aluminum dual pod I got from mooneyes, made a plate big enough to cover the radio holes with a hole slightly bigger than the gauge hole, and epoxied the aluminum to the steel after I painted it. It’s kinda home made looking but also kind of vintage backyard hotrod? The stock dash panels are also not square they are a little kidney shaped. We’ll see if I still like it in the morning...
-
Not in love with it…

-
Other than the roadtrip I got a couple tiny details done- plumbed the soft lines to the hard lines for the transmission cooler, and roughed up & epoxied one of those crazy strong magnets to the key for the locking lugnuts that came with my used wheels. That way I can tuck it in the cab and it won’t rattle or get lost. Edit: I also installed the heater fan switch and made a paper template for the radio holes in my dash. Gotta figure out how to fill them, add the wideband sensor, and make it stylish. The fanciest answer is to weld them shut, paint the whole dash in bass boat red metalflake, and hide a wideband bracket behind the glovebox door. I’m too greedy to get driving and while ratrod is not my goal it ain’t a show truck. At the same time I don’t want to spend time making it uglier than it is. I’m thinking of somehow making a single gauge pod that covers all the holes. A black sheetmetal plate attached with little screws like the dash panels would match the dash but I am thinking of trying to incorporate the finned mooneyes pod I got and or some more ipe wood for a little hotrod bling and luxury