Radarsonwheels
-
Posts
1,232 -
Joined
-
Last visited
-
Days Won
17
Content Type
Links Directory
Profiles
Articles
Forums
Downloads
Store
Gallery
Blogs
Events
Everything posted by Radarsonwheels
-

Comments for the "Links to Building Threads"
Radarsonwheels replied to 48Dodger's topic in Mopar Flathead Truck Forum
I thought bob was MY uncle? If you’re Bob’s uncle you must be ooold! I guess I lucked out with my build thread title. I post progress and problem solving there and sometimes get helpful nudges. Whenever I really need help or think a topic is for the greater good to explore (so it’s searchable later too) I start a thread just on that like I did for my heater. Hopefully I don’t clutter the place up too bad! Thanks again for having me fellas -
Now I have to install it- I needed five more hands to test fit the thing but it looked like it would still fit. Sometimes between the paper having more flex and losing something in translation from paper to metal the gaps won’t be perfect... fingers crossed edit: I tacked it in on the bottom triangle and up the right side and it’s 3/16” high on the left side. I think I need to put a little cutoff wheel or a carbide burr on the die grinder to cut off the tacks and start over from the firewall to floor corners and work out from the middle. Shouldn’t have gotten in a hurry with my last hour of working time!
-
Made that earlier post and didn’t hit submit! Well now it’s a couple hours later and I’m at work for a bit but I took some pics before I left. The firewall pocket is all cut out, folded, and the seams are welded and sanded clean. I painted the interior (motor side) of it so I can just touch up the seams where the paint burnt off once it’s in.

-
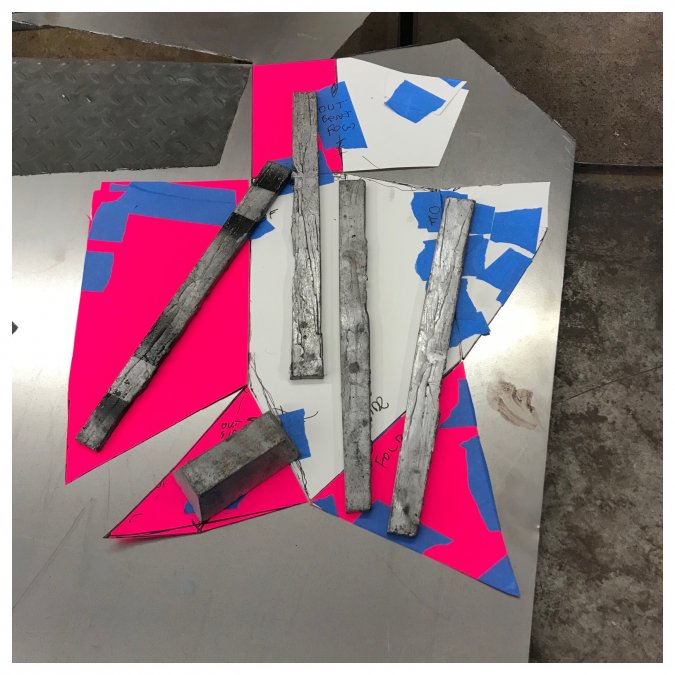
The template for the driver’s side firewall recess looks like a penguin or something! Hopefully I can do it in one piece and weld the folded corners on the bench instead of standing on my head under the dashboard. The other side I did some of that. Gotta get the folds nice and crisp and accurate or it won’t fit!
-
Now I am confused too. Why does the motor care which wire on the distributor is for the #1 sparkplug as long as the wires are put in the proper firing order? The pump is constantly spun whenever the crank spins, as does the rotor in the distributor cap and the cam for the points breaker right? Am I missing something or did I always just get lucky? I never met a motor that wouldn’t fire and time with the rotor aimed at just before the tower for the #1 plug on it’s compression tdc. I can say that on a slant 6 there is only so much adjustment slotted into the distributor hold-down before you need to go underneath to loosen the slotted plate and spin it. On a smallblock LA the distributor is driven with a slot so it can only stab in right or 180 out on a running motor. You can pull the oil pump drive and re-index the slot though just like pulling the whole gear driven distributor in a slant 6. The amount of adjustment on them is 360° but a vacuum can on a stocker can start to get in the way in some positions. On some motors the oil passages to different areas like the top end on some degrees of rotation. Maybe it’s something like that? I have worked on my old 230 but never built one up fresh and not for a few years other than plugs oil and tune-ups. I certainly am not trying to be a know it all or take exception to your doing it the way it was intended by the manufacturer- just throwing ideas out there trying to understand. radar
-
Now I just have to box out this little hole

-
I was gonna go dark green with flecks of yellow mixed in? haha carpet would be really nice but I gotta solve some water leaks before I put in anything that can hold water
-
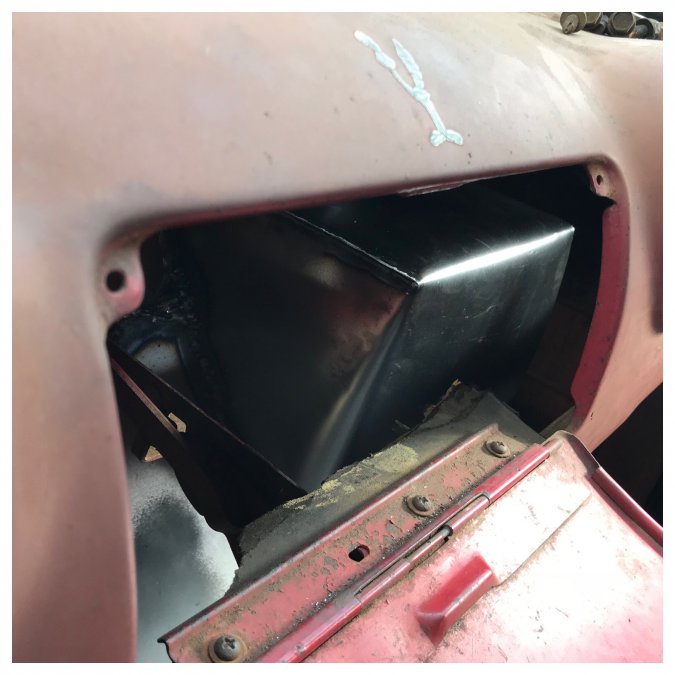
Sent my buddy some pics he said “no more glovebox or passenger footroom huh?” looks worse than it is in that first batch of pics
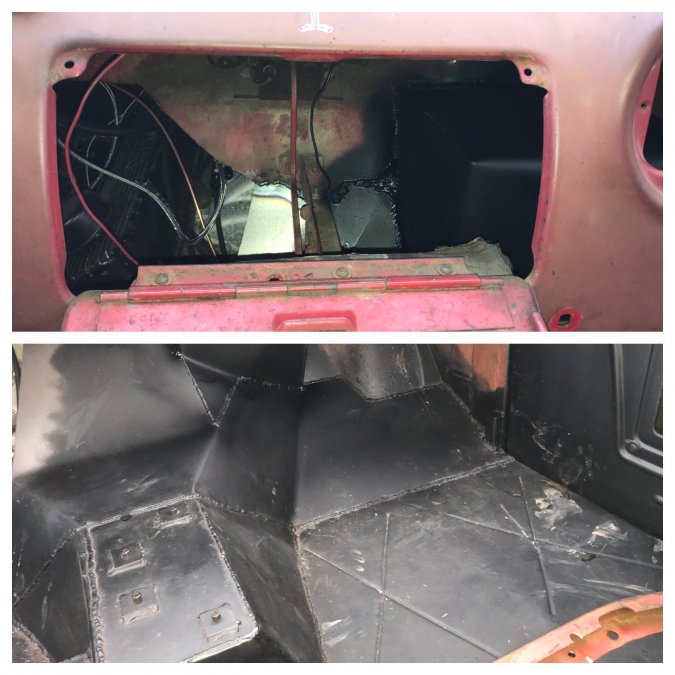
-
That last pic makes it look like behind the dash is stuffed- there is still plenty of dashboard and wiring access for the gauge cluster. The driver’s side will be even better because of the driveline offset.
-
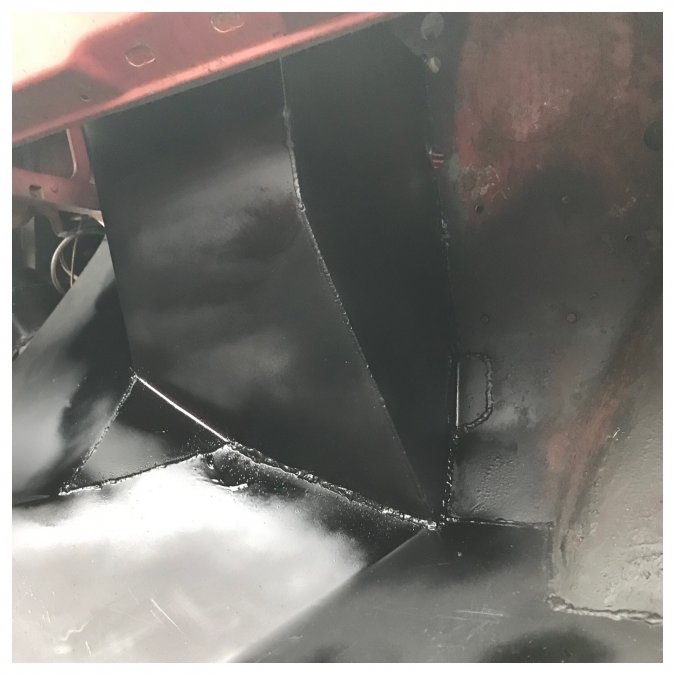
Today I got the passenger side 10” firewall setback patterned, cut out, bent, welded in, and painted black. I got it done in two pieces- the right most side panel coming back off the firewall, and all the rest of it. I’m Psyched! The pictures suck but it basically looks like a giant cartoon big block shape. There is plenty of room to work on the motor and footroom is better than a lot of vans I’ve tried to ride shotgun in with my size 14s.
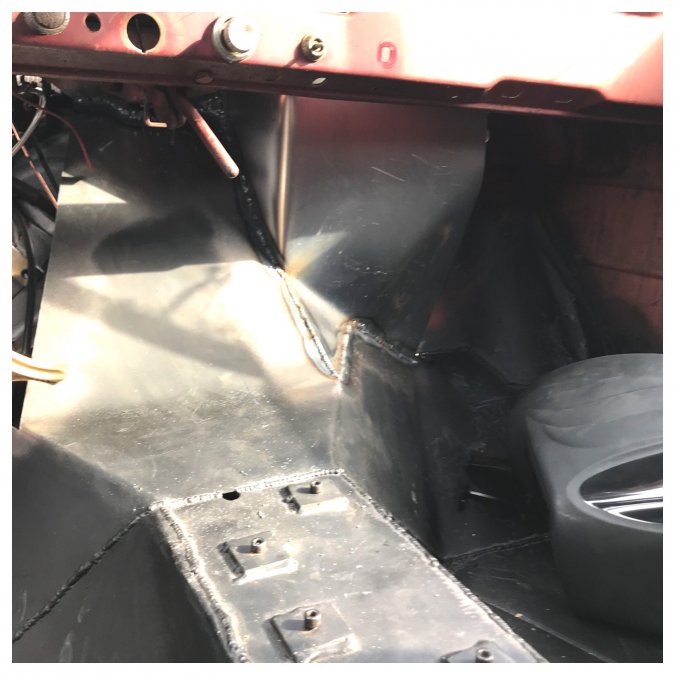
-
Cabbage Hauler - WD-21 Build Thread
Radarsonwheels replied to Jomani's topic in Mopar Flathead Truck Forum
Looks clean and fresh! It’ll be a joy to roll under your frame and so clean you could do it in a tuxedo -
Manifold Stud Replacement
Radarsonwheels replied to Matt Wilson's topic in Mopar Flathead Truck Forum
Yeah breaking studs is my least favorite. I would run a die over the existing studs before trying to pull them. Of course if they wanna come out or are wiggling then that’s different. -
Sound deadening sounds good and definitely makes the ride more luxurious. My thing from riding old harleys was always that as long as everything was tight and nothing rattled or vibrated I don’t mind hearing all the engine noises- sweet music! I’m hoping the new solid floor and bed all polyurethane iso-mounted to the frame will keep the ride solid and only transmit the kind of noises I like. Plus I still get some water through my passenger lower corner windshield gasket when it rains and also somewhere on the driver’s side. Nothing in there can be absorbant and I hated removing the dynamat this summer which I had put in around 2005. I made a new gas pedal tonight that fits much better. I needed it to angle up to 11:00 to match my firewall. The knockoff lokar pedal I had on there angled more like 1:30. The farther to the right I can get the foot controls the better. The barefoot pedal was clamped to the lokar one and did move it over some but it was too big and flirted with touching the brake pedal- not cool. Now that the gas is using my limited space much better I might make a brake pedal that Ls over the the right a little more- the arm swings just left of the steering column and I want to set it up so I can gas/brake without lifting my heel if possible.


-
80 inches (1340) in 1980. Before that it was the 1200 (74”)
-
Yeah they flooded the market with twincams plus the chopper tv craze is over nobody wants bikes any more but they’re still not making any more 1948 springer hardtail panheads- the dreamiest bike ever short of a vincent black shadow.
-
I had a bone stock first year fatboy for a little while and currently drive an ‘09 road king classic. Hell of a machine, pretty, fast, reliable, I’d trade it for a stock panhead in a second
-
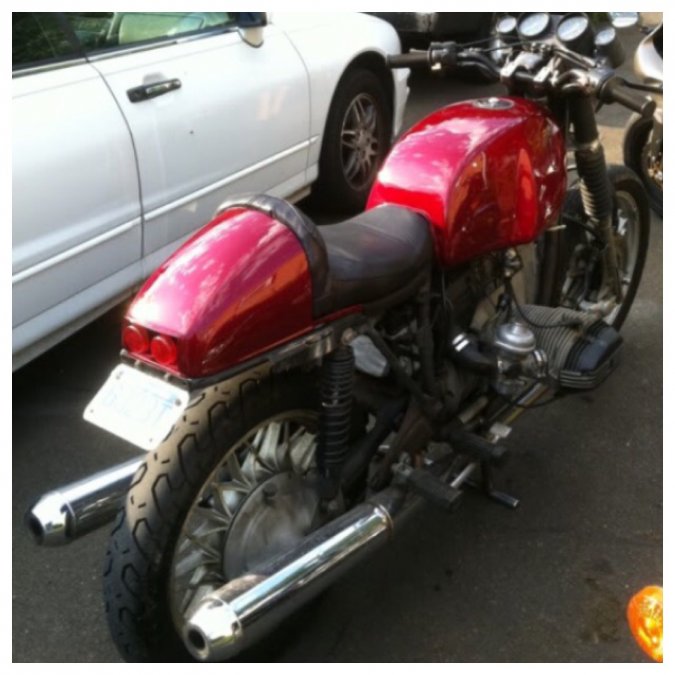
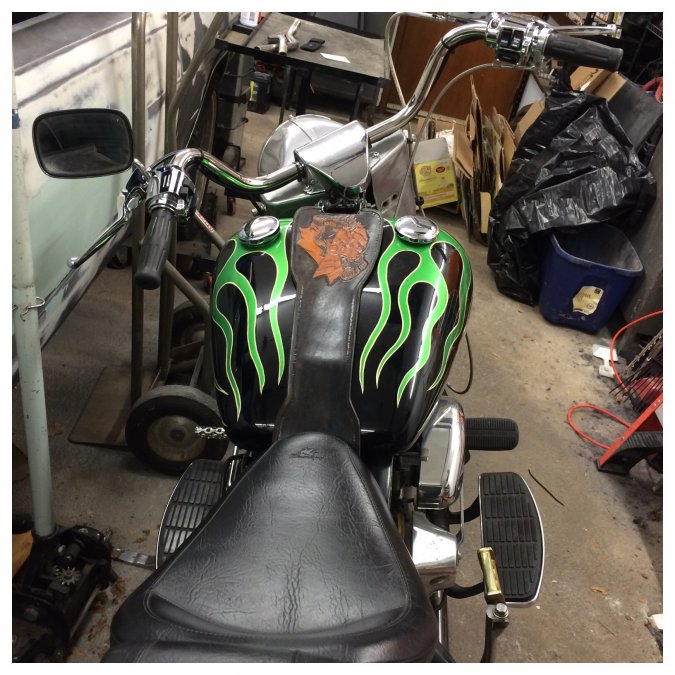
77 Triumph 750cc jubilee hardtail chopper with a 90s sportbike front end (awesome brakes) 79 r100 1000cc bmw cafe. I made the tail out of a honda tank and some trailer lenses. 1980 1340 shovelhead with 3” open primary, jockey shift, ported dual plug heads, 9.5:1 pistons, A grind cam, sportbike brakes, 2000+ bars controls and running boards, softail tanks. 1991 1340 evo softail custom I bought wrecked and rebuilt then got T-boned on the day after this pic
-
Here’s a few I built frame up


-
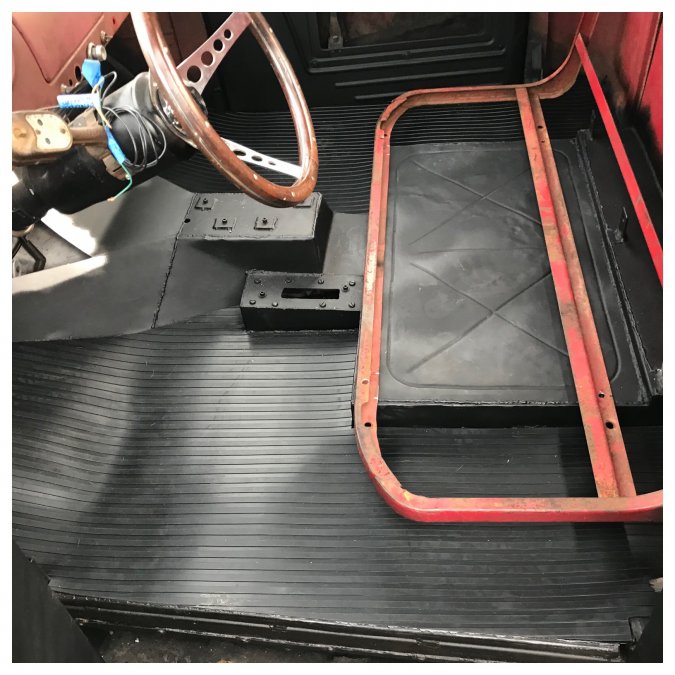
I cut out the rubber floor today. I think I will smooth the welds on the console and leave the rest under the rubber. It isn’t all perfect and beautiful but there aren’t any bad boogers or holes. I gotta work on sinking my tacks in better so I can run over them without a bump.

-
Lets see pic of your trucks
Radarsonwheels replied to Ken_Hart's topic in Mopar Flathead Truck Forum
Judging by the few unmolested unfaded spots of paint on my truck it was originally this color or real close to it. Wow yours looks great! Gotta park next to Bisquik for that ketchup and mustard shot -
Lets see pic of your trucks
Radarsonwheels replied to Ken_Hart's topic in Mopar Flathead Truck Forum
Work in progress- my supervisor is in the one shot!
-
Connecting Rod-to-Bushing Interference Fit
Radarsonwheels replied to Matt Wilson's topic in Mopar Flathead Truck Forum
I’ve measured clearance a ton of times but for most of the hotrods and rebuilds I messed with new high quality rods were cheap insurance. So they came already bushed for piston pins. in my opinion there is nothing wrong with doing what you’re saying on an old forklift motor- it’s not going to throw off the balance at 12,000 rpm! My 230 almost never saw north of 3500. Besides what’s cooler than making the stuff you already have keep working! By this chart I google-fu’d you’d probably be safe inbetween 1/2 a thou and 2 which sounds right to me? I know more like .003 and you’ll have a hell of a time trying to get it in there. Chart: Class V Locational Interferance Fit Tolerance Chart for Holes and Bolts per McDonald Douglas Design Guide "Machining Tolerances". Units given in inches Locational interference fits are used where accuracy of location is of prime importance, and for parts requiring rigidity and alignment with no special requirements for bore pressure. Such fits are not intended for parts designed to transmit frictional loads from one part to another by virtue of the tightness of fit. Class V Locational Interference Tolerance Chart for Holes and Bolts Basic Diameter Hole Diameter Shaft Diameter Interference Maximum Minimum .125 .1240 .1248 .1254 .1250 .0014 .0002 .156 .1562 .1570 .1576 .1572 .0014 .0002 .188 .1875 .1883 .1889 .1885 .0014 .0002 .213 .2188 .2196 .2202 .2198 .0014 .0002 .250 .2500 .2508 .2514 .2510 .0014 .0002 .281 .2812 .2820 .2828 .2823 .0016 .0003 .312 .3125 .3133 .3141 .3136 .0016 .0003 .344 .3438 .3446 .3454 .3449 .0016 .0003 .375 .3750 .3758 .3766 .3761 .0016 .0003 .406 .4062 .4070 .4078 .4073 .0016 .0003 .438 .4375 .4383 .4391 .4386 .0016 .0003 .469 .4688 .4796 .4704 .4699 .0016 .0003 .500 .5000 .5008 .5018 .5011 .0016 .0003 .562 .5625 .5634 .5643 .5637 .0018 .0003 .625 .6250 .6259 .6268 .6262 .0018 .0003 .688 .6875 .6884 .6893 .6887 .0018 .0003 .750 .7500 .7509 .7518 .7512 .0018 .0003 .812 .8125 .8134 .8145 .8138 .0020 .0004 .875 .8750 .8759 .8770 .8763 .0020 .0004 .938 .9375 .9384 .9395 .9388 .0020 .0004 1.000 1.0000 1.0009 1.0020 1.0013 .0020 .0004 1.125 1.1250 1.1260 1.1273 1.1265 .0023 .0005 1.250 1.2500 1.2510 1.2523 1.2515 .0023 .0005 1.375 1.3750 1.3760 1.3773 1.3765 .0023 .0005 1.500 1.5000 1.5010 1.5023 1.5015 .0023 .0005 1.625 1.6250 1.6260 1.6275 1.6266 .0025 -
The Phoenix is awakening / B3B Rises from the Ashes
Radarsonwheels replied to pflaming's topic in Mopar Flathead Truck Forum
Oh no! Even six years ago that hurts to see -
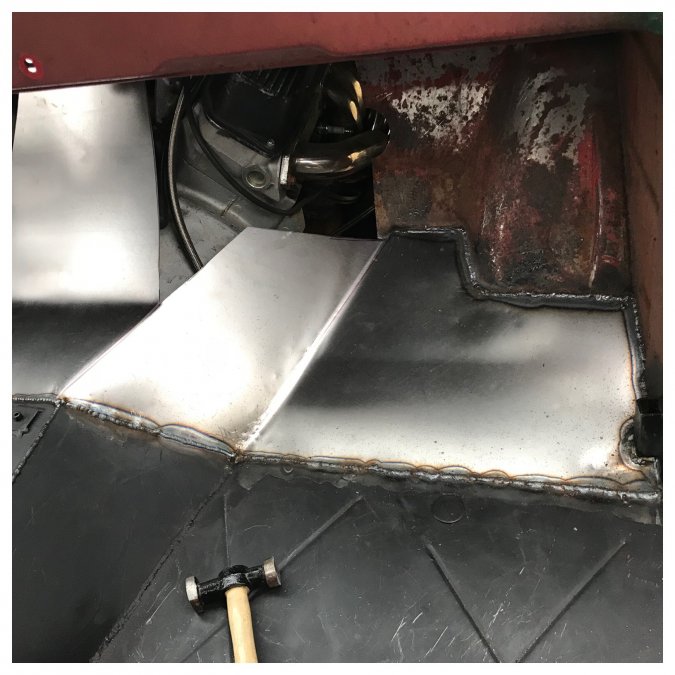
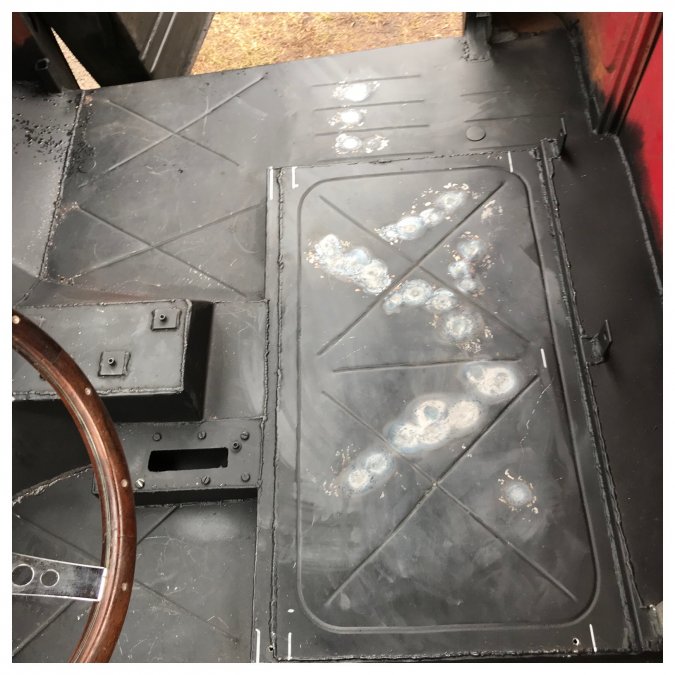
Today I heat shrunk some spots in the floor that had oil cans. Now it’s nice and solid even under the bench.
-
I got the passenger floor and transmission hump done today. The hump swoops up into the central stub of firewall that I left which holds the front of the cowl vent. I was able to do all that with one big piece but the complexity of the remaining firewall was messing with me because of the floppyness of the poster board. I wasn’t confident it would work out so I decided to get the first piece of steel installed then start over on paper templates. Sure would be nice to have a real brake to fold this all up but clamped steel works ok. I also drilled and tapped my seat pedestal and seat frame for four new bolts so when the time comes I can just bolt that in. I still have to extend the tabs on the top of the seat frame a little- my fresh stuffed upholstery makes the seat back ride a touch higher than stock. My rubber floor is here and has been sitting out to remove its curl for a couple days. Fitting it will be interesting since it has vertical ribs and the cab narrows toward the front. I think it will look best parallel to the truck’s center line even though the ribs will not follow the door openings.