Phil363
-
Posts
127 -
Joined
-
Last visited
-
Days Won
1
Everything posted by Phil363
-
is a 1952 dodge truck a positive ground?
Phil363 replied to hernk1's topic in Mopar Flathead Truck Forum
I have a 1952 Dodge B-3-B and it is a 6 volt positive ground electrical system. Look for the red data plates on the starter and generator. If it is red it is a 6 volt system. My battery positive terminal is grounded to the top of the transmission and negative cable is routed to the starter. I believe that a green data plate indicates a 12 volt system. Phil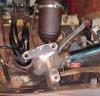
-
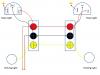
I will be using this one for the Signal Stat switch wiring when I put my truck back together and install new turn signals. All of my wires from the switch on my Signal Stat 700 on the colum were just cut off and hanging below my dash.
-
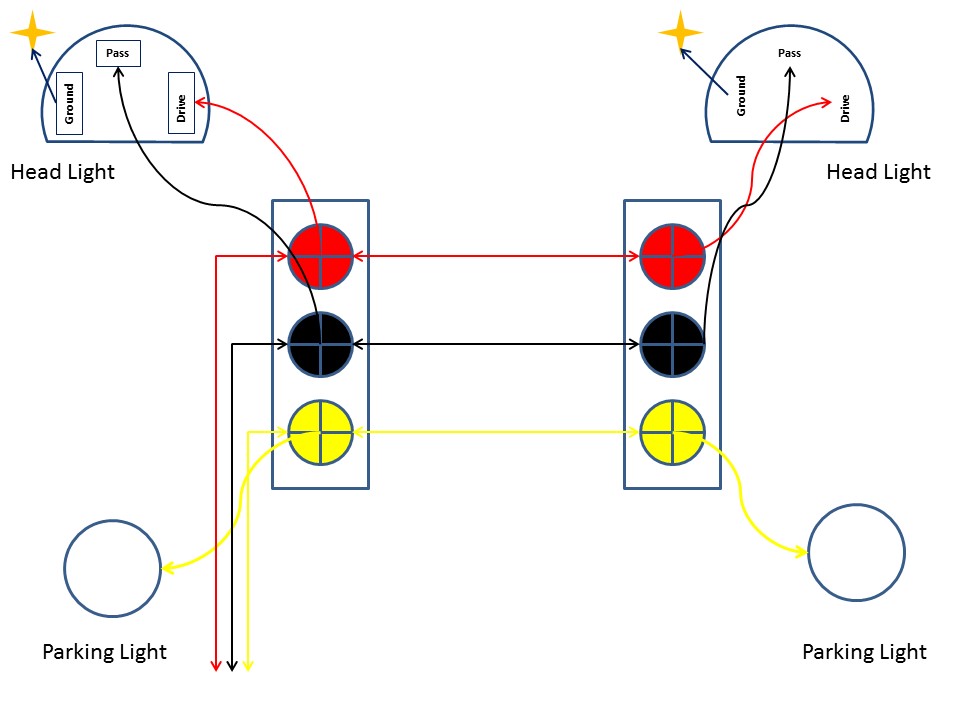
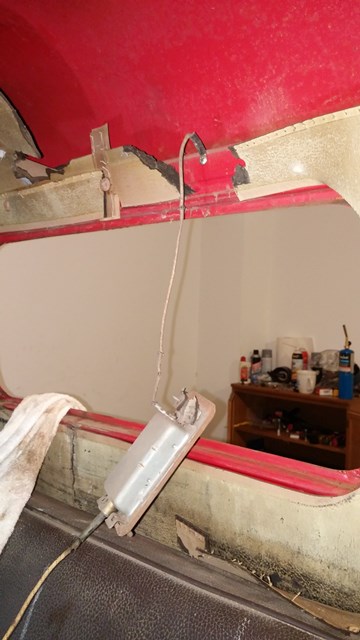
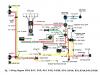
I thought I took high quality photos of everything during my tear down phase for my B-3-B .. until I went looking for a photo showing the location of the light you are looking for. There was one grounding wire that went to the cab frame above the window (see pflaming's 1st photo on the left above and the smallest hole just right of center of the window was were my grounding wire was attached to) and the light itself clips into the headliner on one side and is held in place on the other side with two small screws / clips in the headliner as well. Update 19 May; Just removed my truck photo I had of the cab showing the Dome light mounting location since I put the link to Keven's great photo below. I also just added the grounding wire location photo for my truck as well. The wire for power ran over the driver's door and down the A pillar to the headlight switch. My B-3 Shop manual has the wiring diagram for our series truck on page 198-Electrical system ... I saved it from PDF to jpeg format and color coded the wires ... will go hunt for it and upload here later as an update / edit. I did this after seeing several other members work for their series vehicle electrical system. Slide two is just something I made up to keep the terminal block connection points for the front headlights and parking lights straight in my head. You can clearly see where the courtesy / Dome Light connects to the light switch in the diagram. PS: final update; just added a black and white original electrical diagram as it is easier to see the specific connection points on the light switch for the wires. You can see B-1B Keven's photo which pretty much matches our B-3-B location for the dome light embedded in the headliner at this link (just searched the truck forum with "Dome Light" as a search term ... http://p15-d24.com/topic/29998-dome-light-placement1952-dodge-b3/?hl=%2Bdome+%2Blight Phil


-
Video of a 1950s drive-in......lots of cars........
Phil363 replied to BobT-47P15's topic in Off Topic (OT)
That will be an extra 10 Cents please for that milkshake instead of the coffee .... your right .. back then a milkshake was a given selection -
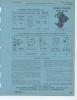
That is one nice looking B&B carb Your 1st photo has the model number which is DTB3R. Rebuild kits are easy to purchase from a couple of the vendors that advertise on the forum. Just use the model number when selecting the correct rebuild kit for your vehicle. I personally just keep an extra gasket on hand for the carb incase I need to go in an do any maintenance to either the float or jet area. I attached a page showing that this model carb was used on some earlier Dodge Truck models. Some of the more experienced forum members may be able to tell you more about this exact model.
-
Video of a 1950s drive-in......lots of cars........
Phil363 replied to BobT-47P15's topic in Off Topic (OT)
Lots of interesting vehicles driving in and by the old drive in. Now if we could still get a Coffee, Cheeseburger with fries for 45cents plus tax -
First ... wish I lived in CA ... you guys have a lot of the old pilothouses out there. Kansas .. not so much. BLUF: I think Brent's $$ number is right on track for a fair value. I use the Old Car Price guide when I look at the fair value of trucks. The current edition of the the Old Car Report Guide that came out last March shows the following for a DODGE 1950-52 1/2-Ton, 108" wb. I tried to read the Serial number in the photo in post #4 but could not make it out. Pickup (PU) CAT 6: $840 CAT 5: $2,520 CAT 4: $4,200 CAT 3: $9,450 CAT 2: $14,700 CAT 1: $21,000 4) GOOD: A drivable vehicle needing no, or only minor work to be functional. Also, a deteriorated restoration or a poor amateur restoration. All components may need restoration to be “excellent,” but the vehicle is mostly usable “as is.” This is a driver. It may be in the process of restoration or its owner may have big plans, but even from 20 feet away, there is no doubt that it needs a lot of help. 5) RESTORABLE: Needs complete restoration of body, chassis and interior. May or may not be running, but isn’t weathered, wrecked and/or stripped to the point of being useful only for parts. This car needs everything. It may not be operable, but it is essentially all there and has only minor surface rust, if any rust at all. While presenting a real challenge to the restorer, it won’t have him doing a lot of chasing for missing parts. 6) PARTS CAR: May or may not be running, but is weathered, wrecked and/or stripped to the point of being useful primarily for parts. This is an incomplete or greatly deteriorated, perhaps rusty vehicle that has value only as a parts donor for other restoration projects. With the cab floor being rusted out as much as mine was I think this vehicle is greater than a 5 but not a 6. The lichens just add character to the truck but they will clean off nicely and floors can be repaird I have seen a perfect SS grill offered on E-bay for a $1000 just by itself ... this set needs some work to clean it up and take a one or two dings out. Phil
-
Great video that is really well made and has given even more ideas for my rebuild. Truly enjoyed it a lot ... as I did the laundry tonight
-
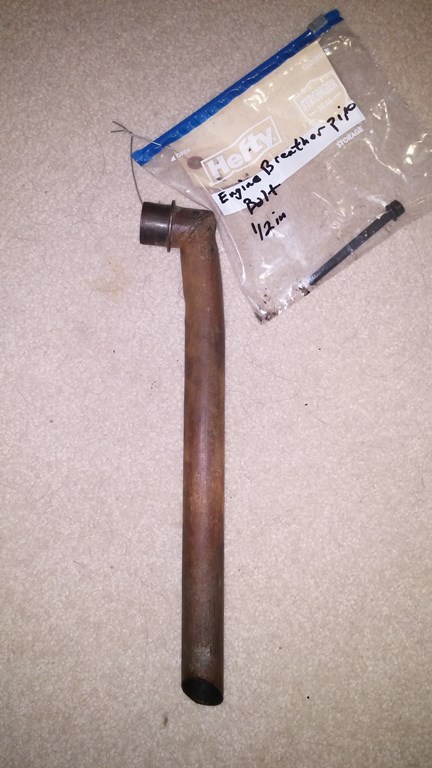
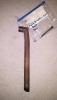
Do you have the shop guide and parts manuel for your vehicle? My shop guide for my vehicle shows the following dimensions for my breather pipe: Bolt, 5/16"-18 x 3 1/2". So on my vehicle the bolt head is 1/2in ... the thread diameter is 5/16in" the thread size is 18 and it is 3 1/2 in long. There is also a gasket for this pipe according to the parts manuel .. but mine was missing On some later model truck engines the thread size is 24 and the overall bolt length is 4 inches
-
In my 52 Dodge B-3-B shop guide it is called a crankcase breather pipe ... and does what Mark and one other says here tonight. Without one the only impact you will have is oil sludge running down the side or your engine from the opening in the block as far as I know. Included a photo .. the pipe actually extends down to almost even with the bottom of my oil pan on my truck 218 ci engine. Note quick update: ... your eBay item is a crankcase breather tube for a flathead engine ... but not sure if it is the correct one for your make / year / vehicle ....
-
That is some well spent vacation time!!! I hope my chassis looks as great as yours does when I get to this stage.
-
4th Annual "International Work On Your Truck Day"...
Phil363 replied to 48Dodger's topic in Mopar Flathead Truck Forum
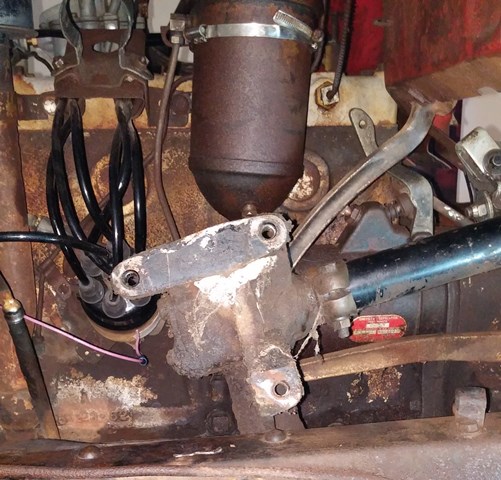
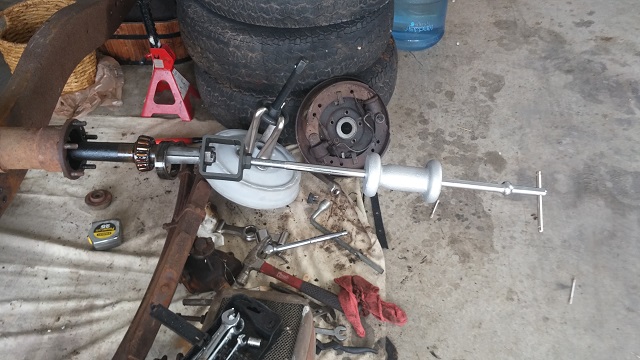
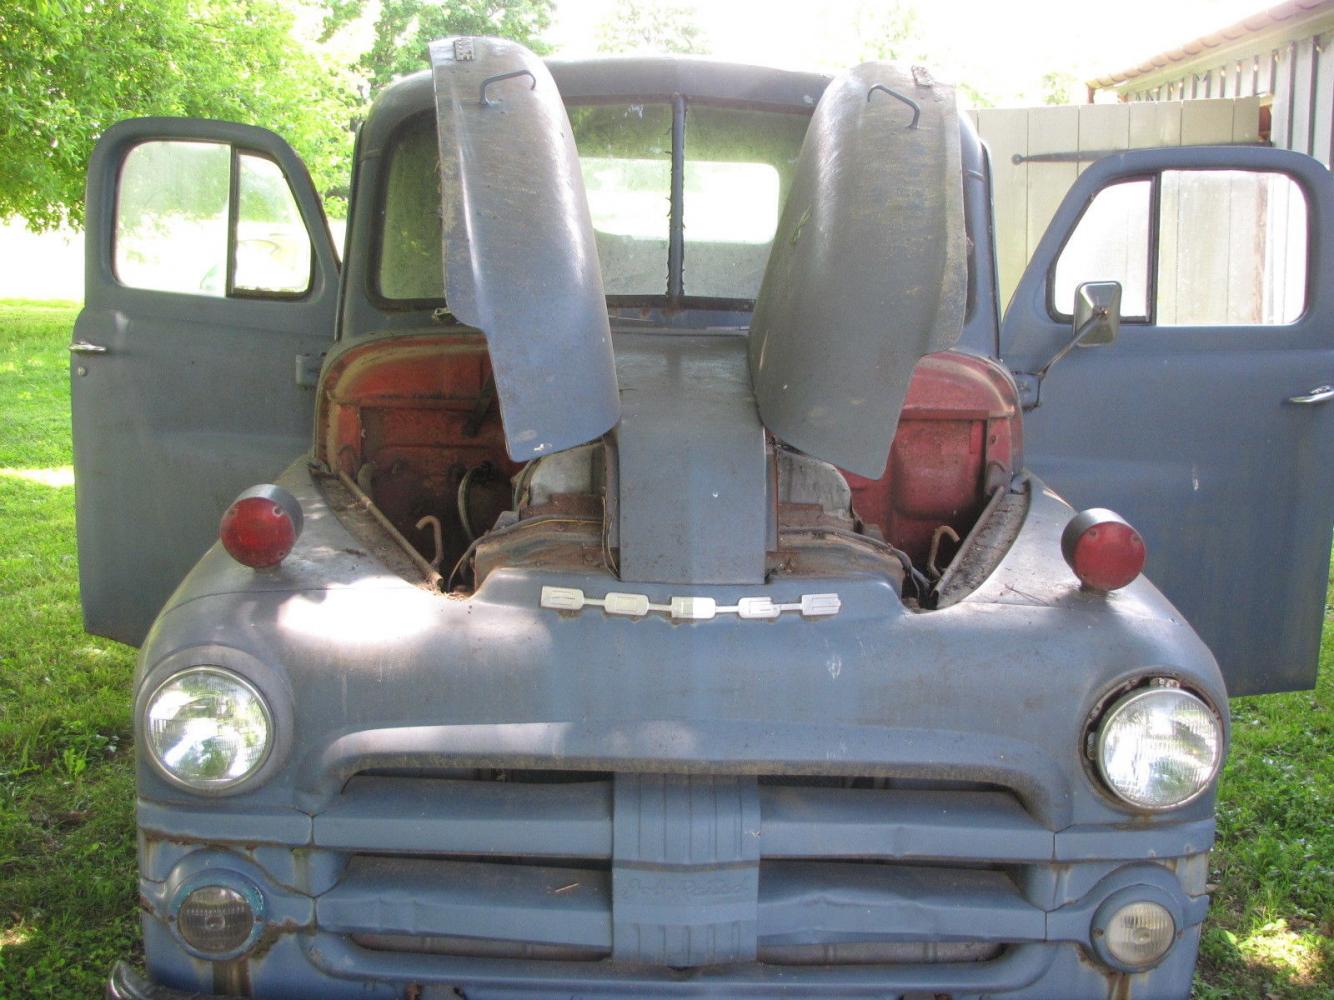
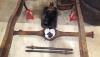
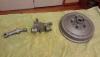
I recently rebuilt my donor 3.73 differential and replaced both differential bearing cone and rollers with new differential bearing cups as well. At which point I just needed one more item which came in the mail today which was the new pinion oil bearing seal. What has also been holding me up and putting it all back together for weeks was removing the drive pinion companion yoke from my original 4.11 differential. I did not have a tool designed to remove it. The local auto craft shops did not carry anything to remove it. The auto craft shop on the local military base I use has every type of puller you can think of ... except what I needed. Did not feel like buying what I needed for a one time use .... So today ... I pulled out my all purpose puller (LOL) I am sure it was not designed for this. But as you can see in the attached photo ... it did attach just fine using opposing points on the Pinion Yoke. After a short time, and the help of a spare socket, it came off. Will sandblast and paint it tomorrow and reassemble the differential after reading the Dodge truck shop manual and of course checking several of the topics I followed that mentioned tips when working on them as well. Working on this old Dodge one piece at a time is just so much fun which is why I do it. As to why a Dodge pilothouse ... I just love the very distinct look that they have ... especially the engine hood and the spacious engine compartment.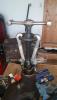
-
The Phoenix is awakening / B3B Rises from the Ashes
Phil363 replied to pflaming's topic in Mopar Flathead Truck Forum
I tend to read the forum(s) more for information on how to best repair a part like .. brakes, engine, transmission or electronics so far in my project .. not so much about painting or color selection. However, I have to admit though the Phoenix’s final appearance locked in under clear coat will be rather unique. With its history and survival written in each burned in swirl of color .... well I would probably not try to rewrite history in this case either -
I have made extensive use of other forum members lessons learned here. Totally agree on that "1" photo that has turned on the light for me. In fact .... I tend to look at photos first then read the post. When I still need help other members have been very helpful via the PM feature.
-
Thanks for the photo and the measurement information ... I found the anchor point. I was curious what could have gone there as every point on the cross member had something connected to it with just the exception of this one small hole. It just did not scream .. HEY!!! I am the anchor point for that spring over there well now I know. Sent you a PM as well.
-
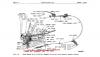
Your photos are fantastic of the underside and the especially of the parking brake linkage. Clean is an understandment... very sharp looking. The parking brake cable where it connects to the lever is supposed to have a return spring connect at the same point at the bottom of the lever. During the tear down phase of my B-3-B all that was there was an inch of spring hanging down from the connection point on the lever for the spring and parking brake cable. So I have two questions today 1. Did you manage to find a replacement spring and if so where did you get it from. 2. Where does the long extension (#4-19-4) of this spring (#4-19-1) connect to on the vehicle? Nothing stood out to me as the obivious connection/anchor point for the extensiion end when I broke the parking brake down. The attached photo is from my parts B-series catalog and it gives no connection point in any photos there nor does the truck shop manuel as far as I can find. Enjoy reading your updates
-
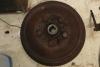
1952 Dodge B-3-B pickup, starting the journey
Phil363 replied to Phil363's topic in Mopar Flathead Truck Forum
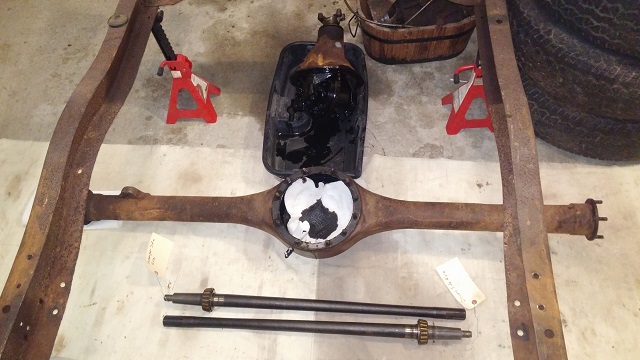
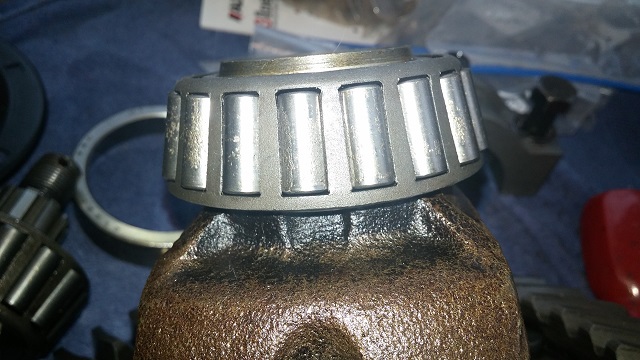
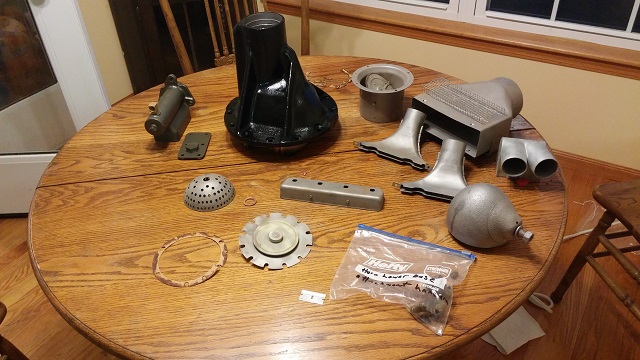
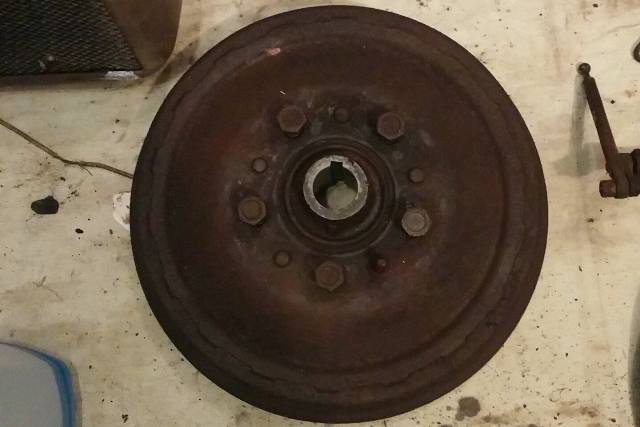
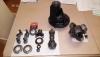
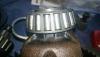
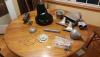
Have not gotten to the frame or engine yet other than cleaning them up and stripping all parts off prior to repair or sandblasting. Spent most of my time sandblasting and painting a lot of small parts and ordering some of the parts I know I will need to replace. I have been told that my use of the Breakfast nook table is a serious no go by the family ... but it is "was" so convenient was my way of thinking .. flat open space ... needing to be used .... well back to the garage for me now. The freshly painted pumpkin is to my 3.73 Ratio differential off of a 1948 Chrysler Windsor ... gears are now nice and cleaned up as well. I may replace one of the bearing inside as there is some very small pitting on the rollers. It is only just the one bearing ... all other gears/bearings look perfect with no wear marks. Will be traveling for the next two weeks for the job and will pull the axles out and remove the old 4.11 differential once I get back and then clean it up. Hope it goes as easily as Young Ed's techniques looked. Will cut some small PVC pieces once I get back as well to use with my rear break drums and heavy duty puller. - - - - - - - - - - - - - - - - - - - - - - - - - - - - - - UPDATED 24 March 2015 - - - - - - - - - - - - - - - - - - - - - - - - - - - - - - I followed Young Ed's technique with the PVC section acting as a spacer with the Heavy duty drum puller ... all I managed to do was strip my threads out of the axle spindle nut. Everything looked good ... it just did not work for me. I supect the spindle nut threads had cracks .. it was really torqued on and a real pain in the butt to get off during the break down phase. So I went to the auto parts store and "borrowed" a sliding hammer and puller set seen in the photo below ... took longer to put it on then to take both axles off. The tool use required a security deposit .. which was fully refunded when I returned the tool. Sweet deal!!!
- 31 replies
-
- 1
-

-
- dodge
- 1952 pickup
- (and 1 more)
-
I found your thread here very interesting / helpful and put the data to good use. I contacted French Lake Auto in MN an told them I was looking for a 3.73 or 3.54 ratio for my 1952 B-3-B Pilothouse. I mentioned, from my reading here that Chrysler Windsors may have what I am looking for. They checked their inverntory and had a 1948 6cyl Manual Chrysler Windsor 4 door Vin# 70789427 with a 10 spine 3.73 ratio in it. It will be sitting on my doorstep when I get home tonight.
-
Great sounding engine. A couple of other forum members mentioned in some of their posts too about that you have to torque once when the engine is cold and once when the engine has run for awhile. I read that in my Dodge Shop manual also I believe. What is next on your too do list for your Dodge?
-
1952 Dodge B-3-B pickup, starting the journey
Phil363 replied to Phil363's topic in Mopar Flathead Truck Forum
Just a very quick update ... having fun sandblasting the small parts from my pickup. Started on the front and rear axle brake parts first. This is going to take awhile .. tons of small parts to put into the sandblasting cabinet. Once I sandblasted the parts I have also shot them with primer. Will paint later once I get enough parts primed before I open up a can of paint. I also ordered and received Charlie's Disc brake conversion kit. Figured it would be easier to put on when I get into reassembly of the frame later this year.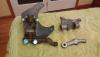
-
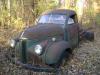
What I found in the woods about 40 years ago in Michigan near my house. When I was a young teenager and working on cars in my Dad's garage I got interested in fixing up an old Studebaker pickup truck. It was at the back of a nearby owner's property next to the wood line. It had been sitting there for years on six flat ties but the windows were unbroken and all the parts were there. So I went up to the house and knocked on the door in 1972 and spoke to the owner's son. His dad was in his 80s and this was his Dad's first truck that he had every bought. Needless to the father was not interested in selling at that time. Fast forward to today ... and the Studebaker is still there ... now sunk up to the axles with the wood bed rotted completely off. Both the son and father have passed away with no close relatives and the house and yard have fallen into disrepair. Vandals have been stripping stuff from the house and yard for years now. Recently the township has come in and cleaned up the yard and the property is going to be sold. Ah well if only I could have gotten it 40 years ago ...

-
Looking forward to hearing and seeing how your restoration goes.
-
1952 Dodge B-3-B pickup, starting the journey
Phil363 replied to Phil363's topic in Mopar Flathead Truck Forum
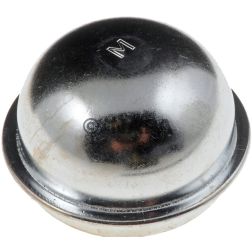
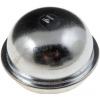
Finally got eveything off of the frame and it will go to the shop here in the next few weeks. Then I will be working my way from the front axle grease cap back up on the rebuild process. To that end I have ordered the Disc Coverison kit from Charlie at rustyhope and am also having him drill out the spindles and steering arms for me at this time as well. Several other threads here have a lot of information on where to acquire the parts from for the disc conversion with parts numbers or search terms to use when searching for the parts on Charlie's list. More than likely I will just follow Charlie's NAPA list myself at this time. I also found a good source at Stengel Bros. Inc in PA for square U-bolts with a 1 13/16 inner measurement which is exactly what the B-3 Parts manuel has for a requirement on my pilothouse. All of the other places I found only had 1 3/4 and then increaments were in 1/8 or 1/4 up or down from that. My Grease Cap up restoration will progress sort of like the answer to the old question of how do you eat an Elephant? Answer ... one bite at a time.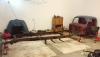
- 31 replies
-
- 1
-
-
- dodge
- 1952 pickup
- (and 1 more)
-
You have found some nice ones near your your location if you can drive to them. My 52 dodge was really a 5(plus) range vehicle. Looked good but had more isses then the sellers photos indicated. Just to keep it simple I would go for the 53 ... based upon the photos that the seller provided. Thankfully you can do a visual inspection when you get there. Prices I would pay would be based upon the overall condition and the 53 looks like a CAT 4 to me .. but a good overall visual inspection could change that. 1953-54 1/2-Ton, 108" wb PU CAT 6: $840; CAT 5: $2,520; CAT 4: $4,200; CAT 3: $9,450; CAT 2: $14,700; CAT 1: $21,000 Panel 760 2,280 3,800 8,550 13,300 19,000 1953-54 1/2-Ton, 116" wb PU 830; 2,500; 4,160; 9,360 14,560 20,800 1953-54 3/4-Ton, 116" wb PU 820 2,470 4,120 9,270 14,420 20,600 Platform 740 2,220 3,700 8,330 12,950 18,500 Stake 740 2,220 3,700 8,330 12,950 18,500 NOTE: Add 3 percent for Fluid Drive. Add 10 percent for V-8. Add 5 percent for automatic transmission. Note: These numbers are from the Old cars guide price guide I mentioned in the post of the 1950 Dodge you were looking at. Phil
-
Hope this helps: It is a 1950 Dodge B-2-B that was built in Detroit, MI. I checked Serial Number at the link below: http://www.t137.com/registry/help/decode.php As for Price in the Old Car Report Guide that came out last Oct. DODGE 1950-52 1/2-Ton, 108" wb Pickup (PU) CAT 6: $840 CAT 5: $2,520 CAT 4: $4,200 CAT 3: $9,450 CAT 2: $14,700 CAT 1: $21,000 4) GOOD: A drivable vehicle needing no, or only minor work to be functional. Also, a deteriorated restoration or a poor amateur restoration. All components may need restoration to be “excellent,” but the vehicle is mostly usable “as is.” This is a driver. It may be in the process of restoration or its owner may have big plans, but even from 20 feet away, there is no doubt that it needs a lot of help. 5) RESTORABLE: Needs complete restoration of body, chassis and interior. May or may not be running, but isn’t weathered, wrecked and/or stripped to the point of being useful only for parts. This car needs everything. It may not be operable, but it is essentially all there and has only minor surface rust, if any rust at all. While presenting a real challenge to the restorer, it won’t have him doing a lot of chasing for missing parts. 6) PARTS CAR: May or may not be running, but is weathered, wrecked and/or stripped to the point of being useful primarily for parts. This is an incomplete or greatly deteriorated, perhaps rusty vehicle that has value only as a parts donor for other restoration projects. Without seeing more photos ... I think this vehicle is greater than a 5 but not yet a 6. Phil