Phil363
-
Posts
127 -
Joined
-
Last visited
-
Days Won
1
Everything posted by Phil363
-
See post Number #11 from knuckleharley .. I now get the same message of not having permission
-
1952 Dodge B-3-B pickup, starting the journey
Phil363 replied to Phil363's topic in Mopar Flathead Truck Forum
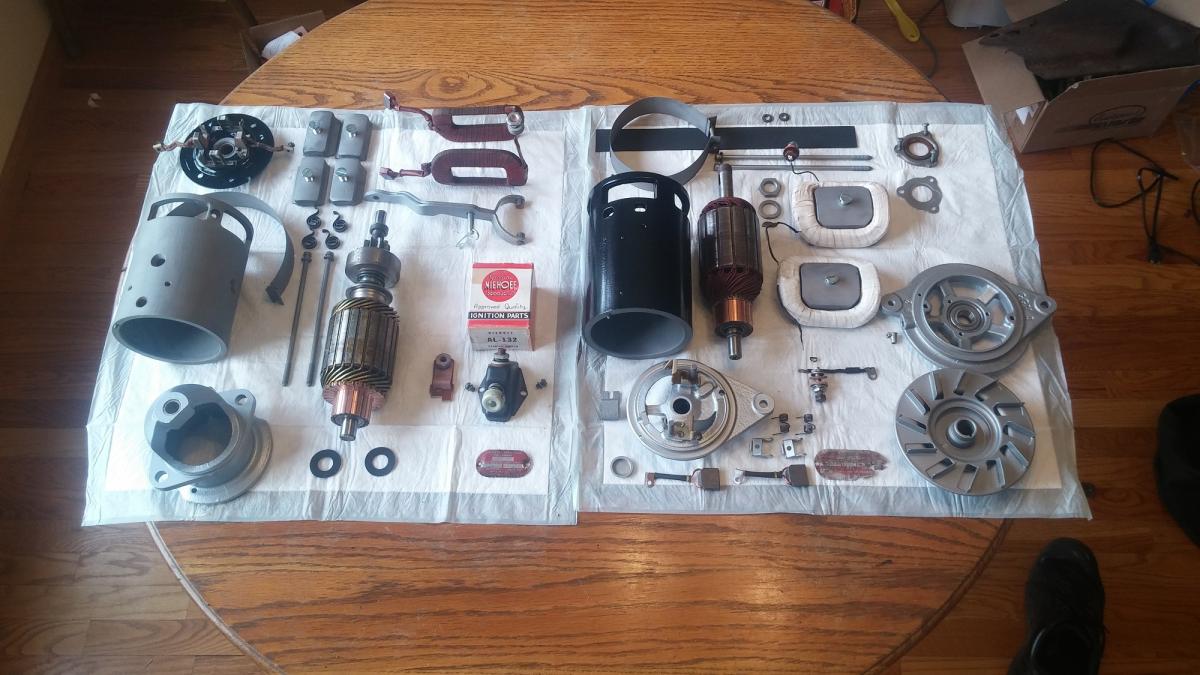
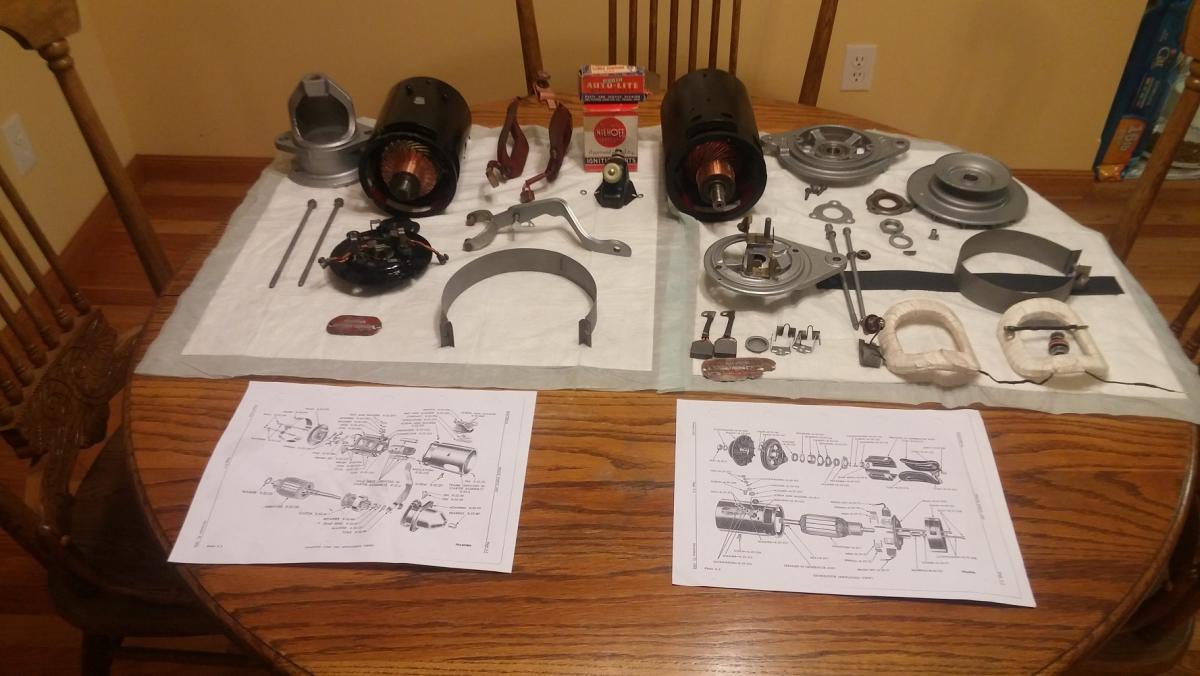
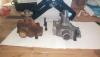
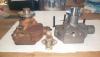
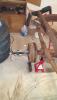
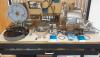
My latest sub-project of my B-3-B rebuild .. the starter and generator. I have to admit ... I finally met my match in the removal of Screws ... specifically the BIG screws that hold the coils inside the housings for the Generator and Starter . Used my impact tool to remove numerous old rusted screws, bolts, and nuts before but only managed to bend the normal sized screw driver heads out of shape this time. I spent about two weeks after work .. periodically giving it the literal wack ... before I said time to pass it to the shop in town that actually rebuilds these old items. They have made a special 1/2 wide screw driver tip for an impact tool .. and gave it some very hard hits .. which damaged the screws ... but they came out of the Generator. I also had him press in my new sealed bearing while he was at it and put the armature on a lathe to clean it up as well. I was going to order the both the Generator and Starter rebuild kits from Andy Bernbaum Auto Parts .... but when I called they said they no longer offer the Generator kit but that I could send it in to them to have it rebuilt. I had to decline as the shipping and return postage of the heavy Generator (or starter) would be cost prohibitive in my mind. I just ordered the new brush set and end bearing from them at that time. Will call them tomorrow and order the complete Starter Kit from them and then finish sandblasting and painting both the generator and starter.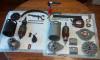
- 31 replies
-
- 2
-

-
- dodge
- 1952 pickup
- (and 1 more)
-
http://p15-d24.com/files/download/100-inner-fender-to-frame-seal-template/ I followed the link above and then clicked on the download link with no problems. Not sure why others cannot get through
-
My french language skills are long gone ... basically it says ..... your going to like your comfort and driving pleasure in this car ... This is a nice looking car ...
-
My B-3-B shop manual says valve tappets should be adjusted with the engine running at normal temperature on page 264 However, the service section in my manual shows that it can be adjusted when cold on page 238. One note is that in the tech section on this forum for valve adjustments has different number(s) for both intake and exhaust valves then my shop manual ... From my shop manual I will use the .010 for Intake and .014 for the Exhaust when the engine is running at normal temps. Cold setting is .014 ... So my plan is to adjust to the cold settings first (to get them into the ball park) and then I will be doing a final adjustment while running at normal temps. Here is a good link that I will be using from this forum later when I get to this event on my rebuild: http://p15-d24.com/topic/39909-valve-adjustment-nervous/page-1 Most importantly ... See Post#2 from Merle Coggins on the link above. There is also of YouTube video of him adjusting the valves while running the engine on Post #1 on the link above. Phil

-
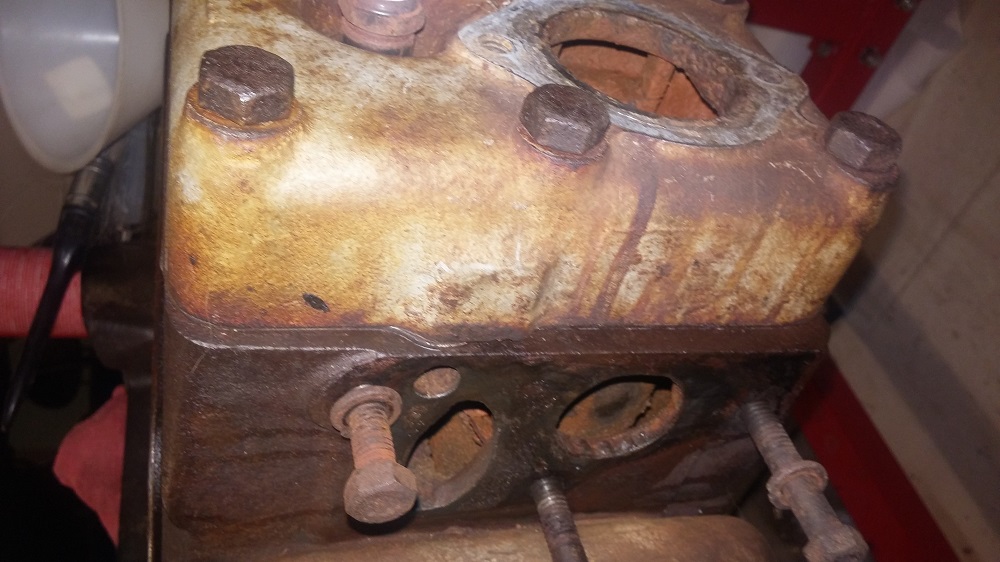
Looking inside of the unknown year thermostat housing area I think it looks quite a bit different where the top gasket of the thermostat would be seated. You may find that the NAPA Thermostat THM 155 (180 degree) or THM 55 (160 degree) may not seat in there like your original thermostat housing. Your 1940 (???) housing looks very much like mine and either of the thermostats that Don mentioned above (and on some other posts I have read) should fit it. Mine looked worst than yours inside with a ton of build up of minerals from the coolant fluid. I lightly sandblasted it inside and out (5 minutes at 125 Lbs of air) and it was ready to be painted. I will get a good seal on both hose connections ... if you have heavy pitting that may be problematic to getting a good seal. The coin is still flipping in the air on whether I will go with the 160 degree or 180 degree thermostat ... Side note: the part number on my housing is 1116777 and below it looks like a B 3 stamped on it. Phil


-
This item was relisted and I contacted the seller and it is 25 1/2 in length. Really is a good price from what I have seen ...
-
http://hagensautoparts.com/pricesheet/engine%2C%20water%20distribution%20tube/ This is the only vendor (other than some on EBay) where I have found Brass WDT's ... looks like Hagen's has Brass and Steel for the 23 and 25 inch flathead six heads. Recommend you give them a call or e-mail to confirm the fit. They are a little pricey ... Like the others here I just went with the steel from a vendor here on this website ... Phil
-
For some of the harder to find parts I go to DCM up in Michigan. I did not see the front end bolt or front fender kits you were looking for on their website but I would ask them if they have the front end bolt kits you need. They do have rear fender bolt kits either zinc or SS at: https://dcmclassics.com/bed-parts/23-bp-207-rear-fender-bolt-kit-ss.html https://dcmclassics.com/body-parts/481-bp-206-rear-fender-bolt-kit.html
-
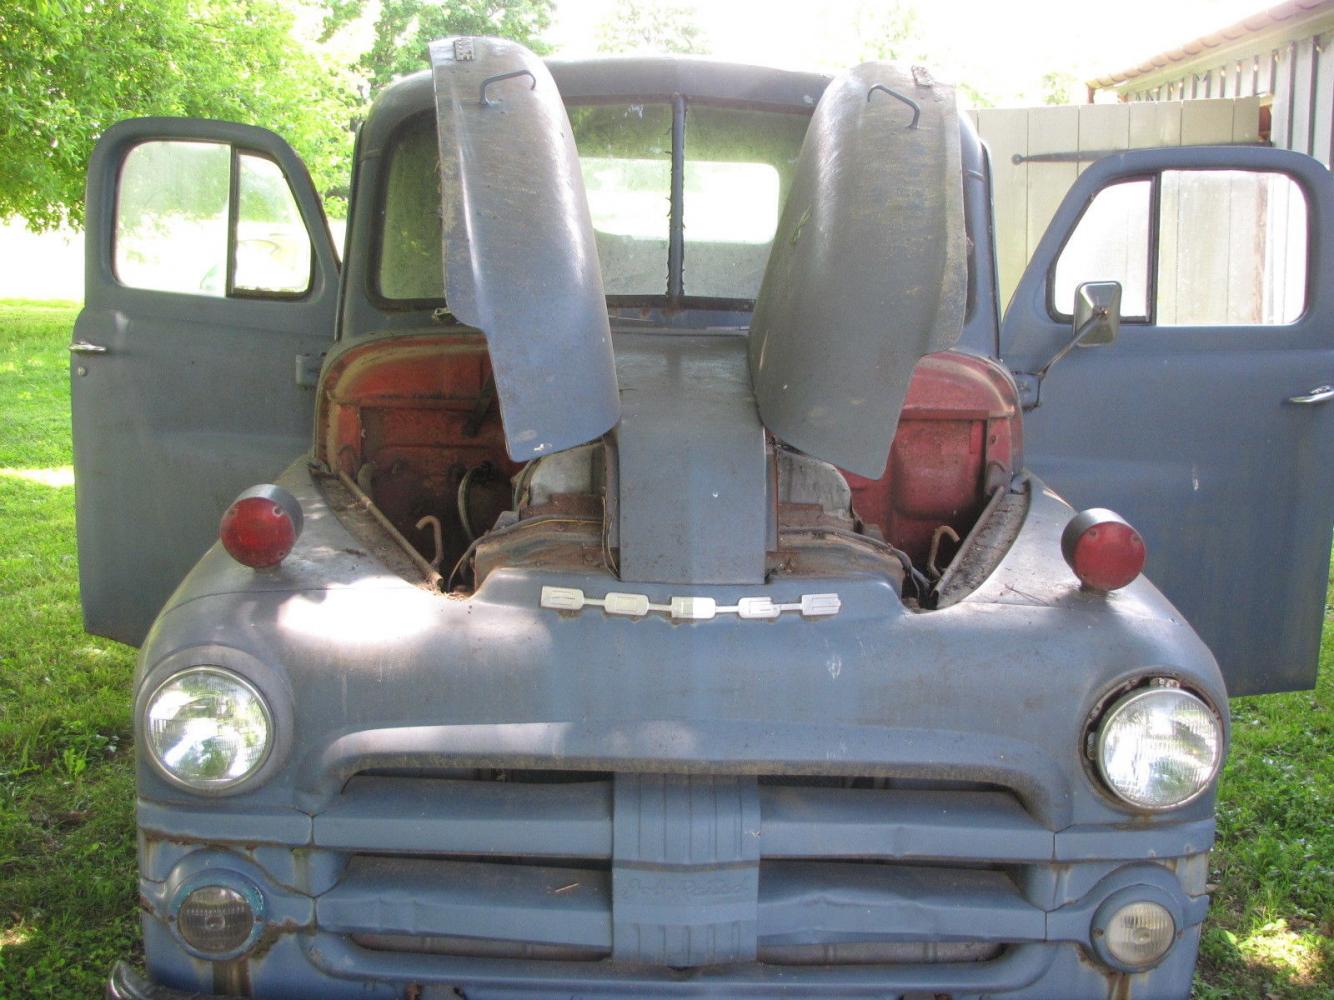
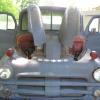
This photo sold Me On getting this vehicle.
Phil363 posted a gallery image in Individual Member Photo Albums
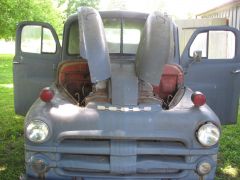
From the album: Phils's 1952 Dodge B-3-B rebuild
First photo I saw of the vehicle I saw online before I bought it. -
Will be sure to use some sealant there as well as the on the bolt threads that secure the water pump to the engine block and go into the water passages of the engine.
-
Thanks, forgot to check Rock auto out today .. $34.99 ($41.89 with shipping) is much better than $72.99 plus shipping. Rock Auto has / is selling the exact same GATES model 42554 that NAPA is selling. Will actually order it is a few minutes ... thanks again UPDATE: 19 Feb 2016. I ordered the new water pump from Rock Auto (late Dec) and am very happy with the product. It can be used either with an internal or external water bypass system. Included was the required gaskets and a new "longer" bolt to replace the shorter bolt found on the older water pumps. The bolt is needed due to the thickness of the attachment point of the new water pump. Added two photos to show some new angles in addition to the ones that Merle posted earlier. I really like the fact that the new water pump has a sealed bearing inside and does not need to be greased from time to time.
-
One of my side projects is getting ready to rebuild the engine so I looked at my pulleys, fan blade and have sandblasted and painted them and put the water pump off to the side until today. I knew I had an internal engine water bypass as JB shows in his engine block and head photos but I also have the external bypass setup. I was entertaining rebuilding the water pump until today until I opened up the back and saw all of the heavy scaling & build up. Once I added all the rebuild costs up (and time) I decided just to buy a new one using Merle's NAPA the part number TFW 42554 I found here searching the forums today ... the cost of inflation has raised the price to $72.99 since 2007. So I am just stopping by to say thank you for your old posts ... found them very beneficial today as always.


-
bwengler I think was suggesting that after turning the hub puller a few turns you give the head of puller screw some "light to medium" taps with a hammer. The vibrations from this tapping releases the tension from the built up torque from tightening the hub puller. My drum slide off a few millimeters at a time this way from tapping on the head of the screw ... versus shooting across the garage as can happen if the drum breaks free all at once. This will not damage the threads or bearings of the axle. Now if you took a 5 pound hammer and gave it very hard hits .. that would at the very least damage the end of axle threads.
-
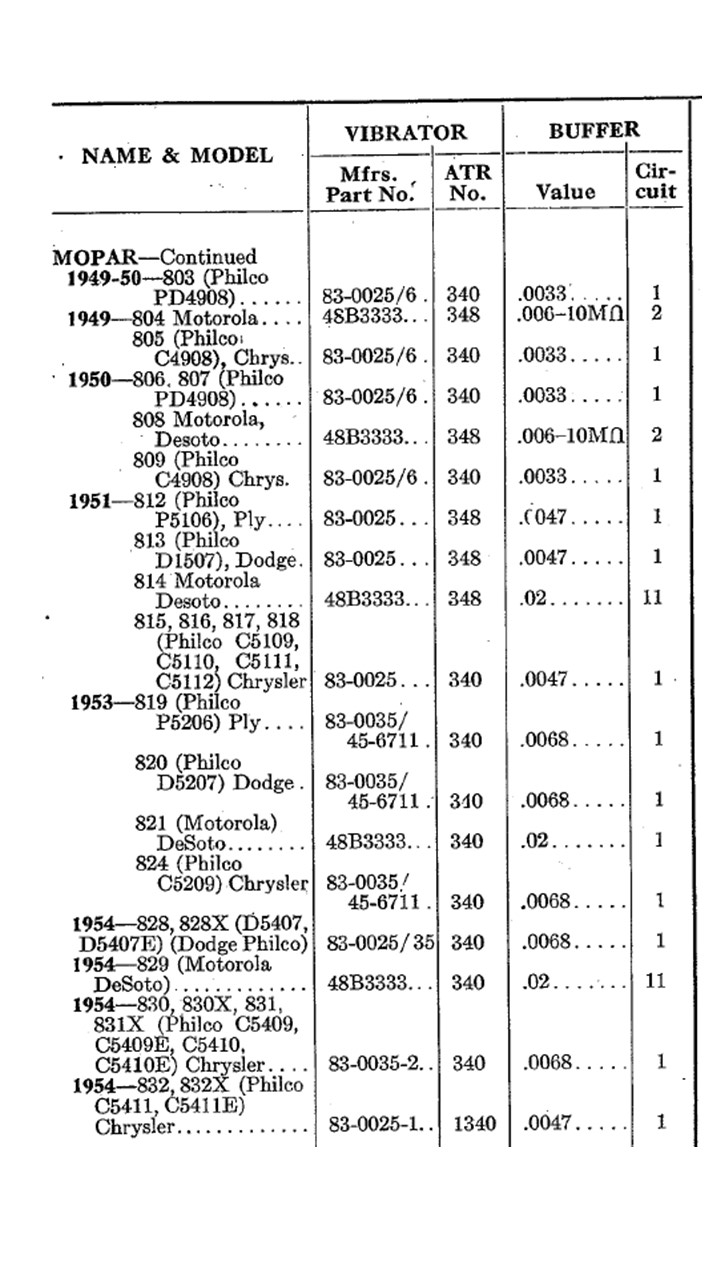
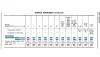
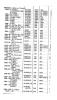
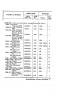
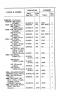
The 607 or perhaps the 813 should work. Many of us talked about this last May here: http://p15-d24.com/topic/38627-b3-radio/page-5 I ordered some references that covered the radios for the 1951 dodge vehicles and attached the photos of the pages below. Phil
-
https://dcmclassics.com/brake-parts/558-br-277-lug-bolt-lh-each.html Not sure if these are the correct ones for your '48 B1D
-
How Many Pilot House Trucks Have Survived?
Phil363 replied to Bradley S.'s topic in Mopar Flathead Truck Forum
How you guys manage the time for multiple projects is a mystery to me ... of course you have excellent results ... and seeing your work gives me ideas for my project. However, I think Todd may be on the right track ... a support group may be required ... -
1952 Dodge B-3-B pickup, starting the journey
Phil363 replied to Phil363's topic in Mopar Flathead Truck Forum
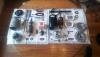
The neat work bench will not last the weekend ... just cleaned it up last night and laid out the parts I will be working on this weekend after X-Mas- 31 replies
-
- 1
-
-
- dodge
- 1952 pickup
- (and 1 more)
-
1952 Dodge B-3-B pickup, starting the journey
Phil363 replied to Phil363's topic in Mopar Flathead Truck Forum
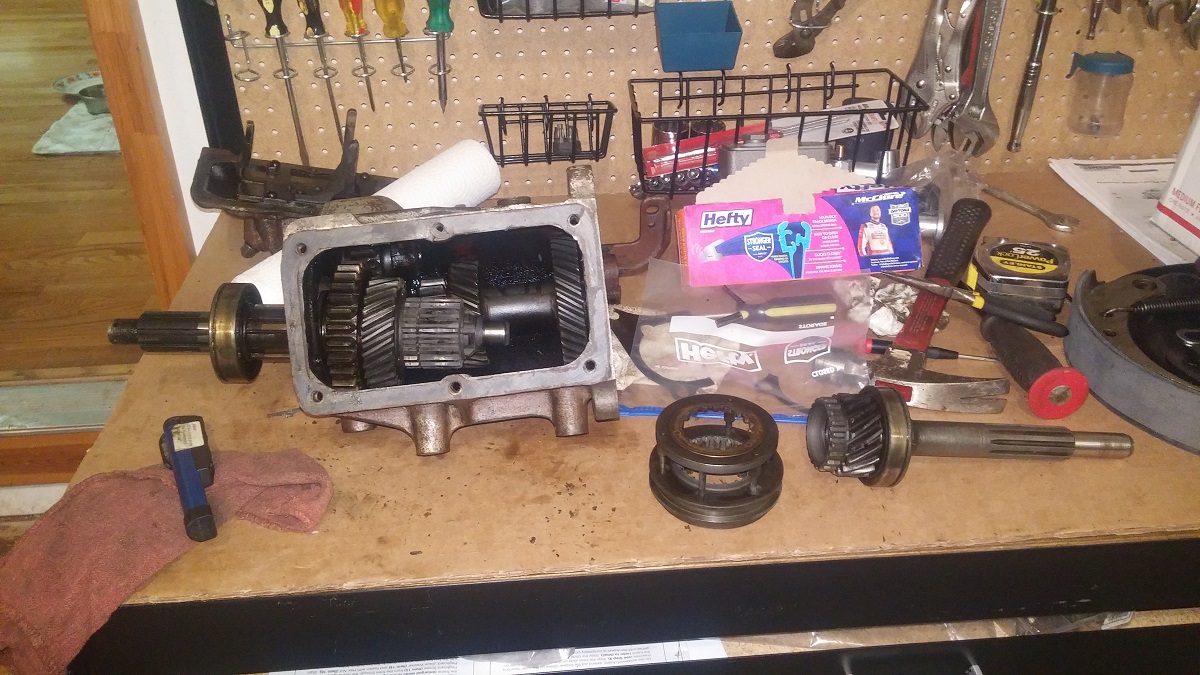
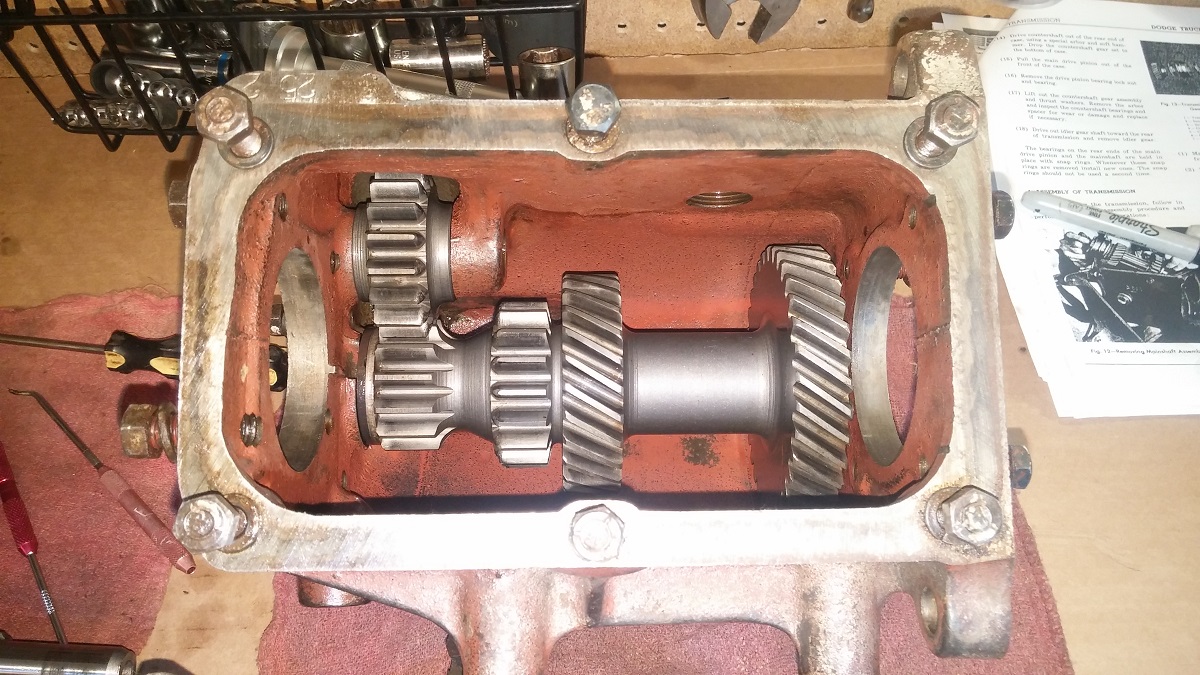
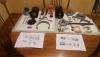
Have been on a hiatus since the late spring this year when I had completed my tear down phase. Had managed to rebuild the third member with 3.73 gears and put in some new bearings into that when the family said I had to spend more time with them .. which led to summer vacations overseas .. getting daughter off to her last 2 years for college in Japan etc … there was a long list of things to do other than my hobby J Anyway, between the spring time and now I have been stock piling parts that I needed once I got the time to get back into the rebuild which is where I am now. Working on the 3 speed column shift transmission and working my way to the engine. The transmission sounded fine but was filled with black jelly for transmission fluid. Leaked transmission fluid from the speedo cable and rear seal. Inside was just black gunk stuck to every square inch of metal / gears … but no metal shavings were found when I poured the trans fluid over a very strong magnet thru a funnel. The gears are also in great shape and require no replacement that I can see. Since I have it opened and clean I also decided to replace the front and rear bearings (FAFNIR 207WDG C-1 & FAFNIR 306KG-2 respectively) along with the needle bearing SKF QBR23549 (I found and purchased some NOS bearings in pristine condition). Well I will now be shooting for a rolling frame in the spring … and work on it as I can. This could take a while .. but I am still enjoying myself even at this slower pace. PS: have enjoyed reading everyone's else's posts on their own project(s) over the summer and fall as well.

- 31 replies
-
- 3
-
-
- dodge
- 1952 pickup
- (and 1 more)
-
Bed Assembly Questions... Crossmembers
Phil363 replied to 59bisquik's topic in Mopar Flathead Truck Forum
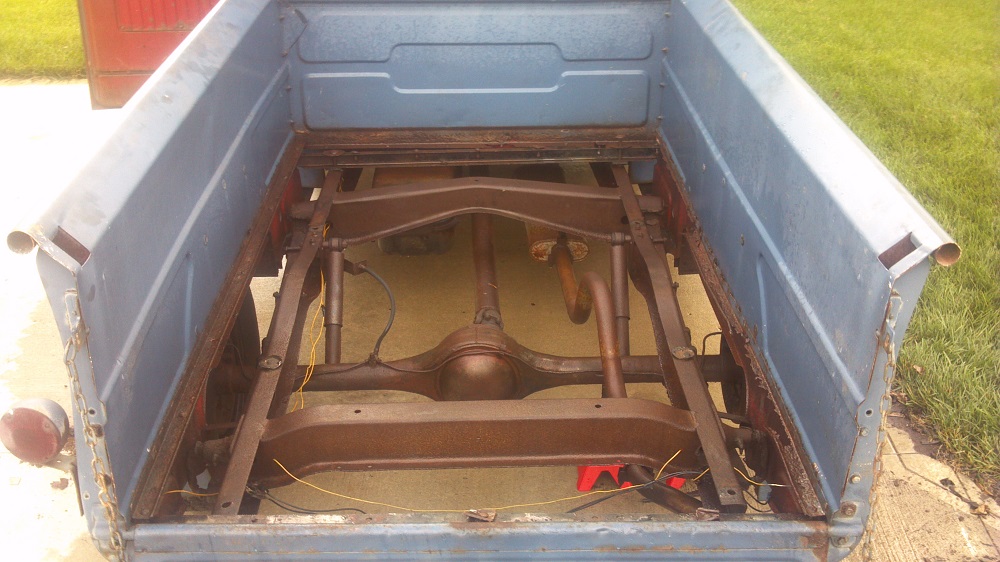
The angle bracket bolts to the bed sides and the frame rail and provides the ground for your original taillights which are attached to the bed sides. Attached the best photos I took that I have of both angle brackets going from the sides to the frame. It is important to make sure that you have metal to metal contact on both ends or the taillights will not work. The second photo shows the location that the bracket bolted to my frame and I have left the bolt in the hole just to remind me. Your connection location may be different from mine as you have a 1955 model.

-
Bed Assembly Questions... Crossmembers
Phil363 replied to 59bisquik's topic in Mopar Flathead Truck Forum
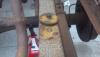
Here is my cross member support sequence on my 1952 B-3-B. It is the same as the others have posted here. There are rubber support pads under the 1st, 2nd, and 4th cross sills that a bolt runs through to the frame. The 3rd cross sill (from the front of the bed) does not attach to the frame (just bolts to the bed floor and support strips themselves) but has two circular rubber pads with a dimple that measure approx. 2 1/2 inch in diameter and 1/4 inch thick. I will post a photo of one once I get home tonight. Your Pickup frame is looking good being painted now. Phil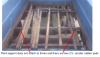
-
Adventures of Dolly Dodge Nov 2015
Phil363 replied to DollyDodge's topic in Mopar Flathead Truck Forum
Enjoyed the video this time ...that is one quiet ride .... like the others it would not open for me earlier. -
I think Don ... above response ... and THE OIL SOUP on another thread you have are on the right track here ... Check out this link and compare your engine block number to the data here: http://www.t137.com/registry/help/otherengines/cengines.html If the number on the engine block is C 7603 that would indicate ( I believe) that block is from a 1936 Chrysler car. The site does not give the engine displacement data but other forum members can figure it out once you ID the engine make, year and what type car it came out of. Our truck engine block numbers begin with the Letter "T". Phil
-
Looks great to me!!! Thanks for the photos.
-
I will have to add this great trailer hitch idea of yours to my to do list and I have just saved all of your photos of the hitch in my to do list folder for future enhancements for my truck. It is actually pretty impressive and the only one I have seen developed by anyone here on the forum. Do you have any measurements or drawings you can share with us here of the trailer hitch? Phil