


bkahler
-
Posts
1,951 -
Joined
-
Last visited
-
Days Won
39
Content Type
Links Directory
Profiles
Articles
Forums
Downloads
Store
Gallery
Blogs
Events
Everything posted by bkahler
-
Don't get to concerned about your dash knobs..... Post edited by moderator: Please keep offers of parts to PM and off the forum please.
-
51 B3B build thread - after all these years
bkahler replied to bkahler's topic in Mopar Flathead Truck Forum
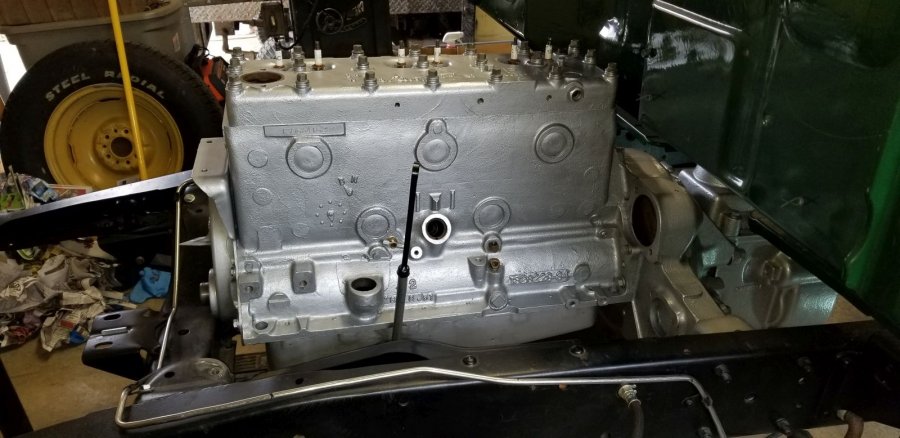
The repaint of the engine and transmission is for the most part done. I still want to repaint the oil pan but will wait on that until after I get the front engine mount re-installed. Now I can finally start the assembly process again. Maybe this time I'll get it all done before I have to paint it all again ? Brad


-
512 cid C series on Dakota chassis- build thread
bkahler replied to Radarsonwheels's topic in Mopar Flathead Truck Forum
Needless to say I'm looking forward to how you work through this rust issue. It takes talent to deal with issues like that, something I do NOT have in this area! Good luck Brad -
512 cid C series on Dakota chassis- build thread
bkahler replied to Radarsonwheels's topic in Mopar Flathead Truck Forum
Wow, you have considerably more work to do that I thought from those first pictures. Do you have a source for replacement sections? -
Transmission to bell housing bolt torque
bkahler replied to bkahler's topic in Mopar Flathead Truck Forum
For the most part I used to torque by feel and never had issues. I had heart surgery a little over a year ago and I still don't have the strength in my right arm that I used to. It's getting better but when it comes to the large bolts I feel more comfortable using a torque wrench. I'm pretty sure when I installed them the first time 20 years ago I didn't use a torque wrench and they were more than tight enough when I tried to remove them the other day! I've had my share of disasters and I certainly don't like watching paint dry! Oh well....... ? -
Transmission to bell housing bolt torque
bkahler replied to bkahler's topic in Mopar Flathead Truck Forum
Not 1/2" either. I just measured the bolt and it's 9/16. The attached picture show a 3/8, 1/2 and my transmission mounting bolt. Assuming grade 5 that would place the torque range at 82 to 91 ft/lbs.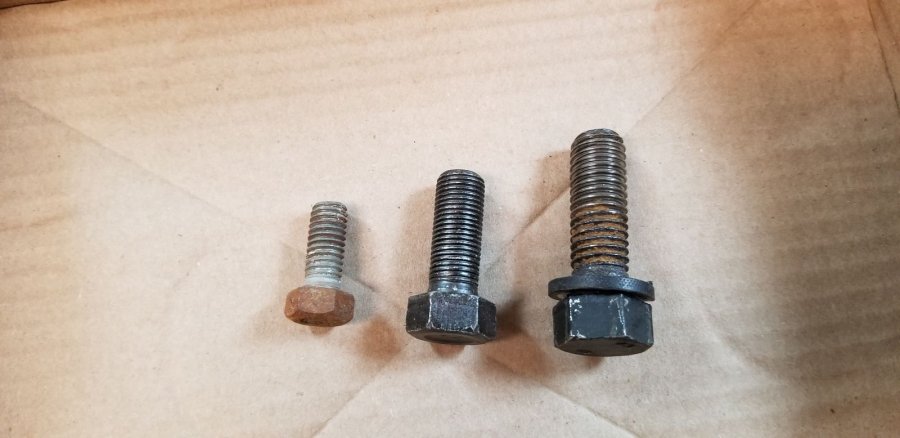
-
Transmission to bell housing bolt torque
bkahler replied to bkahler's topic in Mopar Flathead Truck Forum
Hmm.....any idea where I can meet Destiny? ? Those older mechanics must have had crescent wrenches for hands! For me a 1/4 turn on a 9/16" bolt with a lock washer won't even compress the lock washer! -
Transmission to bell housing bolt torque
bkahler replied to bkahler's topic in Mopar Flathead Truck Forum
Morning Ken, The heads on the bolts are 15/16" (or was it 7/8"?!). Regardless, they are definitely not 3/8". I was thinking the bolts were 5/8" diameter but I found a post that mentioned them being 9/16" which led to my torque search for 9/16" bolts. I will verify size tonight. The bell housing to engine block bolts are 3/8" as I removed a couple of those last night. Brad -
I guess I should close out this thread. I bought a Model 75 off of ebay which is basically identical to the Model 62 that I started with. The only difference I could find was the cover that said 75 instead of 62 and the motor is 12 volt. Fortunately this heater core turned out to be in excellent condition and the motor looks like new. And since I'm converting to 12 volts I now have a nice 12 volt motor to use. Onward...... Brad
-
I searched through the forums and I've looked in the service manual and can't find the number. I believe the bolts are 9/16-12 and searching online I find specs for grade 5 and grade 8. Grade 5 is in the 70s to 80s and grade 8 is over 100 up to 115 or so. I'm guessing the mounting bolts are grade 8 or better but I'd hate to torque a grade 5 to a grade 8 spec! Anyone know the torque number?! Thanks! Brad
-
Terrence, welcome! The wire gauge sizes listed in the B3B wiring diagram will be just fine. Switching to 12 volts you'll find that the current draw is actually less than if you were running a 6 volt system. I'm making this same conversion to my 51 B3b and followed the diagram for wire sizing. You should post pictures of your truck when you get a chance. We would all like to see them. Brad I see Los_control beat me to it!
-
Ordered Permatex #2 yesterday from Amazon and should have it Friday. I really wish I hadn't waited 20 years to restart the restoration but sometimes life just gets in the way. Brad
-
51 B3B build thread - after all these years
bkahler replied to bkahler's topic in Mopar Flathead Truck Forum
We had some awesome weather here today which allowed me to open the garage door and enjoy the warmth while working on the Dodge. After stripping all of the components off the block the other day I was able to proceed to prep the block and transmission for painting. 20 years of sitting caused a lot of surface rust to occur in areas that I hadn't painted previously (I should have painted but didn't!). I read on the forum that someone recommended Corroseal to convert rust so I ordered some and gave it a try. The instructions say to brush it onto the affected area and as the rust is converted it will turn black. Boy did it turn black! I have to wait 24 hours and then I can clean up the residue. I don't have pictures but everything is now masked and prepped for paint so I'm figuring sometime Friday or Saturday I should be done with the painting. It'll be nice to be able to start putting things back together again for a change Brad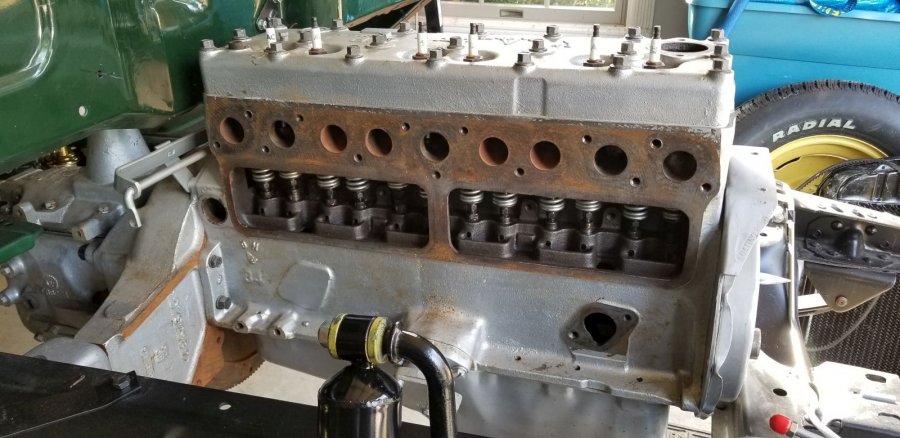


-
Aluminum. Interesting, I'll have to do some searching. I agree, not hardening is a definite necessity! Thanks! Brad
-
I think there is a package floating around my garage somewhere with leftover bits and pieces from the original gasket set. With luck it's in that package. What I'm most concerned with is the head bolts. When my engine was built way back when the builder knew it would be a while before I was going to start the engine so he told me that he only torqued the bolts to about 20 lbs. I believe this means I am good to remove each bolt one at a time to check to see if he put sealant on any of them. Do the torque specs change if a bolt has sealant on it?! I assume the way to tell if it goes into the cooling jacket is to stick a screw driver in the hole and if it doesn't bottom out (within reason of course!) then the bolt likely needs sealant. On the ones for the water pump the sealant is a gooey silver color. Not sure what type that would be as I don't remember seeing any brands that were silver.
-
I pulled the distributor yesterday and noticed there was no gasket or o-ring between it and the block. I was thinking there should be something there but a brief search got me know where. Am I missing something? Next, something I've been thinking about for a while is which holes in the block and head require sealant. When I pulled the water pump yesterday those bolts had sealant on the threads. Is there a definitive list somewhere that points out each and every hole that needs sealant applied to the threads? I've read there are some head bolts that require sealant as well as some manifold studs. Anyone have the specifics? And finally, what is the recommended sealant? Thanks! Brad
-
Other than taking big stuff to the local hot water high pressure car wash, kereose is pretty much all I've ever used for parts cleaning.
-
I'll bet 4/2 makes for an interesting exhaust note!
-
Any idea what kind of plastic? There are some plastics like delrin that would likely make excellent king pin bushings.
-
512 cid C series on Dakota chassis- build thread
bkahler replied to Radarsonwheels's topic in Mopar Flathead Truck Forum
That's where you just take your time, but then you already know that You should make a youtube video of the install. I'd love to see it. -
51 B3B build thread - after all these years
bkahler replied to bkahler's topic in Mopar Flathead Truck Forum
Worked on a smorgasbord of things this weekend. Finish replacing the clutch fork shaft, bolted the transmission back in place, stripped all the components off the engine block in preparation for painting, finished the gas tank installation and installed the filler neck. Oh yeah, painted the heater fan and stretched the draft seals over the foot pedals. The last was only partially successful. One of them has a slight tear but I haven't made up my mind whether to replace it or live with it. Oh yeah, I also managed to get the rubber bump stops forced into their pockets for the rear overload springs. Brad -
512 cid C series on Dakota chassis- build thread
bkahler replied to Radarsonwheels's topic in Mopar Flathead Truck Forum
There's some definite rust you're going to have to deal with but I've seen worse. Are new windshield gaskets available? -
I'd check with your local parts store, they should have a loaner tool that you can use.
-
Do you plan on going with stock tail lights?
-
Gear puller This is what I used to pull mine. There should be 2 tapped holes in the pulley. Brad

