


bkahler
-
Posts
1,947 -
Joined
-
Last visited
-
Days Won
39
Content Type
Links Directory
Profiles
Articles
Forums
Downloads
Store
Gallery
Blogs
Events
Everything posted by bkahler
-
I'm going to check my manual again on the fuel gauge but I thought I had previously checked the fuel system section to see if the gauge details might be there and I didn't see it. But again like I said previously I frequently seem to miss details
-
Thanks Merle Now you have me wondering if I just don't know how to find things in the shop manual! I would have thought the B3 manual would be more refined with more/better info. I've downloaded the manual, thank you. Tonight I'll do some comparisons between the B2 and the B3 manuals to see if I'm just not finding info like I should. It wouldn't be the first time I've missed information that's staring me in the face. Brad
-
1951 B3B 3 on the tree to floor shift conversion
bkahler replied to Mseacow's topic in Mopar Flathead Truck Forum
Hi Paul, welcome to the forum. It sounds like you like the floor shift over the column shift, you're not alone in that Just so you're aware, parts requests are frowned upon within messages. The preferred method of making a parts request is using the Classified section. Parts requests are free, parts being listed for sale cost, I think $5. Anyway, a moderator will likely edit your request and mention the Classifieds. Good look in your search! Brad -
Merle, I realize this is an old post but this is second time recently where I've found you referencing your shop manual. What surprises me is your shop manual seems to be a lot more detailed than mine! What version/year of shop manual do you have? Could you provide details so I can try and locate a copy? Thanks! Brad
-
I'm glad you qualified your statement about best year...... ?
-
Original Fuel Pump Filters / Strainers
bkahler replied to bkahler's topic in Mopar Flathead Truck Forum
I tend to agree for long term operation a pre filter and the strainer are probably enough. I do however kind of like the idea of more filtration on a new system. As much as I tried to keep things clean while building the fuel system I'm betting there is still trash of various sizes in the system. Heck, who would have thought an aluminum fuel filter housing would be porous enough to leak! -
Oh well, to late for me. I've already got the fitting installed. The nut did seem to snug up nicely so with luck I won't have a leak. However to be on the safe side I don't think I' will install the floor mat until I know for sure
-
51 B3B build thread - after all these years
bkahler replied to bkahler's topic in Mopar Flathead Truck Forum
I didn't have the opportunity to work on the truck as much as I had originally planned for this weekend. The opportunity arose for me to dispose of my above ground pool so this Friday I spent the day dismantling and loading the pool bits and pieces on the new owners trailer. Unfortunately this effort pretty much wiped me out and I spent more time recovering than working on what I wanted to But a few things did get accomplished. The windshield interior molding is now installed and looks good. I also installed the parking brake cable. I was somewhat worried about whether the cable would fit properly since the truck has dual exhaust down pipes. It turns out the cable routes perfectly around the rear down pipe. That took care of a big worry I also spent time prepping the vent windows for installation in the doors. I bought the wing window rubber gaskets back in 1998 from Roberts. The rubber was still nice and pliable which was a big relief. It was definitely a struggle getting the rubber into the frame and I have a nice puncture wound in the palm of my hand for my efforts! Brad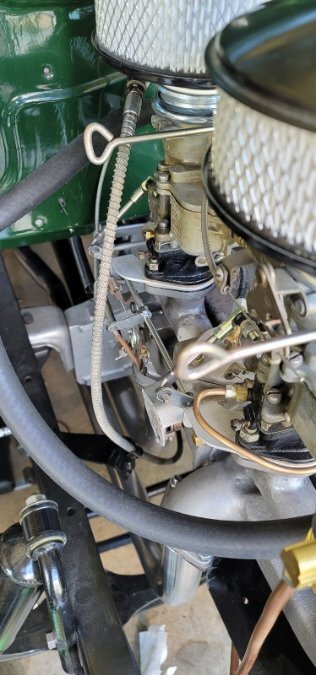
-
After much searching I ended up buying the Oil Pressure Gauge Sleeve/Nut from McMaster Carr.
-
51 B3B build thread - after all these years
bkahler replied to bkahler's topic in Mopar Flathead Truck Forum
I'm trying to decide whether I should use these window assemblies as is or maybe spruce them up a little bit with some rattle can paint.....
-
Which came first the chicken or the......
bkahler replied to bkahler's topic in Mopar Flathead Truck Forum
Thank you both for the quick responses. I hope to start building the doors this weekend. I have a nice big dining table that will make for a perfect assembly station -
......in this case I'm referring to the door latch mechanism or the window parts? I'm ready to start assembling the doors. Should I install the door latch mechanism first or install all of the door glass components first? Through searches I've found what sequence to install all of the glass components but I haven't found whether the door latch components should be put in before or after the glass components. Thanks!
-
Original Fuel Pump Filters / Strainers
bkahler replied to bkahler's topic in Mopar Flathead Truck Forum
My pump is rebuilt but it's the correct pump (i.e. Carter #). Do you have a part number for the filter? -
Original Fuel Pump Filters / Strainers
bkahler replied to bkahler's topic in Mopar Flathead Truck Forum
I'm not a big fan of the stone type either. I have the same setup. ? -
Original Fuel Pump Filters / Strainers
bkahler replied to bkahler's topic in Mopar Flathead Truck Forum
That's interesting. Are they the stone type or paper? In other words, please provide details of pump and filter! -
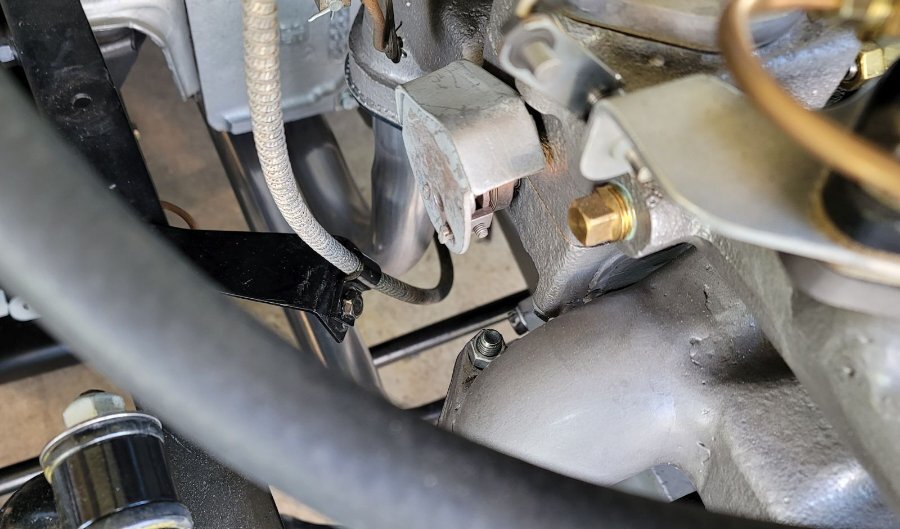
While I was looking at options to replace the filter I have mounted at the front carburetor I got to thinking about why it's there in the first place. So looking at the original fuel system it appears that the fuel pump just had a strainer (no filter) and the real filtering was done at the carburetor. In my freshly installed system I have, starting at the tank a glass bowl with paper filter, electric suction pump, mechanical pump with strainer and finally a glass bowl with paper filter at the carburetor. The filter at the carburetor is apparently a very porous piece of junk that I need to replace or eliminate. This got me to thinking as to whether or not I need the filter at the carburetor since I already have a filter at the inlet side of the electric suction pump. As a temporary measure I'm going to remove the filter at the carburetor and proceed with my engine start up. The question is with my current setup, do I really need the filter at the carburetor? Did any of the original mechanical pumps have filters or were they all just strainers?
-
JB, I'm beginning to think you have this secret desire to own a Route Van....
-
Bet I know why this eng didn’t run!
bkahler replied to kencombs's topic in Mopar Flathead Truck Forum
This subject brings back memories from my high school days long ago. My girl friend had just bought a car and I was of course trying to impress her with my mechanic's skills. I offered to do a tune up where I replaced the spark plugs, points and condenser. All went well until I tried to start the engine and it wouldn't start ? After much looking on my part I called a neighbor over who worked on cars as a hobby. After a few moments of inspection he found I had shorted the points to ground. A slight adjustment on his part and the car roared to life That was an embarrassing lesson I've never forgotten..... -
I'm guessing they slide in. I would assume the ones sold by Vintage Power Wagons fit into the slot at the right shown in the picture on the below?
-
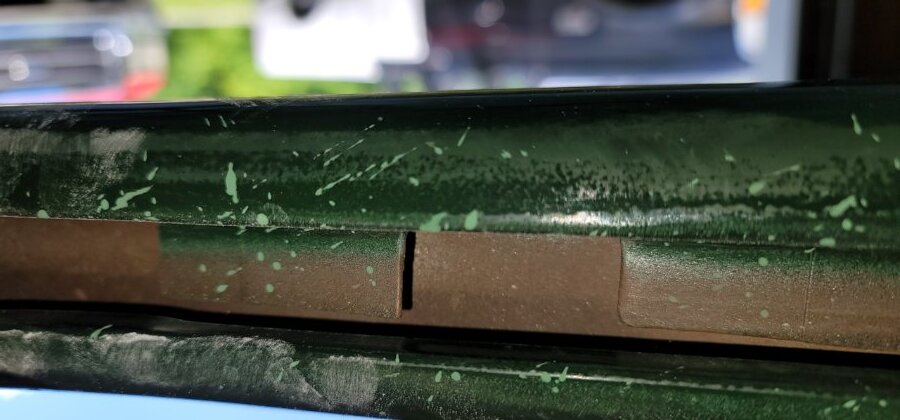
The reason I wasn't sure is my doors look like they could accommodate the clips that have the clips that are 90 degrees to the track. You can see in the picture below why. Yesterday I stopped by the painters to pick up a rattle can filled with the green paint and he gave me the one clip he happened to find still attached to the door. Turns out it's the style sold by Vintage Power Wagons. So I can confirm Mark's guidance as to which clips are correct for the B3 doors. So I'll be ordering 8 clips from Vintage Power Wagons later today
-
I'm just about ready to bolt the grille bars to the front nose piece. I think the new weld nuts came out ok. The beads aren't that great but the will hold. I was really trying to keep from ruining the paint where it shows which fortunately I was successful at. I need to do a little grinding and then I'll rattle can the exposed metal. When I bought the paint I had them mix up enough to fill a couple of rattle cans for situations just like this My question is should there be some sort of rubber gasket between the nut plate and the nose piece where the bolts are? I don't really like the idea of metal to metal. Thanks! Brad
- 1 reply
-
- 2
-

-
51 B3B build thread - after all these years
bkahler replied to bkahler's topic in Mopar Flathead Truck Forum
Good point about the dual carb setup. It will be interesting to see just how nice or how much of a pain the dual carb setup will end up being -
51 B3B build thread - after all these years
bkahler replied to bkahler's topic in Mopar Flathead Truck Forum
That would be a lot better than I was expecting I was thinking 9 to maybe 12. I do have the 3.73 diff so that's in my favor. -
51 B3B build thread - after all these years
bkahler replied to bkahler's topic in Mopar Flathead Truck Forum
A 1.5 gallon heel in the tank isn't to bad. I'm hoping my 1/2 ton gets a little more than your 1.5 ton truck -
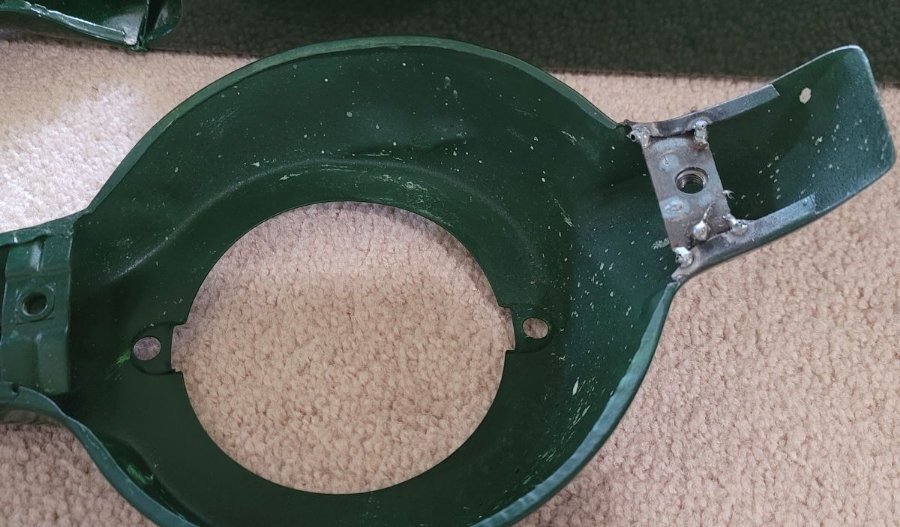
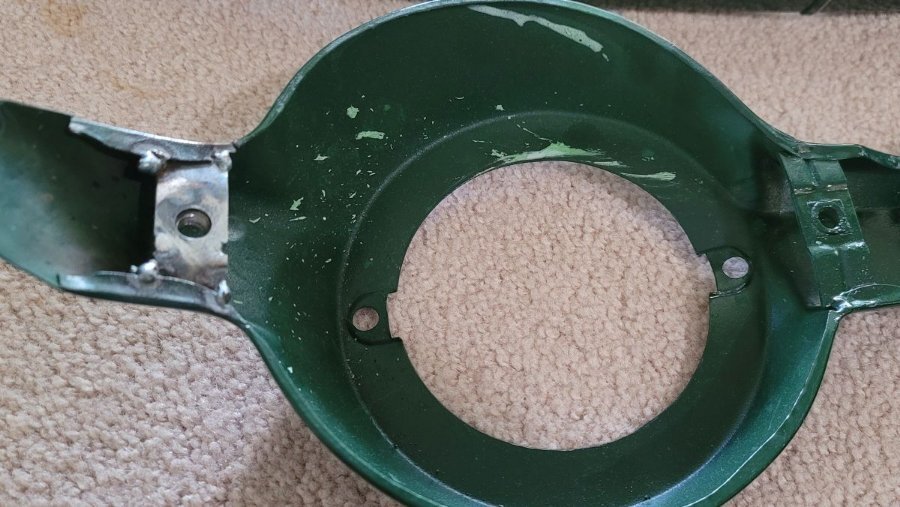
So which one of these clips would be correct for a 51 B3B ?
