-
Posts
1,435 -
Joined
-
Last visited
-
Days Won
3
Tom Skinner last won the day on February 20 2023
Tom Skinner had the most liked content!
Reputation
313 ExcellentAbout Tom Skinner
- Birthday 11/13/1956
Profile Information
-
Gender
Male
-
Location
Huntersville NC
-
My Project Cars
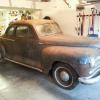
1948 Chrysler Royal Sedan
Contact Methods
-
Biography
Had 1948 Royals all my adult life
-
Occupation
Retired
Converted
-
Location
Huntersville NC
-
Interests
Restoration - Stock
Recent Profile Visitors
The recent visitors block is disabled and is not being shown to other users.
-

Brake Master Cylinder Rebuild on a 1948 Chrysler Royal Question
Tom Skinner replied to Tom Skinner's topic in P15-D24 Forum
OK Gents here's the tips: I went on the AACA Thread to get this information. I will mark this Thread as solved afterwards. In order to remove the Master Cylinder there is a Pin/Rod at the front of the MC. Use a 13/16" Open Wrench to push the Retaining Clips off the Pin Ends in order to remove the Pedals. If need be use JB Blaster to loosen every Bolt up to and including the 2 Brake Lines coming out of the back of the MC. One Line supplies the front Brakes the other the Rear Brakes. Have a Drain Pan to catch the Brake Fluid after removing the Lines or the Front Push Rod. Remove the Bolts and Replace the MC. by reversing the steps. The Service Manual speaks to this but to have the tips to remove the Retaining Clips without them spinning and staying on the Pin/Rod is very helpful. Re-install the Pin/Rod with a Mash Hammer if a Press isn't available (LOL) be careful not to Monk up the Pin ends. There is a MC Bleeder Tool (It Looks like a syringe) to Bleed the MC before bleeding the rest of the System. So there it is Easy Peasy. I was just looking for some simple Tips. These could benefit others that would like to replace their Master Cylinders without any reservations as to skill set. I know Rich likes to Push The Ammco 1750 and MT19 Tools for adjusting Brake Shoes but they really aren't necessary unless you have $600 or more to throw away for a tool you may only use once or twice in your life. In addition to that you would be upside down real fast with your old Mopar paying someone else to monkey with it. Unless the Mechanic is 60 years old or better and know what he is doing with these old Shoe Brakes or a Truck Mechanic with Shoe experience. For now I am holding my own enjoying still working on and mastering every little thing my Chrysler throws at me, it is a tremendous privilege to continue be able to do so. Tom -

Brake Master Cylinder Rebuild on a 1948 Chrysler Royal Question
Tom Skinner replied to Tom Skinner's topic in P15-D24 Forum
Rich, I have done all of the above in your previous post. I use the homemade tool to adjust the shoes with the feeler gauge .006 around Heel and Toe. I also checked shoe wear with chalk on test runs and removed the drums several times to re-adjust Heel Toe to satisfaction. My only thought is shouldn't the tires actually skid when slamming the brakes on without one pumping action? That my friend is why I am questioning the strength of my Master Cylinder. The advice I seek here from another old Mopar War Horse like myself is: What to disconnect first to start the MC Re-Build or replacement. Roofus came close with his description of shifting the axis of the pedal etc.. I will wait a week or so for a seasoned explanation - sort of step by step, or just plow ahead on my own next week. I even have the bushings - if needed to replace on the MC Pin so I don't lack parts just some simple start finish tips to avoid the usual stupid stuff that may pop up as is usually the case when working on our old buses. Not being so young my bark is getting thin so I have to wear leather gloves so as not to cut myself. LOL. The Ammco 1750 and the MT19 Tools are best to own but not necessary if using the tool I used, (Which I will admit takes several tries) because the homemade tool is not as accurate. All in all having done Shoe and Wheel Cylinder brake jobs on old Chryslers over the years I sort of have a knack for it. Thank you for your input. By the Way the Cam Nut is 9/16" as you said above The Anchor Bolts are 7/8" Wrench. The real problem I see is the old brake lines going into the back of the MC need PB Blaster for sure as well as everything looking kind of crusty so as not to break anything - especially brake lines. Tom -

Brake Master Cylinder Rebuild on a 1948 Chrysler Royal Question
Tom Skinner replied to Tom Skinner's topic in P15-D24 Forum
Rich, I have owned 1948 Chryslers (see above - plural a s at the end of Chrysler for 50 years) I always bled my brakes every other year or so. I just replaced all of my Wheel Cylinders and Shoes and adjusted them to pretty good satisfaction, however, the slam the brakes on skid test doesn't work unless I pump the Brake Pedal and then it comes up hard and firm but doesn't skid. I believe the MC is original on my present Chrysler and may need rebuilding or replacing. I have good brakes now, however I feel they should/could be better. That being said thanks for your input, I can and will finish the job myself as I am still stout enough, I just need some technical input as to where to start and a little step by step advice as to what I may need to look out for that might trip me up. Tom -
Gents, Having owned 1948 Chryslers for 50+ years I have never rebuilt, or replaced a Brake Master Cylinder. I have 3 Questions: 1. Does the Master Cylinder need to be out of the car to rebuild it, (The Serv. Manual speaks to this) or is there room to replace its inner parts with it in the car. 2. Would you rebuild it, or replace it if you had parts for either (a re-build or replacement). 3. Go over the part about replacing the inner parts with it in place, as opposed to just pulling the floor pan and whole MC out and having to press out the Pin etc. It would seem to me if it could be re-built in place it would save a lot of labor. Thanks in advance for any feedback. Tom
-
Ffreeb, I would start with a hair blow dryer first much like you might to take wrinkles out of a headliner. An Iron may melt your project, A Gentle easy Heat might suffice without damaging the plastic Tom
-
I like what I heard and saw, Old Timer sharing his knowledge, what could be better? Tom
-
There is a Fluid Drive Guru on here called DodgeB4ya. He can say for sure if there is a break in period on the carbon seal or not. I have owned several 1948 Chrysler's with Fluid Drive since 1974 and none of my Seals have leaked. When reading the Service Manual there is an extreme caution not to scratch or score any surface the Carbon Seal rests in. I hope that a break in period is all you need to stop the leak. I am not sure if the system is pressurized, so pressurizing it to 15psi may not even be necessary. I hope someone can help here, I sometimes wonder weather I should buy the Seal Kit for myself, but being 68 I am probably running out of time to even work on a Fluid Drive Torque Converter without the help of another. I did buy a complete set of Fluid Drive Service Tools years ago and have them all for my Unit, but time rolls on and it is unstoppable. I hope someone here with more knowledge can chime in. I hope your system is OK and turns out that pressurizing it is not necessary for the Unit to work. By the Way Nice Homemade Tool ! Tom Huntersville, NC.
-
Rich, Great advice, and keep an old soft paint brush to brush away any residual wax build up around ornaments and Lettering. Tom
-
OK, For those that want to straighten their Carb Horns, from: Collector Car Restoration Bible, by Matt Joseph, Copyright 2005, Pages 166, and 167. Edited for brevity by me. "Warped Bowl Covers can be Hammered Straight, Heating a Bowl Cover to 350 Degrees in an oven for 30 minutes and C Clamping it to a piece of Hardwood in increments. Tightening it down slowly - go easy. Also soaking the Bowl Gasket in Kerosene before installation causing it to swell. Tightening the Carb screws in careful stages down to 16 -24 OZ each (I don't even know how to do this). So there you go everybody has their own solution. I sanded mine on glass, didn't take much off and put a new gasket on. Wala no leaks. So I guess instead of us being obstinate about the method used "Its whatever floats your skirt" LOL Tom
-
FarmerJon has a point there IvanB. I have worked with these Carter Ball and Ball Single Downdraft Carbs for 50 years and tried straightening the Warped Horns multiple times. Bumping them in a vice helps but heat from the engine manifold will usually put them back warped again, sanding them flat on glass works. Often times finding a donor Carb to Frankenstein a Horn from is the answer. Gasket Sealer isn't something I would do, its messy and a pain to deal with going forward without really resolving the problem - gas leaks down onto the hot manifold from in this case because of is a Warped Air Horn surface. One must endeavor to bring it back Flat and true to its mating surface to the top of the Body of the Carb. Only then can one lift the horn off to set the float height right or clean or adjust the Pump Connector Link or Plunger or Step up Jets etc. without hassle. This is just my humble opinion Tom
-
Pep48, Great Tips for Carburetor Repair! Merry Christmas!
-
I wouldn't pay someone to rebuild the carb. I would do it myself to be sure it is done properly. There isn't enough parts to it to become confused, One last thing, No Air Cleaner? You are sure to suck in enough dirt to clog things up
-
I am with Sniper, Choke if a Sisson needs adjustment. Dirty Needle and Seat? Idle Mixture Screw Tip Worn? Hesitation upon acceleration - Dry Leather on the Accelerator Piston in the Carb? Winter Stroke Setting under the Piston? Dirty Passages at the Check Balls inside the Carb? Dry Leather in the Dash Pot Piston?
-
I use a Long Breaker Bar with a 1-1/8" or 1-1/4" Socket to turn the Dog Bone on the Puller. Slowly stepping on in until POW the Drum Breaks loose. Back in the 70's when I was a poorer younger Lad I simply loosened the Castle Nuts on the Rear Axle and drove in a circle until they popped loose. I only suggest my Breaker Bar method because I believe beating the Hell out of the Dog Bone with a 5 or 6 Pound Hammer might end up breaking something - or maybe not - I just don't want to risk it.
-
With or without the heated storage I would use penetrating oil and seal it in plastic best I could. It is your call, I always stored extra engines and Transmissions in a corner of my Garage, of course I never had more than 1 or 2 in a corner.


