


Kilgore47
-
Posts
426 -
Joined
-
Last visited
-
Days Won
11
Content Type
Links Directory
Profiles
Articles
Forums
Downloads
Store
Gallery
Blogs
Events
Everything posted by Kilgore47
-
I like to do several easy projects in between the hard projects. Now it's time for a hard project. The 3.90 pumpkin in the P15 needs to be re built. There is a lot of slack in the gears. When I first got the car the pumpkin was pulled to check everything. Removing it and putting it back in was difficult under the car by myself. This time I'm thinking about pulling the entire rear end so I can work on it on the ground. I'll pull the axels first to make it easier to handle. The 3.90 that's in the car would probably last as long as I will own it but I want to change it to a 3.54. I have a 3.54 pumpkin but the housings don't match. From what I have read the gears should be the same so I will remove the gears from the 3.54 housing and attempt to install them in the 3.90 housing. I'll probably take it to the local shop I use for final set up. Not sure my shade tree skills are good enough to get the set up correct. I guess the worst that could happen is that I'll have to put the 3.90 back together and use it. As long as I don't break something. Remember - shade tree skills - I've been known to break things while trying to fix them. I can fix that - I think
-
Just keep working at it. You'll eventually get all those bolts out. Heating - soaking - hitting the head of the bolt. All these help. Sometimes a little turn clock wise before you try to take it out will help break them loose.
-
If you only use one quart a year I wouldn't worry about it. How many miles is that? Next I'm going to say something that will probably get me several comments. But since you are using a 10 \ 40 oil - you might consider using a 20 \ 50 oil instead of an additive. It's your car and from what you have described - if you don't change anything your car should be fine.
-
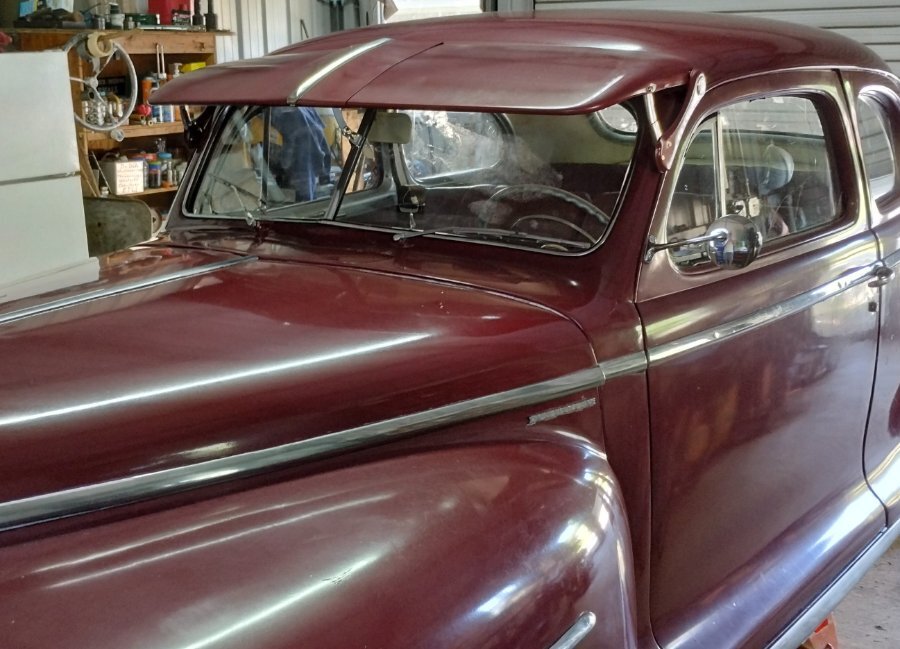
Are the end brackets identical? Is it possible that they are reversed. If you switch them they may fit better. I recently installed a visor on the 47 P15 and it was hard to get everything to line up. The one I installed in a reproduction with dog bone style end brackets. It looks good but the one you have looks better. The chrome along the leading edge is nice.
-
I could do that
-
And that's why I don't have a P15 clock
-
I checked and the DeSoto clock will fit where the radio goes. Problem is I have a radio I wanted to install also. I thing I would rather have the radio. I'll figure something out.
-
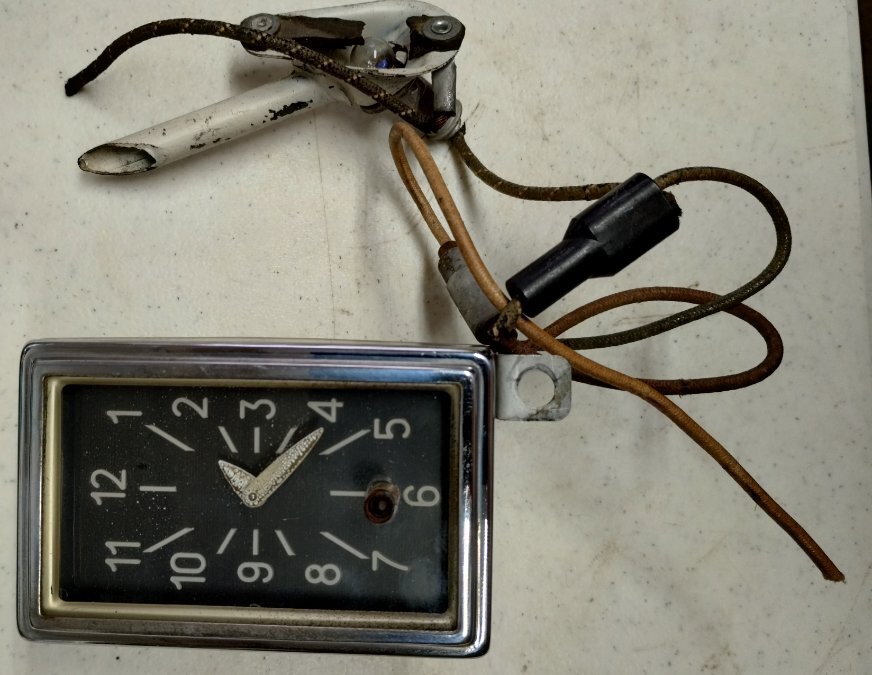
Oops - I thought they would be the same. Fuel and amp gauges bolt in - just different face plates and I have switched those out. If I can't make it work then I guess there will be a really nice 100 dollar clock available I have found several good deals in the past week or so. Each one has cost two or three hours of searching the web. But what else you gona do on a cold damp morning. Maybe you shouldn't answer that. More news later
-
A few days back I found a dash clock advertised for a 46 47 48 DeSoto. The pictures looked good and they were asking 100 dollars. I tripped over myself trying to get my debit card out before someone else got it. Ordered it hoping that when it came in it would be the same one that was shown in the pictures. It came in today and it is as advertised. The hands are a little flakey, but there. The adjusting knob is missing but the add was up front about that. I'm betting I can find a replacement knob for that at the local clock repair shop. It also came with a light tube with a light in it and I don't know what that is for. This clock is going into a 47 P15. Maybe the DeSoto has another accessory that the P15 doesn't have. If anyone knows what this light tube is for please let me know.

-
Yep - that fixed it
-
I tried to find this site and got everything from games to mattresses. Any chance you could add a link?
-
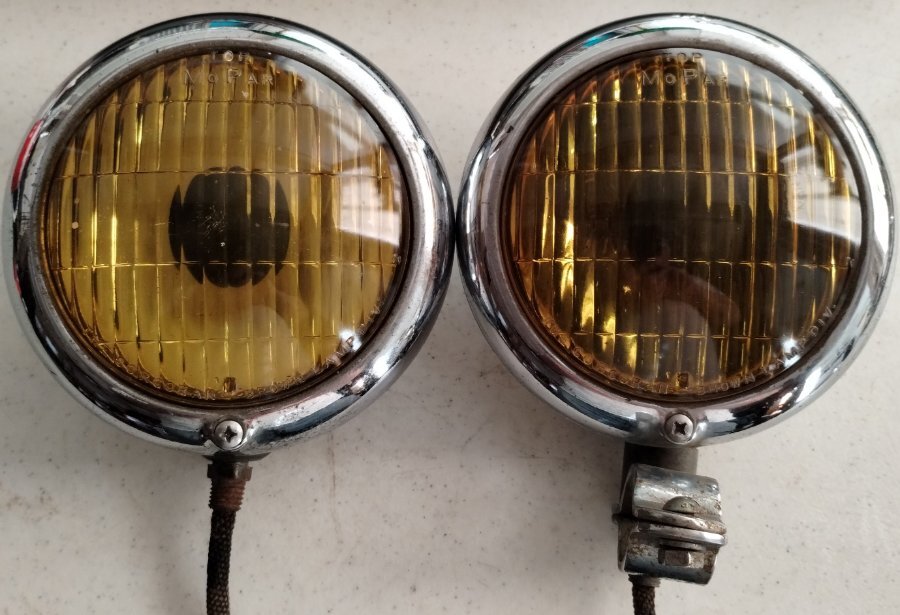
The NOS bulbs are amber glass. Not painted. Don't know what additive is used to make the glass amber.
-
I found an original amber bulb with Mopar on it for 25 bucks. It has a housing also. The housing is rough but it will be a spare. Thanks for the link Sniper. That confirms that they can be painted.
-
I have heard of buying clear bulbs and painting them amber. My paint and body friend said he would paint them for me. If I could find amber in a rattle can then I could do it. I don't mind the pay to play for these old cars. But it's fun to find a bargain once in a while.
-
I have found bulbs on line but they want more for one bulb than I paid for the pair of fog lights. Don't really care if they work. They are mainly for show. I have a couple of old tractor lights and one is amber. They will probably fit but it won't have Mopar stamped on it. And it will be a different color. I'll also check with the local auto parts. Sometimes they surprise me with what they come up with. More news later
-
I've been looking for original fog lights for a long time. Found these while surfing the web a few days back and got them. Guess I'll have to try and make brackets for them. Turns out there are a few of these out there right now. And some of them are reasonably priced. These have bulbs with Mopar stamped on them. Got these - with shipping - for less than 75 dollars. One of the bulbs looks like it is burned out. But that's OK because I mainly wanted them for show. I don't drive the car at night or in bad weather. If you take the time to look. There are people still selling old Mopar stuff for good prices. Not like some sellers that seam to be trying to retire from selling one item. Also found a dash clock for 100 dollars. The pictures looked good. Hope it's the same one that shows up. These are my Christmas presents.
-
I second the idea that the vent could be plugged. I know this because I had to replace the rear shoes twice. If the vent is plugged then as the housing heats up and builds pressure it will force the grease out on to the shoes. Also had to re position one of the outer seals to a smoother part of the axel to stop a leak.
-
Distributor cap - that's another thing to check. When I got the P15 one of the things I found was that the plug wires were not pushed all the way down into the holes on the cap. This caused the plug wires to arch from the cap to the wires and eventually burned the cap in those places. Point is that it could be one thing or a combination of things that's giving you the problem you have. Most likely a combination of things. The PO said they had a hard time getting the car to start and couldn't get it to stay running. After going through all the systems I couldn't believe they could get it to start. Just keep fixing all the things that have been discussed here and one day you will start it for a test run and realize that all is well again.
-
That sounds like valve adjustment. The P15 did the same thing. After adjusting the valves it was fine.
-
I think this has been mentioned. In the dark, start the car - open the hood and look for sparks coming from the plug wires. And adjusting the valves should be done. 12 thousand miles on a new engine - it's time.
-
If those spark plug wires have been on the car for the 10 years you have owned it then it's probably time to replace them.
-
Adjusting the valves while the engine is hot is probably the most accurate way to do it. But I was too chicken to do that. Burned hands and face while working that close to the hot exhaust manifold wasn't something I wanted to try. I removed the manifolds and adjusted the valves on a cold engine. That's a little extreme but I was replacing the intake manifold and it was a good time to adjust the valves with everything out of the way. The valves can be adjusted with the manifolds on and if I ever have to do it again that's the way I'll do it. On a cold engine. Just make sure you use the cold clearance settings for your engine.
-
Your problem does sound fuel related. But when I got the P15 it did the same thing. Sitting at a light it would start running rough. Blip the throttle and it would run smooth for a few seconds and then go back to running rough. I went through the fuel and ignition systems and it still did the same thing. The engine had about ten thousand miles on it per the PO. The valves needed to be adjusted because I could hear them under the hood clacking away like an old sewing machine. Finally got around to adjusting the valves and the rough idle went away. If your valves are talking to you then that's another path you could consider.
-
First thing is to put air in that low tire. Then gravity will be equal. ? If I make it to the P15 today I'll try to get a picture.
-
It looks like there are plenty of threads on the other end of that stud. You could move the stud over and there would be room for the nut.


